For years I have kept my chisels in a drawer. I keep covers on the tips so they don’t damage each other, but as my chisel collection has grown, the drawer has gotten crowded and is just not the best way to store and access them repeatedly. So I decided to make a chisel rack. As with nearly all my projects, I have a list of requirements firmly in my mind. I wanted:
- Something that could hang on a wall, yet be easily removable.
- Something that could stand on a bench without tipping over.
- Something that kept the blades protected, and me protected from the blades (no dangling sharp things!)
- Since most of my chisels are socket chisels, it needs to support the chisels by the socket, not the handle. Otherwise they’d be prone to falling out.
- No MAGNETS! I don’t need iron filings sticking to the tips of my sharp chisels.
- Had to be small enough to fit in a tote.
With that list in mind I set out to find a better chisel rack. Most chisel racks that I found look like glistening walls of death. 20 Chisels all seeming precariously supported by the waist with their blades exposed. Or dainty little cadelabra looking things that sit on a bench begging to be knocked over and sending the chisels skittering to the floor. The floor is hard, and my toes reside down there too. The closest rack I found that I liked was one that Christopher Schwarz put together at Popular Woodworking. It was made to hang from a French-cleat, and kept the chisel tips out of harm’s way. It also had a little slot to allow any debris that entered the chisel hole to pass easily out. The only drawback I saw was that it was fairly long, and it wasn’t able to stand up on its own. So I added some twist out feet (kickstands) to the bottom that could be turned flat if hanging from a cleat, but turned 90 degrees would keep the rack from tipping over while standing up on a bench. I even drew up a Sketch-Up plan for my modification of the Chisel Rack. However, as many of my plans go, I decided to build it differently and didn’t bother to go re-draw it. You’ll have to settle for seeing the finished product.
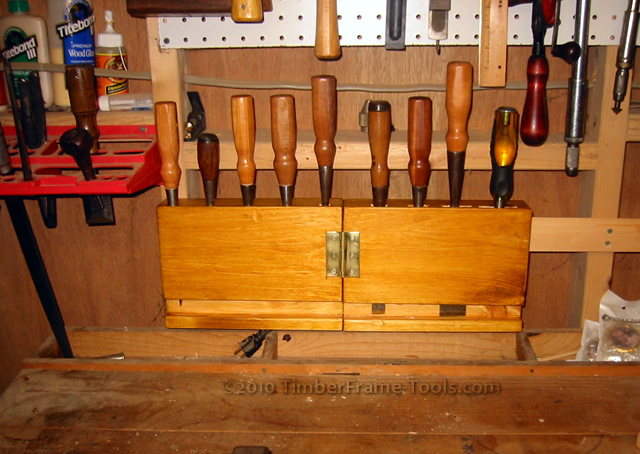
The rack I built hangs securely on a French cleat. The cleat can be on the wall or on the side or back of a bench.
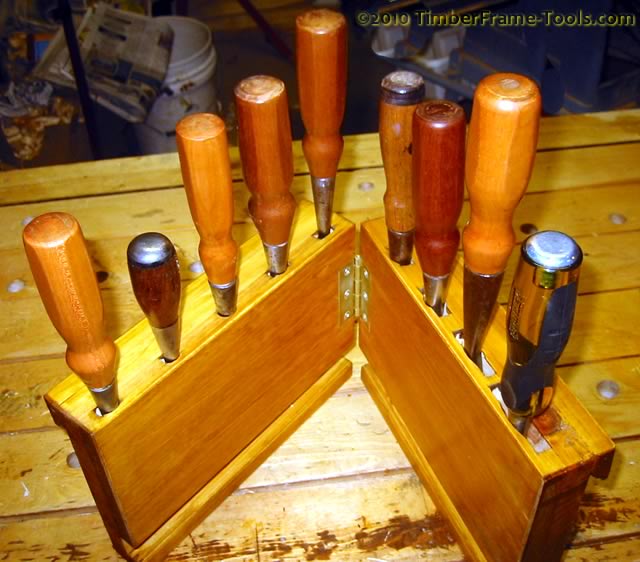
When removed from the cleat, the rack can be folded along the central hinge and stand solidly on a bench. The mass of the chisels and the wide triangular foot print make it very difficult to tip over. In the unlikely event that it does tip over, the chisels don’t exit the holder since the French cleat keeps the openings elevated even when laying down.
I thought I might actually like using it on the bench laying down (as in the photo above) but returning the chisels to the holder is not as smooth as dropping them in from above.
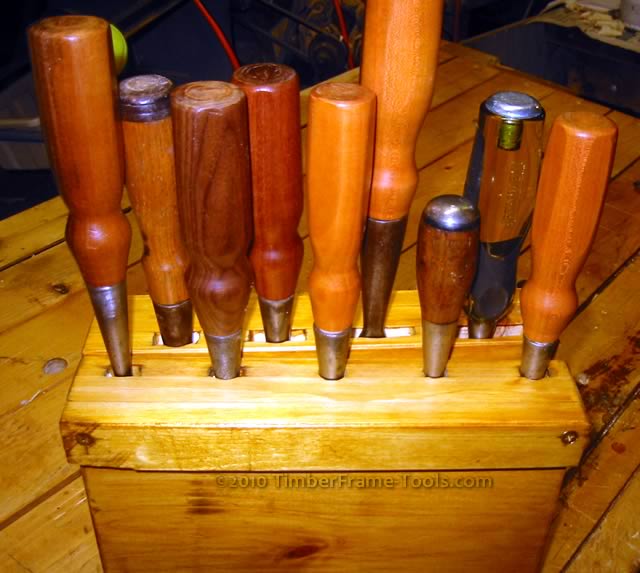
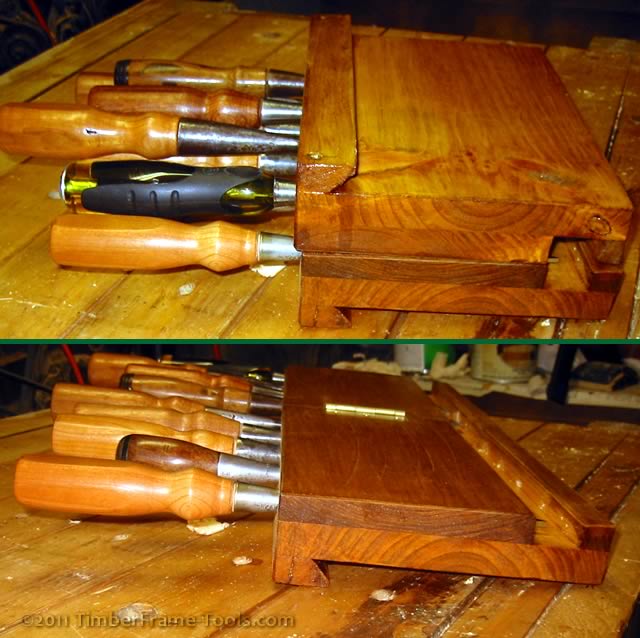
When folded up, the rack can be placed more easily in a tote, or even wrapped in cloth for safe transport.
Fully folded, the spacing of the handles nest together to make it possible get them all in and out, but the rack sit in a tool tote. Yes I have a tote that has the top of the side panels cut like a French cleat so the rack can hang within the tote (more on that in another post).
Building the Folding Chisel Rack Stand
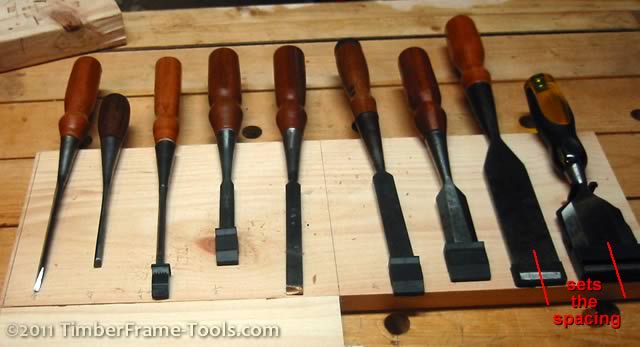
To build the folding chisel rack stand, I gathered together my chisels. It is important to take the extremes into account. My set of chisels has a little Stanley Everlast chisel and a large framing chisel, so I needed to make sure the wood slots that hold the chisel would securely hold the longest chisel and the shortest. My chisels range in width from 1/8″ to 2″. I wanted them to look evenly spaced when in the rack so I laid them all out just to get the feel for the size rack I would need.
The two largest chisels determine the spacing that the rest of the chisels would need in order to be evenly spaced. I could have condensed the narrower chisels together, but I wanted to have enough space to easily grasp each handle securely. I didn’t want to have to grab chisels with just my fingertips. For my chisel set, each half of the rack would be 10″ long.
An odd number chisels works best for this design as you can lay them out with an even number of chisels on one half and an odd number on the other. With a little adjustment you can make it so the handles fit between each other when the rack is folded closed. I found it easiest to draw the tops of both halves on the chisel rack in a drawing package (I used CorelDraw) so I could use the “align and distribute” command to set the spacing evenly and make sure both halves wove into each other.
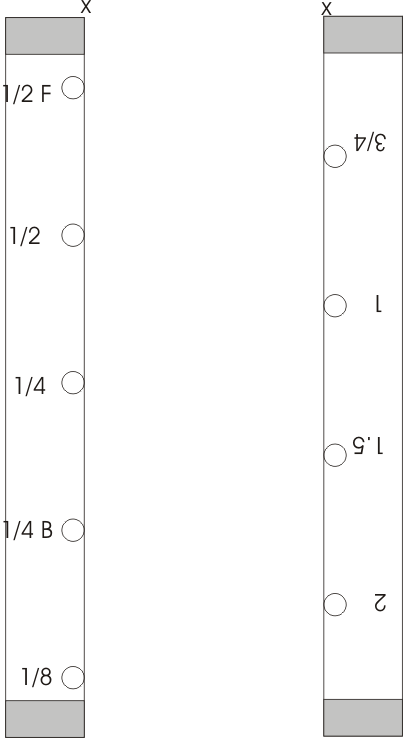
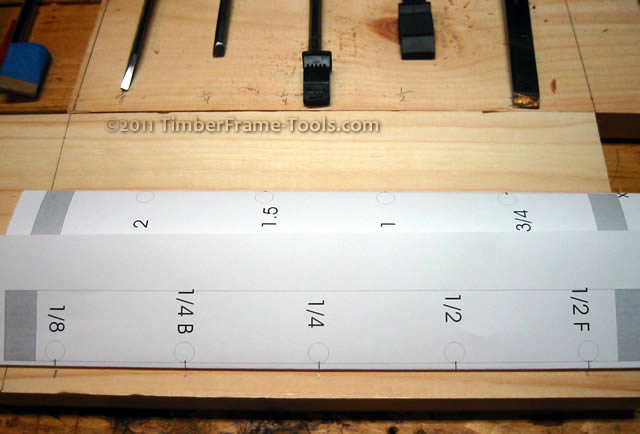
This is the spacing of the tools on each half. The X's indicate the hinge, and the numbers are just the widths of the chisel, so I could track what went where.
The shaded ends are just the 1/2″ clearance I left at each end to allow for gluing and hinge screws. You can download this file as a PDF if you wish. By printing out the drawing, I could simply hold the drawing at the edge of the wood and mark the center point of each chisel.
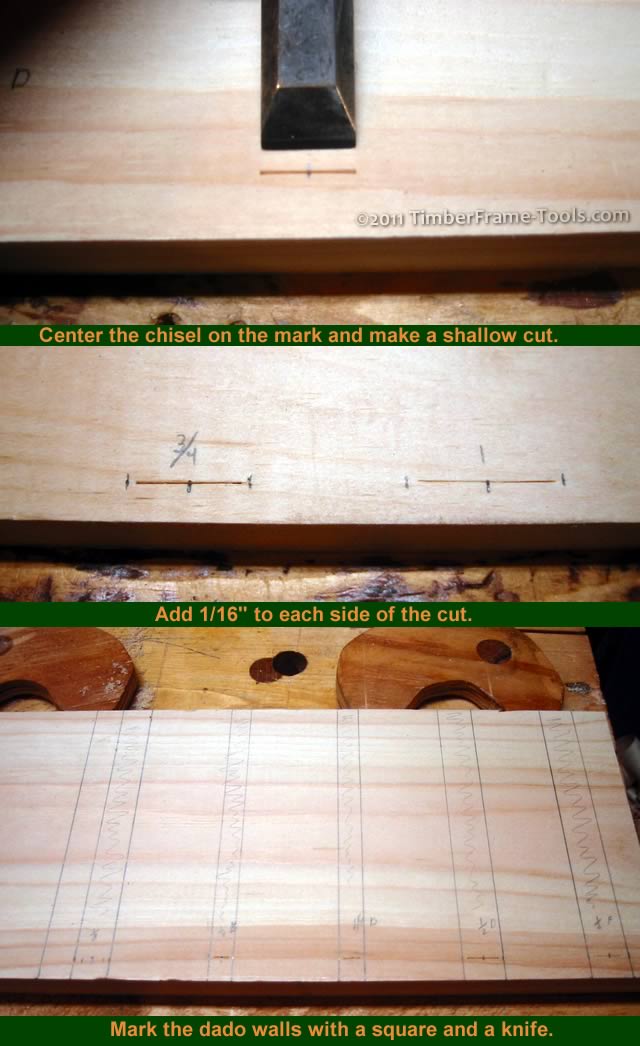
With the center points marked, I simply transfer the width of each chisel to the mark by centering it on the mark and pressing it into the wood. The mark left is the exact width of the chisel.
The slots need some wiggle room to allow the chisels to exit and enter without getting stuck. I widened the width of each by 1/16″ in each direction. This gives an 1/8″ of extra space for each chisel. I then mark the entire length of the dadoes with a marking knife (penciled in for added visibility) which gives a nice track to guide the saw.
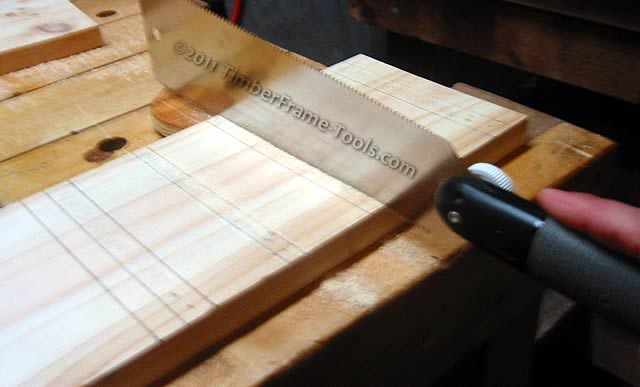
I chose to use the crosscut side of my Ryoba for these cuts because with this pine there would be a lot of tear-out with a thicker saw. Since my chisels are a variety of old tools, they each have different thicknesses. I used a marking gauge to mark the maximum thickness of the thickest chisel, so I would know how deep to cut.
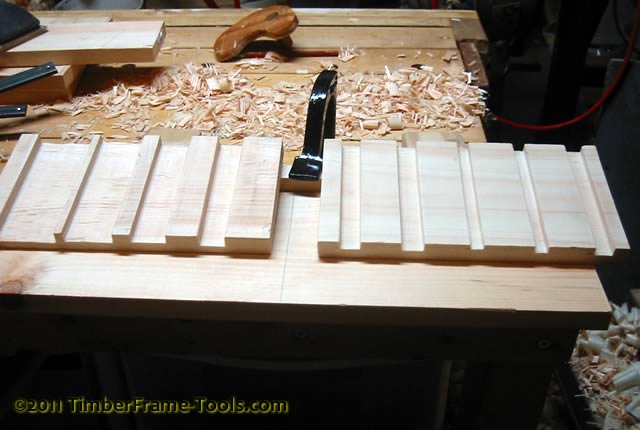
Once all the walls were cut in, I went back and made some other relief cuts for any widths over half an inch. This makes it faster and easier to use the router plane.
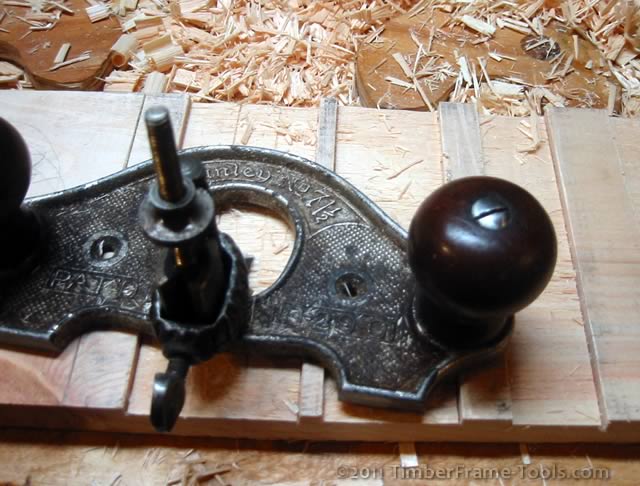
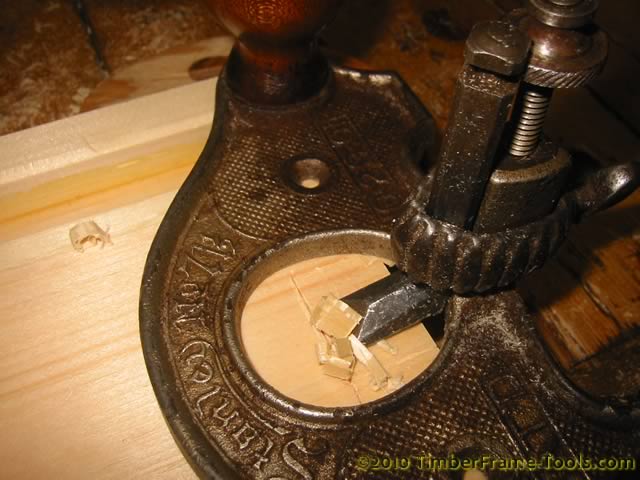
The router plane (a Stanley 71-1/2) is the perfect tool for making the dadoes. Easy to use, and much quieter than my Porter Cable. I had all the dadoes completed in the time it would have taken me to set the dado stack on the table saw for just one of them.
The dadoes are all cut and ready for glue.
When gluing up, I had to be careful to only put glue on the lands and not the grooves.
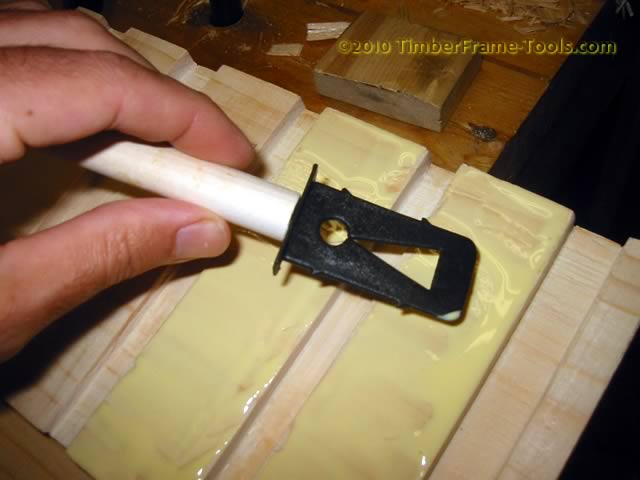
I learned this tip on LumberJocks, when done with a foam brush, rip off the foam and save the inside as a glue spreader.
When clamping, care must be taken to not clamp directly over the real wide dado for the wider chisels. You have to make sure to clamp on the solid strips or you risk cracking the wood. Of course, no matter how careful I try to be with the glue, I always get squeeze-out. The problem comes when the squeeze-out goes into the dado which could block the chisel.
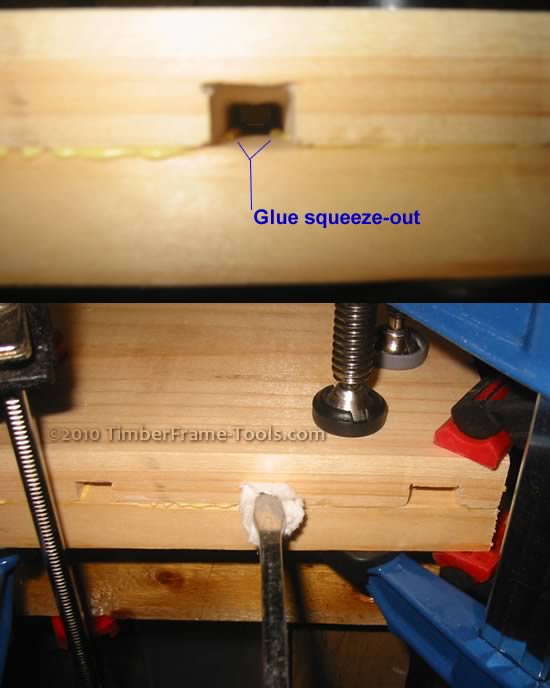
Cleared the squeeze-out in the slots by pushing a piece of paper towel through the slot with a long thin screwdriver.
A long thin screwdriver pushing a piece of paper towel through cleared the squeeze-out from the slots.
After the glue dried, I used a cutting gauge to set and mark the length from the end of the hinge to the center of the pin.
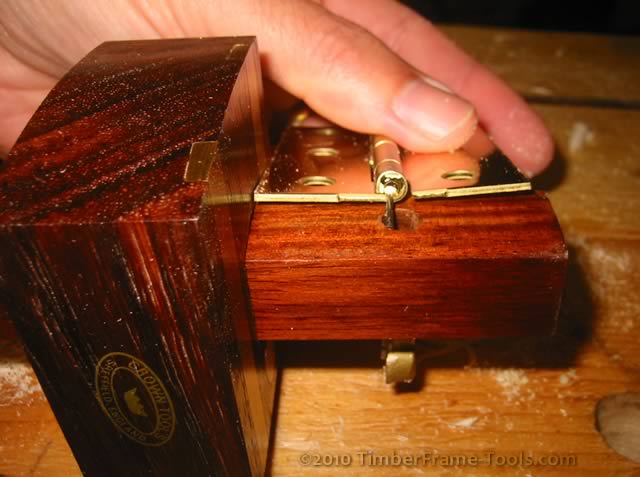
No measurement needed. Set the length from the back to the center of the hinge pin and you are ready to cut the mortise.
I used a knife to cut the sides of the hinge mortise, and the cutting gauge to cut the back. The router plane then made quick work of removing the wood from the mortise to the depth of the hinge.
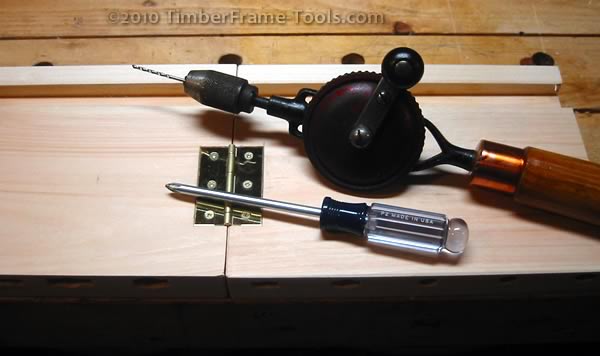
Nothing left to do but mark the screw holes for the hinge, and install the hinge.
The holes slots for the chisels each needed a bit of custom relief with a round file/rasp to round them to seat the sockets on the chisels. Each chisel is unique so each needed a different amount of fitting. My goal was to have them all seat to about the same depth. The only exception being the lone butt chisel and the timber framing chisel.
Once it was assembled, I used a block plane to quickly chamfer all the sharp corners on the wood, then wiped on a couple of coats of amber shellac.
Now all I have to do is find a little clasp to hold it together when it is folded closed AND find an old D.R. Barton 2″ chisel to replace that hideous yellow plastic thing taking up space in my rack. (The yellow thing is actually a decent chisel, it is just its newness that offends me.)
Chisel Rack Related Links
- PopularWoodworking Portable Chisel Rack – Article – SketchUp – PDF
- the Village Carpenter had a unique approach to a portable chisel rack – not a fan of chisel tips pointed at my hand though.
- Chisel Rolls at Amazon.com
- For more portability, I really favor this chisel box design.
