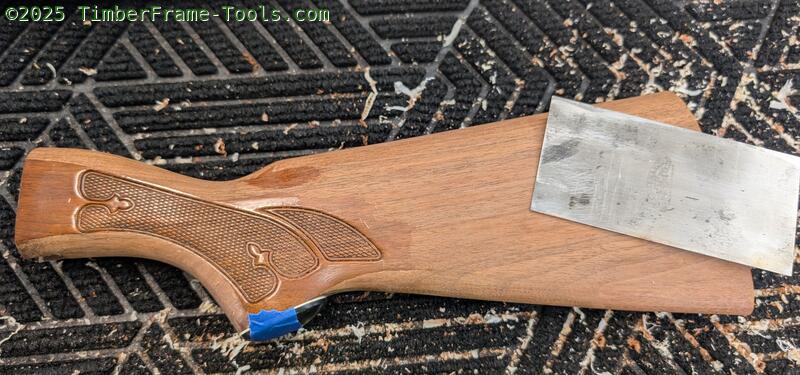
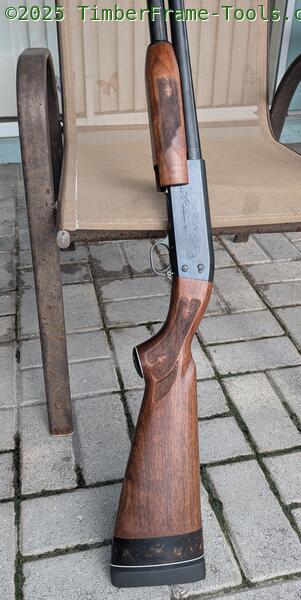
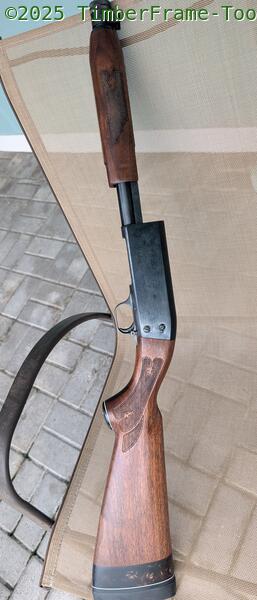
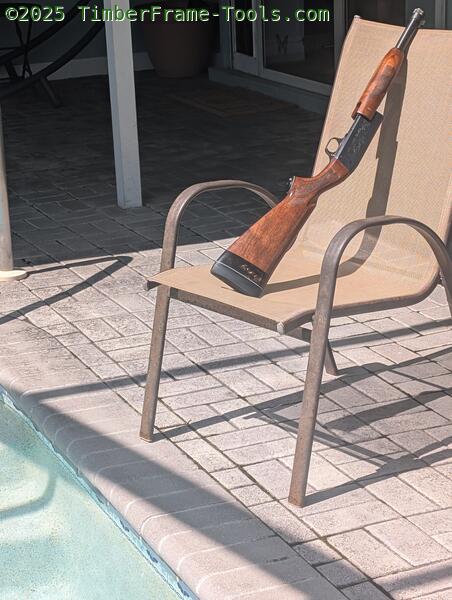
One of my nephews has been joining us several times at the clays course. After he shot my Ithaca Model 37 pump, he decided he might want his own. I don’t know if he was enamored with the brilliance of John Browning and John Pedersen’s design, the history of the gun, or if he was just tired of me yammering about what a great gun it is. So we co-navigated the dark river of gunbroker and managed to get a good price on one. What he ended up with was a 1975 Ithaca Model 37 in 12 gauge, with a 28″ Modified choke barrel. We gave it a thorough disassembly when it arrived. It had a few stock and steel blemishes but very minor for a gun that is 50 yrs old. The internals show no wear at all. I’d be very surprised if this gun has more than a a few hundred rounds in her history. What a fantastic deal. It had a few minor scratches and dents on the stock that damaged the factory finish (likely lacquer or polyurethane) which made it unlikely that finish repair would work. Also we needed to put on a new grind-to-fit recoil pad. We also had to make and add a spacer. The stock was it’s factory length, but my nephew has some long arms.
Rundown of this Ithaca Model 37
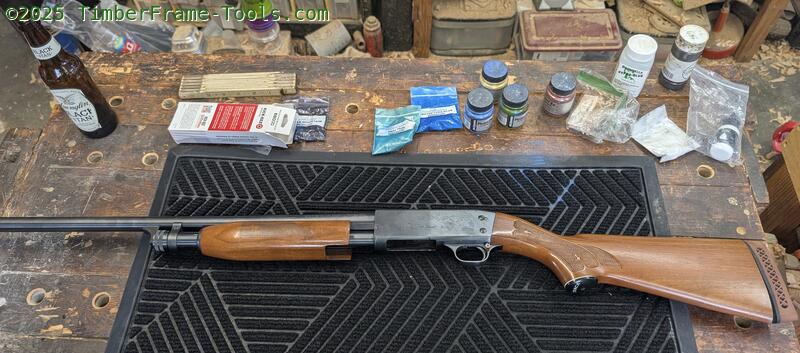
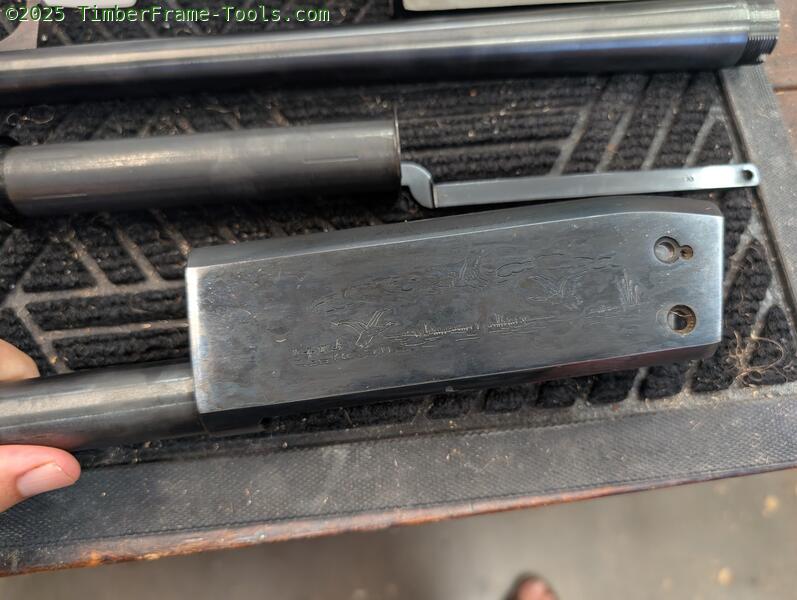
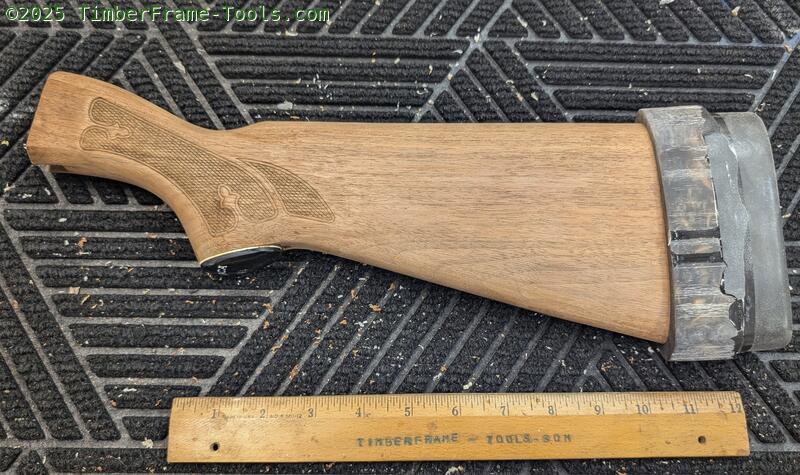
The Ithaca model 37 as she arrived.
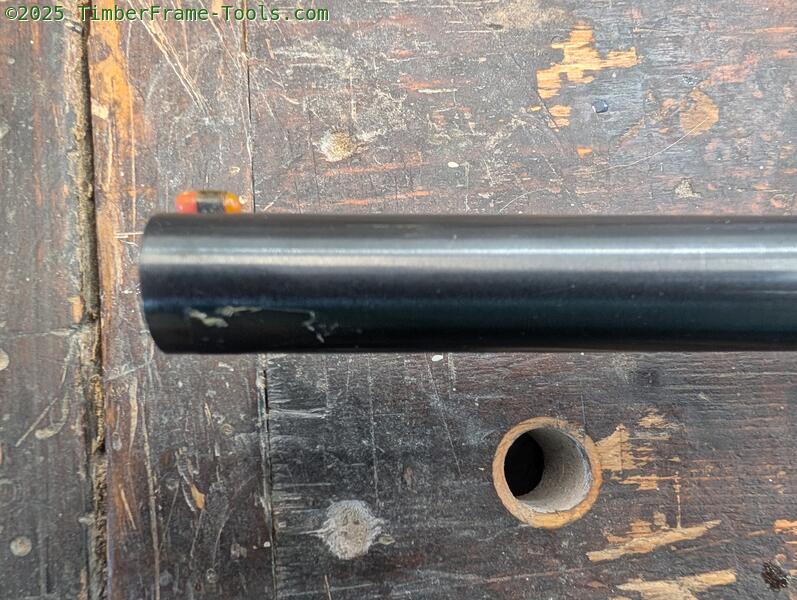
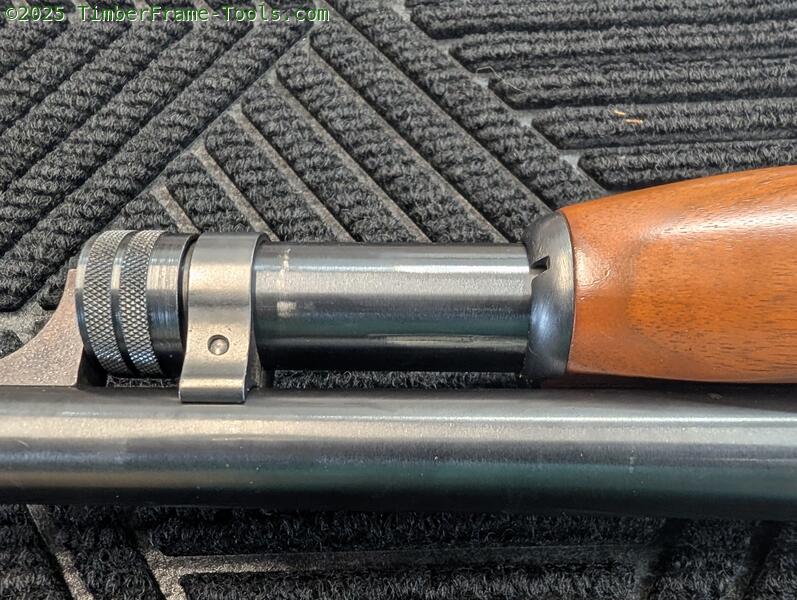
Looking good at the muzzle. Only some crud that looks like tape or oil residue.
Some minor abrasions to the bluing from the pump handle. Completely in line with any shotgun that has ever been pumped more than once 😉
With the slide to the rear, no surprises.
Minor wear.
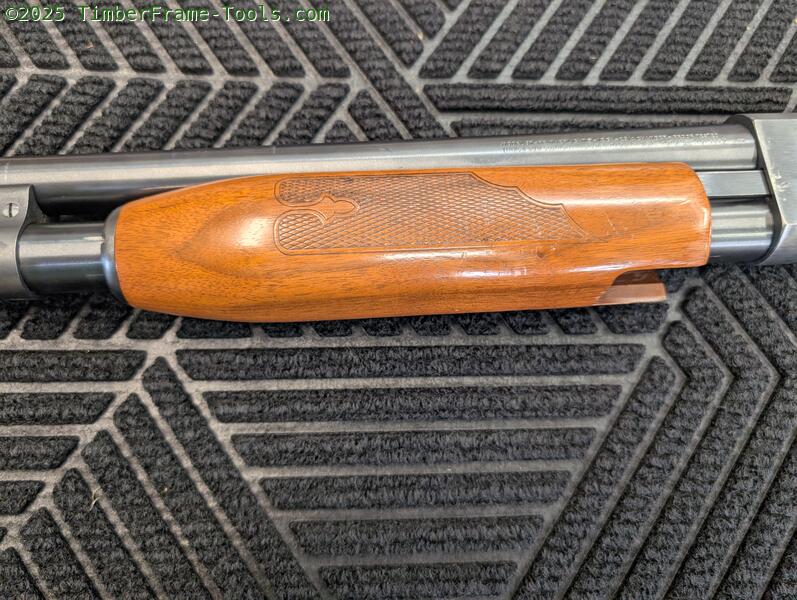
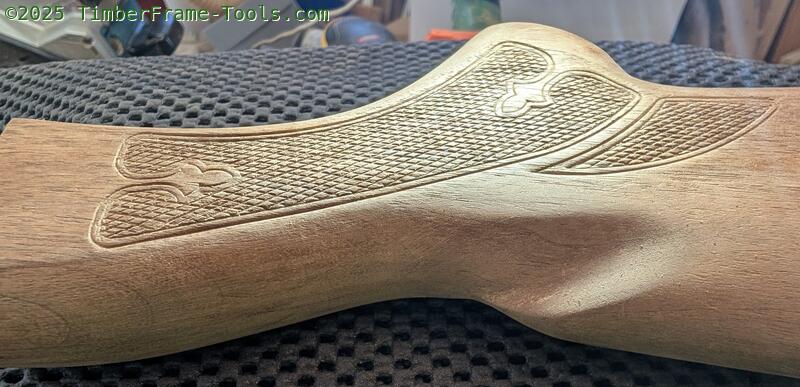
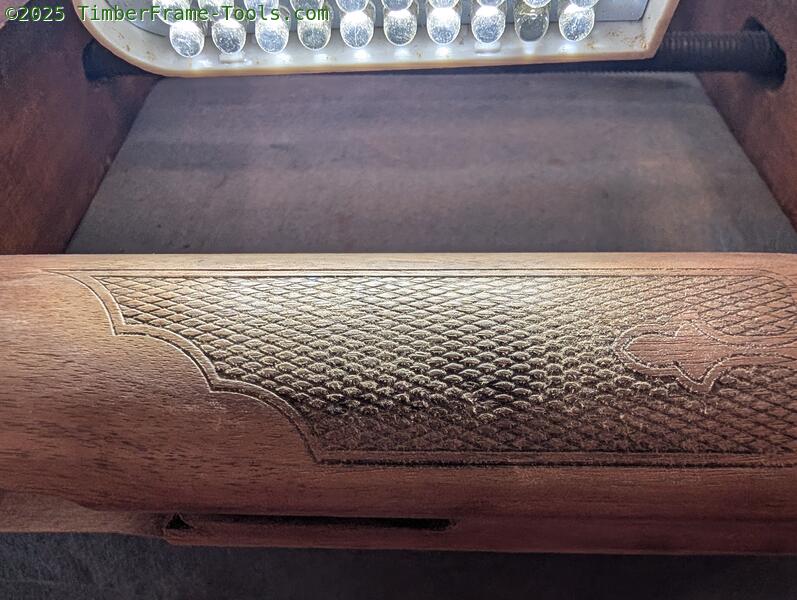
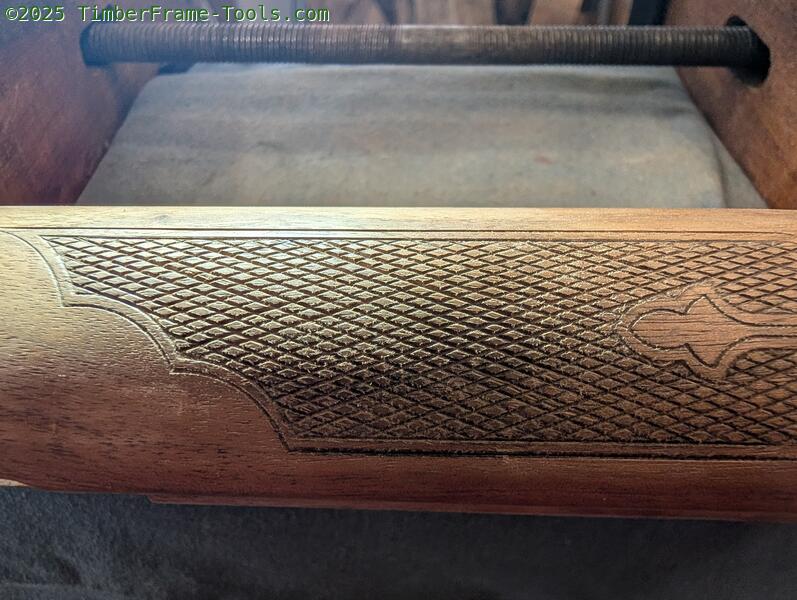
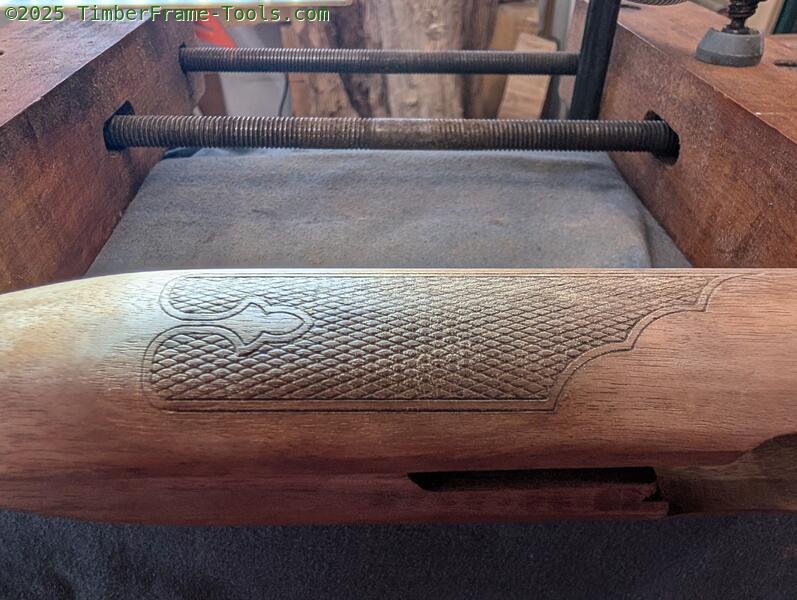
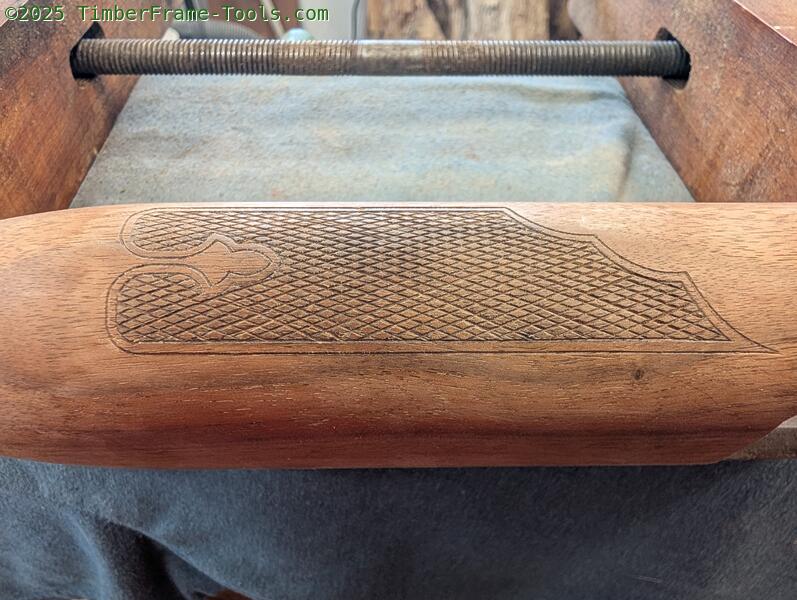
Only a few dings here. The checkering is faint but not filled with crud. Continuing the evidence that this gun was not used much.
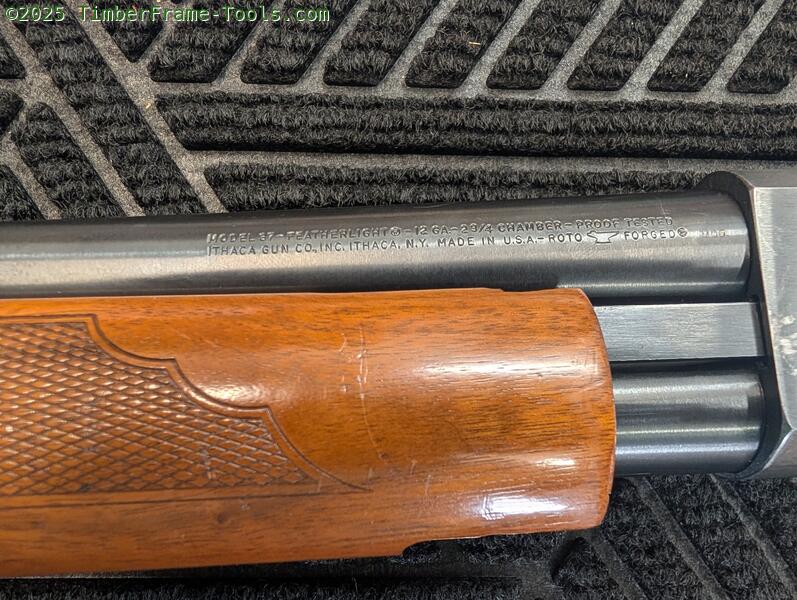
The roll stamp indicates made in Ithaca NY (not Kings Ferry, or Upper Sandusky OH). The faint “Mod” indicates modified choke, which we measured to be accurate.
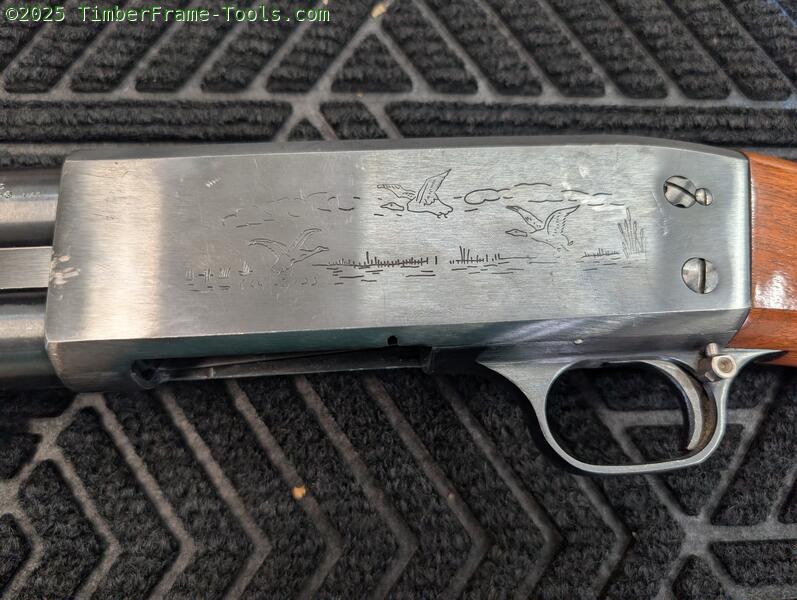
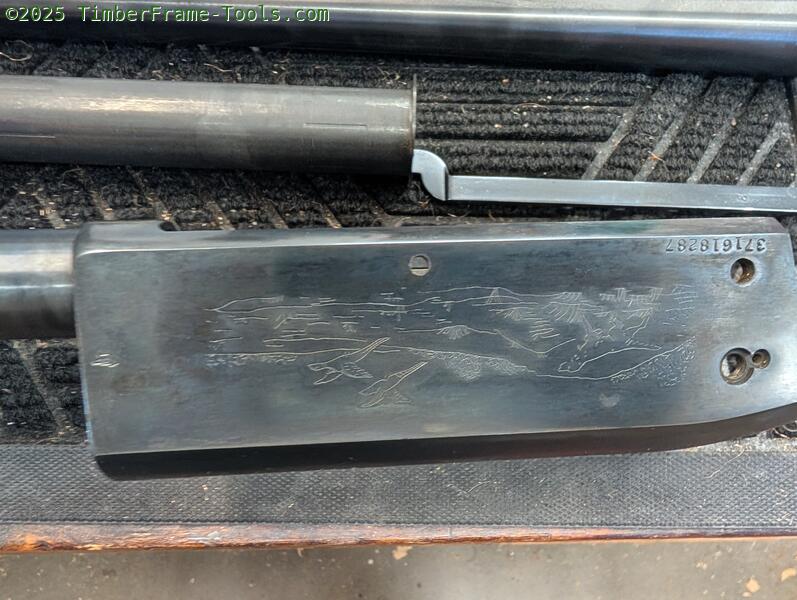
Before: A few minor scuffs on the receiver. The screws were in good shape indicating not too many people have been inside this gun.
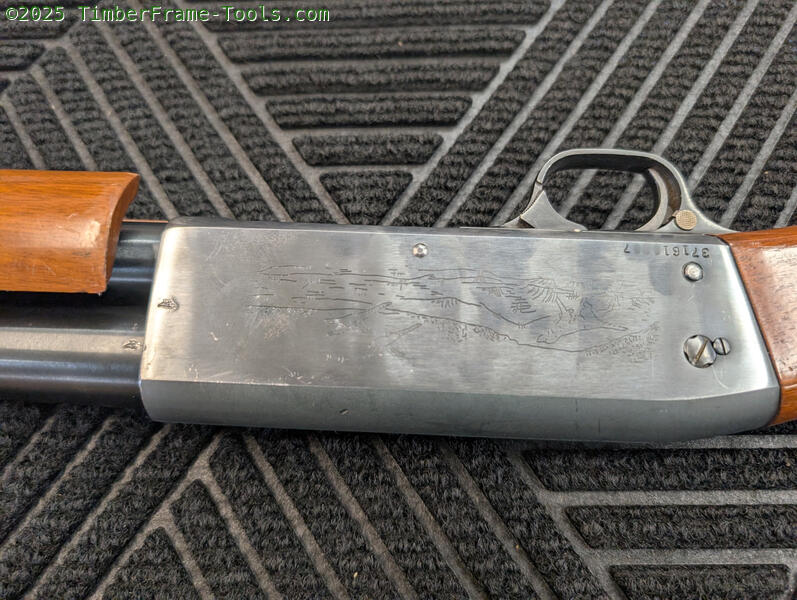
After: Reblued with Oxpho-blue.

Before: I think the top is a Parkerized finish on the top to reduce glare. It has a few wear spots. It is going to be interesting if ordinary bluing will hide them, or if they will stand out because they are now shiny.
After: I was happy that re-bluing did not ruin the parkerized finish on the top. The scratches are pretty much invisible.
Before: Minor wear on this side.
After: I did a bit of sanding to remove some of the scratches then I re-blued it with Oxpho-blue
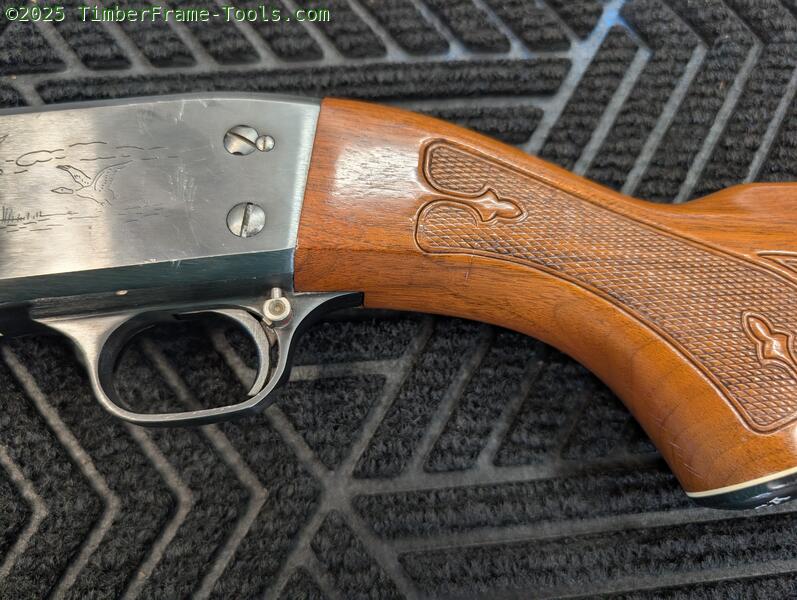
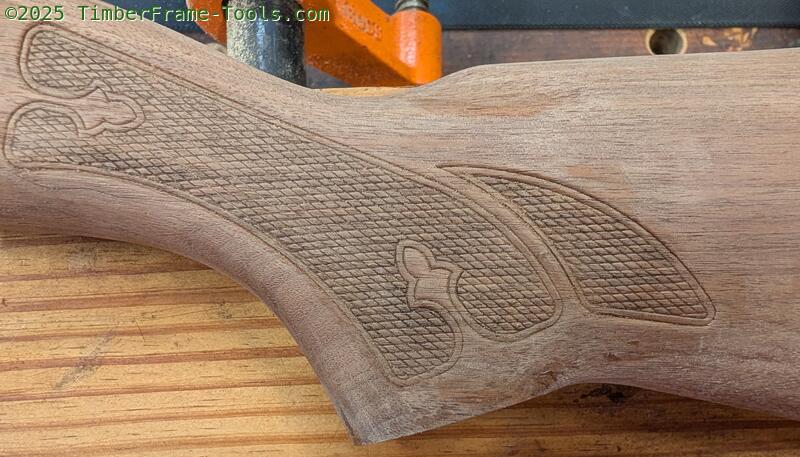
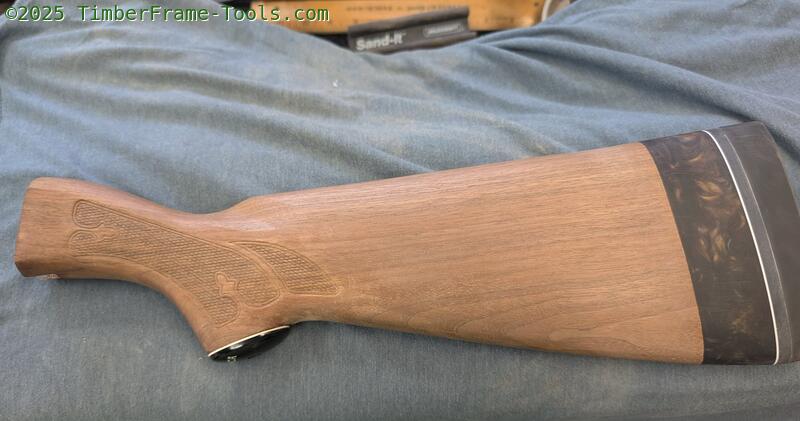
The pistol grip is great with no cracks or chips, only minor scratches.
One interesting thing, is that on my Ithaca 37 from 1967. the checkering is pressed, but the diamond points go in and the dividing lines come out. Where on this gun the checkering is pressed in a way where the lines are pressed in and the points are out. It more closely resembles hand cut checkering, and due to the shape, actually allows redefining/cleaning-up the lines. Where mine is impossible to that. Point scored for the 70’s.
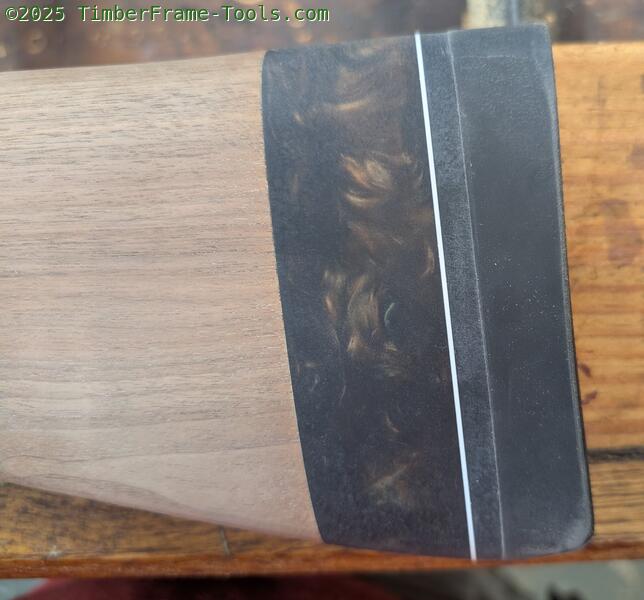
Pistol grip cap with a white line spacer.
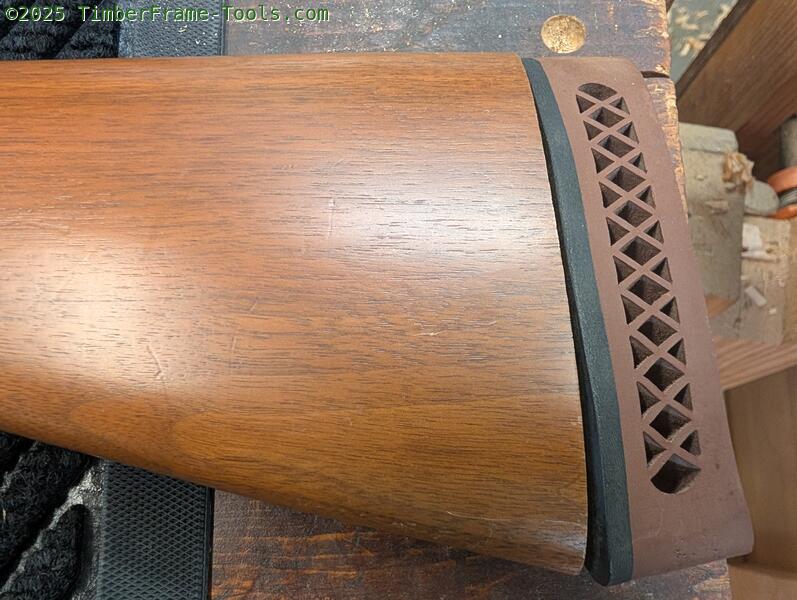
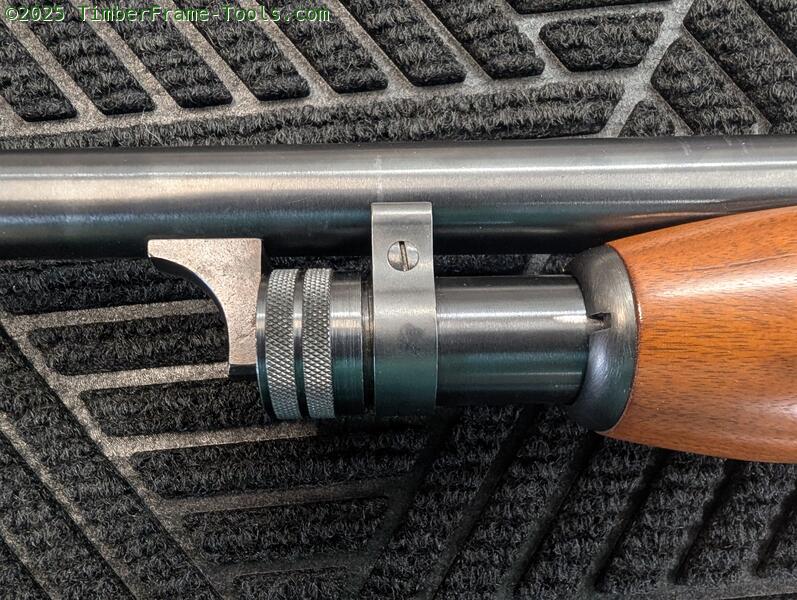
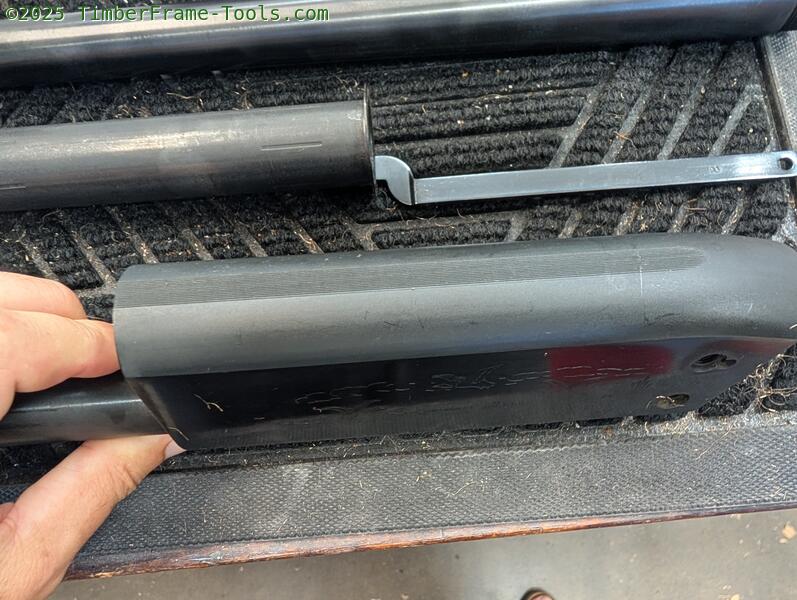
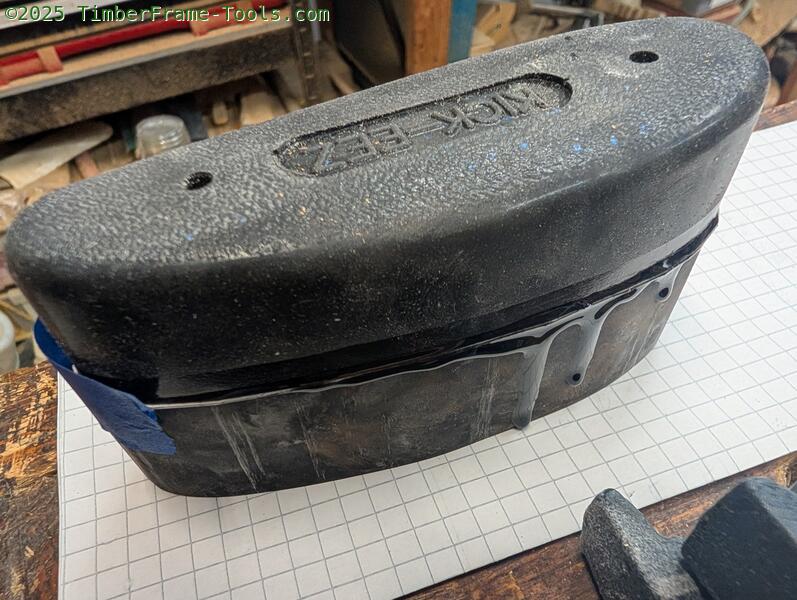
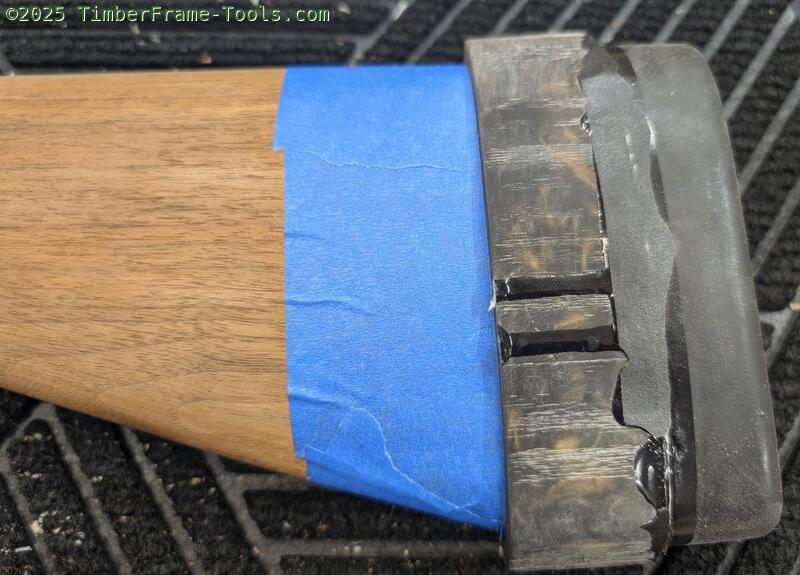
We knew from the auction photos that the recoil pad was wonky. My guess is the one on it before the auction was decomposed so someone slapped this on on it in a hurry to make it look better in the auction.
On further inspection, the recoil pad was actually warped in two different ways. The black layer which is usually hard plastic, was actually rubber too.
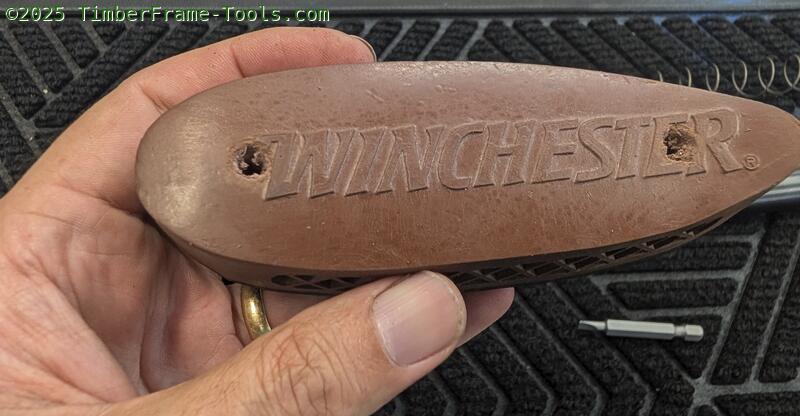
Or maybe the spirit of Oliver WInchester warped the pad to avoid a WInchester pad being used on an Ithaca gun. 😉
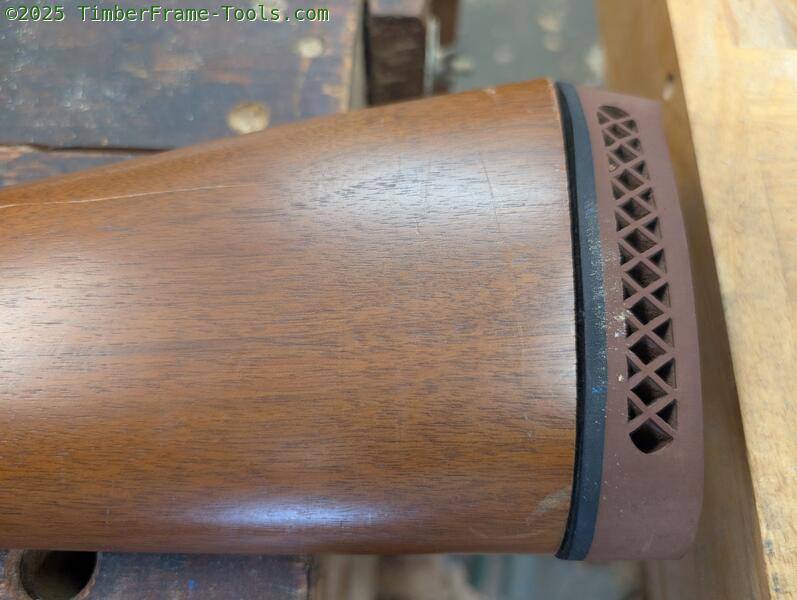
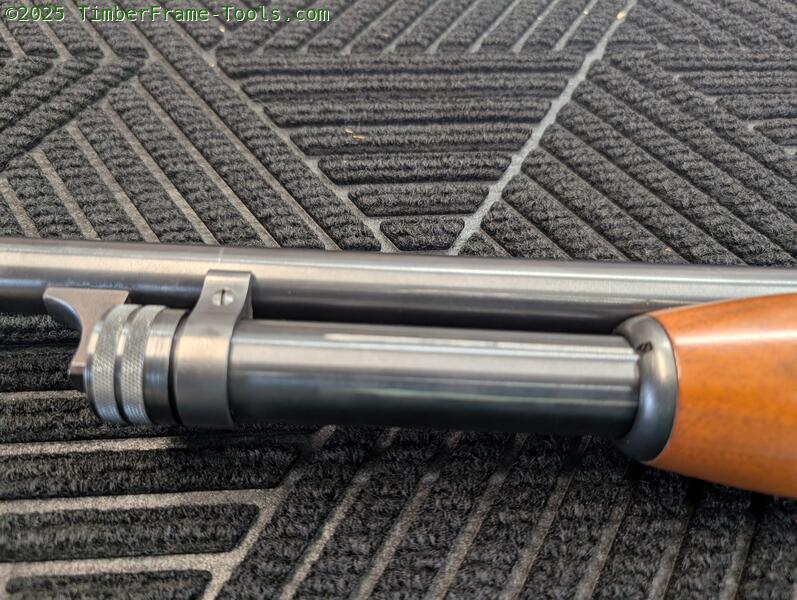
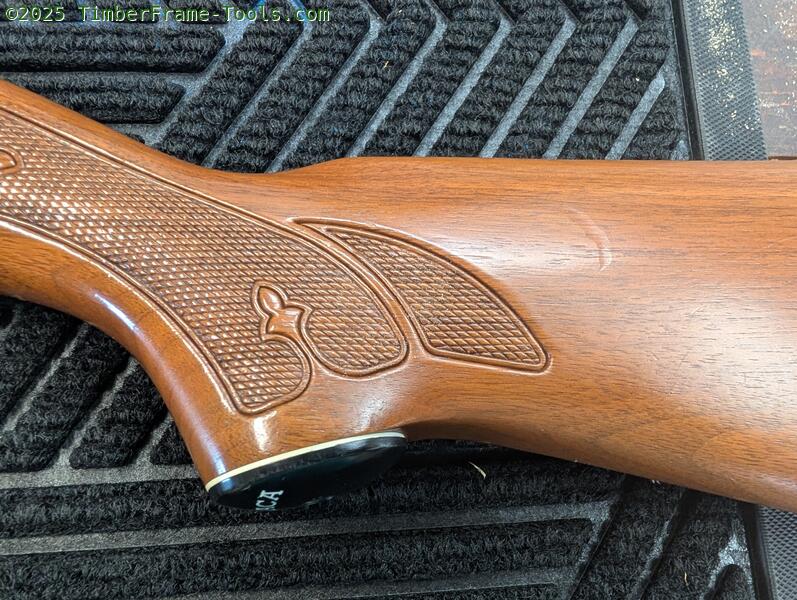
A few scratches on the stock and badly fitting recoil pad on this side too.
Disassembling the Ithaca Model 37
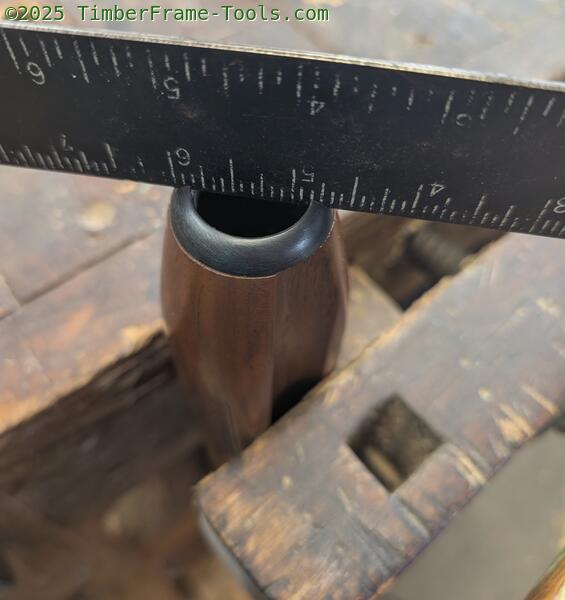
Removing the pump’s nut is easy. Put the handle in a vise, then use a framing square in the slot to loosen the nut.
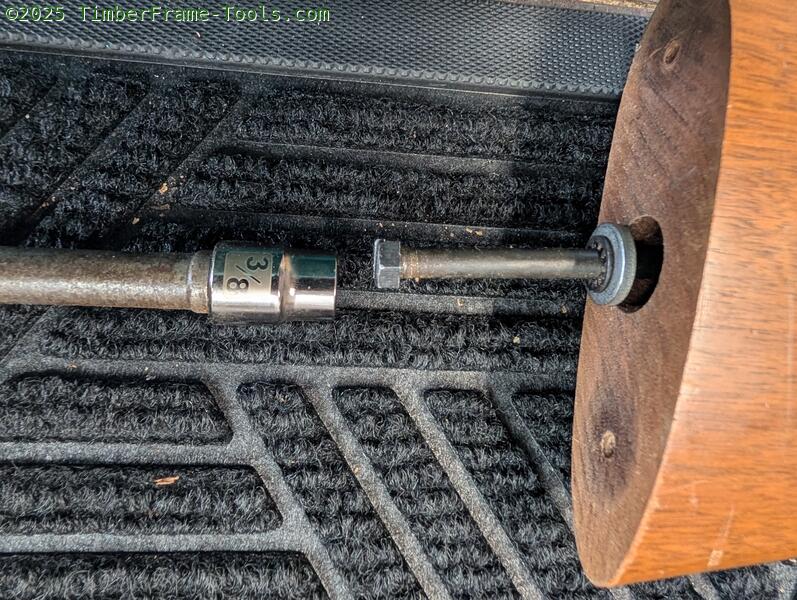
The stock bolt/screw is tough to get a regular screwdriver into because you can’t see to align the slot, A 3/8″ socket works much better.

With all the hardware removed, it is time to get this black walnut cleaned up.
A card scraper can do the bulk of the work.
A sharpenedcard scraper dragged gently over the wood will usually cut way the finish with out cutting/ removing much of the wood.
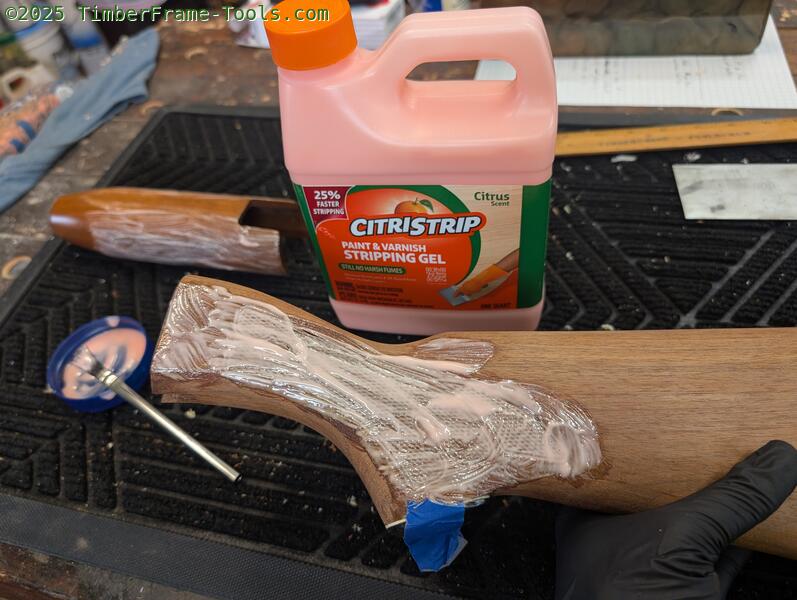
CitrusStrip works well for removing finish from the checkering.
Unfortunately, you can’t use the scraper near the checkering so will have to resort to using CitriStrip stripping gel . I paint a small amount on with an acid brush and let it sit about an hour. Then I wash it off with water and a soft tooth brush. The water will not hurt the stock, just let it air dry naturally.
I also used CitrusStrip on the pump handle since it also had checkering and the scraper on a round shape does not work well.
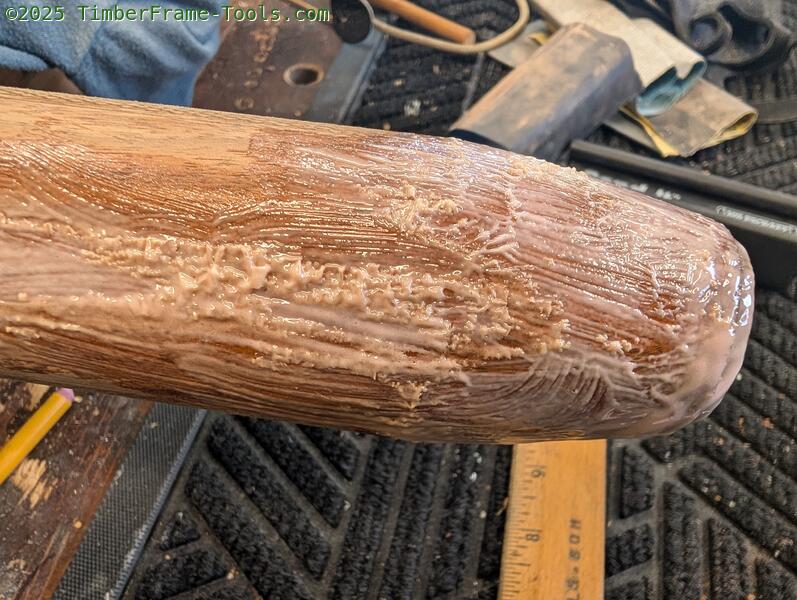
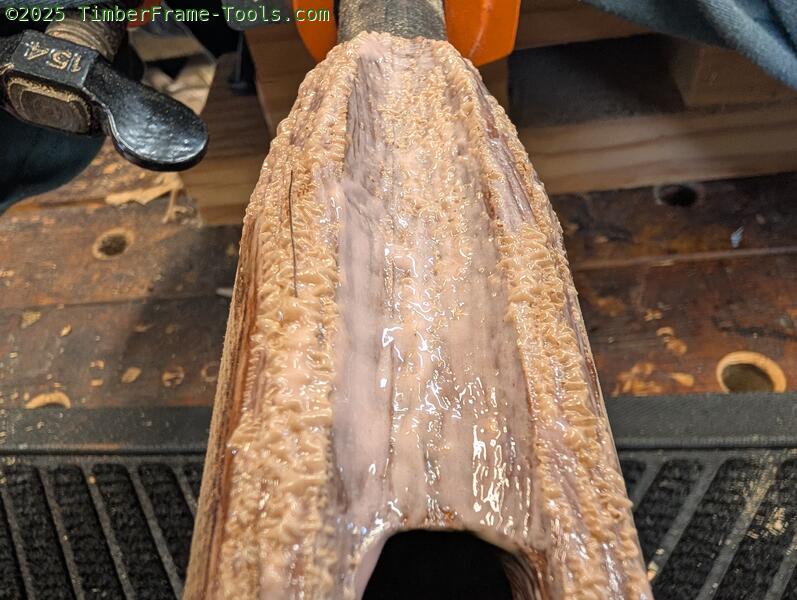
The CitrusStrip lifts the old finish and let me scrape it off with a plastic putty knife, then I rinsed it off with running water from the hose.
Discovery: The same way steam and water will raise dents in wood by just puffing the fibers of the wood back up. water from rinsing off the CitrusStrip also results in raising the dents of pressed checkering. I have never used it on anything but cut checkering before and it does not have that effect, because it is cut, not pressed. Pressed checkering is basically bunch of controlled dents, so in hindsight it makes sense that water would raise them. I will have to cut them to get them re-established.
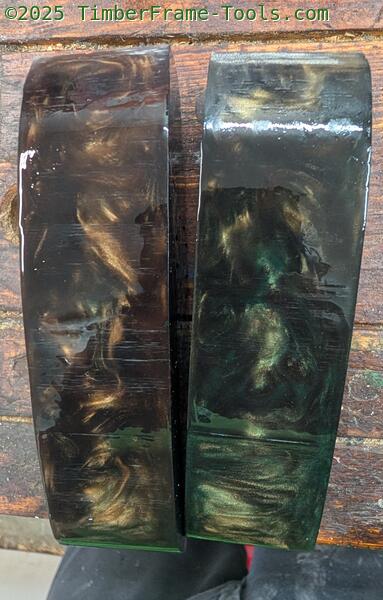
Custom epoxy gun stock spacer
Since we had to lengthen the stock by an inch and a half, we needed to pour a deep spacer. The color choices can be overwhelming. My nephew looked at a bunch of the other spacers we had made, and chose to go with Black and Gold. Since the depth is over half an inch we had to use deep pour epoxy]]. We mixed up one batch with [[[mars black pigment and one with Gold Perl Ex pigment.
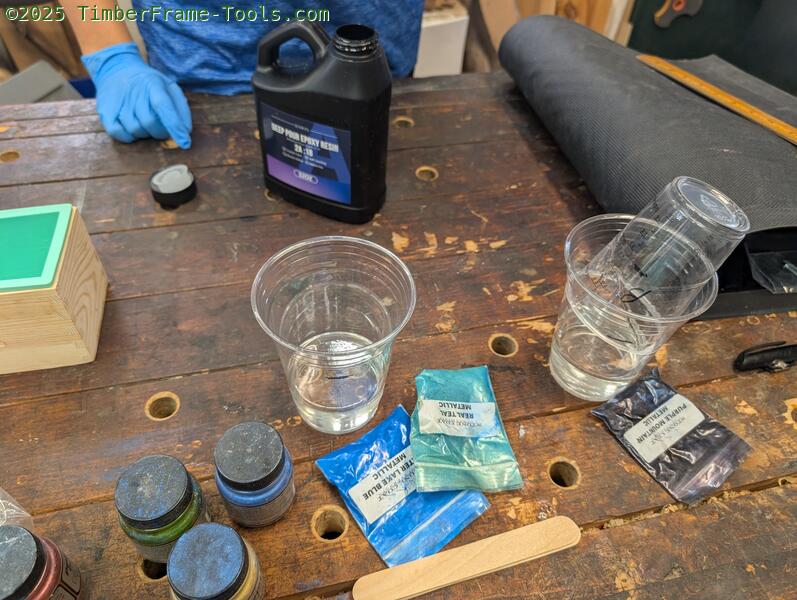
Clear cups, goggles, popsicle sticks and rubber gloves are a must.
At normal temperatures this epoxy should take 48 hours to cure. In Florida, in the summer… it took 8 hours.
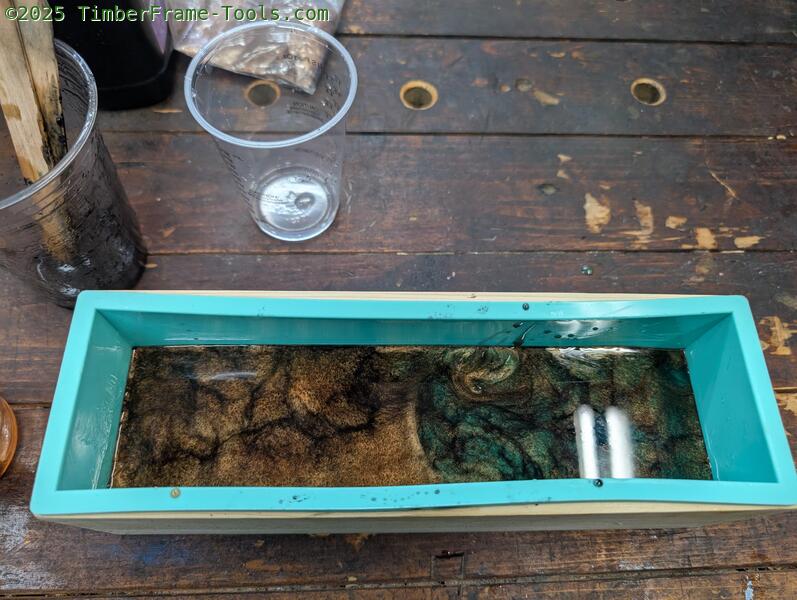
A silicone soap mold is the closest shaped container I can find. It is big enough to make two spacers. For the second spacer I added just a touch of Pearl Ex Emerald Green pigment to the black and gold.
A big block of epoxy pops out of the mold.
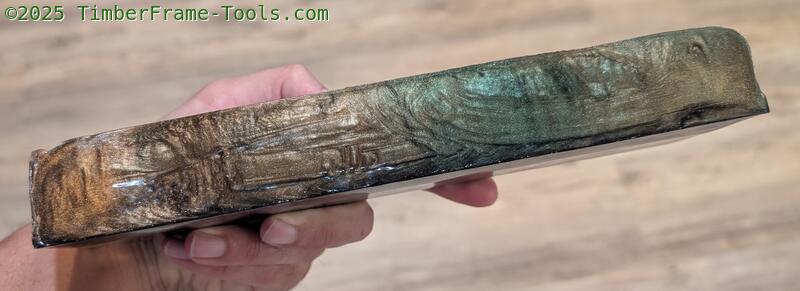
I cut them out of the block using my band saw. Then I sprayed them with water to get a look at the patterns. (they won’t re-emerge until the sanding is complete)
My flattening rig.
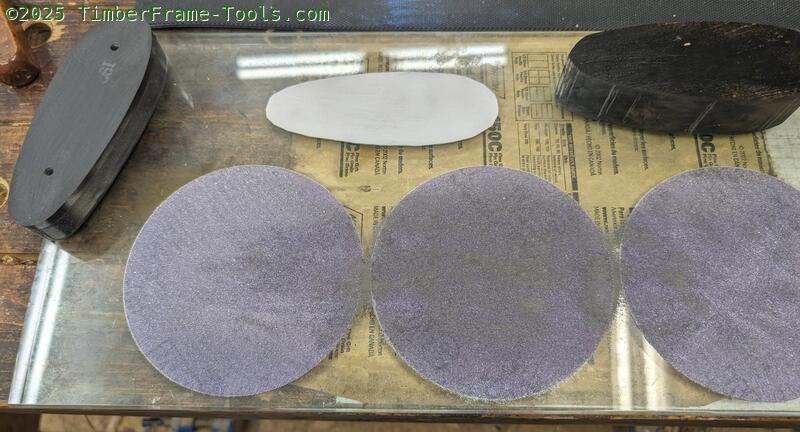
The bottom of the mold is not perfectly flat, and because the epoxy cured so fast due to the Florida heat, it buckled a bit at the top. It is essential that the part of the spacer that touches the stock and the part that touches the recoil pad are absolutely flat. Otherwise you will end up with ugly gaps. So I stick 150 grit 3M Cubitron II sanding discs to a glass plate to stay absolutely flat. Then I rub the two flat sides of the spacer against it until both sides have even scratches across the surface. I adjust my weight on the spacer slightly to make sure both sanded faces are parallel (coplanar) to each other.
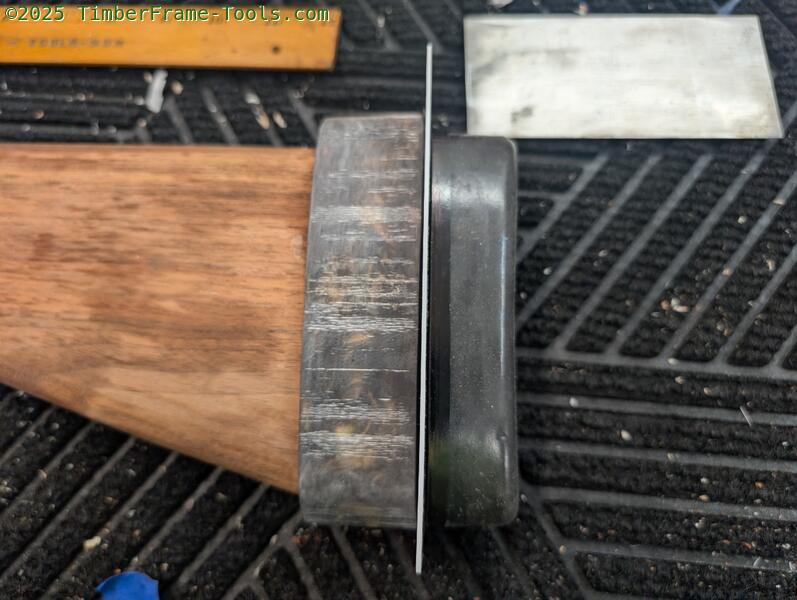
Since the pistol grip cap has a white line spacer which was popular in the 1970’s, we decided to add one to the new recoil pad to keep them matching.
It is important to maintaining seemless transition from one material to the next, that none of them slip or change position during removal and re-installation, so I epoxy them together.
The white line spacer is simply white ABS Plastic Sheet 0.04 Inch thick. To keep the three pieces from moving around, I stick them all together with a dab of black 15 minute epoxy. I epoxy the white line spacer to the custom epoxy spacer, then epoxy the recoil pad to the white line spacer
I am a big fan of the Kick-Eez grind to fit recoil pads, they definitely do their job of reducing recoil and it is especially important on a “Featherlight” gun in 12 ga.
Screwed on and ready for grinding… errr… sanding.
I use one layer of blue painters tape to mask off the wood. The tape doesn’t really protect anything, it is more a visual indicator that I can see when the sander starts hitting the tape.
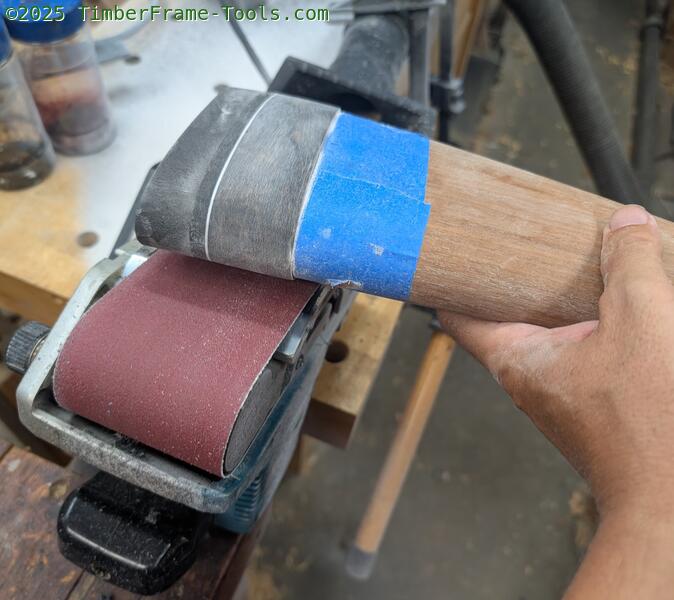
I put my belt sander upside down in a vise, with a 120 grit belt on it. I set the shopvac to try to catch the debris that comes off the belt. It makes a mess.
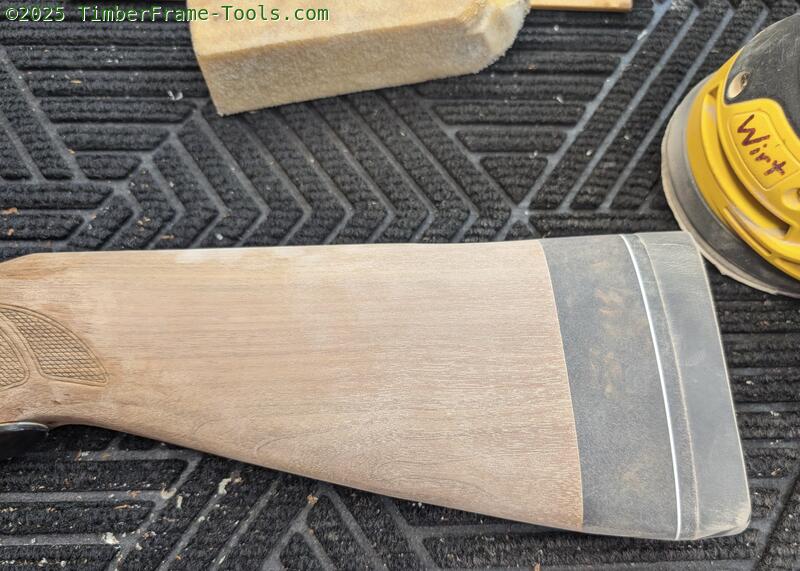
After I get close with the belt sander, I switch to a random orbit sander and sand with 180, 220, and 320 grits.
At 320 grit you can see the patterns emerge. I switch to 400, 600, 800, and 1200 grit on the epoxy and plastic. That gets it smooth enough to shine when we add the oil finish.
On this stock, the pistol grip end abruptly with no smooth transition to the rest of the stock. It is just a big flat spot below the cap.
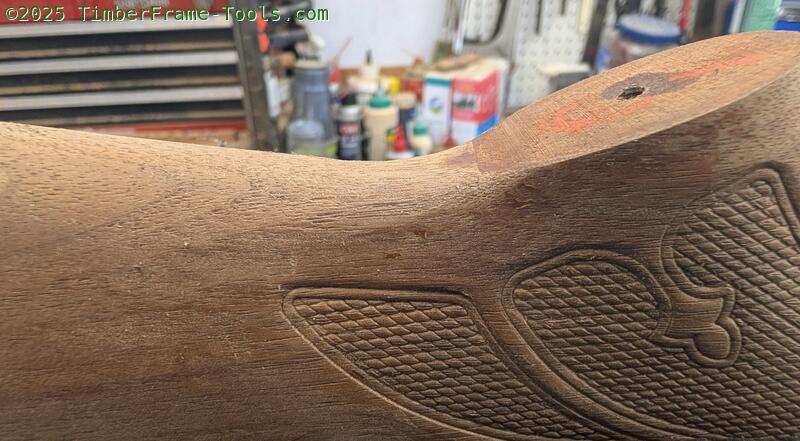
Another view of the flat spot just to the left of where the cap sits. This could be better.
I used a rat tail rasp followed by sandpaper on a dowel to shape the region just behind where the cap sits. I always been partial to the grip caps that had the white Ithaca letters.
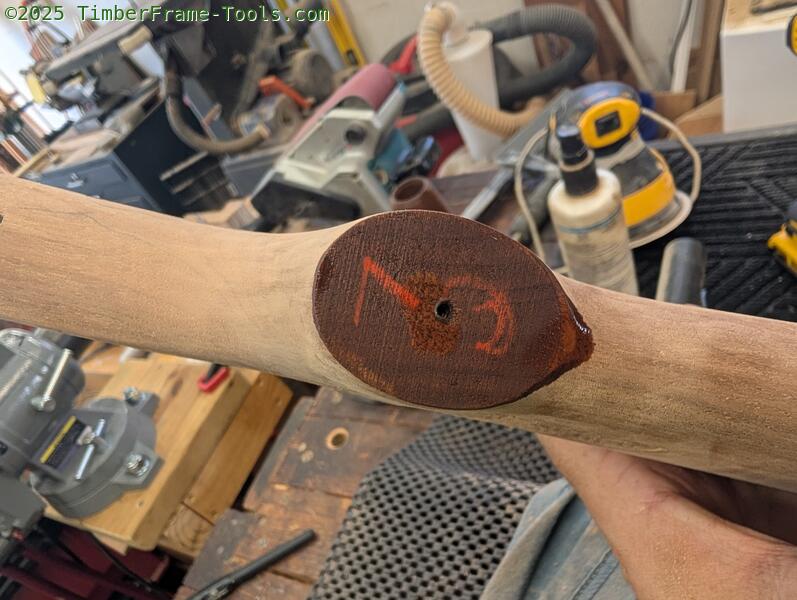
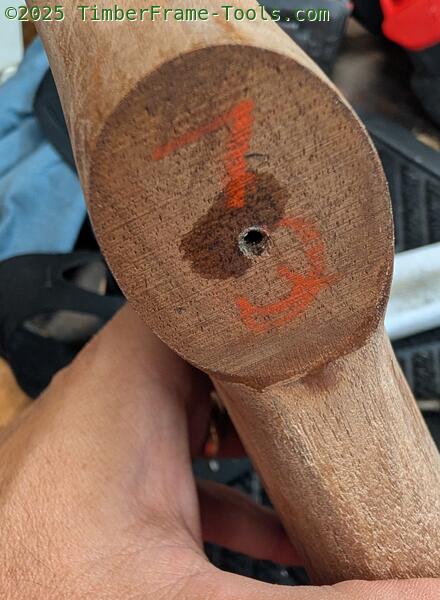
Here you can see the more pronounced tear drop shape. I added a bit of Tung Oil to the cap section to seal it before I put the cap back on for final sanding. Note the “73” . I read one of the historians saying that Ithaca would write the year on the stock with a red grease pen. This looks like this stock was made 2 years before the mechanicals of the gun. This kind of makes sense that the wood may be cut and shaped then set aside to dry to assess it later for warps or cracks that may have occurred.
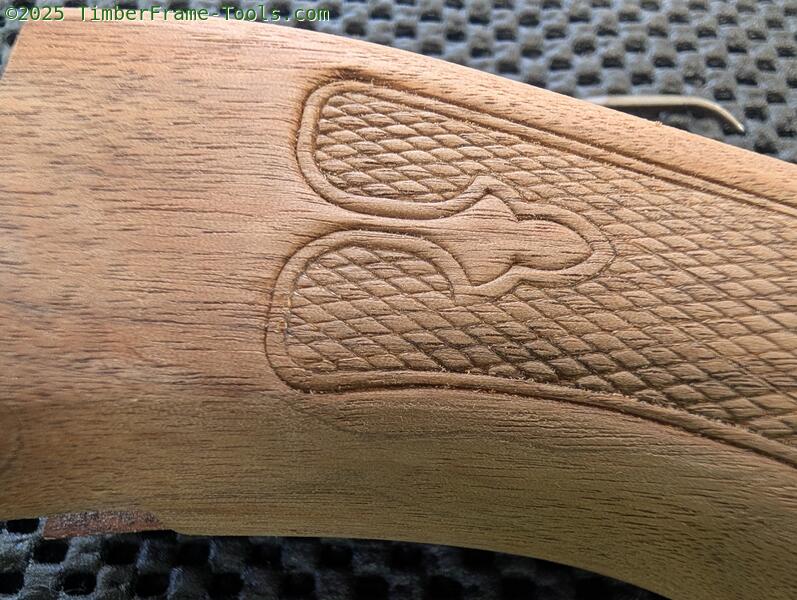
Re-cutting pressed checkering
Time to clean up my mistake. The water rinse after the stripping had caused the checkering to become less pronounced, as it essentially decompressed the pressed checkering.
You can see the pressed checkering has become muted as the lines swelled and became less pressed
Here is the checkering after cutting the pressed line with a riffle file
Before cutting the checkering
After: the riffler file cleaned up the lines.
Before: swollen and muted.
After: cleaned up and re-cut with a file.
Before: faint checking

Riffler file at work
I find that a Grobet Swiss Pattern File Diesinker Riffler #942 or #519 6 Inch Cut 2 works really well for re-cutting or reestablishing the lines of the checkering. I use a 3x magnifier headset and a small light at a low raking angle to help me see the lines. The little files work well, but they make your hands cramp, so taking frequent breaks can help.
After: all nicely refined checkering.
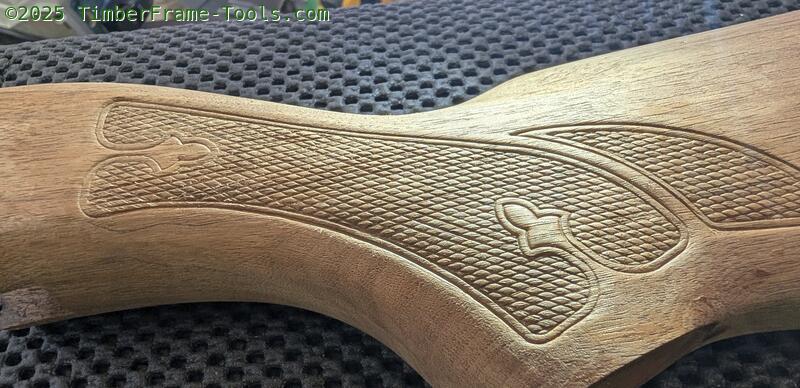
Applying a Tung Oil Finish
With everything sanded to 400 grit, I am ready to start building the finish.
Gun stock sanded but not oiled yet.
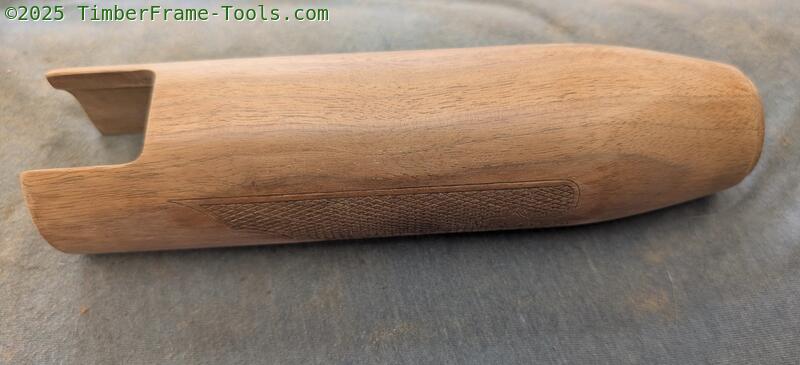
Pump handle sanded and ready to go.
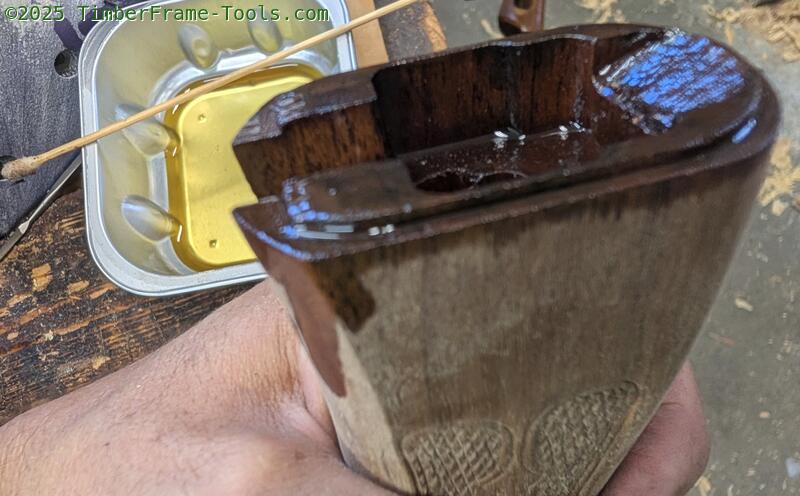
It is important to put finish on the end-grain wood that meets up with the gun. People typically oil their guns then stand them on the butt pad and let them sit. Gravity makes the oil run down the metal and then hit the wood where it gets absorbed into the wood if it is not sealed. Gun oil is not good for the wood and actually causes it to get soft and spongy. This is the one spot in the gun where you don’t want the wood to be softer. By putting Tung oil on the end, it should help prevent gun oil from getting in the wood.
With all the wood final sanded to 400 grit, and the epoxy and plastic sanded to 2000 grit, it is time for the Pure Tung oil. For the first 3 coats I rub in Pure Tung Oil then immediately follow with rubbing in Rottenstone powder. As you rub it in, it disappears into the pores and lines in the grain and fills them to form a smoother surface. Then I immediately follow up with another rub of Tung oil. 10 minutes later I wipe it all down with a clean paper towel to pull off any extra powder. I sun it for a full day between coats. The Tung oil normally takes days to cure, but the UV from the sun cures thin applications in hours.
Its hard to make out in this photo, but the first coat of Tung oil was showing the pump handle as being lighter than the stock.
The original wood on finish on the stock had the pump handle and the butt stock identical in color. Both were kind of a lighter tan than traditional walnut. However, when I hit the bare wood with the Tung oil, they both achieved more traditional Walnut colors but the pump handle was several shades lighter. This tells me two things. 1. The factory finish used a color toner in the finish to make both pieces of wood match. 2 The toner was lighter than the natural wood’s color. I thought they might come closer the same color when I put more coats of Tung Oil on. Nope, they were still different in color. The pump handle was several shades lighter. It was important to me that they match. So I took the pump handle off and sanded away most of the Tung oil finish. Once I had it down to bare wood, I hit it with a few swipes of TransTint Dark Walnut dye I mix the dye in alcohol and wipe it on with a cloth. Now when I put the Tung Oil on it, the colors are much closer. The butt stock has some more open grain that the pump handle which gives it some nice mineral streaks that the pump lacks. Not much I can do about that.
Color balanced with a bit of dye.
Back to the three coats of Tung oil and rottenstone. By the third treatment of rottenstone the surface is pretty smooth. Then I switch to daily coats of just Tung oil. I wipe on the pure Tung oil, then wipe it off with a cloth. It is very important not to put on too much or leave any wet spots on the surface. Then I make sure to sun it for the day before applying the next thin coat. I am of the strong belief that pure Tung oil is the best finish for a stock
The sun cures the Tung oil and also makes the gun feel like it has spent a week at the spa. Happy gun, happy fun.
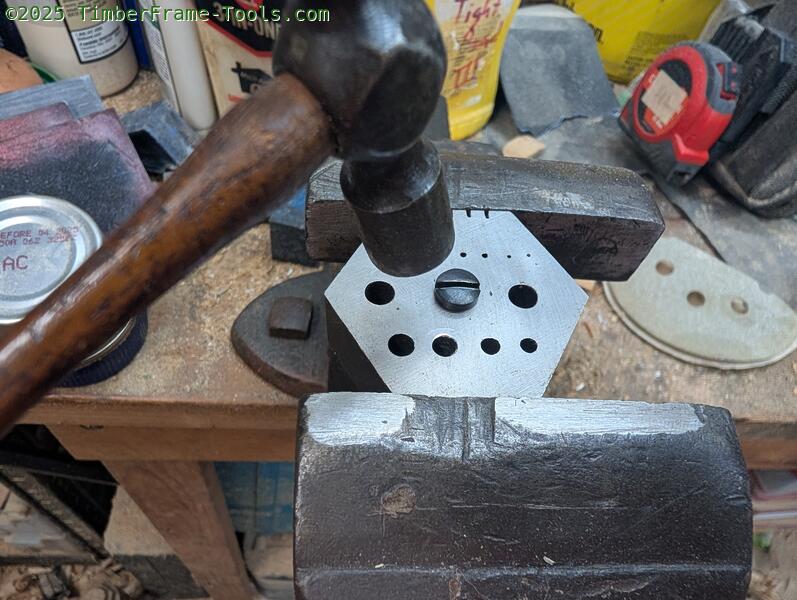
It seems oxymoronic that you fix a chewed-up screw with a hammer. This photo is deceiving, the entire hammer head is smaller than my thumb. Light taps on screw slot that has been chewed up by a bad screwdriver will restore it to near its original shape. Fortunately there was only one screw on the gun that was a bit damaged. The rest were perfect. This jewelers riveting blocks are very handy for fixing screw heads.
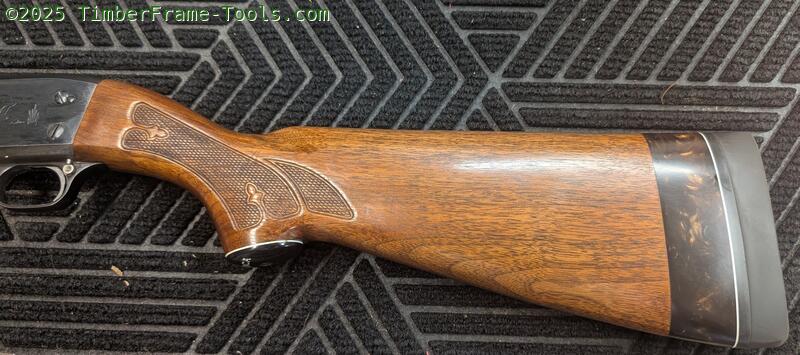
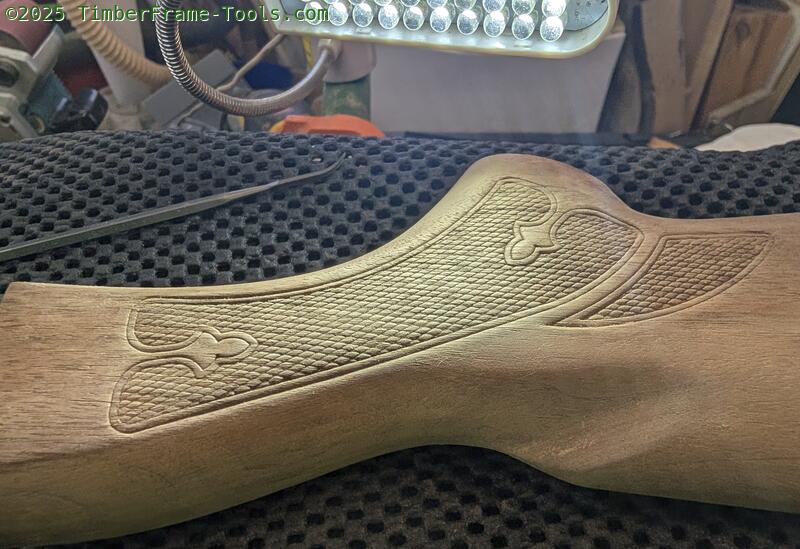
Here is the finished stock with 7 coats of Tung oil on it.
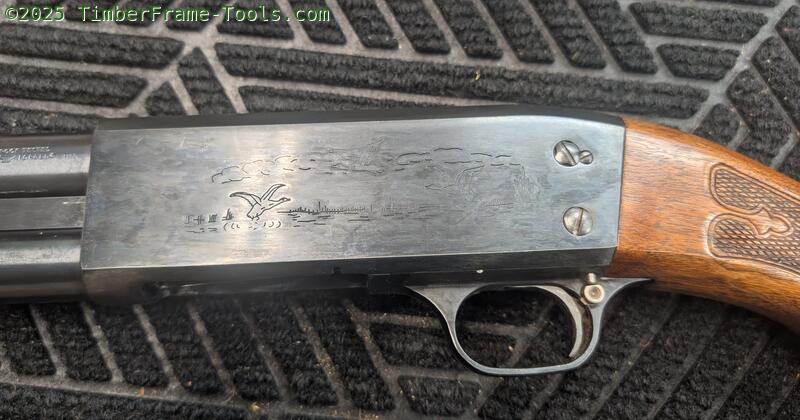
The bluing with a gun oil on it darkened up quite nicely.
I really like how this Ithaca model 37 looks now. I hope my nephew is happy with it.
Does it slam fire?
All the tacti-cool kids want know if it can slam fire. Sorry, no. In 1975 Ithaca deactivated slam fire on their non-defense shotguns. Did they put in a new mechanism to make it safer? No, they simple removed a pair of teeth. Prior to 1975 if the trigger was held in while the slide was run, there was a little tooth on the hammer that would catch on a tooth on the slide release, causing the hammer to stay in place until the slide release pivoted as the bolt locked into battery. This allowed for the hammer to drop at just as the bolt locked. This is “slam firing” From 1975 onward, the two teeth were removed, so if you keep the trigger pressed as the bolt closes, the hammer just follows the bolt and does not hit with enough energy to detonate the primer. The downside of this is that the gun has a live shell in the chamber, but internal hammer is not cocked, so there is now way to fire it. A rack of the slide is needed to cock the hammer, but it also ejects the shell. The 70’s were a goofy time, but I am pretty sure John Browning and John Pedersen both rolled over in their grave in 1975 when this design change took place. Yes slam fire can be dangerous for a variety of reasons, but having a gun that can’t go boom when you want it to, is also a bad situation. I am not sure why Ithaca did not elect to make the hammer stay cocked and just need a finger reset (release of the trigger) to then have it ready to fire. That is the approach that both the Remington 870 and Mossberg 500 have always used. I am sure they had engineers that could pull it off, but for some reason they chose not to.