Back in 2014 I built my manually operated sit/stand desk. It served me well for a decade, but because it was inside an armoire style cabinet, it had limited desktop space. As I put more hardware on the desk, it became harder to lift and lower. So I eventually grew lazy about any standing.
I needed to build something bigger and better. I bought the highest rated, lowest cost power desk that I could find. I bought the Famisky 48″x25″ power standing desk. The top was made out of particle board and laminate that I would discard. All I really wanted were the legs and control mechanism.
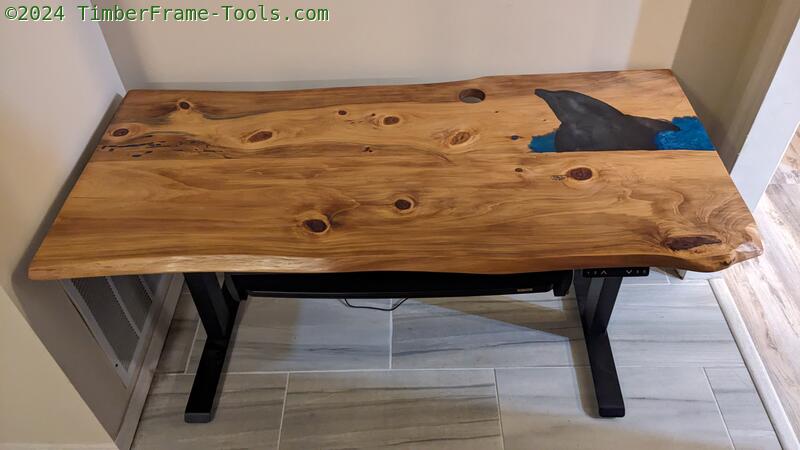
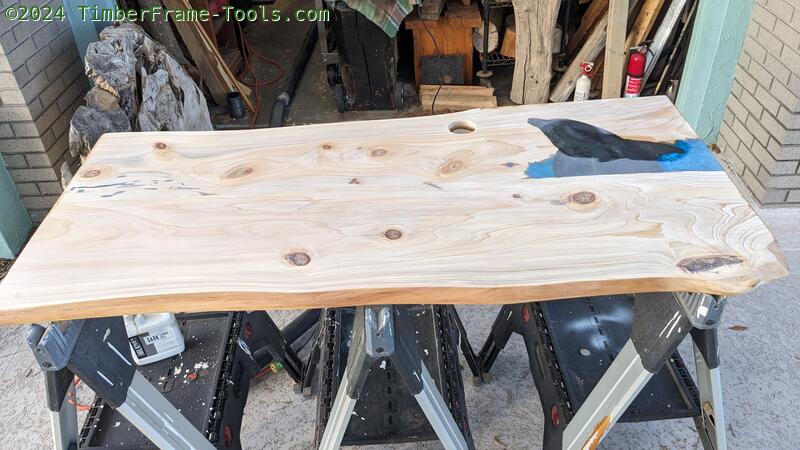
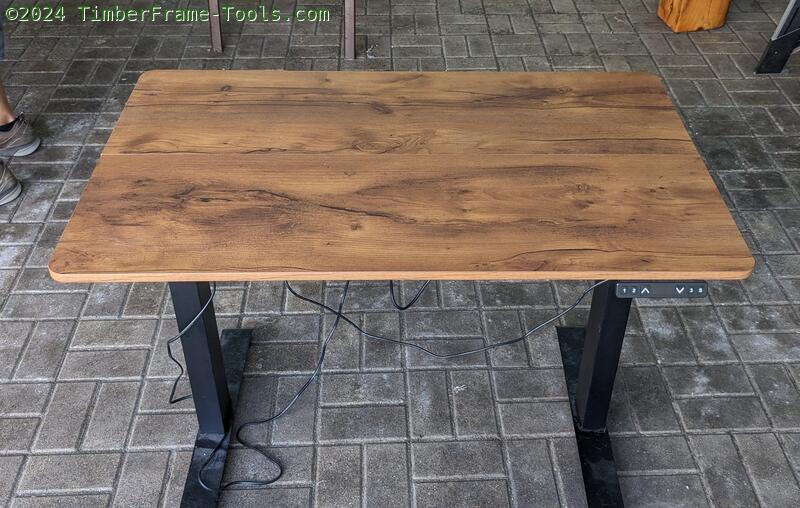
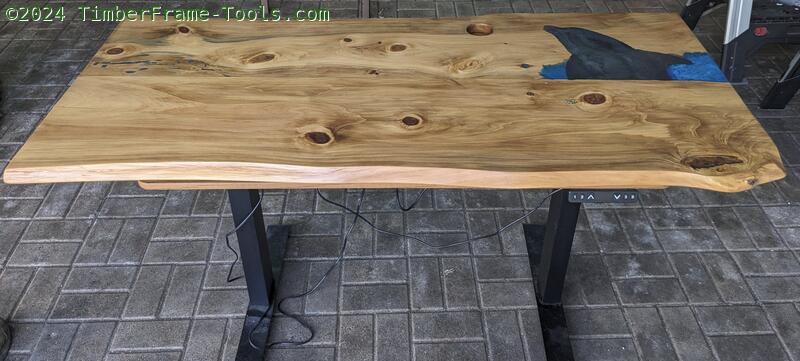
Here is the finished desk with a 58″ top made from Cypress.
The Cypress I used for the top came from my backyard. I had two large Cypress tress cut down in 2019. I then cut slabs with a chainsaw. From the slabs I still have left, I found two that would work.
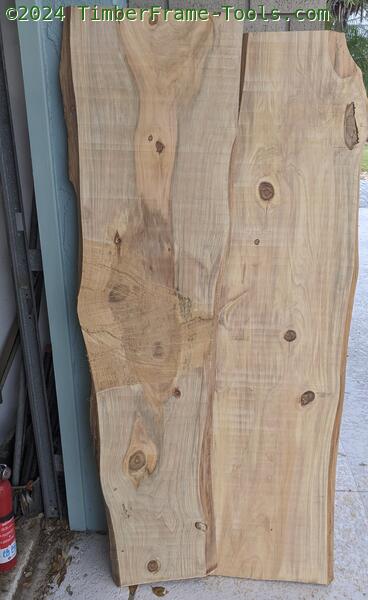
Slabs in need of more flattening.
These slabs were a bit long and unwieldy, they were too long for my bench. So I setup my flattening jig on some sawhorses. This setup works pretty well. It is not terribly precise, but does allow me to keep the mess out in the driveway, instead of burying my workshop in wood chips. I use four Stanley Fat Max saw horses and a pair of 2x6s on the sides to support the router sled.
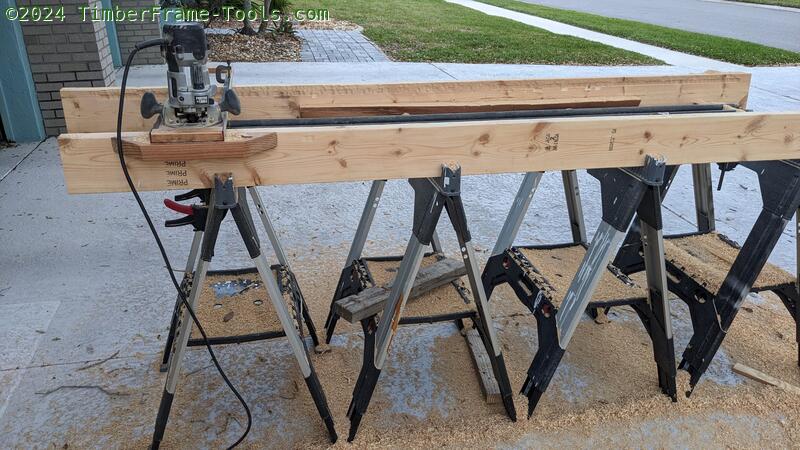
Four saw horses and some 2x6s make a decent router flattening system. It helps to have a flat driveway.
To keep the slab supported I lay down 1″ iron pipe (from my pipe clamps) The pipes want to roll so I clamp the end pipes down using Powertec Tracksaw Track Guide Rail Clamps to keep them from rolling.
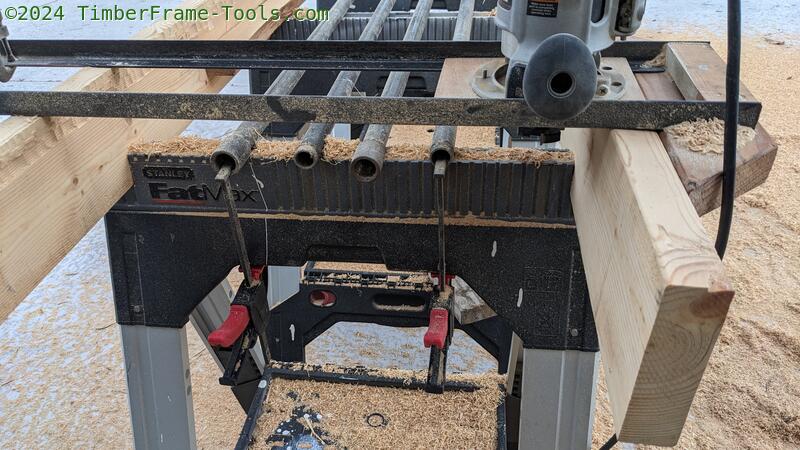
These Powertec clamps can hold in ways that nothing else can.
Multiple passes of the router using a flattening bit had the slabs ready for the next step.
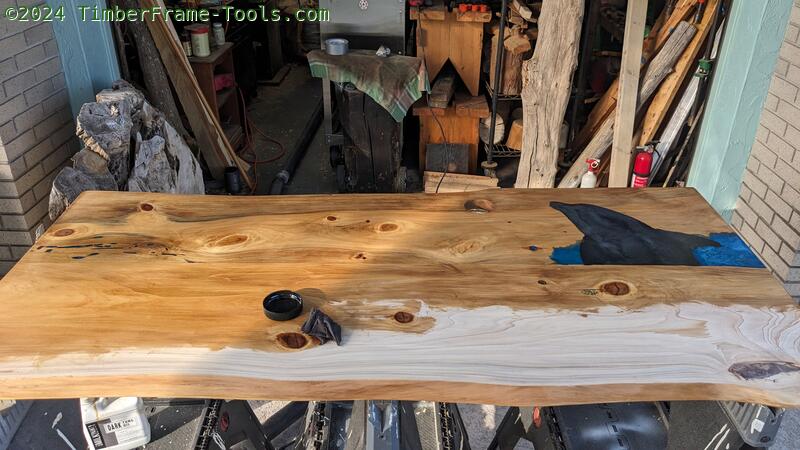
With the slabs flattened, we can now see the beauty and some of the cool defects… errr… bug holes. Those will need to be filled with epoxy.
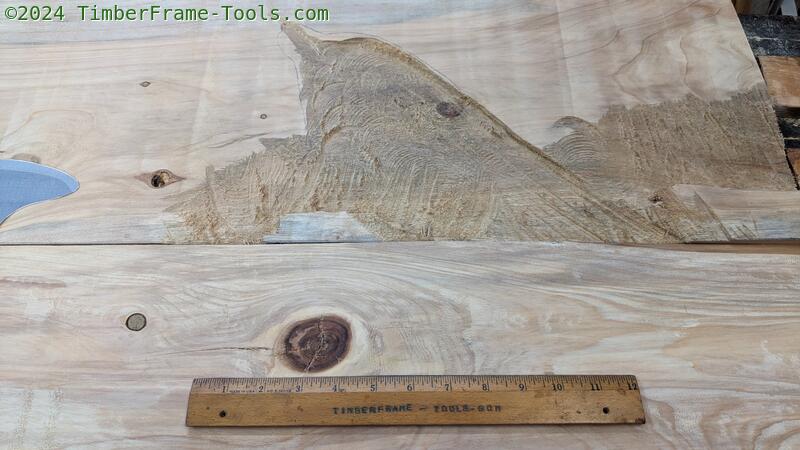
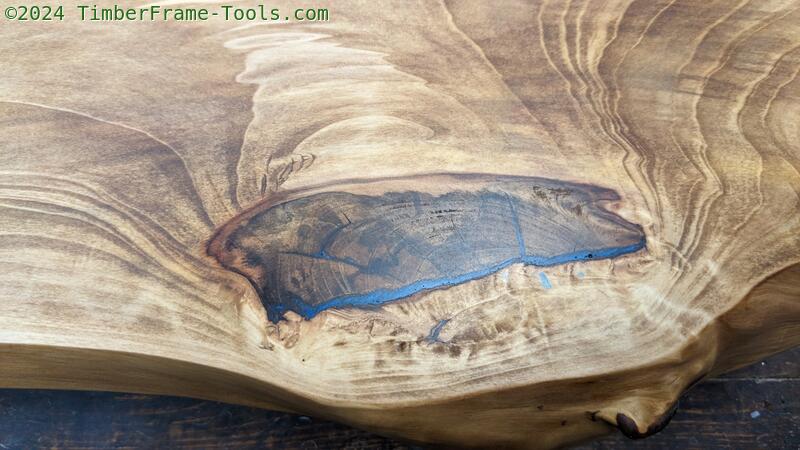
One of the slabs had some deep chainsaw scars on both sides. Flattening either side enough to get rid of the scars would have left the slab too thin, so the scars had to stay. What could I disguise this chainsaw scar with? What animal do you see in the shape?
If you said Dolphin, then you matched me. If you said Narwahl, you matched my wife. If you said plane crash, you matched my son. So dolphin it is.
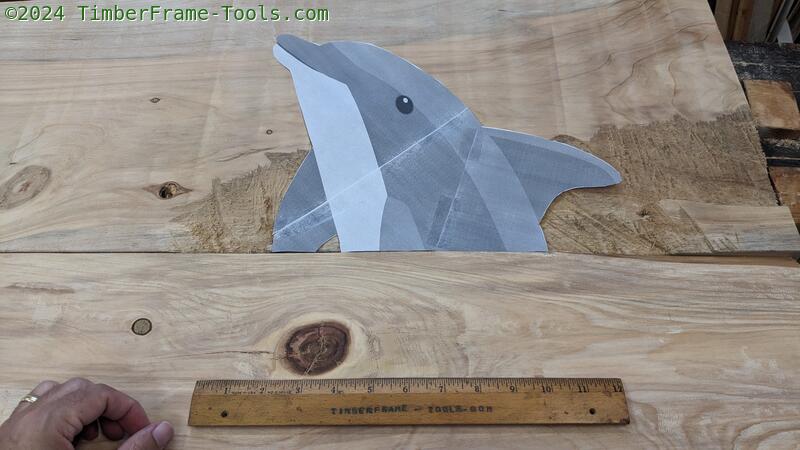
I found a line art dolphin online and printed it out big.
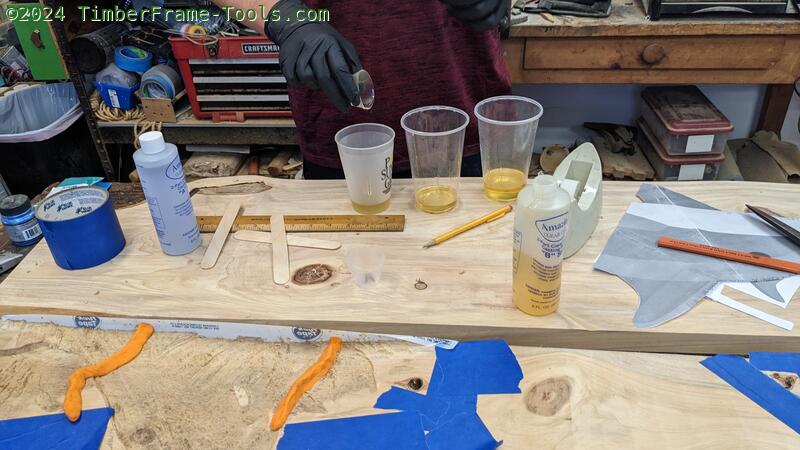
Prepping to pour a small amount of “water”.
Not needing a large jug of epoxy I went with Amazing Clear Cast epoxy because it works well and comes in smaller quantities.
Here you can see the initial pour that was mainly to get the taped edge sealed up. If I poured too much, the entire thing would have leaked out.
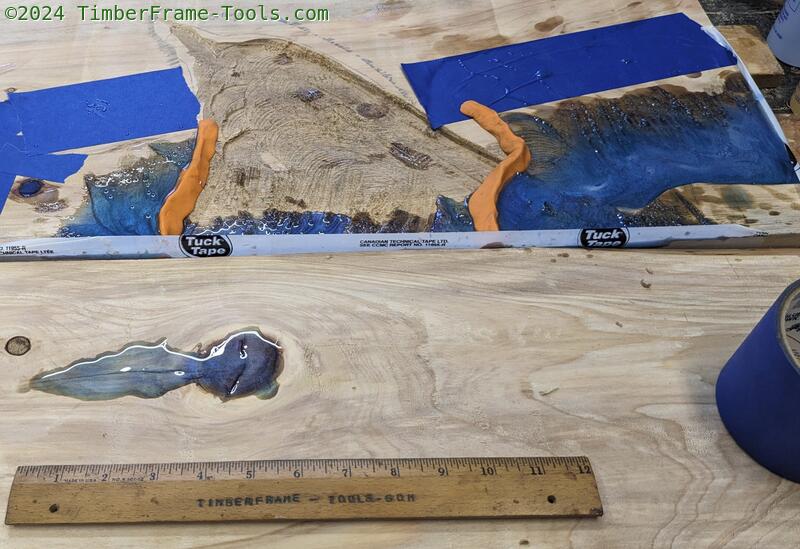
Since the dolphin will need precision to look like the dolphin and the water needs no precision, the water gets poured first. I used some Tuck tape to create the sides. The trick to avoiding leaks is to pour just a wee bit the first pour and let it harden. That seals the holes. I used Blue painters tape to mask off the area being poured, and I used plasticene modelling clay to keep the blue water from filling in where the dolphin will go.
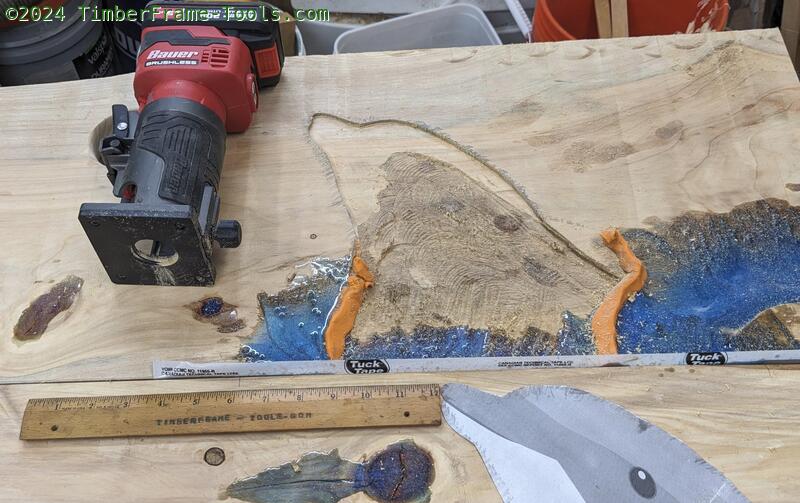
I used my palm router with a straight bit to define the shape of the dolphin.
I never thought I needed a palm router, until I got one. This Bauer works quite well. I used it freehand to define the shape if the dolphin.
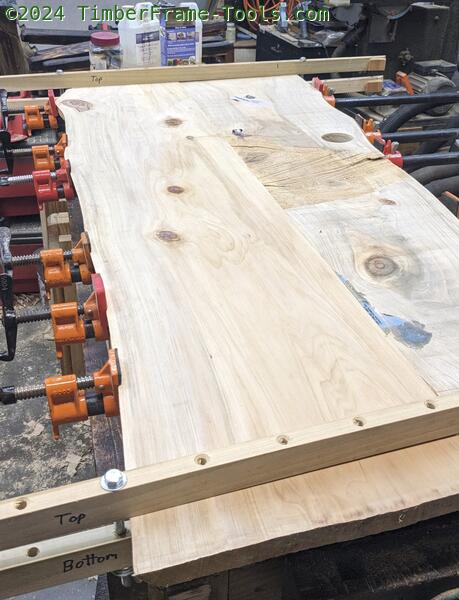
With most of the epoxy poured, it was time to joint the edges and glue up the slabs. They are upside down right now so you can’t see the epoxy.
Relatively standard glue-up. I used some shop made clamping cauls to keep the two boards flat while I clamped them together. I had to go light on the pipe clamps so they would not crush the live edge. I also used a doweling jig to put in three dowels, just to help with alignment
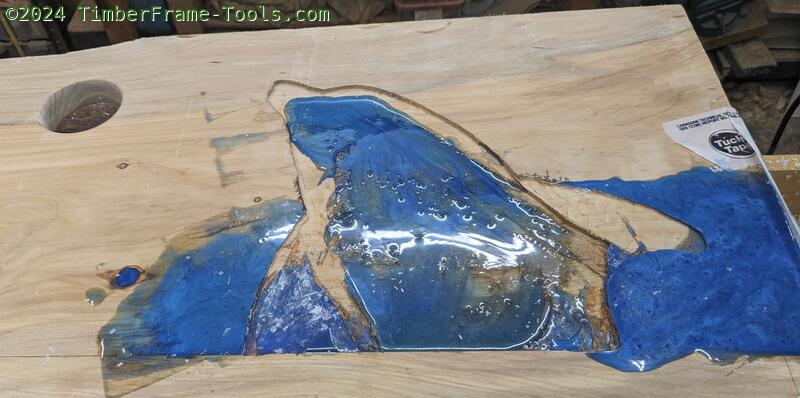
Here is after the final pour of blue water epoxy. The blue in the dolphin is just the excess and will get covered with dolphin colored epoxy soon.
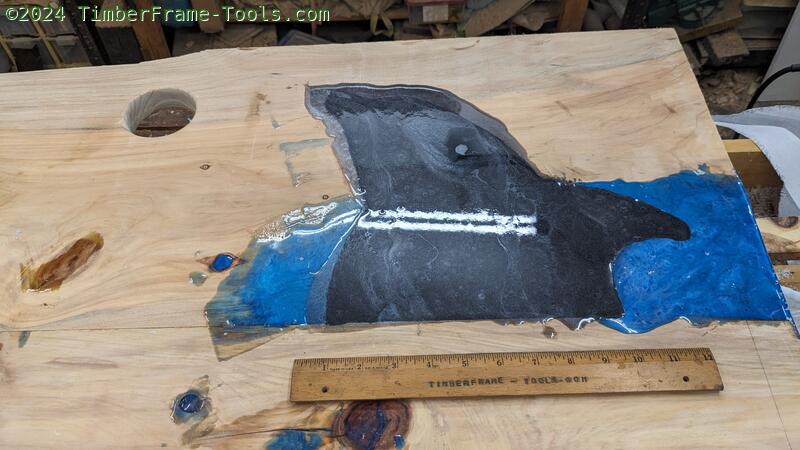
Here is the pour of the dolphin color.
I mixed black and white pigment to get gray. It came out a lot darker than it appeared in the cup.
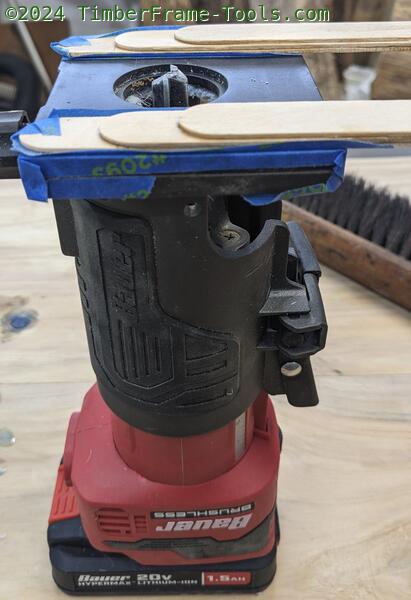
Here is a sled for the router that made to make the router remove epoxy that is proud of the surface.
I made this sled for my palm router out of popsicle sticks glued together with CA glue. The trick is to have the bottom of the sled start behind the router bit. This lets you hit and remove any epoxy that stands proud of the wood. I put a piece of blue tape on each side of the base plate, then another piece tape on each side of the sled. Then I use CA glue to stick the two pieces of tape together. That way I can remove the sled from the router base when I am done with it.
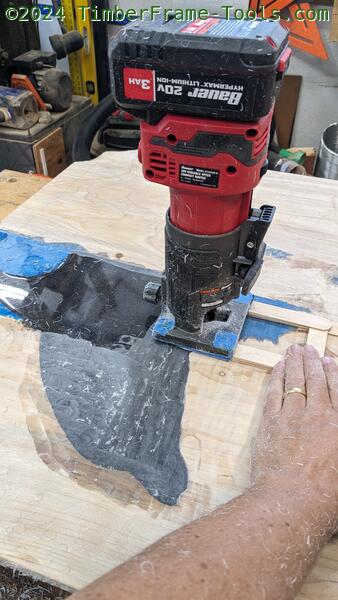
Epoxy removal sled in use on a palm router
Here you can see how I have moved the router progressively forward over the epoxy to bring it down to level with the wood. This method has the potential for errors to stack up. If the bit is to high above the wood, each pass of the router will get progressively higher. If the bit is just below the surface of the wood, it will get progressively lower and will dish out the area. So it pays to take time to get the bit to be exactly the same height as the wood.
The desktop, glued up, leveled, and sanded up through 400 grit.
The first coat of Dark Tung Oil going on. Not too heavy, not thinned. Rubbing it in with a scrap of cloth as I go.
This is the original power desk.
The power desk I bought had a cheap particle board top that looked … OK. The system has 3 memory points you can set and it works smoothly and quietly. The entire desk was more affordable that just trying to buy the legs separately.
Here is the new top just set on the original top. You can see it is significantly wider than the original top.
To mount the legs to the new top, I moved the legs out toward the ends to make it look a little better balanced.
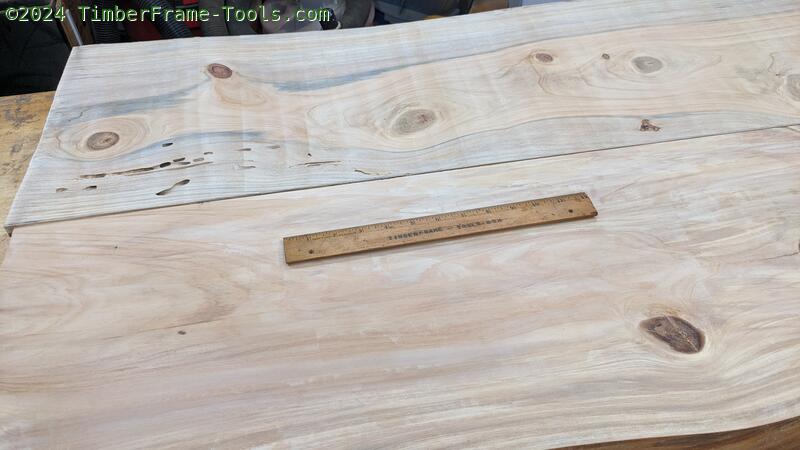
One of the features I like about this top is this limb inclusion. It is where a limb got cut off, then later the tree eventually covered it over.
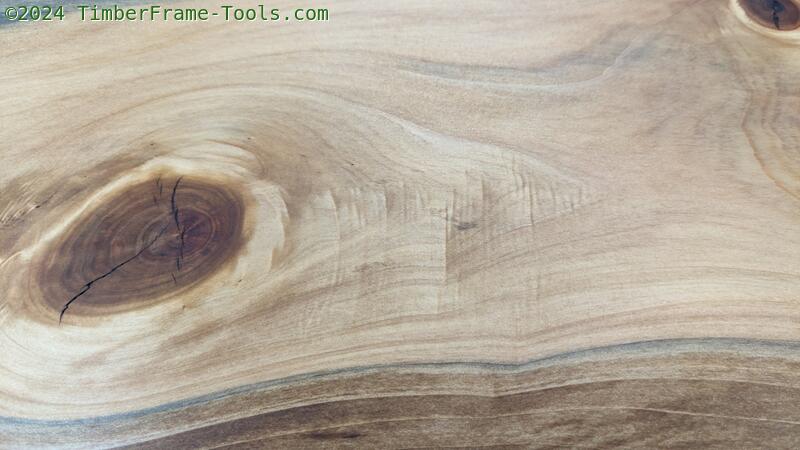
The other feature I like are the ripples that appear above or below knots. They take on an almost holographic appearance since the move a little as you move. These formations are pretty common in Cypress.
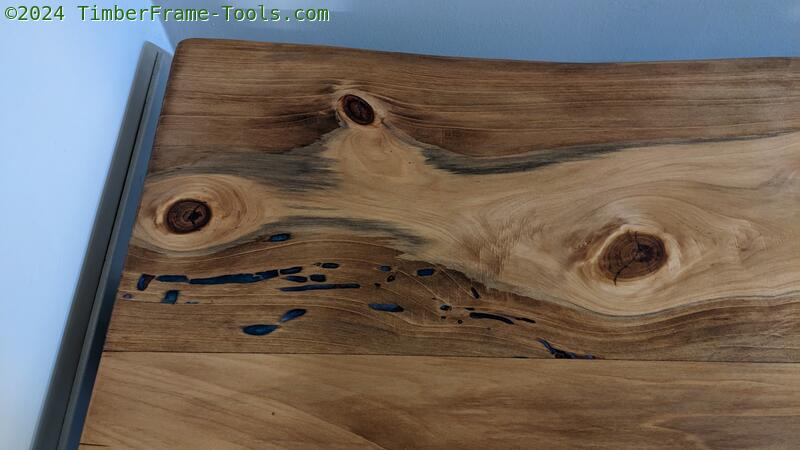
Here are both bug holes from painted long horn beetle larva and some blue stain.
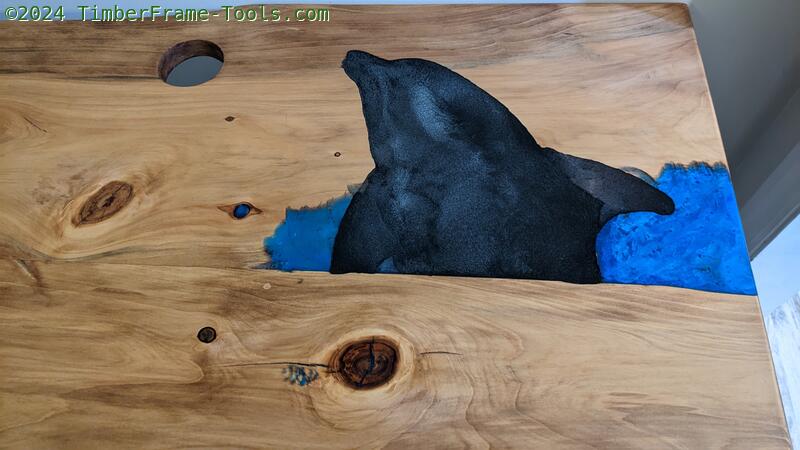
Here is the epoxy dolphin.
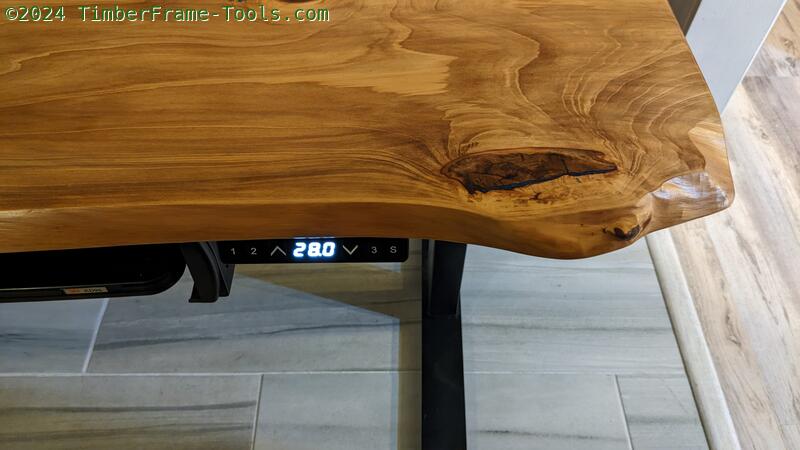
Modern convenience of height control on a rustic style top.
I am very happy with how this desk turned out. I spend 8+ hrs per day on for working from home, and it makes me happy to look at it.