I am in the middle of working on a live edge table, but I have the live edges interior to the table rather than at the table edge. So I have one live edge that needs to join up to another piece of wood. A lot of woodworkers solve this with a river of epoxy. Not for me this time. I want a wood-to-wood joint. I traced the adjoining piece with a pencil, then cut the middle strip on a bandsaw to get the shape close. I also used a drawknife and spoke shave on the non-live edge piece to approximate the shape of the mating edge. With the edges close to the right shape, it is time to start kerfing.
Usually kerfing is done by cutting between two miters with a saw, to create a perfectly matching joint. This would not really work on a live edge that is nearly 8′ long. Fortunately I have a bunch of 80 grit Gator Grit belt sander belts that have tape joints that did not survive. (Don’t use Gator Grit belts if you expect them to stay belts.)
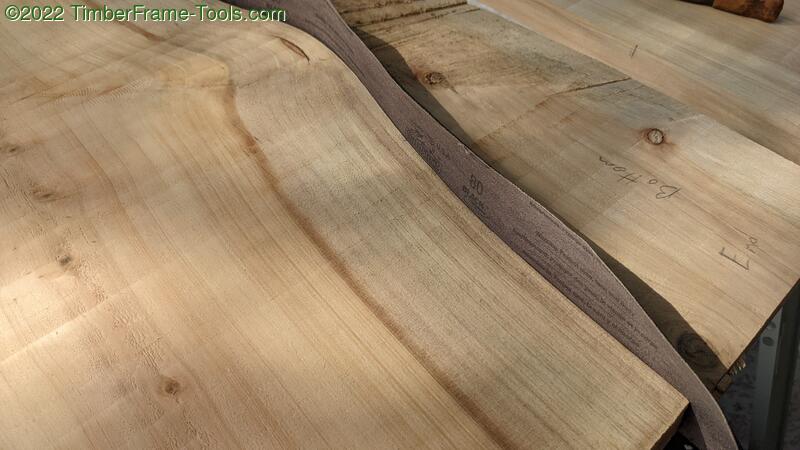
You can use the belt lengthwise in the gap between the two boards, but it is challenging to hold the boards together and keep them aligned while sliding the belt back and forth along the long edge.
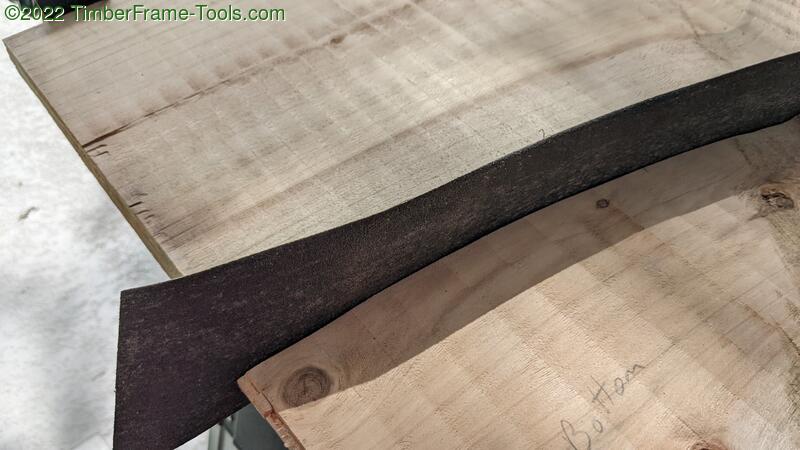
This orientation is better for final kerfing and not so much bulk removal. It takes too long and can also flatten some of the sharper curves.
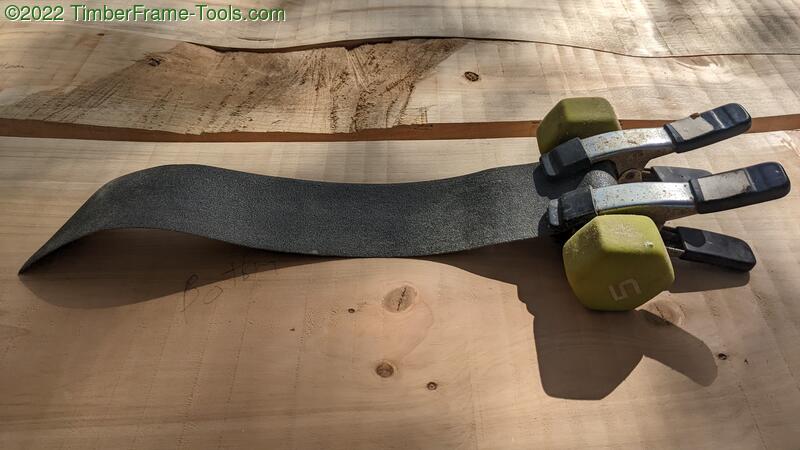
An action going across the edge rather than lengthwise is better. In old sawing days, a helper in the sawing pit called the “pitman” would pull the saw down and the tillerman up top would lift the saw. So my pitman for this project was a 5lb weight clamped to the end of a belt sander belt.
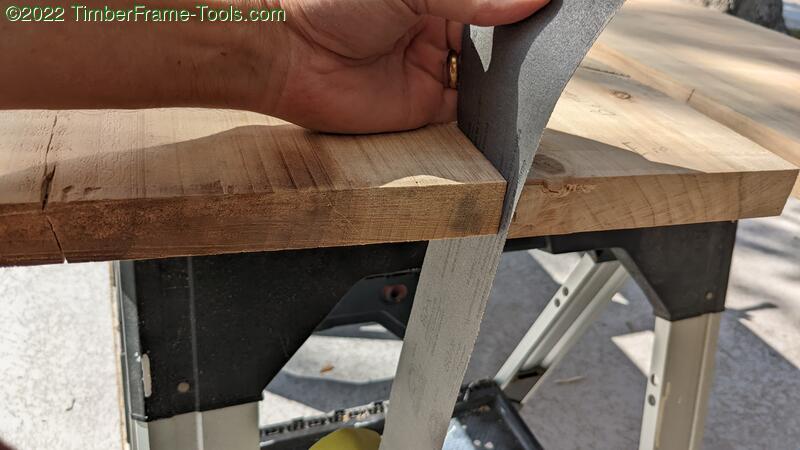
The idea is, put the non-abrasive side of the belt against the edge you want to preserve, and the grit side against the mating edge. Pull up on the belt while squeezing the two boards together slightly. Squeeze too hard and the dumbell is not heavy enough to pull the belt back through.
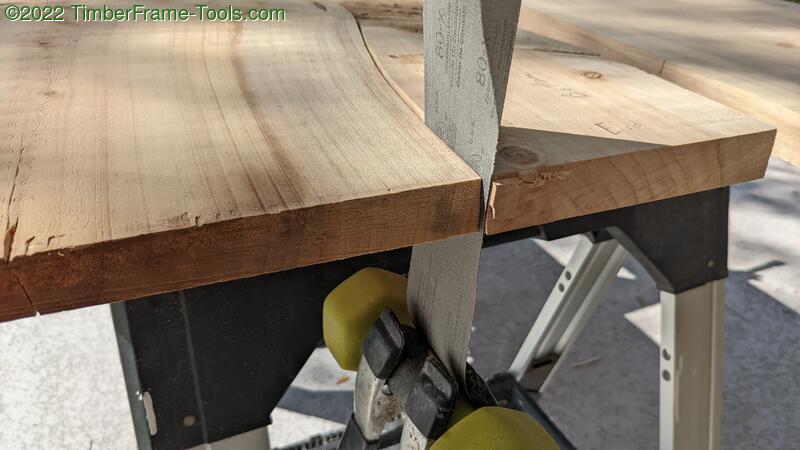
As you move the belt up and down, the pressure points abrade away until you get even pressure and eventually a mating surface.
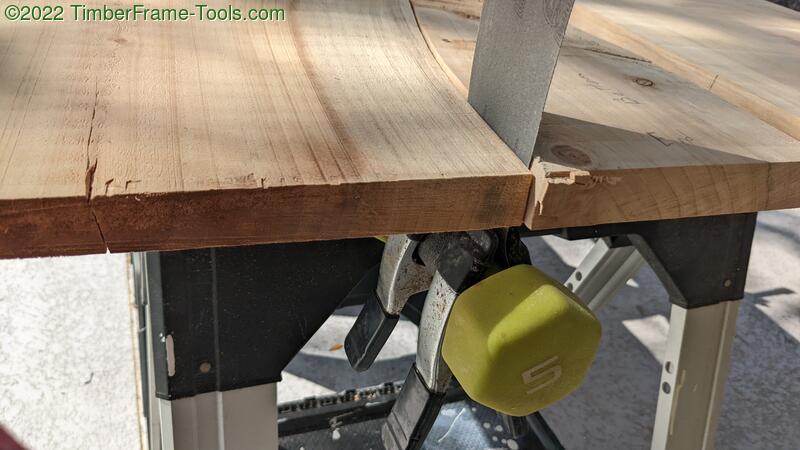
Keep moving the belt to the regions where the wood touches the other wood and with a bit of time and some up and down work with the pitman, the contact points get longer and longer while the gaps get smaller and smaller
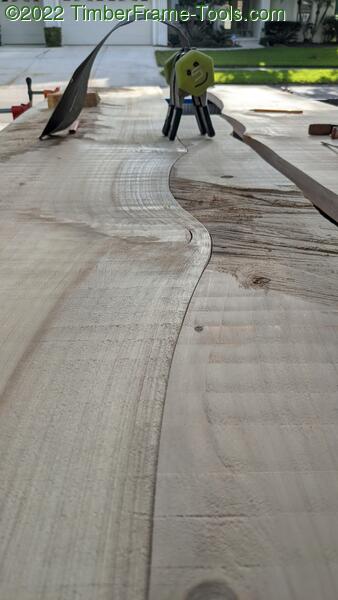
Repeat this process until the boards mate up to your satisfaction. Above you can see the two pieces of wood nicely kerfed together.
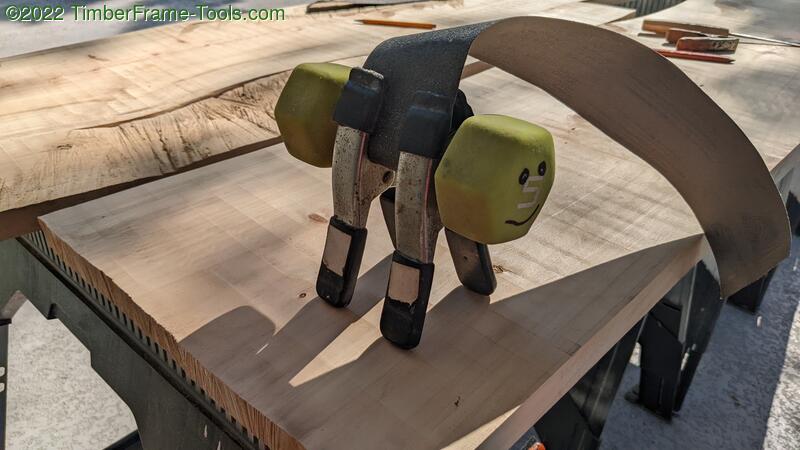
When my son was younger and helping me in the shop, we’d make up character names for tools. He’s older now and doesn’t usually appreciate the names, but he smiled a bit when I introduced him to my new helper, “Kerfy Pitman.”
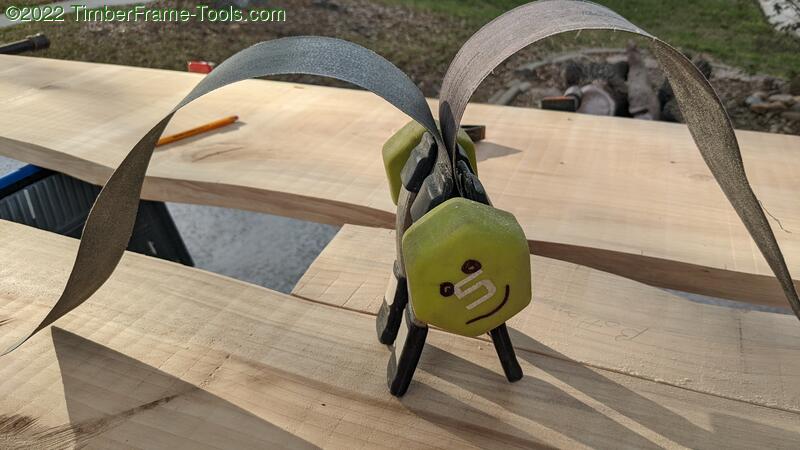
The other cool part about Kerfy Pitman is that if you are more worried about speed than preserving the shape of one of the edges, you can put two sanding belts back to back and kerf both sides at once.
Kerfing a joint is not just for saws. It’s also not just for live edges. You can use it to tighten up a variety of woodworking joints.
Previously
- Forged knife
A few years ago, my son went on a school trip to St. Augustine FL. One of the things they visited was a blacksmith shop. He was intrigued, so we entered into adding some ironworking to our shop. Back in March 2019 we decided to make a propane bucket forge and then make a knife. […]
- Mountain Wall Light
As my son has gotten older, his homework time has stretched later into the evening when light is fading. He clearly needed more photons. We had a few requirements: It had to look good with his custom desk, and book cabinet. His desk is in our family room, so it had to look good. It […]
- Sliding Dovetailed Book Cabinet
My son has been schooling remotely due to COVID so we needed a place for him to stash all his books and papers that would normally be in his locker at school. The river desk we built back at the end of 2018 serves him well, but is has no storage either so I decided […]
- Easy Sliding Dovetail Jig
As a result of my constant fascination/challenge to make furniture without metal fasteners, I often turn to using sliding dovetails. Generally making sliding dovetails is a little finicky. Too tight and you can’t slide the joint together. To loose and the joint is wobbly. Recently I came up with a solution that makes the process […]
- Australian Pine Live Edge Mirror
On one of our many boating trips to a favorite nearby beach we stumbled upon an Australian Pine rolling in the surf. As it was a hazard to navigation, I pulled it out of the surf and dragged it up on the beach. It was pretty large, roughly 25 feet long. This was back in […]
- Cypress Stump End Tables
I wrote a while back about the Cypress Stump Console I made from one of the two Cypress trees I had removed in my back yard. The second stump… the butt really, was a bit shorter. I thought it would make a good coffee table but we don’t need any more of those. However we […]
- Sawdust in the Wind
My Dad passed away a week ago. I credit him with teaching me about creative work, a bit of woodworking and especially hand tool woodworking. In preparing for his memorial service I came across a few photos that answered some of the mystery for me about this hobby that has become a bit of an […]
- Heart Bar Stool
I had this idea kicking around in my head for a barstool made from a log with a built in footrest. My original thought was for a square seat, but used on a diagonal like a diamond. Then I was looking for ways to reduce the weight and realized that the back corner of the […]
- Cypress Stump Console Table
Back in May 2019 we had two large Bald Cypress trees removed from our back yard. Steve’s Tree Service did a great job and they obliged me in my request to have the trunks cut as close to the ground as possible so that I could have some nicely flared stumps for creative woodworking. This […]
- Cypress Serving Tray
Each year, my son makes a gift for his teacher. Here is the 2020 tale as written by him. In May 2019 my dad cut down 2 Cypress trees and the wood sat in our driveway for way too long. After the wood was out of the driveway some went in the attic to […]
- Florida Chainsaw Mill
Anybody who is into natural woodworking is likely familiar with the “Alaskan Chainsaw Mill.” Carried into the wilderness, slung over a well muscled shoulder and ready to turn logs into lumber. These mills made by Granberg and others are impressive, but that is just not how we roll down in Florida. We are grayer, more […]
- Finished: Slab sided floating top river-desk
Now that all the pieces are done for this desk, it is time to assemble. The problem is that the slab sides are quite heavy and the top with the attached stretchers is very heavy so it has to be assembled in-place and I had no free hands to take assembly photos. The assembly, if […]
- Slab Side Legs
In August 2018, I was taking my morning walk with my dog around our neighborhood. I spied several people with chainsaws and safety gear. Then I saw their target. A double trunked water oak…. my precious. I spoke to Steve of Steve’s Tree & Hauling and inquired if it was headed for lumber mill or […]
- Stretchers for a Floating Desktop
The desk top for my son’s river desk is kiln dried Southern Yellow Pine. The uprights for it are 2″+ thick red oak that was cut and milled less than a year ago. Most woodworkers will advise not to build with wood until it has dried at least a year per inch. that is probably […]
- Prize Trace Hook from Dirty Shed Creations
I started watching the YouTube channel Dirty Shed Creations when they began their wood log throne series about 6 months ago and I have not missed a release yet. I like Dirty Shed creations both for its enjoyable cast of characters (Uncle Al, Camera Boy, and Tammy) and the projects they come up with match […]
- Epoxy River Desktop
My son was pretty adamant that he wanted his new desk to have an epoxy river on it. He has enjoyed the few times we have used epoxy to fill gaps in the past and he wanted to do more. We were going to be making the desktop out of Southern Yellow Pine so the […]
- Floating Top River Desk with Slab Sides – Intro
My son currently uses a desk that is a simple trestle style that belonged to his grandfather. I like the style of it, but it was from an era that knew nothing of laptops and mice and was a bit small for today’s deskly duties. He has simply outgrown the desk and was in need […]
- Easy clamping cauls
A few years ago I saw these bar clamps made by Sergio Acuña Padin on Youtube. His channel is full of clever, inexpensive tool builds. I liked these clamps because they were simple, effective and cheap. They are perfect for panel glue-ups. I have quite a few pipe clamps, so I didn’t really have a […]
- $4 Planing Stop
I have a bunch of dog holes on my bench and a bunch of bench dogs of various thickness. However, in practice when I am face planing a board I can almost guarantee that the bench dog will either be too thick, causing the plane to catch the top of the dog, or in the […]


