I have a bunch of dog holes on my bench and a bunch of bench dogs of various thickness. However, in practice when I am face planing a board I can almost guarantee that the bench dog will either be too thick, causing the plane to catch the top of the dog, or in the wrong place, causing the board to shift.
I have seen and envied some of the traditional planing stops like this Benchcrafted Planing Stop, but it would not work on my current bench. Lee Valley carries a different variety that seems to flip up nicely. My issue with both of these is that they are limited in scope, they will only work with wood that is relatively narrow (~6″) and squared off. I don’t always work with narrow lumber or with pieces that are squared off.
The idea hit me to put in a row of flat head screws, then I could raise as many or as few as I needed. The tapered shape of the flat head creates a natural downward wedge and all that are needed are some teeth on the head of the screw to keep things from sliding sideways.
The Plan for a Cheap Planing Stop
- Get some #14 flat head screws, 2.5″ long or longer (length depends on your bench thickness).
- Use an angle grinder with a cut-off wheel to cut some teeth on the head of the screw.
- Draw a line perpendicular to the front of my bench and the left edge of the bench.
- Drill and countersink the screws along that line spaced roughly every 2″.
I started with #14 flathead screws. I chose steel for strength. I considered brass for blade safety, since it it soft enough to not chip a plane blade, but I am pretty sure that brass screws would not be strong enough to not bend or break. I would have preferred slotted screws over phillips head because it is easier to clean debris from a slot than from a phillips head cavity. Unfortunately, the only flatheads that the store carried in that size were phillips head.
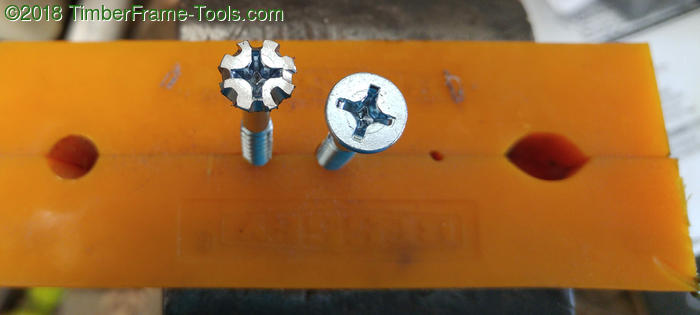
I held the screw in the vice and used a cutoff in my angle grinder to cut some teeth around the head of the screw. A triangular saw file could have cut similar teeth as well . The screw head is also slightly rounded at the edges, so I used a flat file to flatten the top of the screw, until the edge was sharper. I then repeated this 5 more times for a total of 6 screws. Since the screws are to be set ~2″ apart, that gives me a 12″+ capacity.
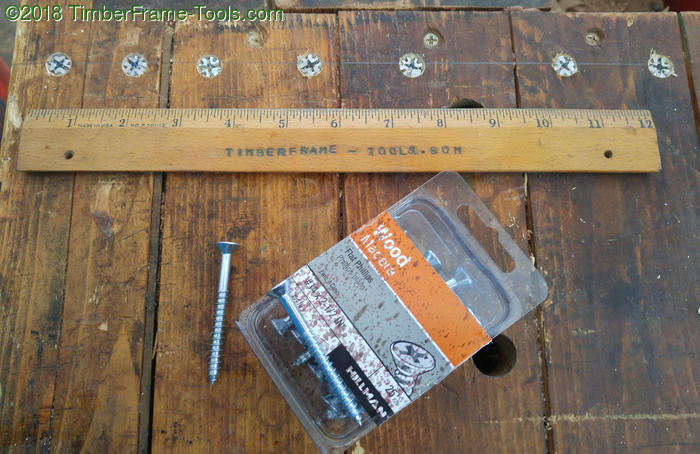
I couldn’t stick to strict spacing of every two inches because it would have landed some screws in weak areas at the seams between boards in my bench. The teeth are kind of sharp, so it is crucial that they are countersunk enough to below the surface of the bench.
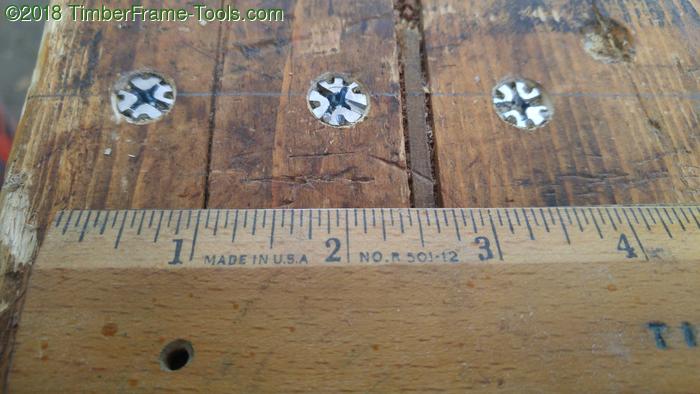
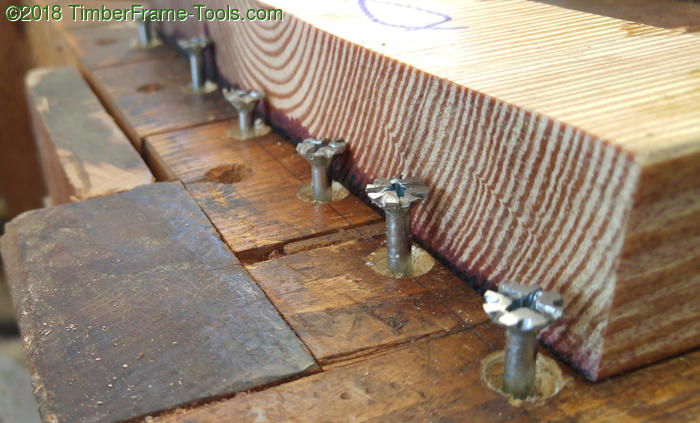
Here is a close-up of the planing stop. The first 2 screws are an inch apart rather than 2″ to support narrower boards.
In this close-up, you can see that these planing stops when raised just a little can easily provide a stop for thin material. Thinner than the ruler in this photo.
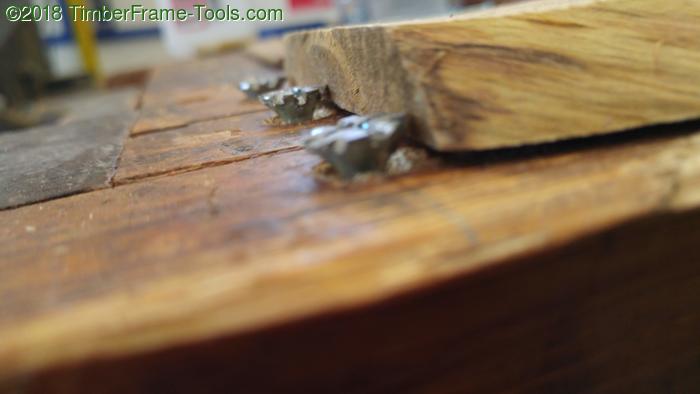
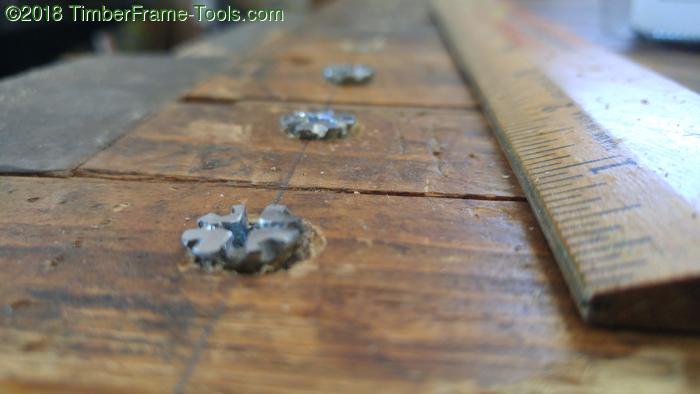
Here they are effectively holding a 3/8″ board.
This last photo shows holding 2″ stock. I have found that more screws is not always better. So now I turn up the screw on each end, and leave the middle ones down. This works out because 2 points always form a line, where multiple points almost never fit cleanly on a line.
This method is easy, cheap, and very effective. It could be used on just about any bench.
I honestly created this idea on my own, but then in researching this a bit more, I did find that others had the idea first.
- Screw stop examples on Stack Exchange Woodworking here.
- New Yinzer Workshop blog entry here.
- Even productized here. http://www.evenfallstudios.com/woodworks/2011/02/16/the-bench-end-planing-stop
screws used as stop on “sticking boads”
Sylvain
So every time a wide piece is planed, you need to work all those screws up and then down afterwards? This isn’t a good way to reinvent the wheel.
@Richard
The last photo is a bit deceiving. As I wrote near the last photo, I have taken to only raising two screws. One nearest each corner of the board, not all of them. However even if you did raise and lower them all… it takes less than 15 seconds. Less than 5 seconds if a cordless screw gun is used.