As a result of my constant fascination/challenge to make furniture without metal fasteners, I often turn to using sliding dovetails. Generally making sliding dovetails is a little finicky. Too tight and you can’t slide the joint together. To loose and the joint is wobbly. Recently I came up with a solution that makes the process of creating sliding dovetail joints and tapered sliding dovetail joints a whole lot more reliable.
The idea is pretty simple, but I have not seen anyone else in the internet sphere using it. This method can be used with any router, any dimension of wood, and any dovetail bit (1/4″ chank bits clear the guides better than 1/2″). The jig consists of a pair of guides.
Sliding Dovetail Jig Construction
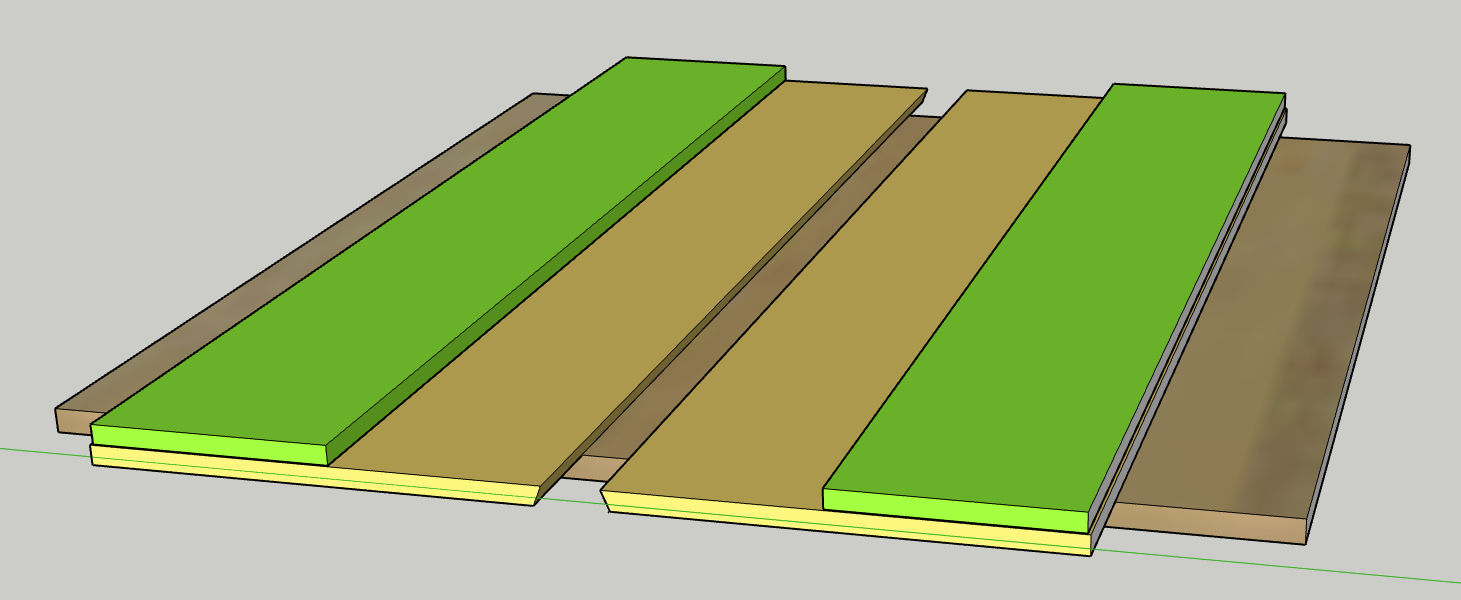
To make this jig you will need to prepare four pieces of plywood that consist of two router fences and two guides. They should all be the same length. How long? They should be ~ 5″ longer than the longest sliding dovetail you need to make.
Fence – The fences (green in the image) can be made of plywood of just about any thickness. 1/4″ works but added thickness makes the jig a bit more solid, so anything up to 1″ thick is just fine. One edge of the fences needs to be perfectly straight.
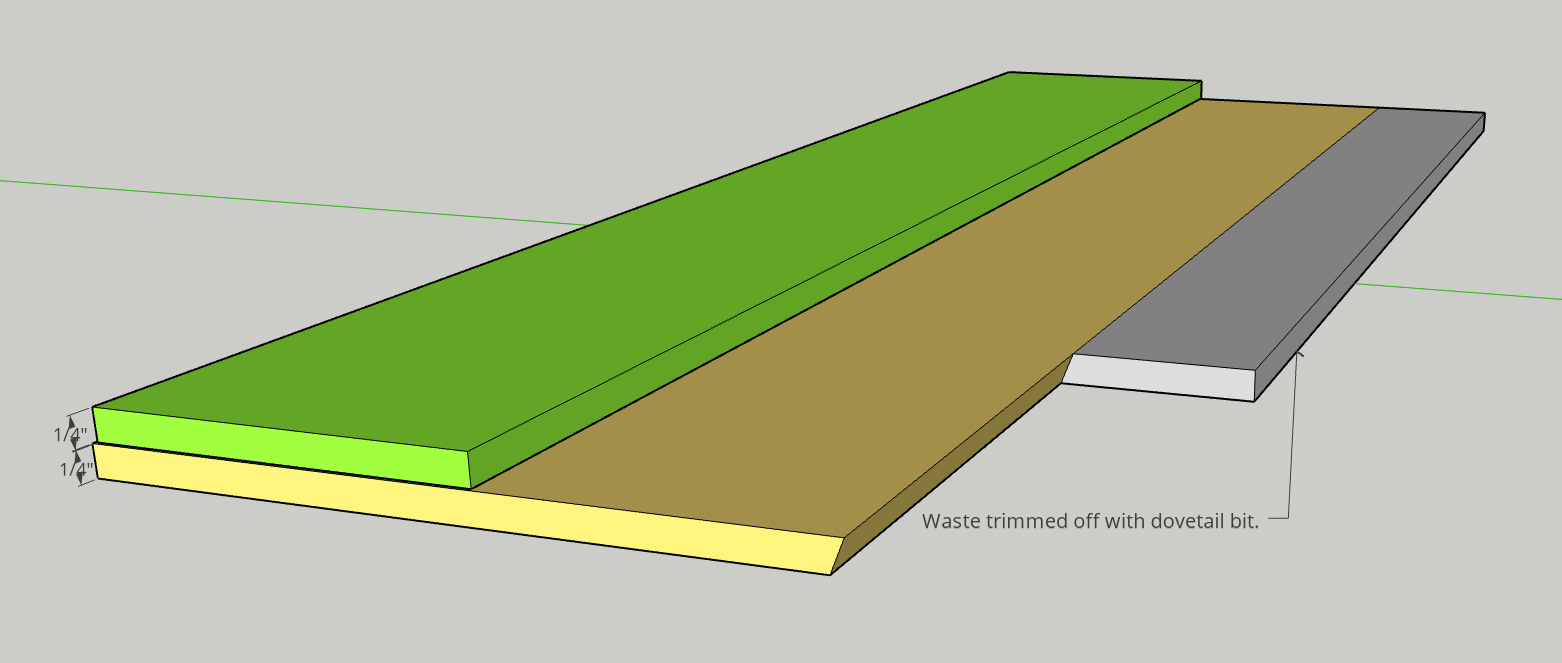
Guide Base – The guides (tan in the image) should be no more than 1/4″ thick. If they are thicker than that, it will either hit the shoulder of your dovetail or hit the router bit shank which would be a problem. The width needs to be as wide as the fence PLUS more than half the width of your router. This will ensure that there is some extra part to the guide that will get cut off when you run your router along it the first time.
Glue the guides and fences together as seen in the image above.

When the glue has dried, adjust your dovetail bit in your router so that is it the exact same depth as the plywood you used for the guide. This part is critical, take your time. Too deep and your joints will be too tight, too shallow and you won’t fully trim off the sacrificial edge. Best to sneak up on the depth.
When the depth is set, clamp the guide to the edge of your workbench and run your router along the fence. The result should be a profile on the base that is the mirror image of the side of your dovetail bit. Repeat for the second guide. That is it, the jig is complete.
Sliding Dovetail Jig Theory
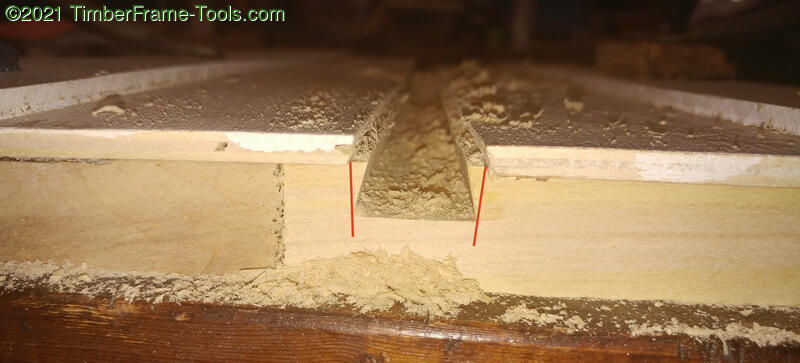
The theory is pretty simple. The freshly cut edges of your guides exactly match the corner of the sliding dovetail housing at any depth you choose. Notice in the image above I have drawn red lines to indicate how the bottom edge of the guide matches the bottom edge of the dovetail housing that gets cut by the bit. If you set the bit dept to 3/8″ deep, they match. Set it to 1″ deep, they still match. So if you set depth to match the depth of the router to be the length of your dovetail PLUS the thickness of your guide, you will get the right depth.
Sliding Dovetail Jig in Use
Use your router or router table to cut the dovetail on the ends of your shelf. How wide and how deep is completely up to you. The only requirement is that the bit you use has to be the same as the one you use to cut the housing with the jig.
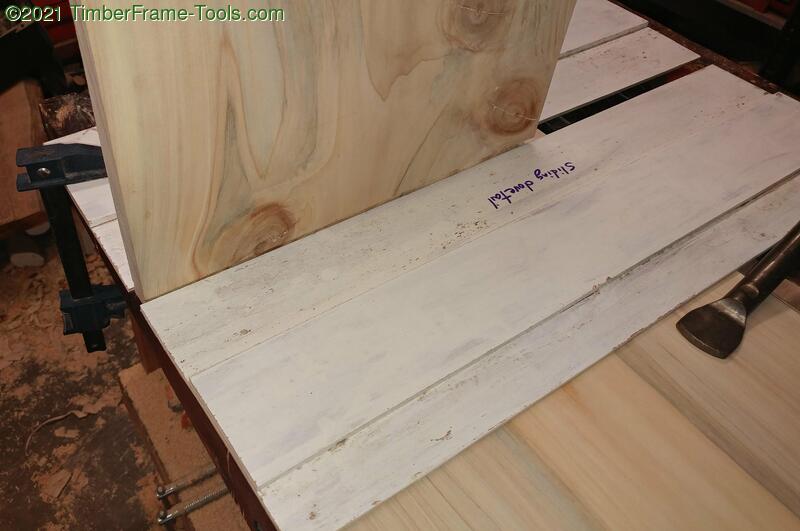
Position the jig where you need the dovetail housing to be cut. Secure it with clamps. It is crucial that it does not move. You also want the front of the guide to extend out an inch or so in front of the edge of the board.

Position the dovetail of the shelf right up against the guide base. The angle on the guide base and the angle on the dovetail should mate up.
Slide the second guide right up against the dovetail on the shelf.
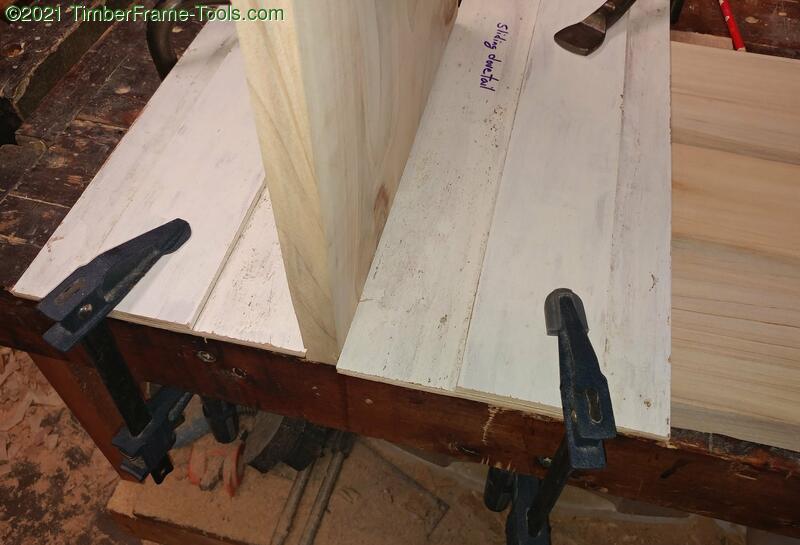
Push the two together tight and clamp it in place. If done right, the shelf should be held in place by the guides.
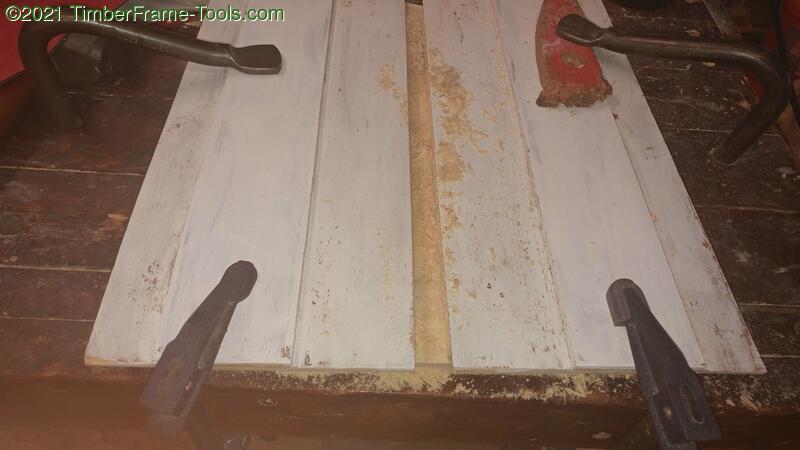
With the guides all clamped in and double-checked for tightness, slide the shelf out the end.
Adjust your bit dovetail bit depth to be the length of the dovetail PLUS the thickness of the plywood base. Once again, double check this depth. You only get one shot at this. Too deep and dovetail will not touch bottom and the housing will be too tight for it to go in. Too shallow and the shoulder of the dovetail will not touch its mate (sacrificing strength) and trying to make a second deeper pass will result in a housing that is too wide for the dovetail. Take your time and making a test piece is not a bad idea.
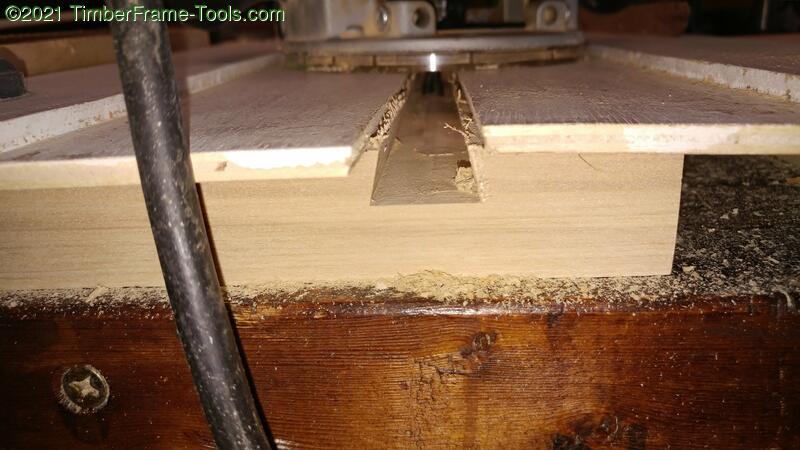
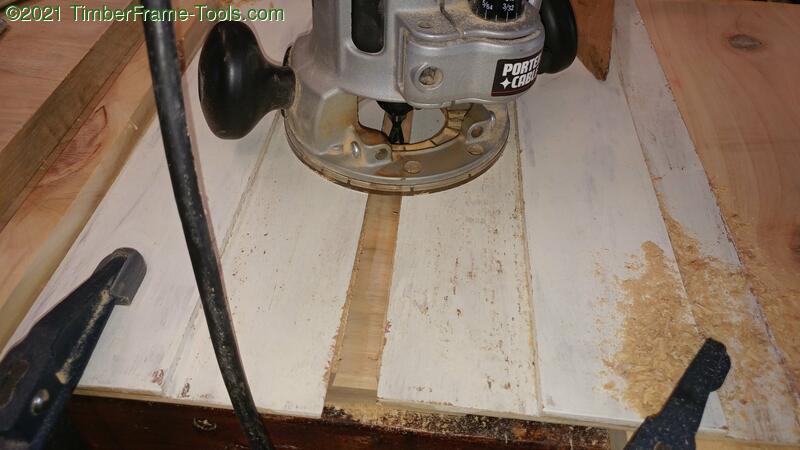
Turn your router on and make your first pass down the left fence. When you reach the end of your cut (take into account if it is a through sliding dovetail or a stopped cut) push the router to the right so it contacts the right hand fence and pull it toward you. If there it any extra wood in the middle, make however many passes you need to remove it.
When you are done, remove the guides and slide your dovetail into the housing, it should be a perfect fit. This also works for tapered sliding dovetails. If the dovetail is tapered along its length, the guides will match that taper and recreate the taper in the housing.
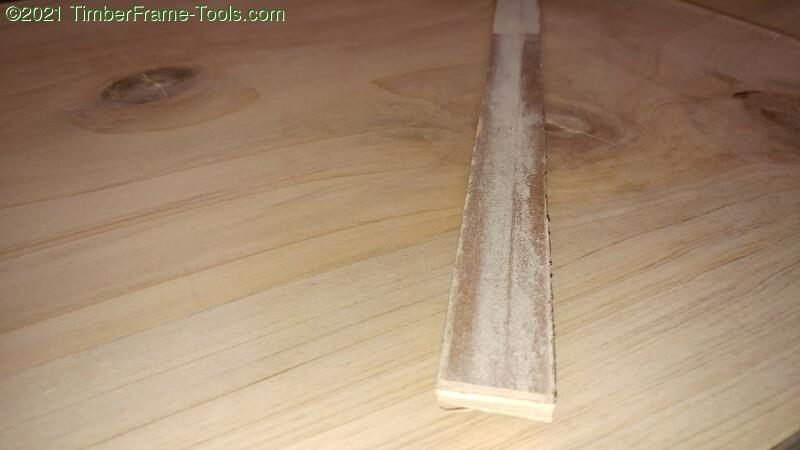
Tip: If the joint seems tight, it is likely due to fuzz left on both the housing walls and the dovetail itself. I use a small strip of 1/4″ plywood and adhere some 220 grit sandpaper to it with spray glue. Then I run the sandpaper along the inside of the dovetail housing and the sides of the dovetail. Just a couple passes removes any fuzz and makes things slide together more easily.
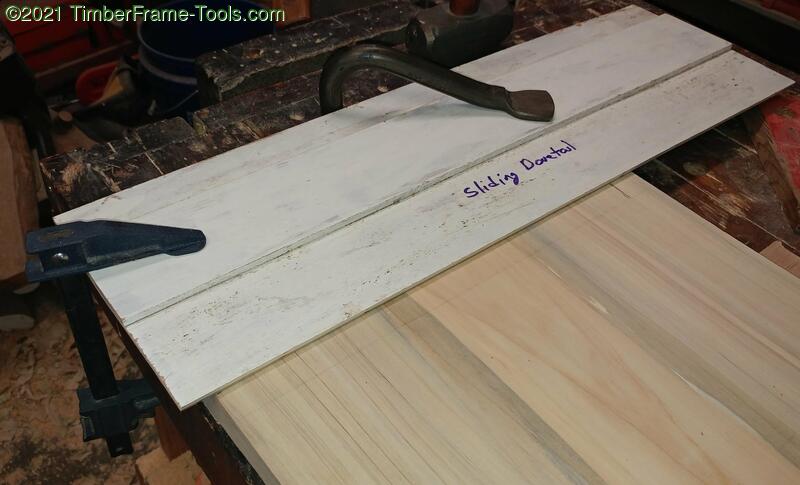
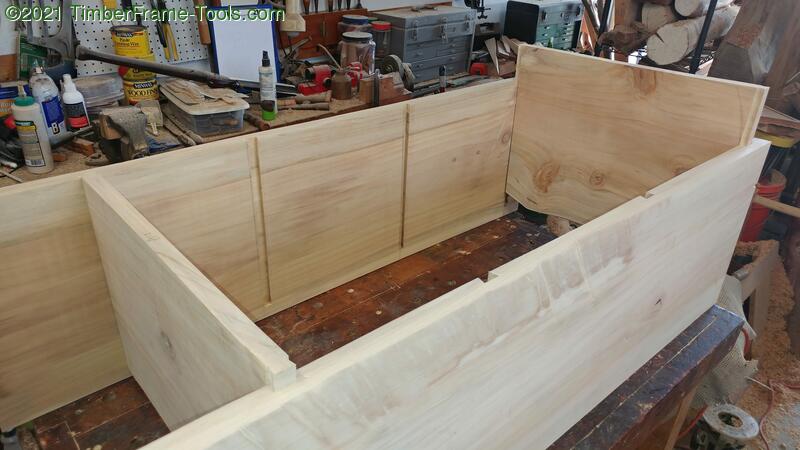 The 8 tapered, stopped, sliding dovetails that I cut for this cabinet fit perfectly and hold themselves in place without need for glue. More on this cabinet coming soon.
Sweet. Thanks for posting.