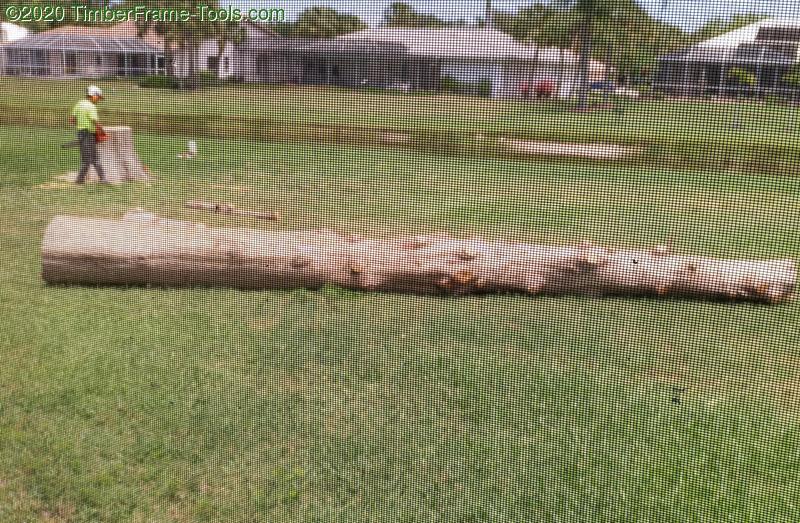
Back in May 2019 we had two large Bald Cypress trees removed from our back yard. Steve’s Tree Service did a great job and they obliged me in my request to have the trunks cut as close to the ground as possible so that I could have some nicely flared stumps for creative woodworking.
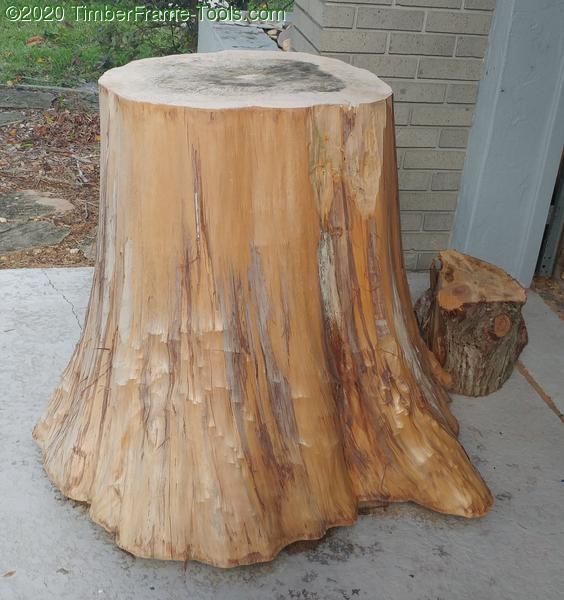
This was the tallest and widest of the two trunks. It took me a while to peel all the bark off.
I toyed with the idea of just flipping it over and making a nice dining table for 4 but there were a few problems.
- The weight and size made it nearly impossible to move.
- It didn’t flair out enough to keep from banging your knees when sitting at it.
- It did not involve any creativity… it was too obvious.
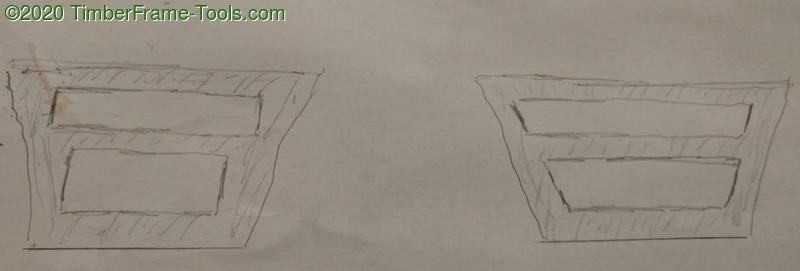
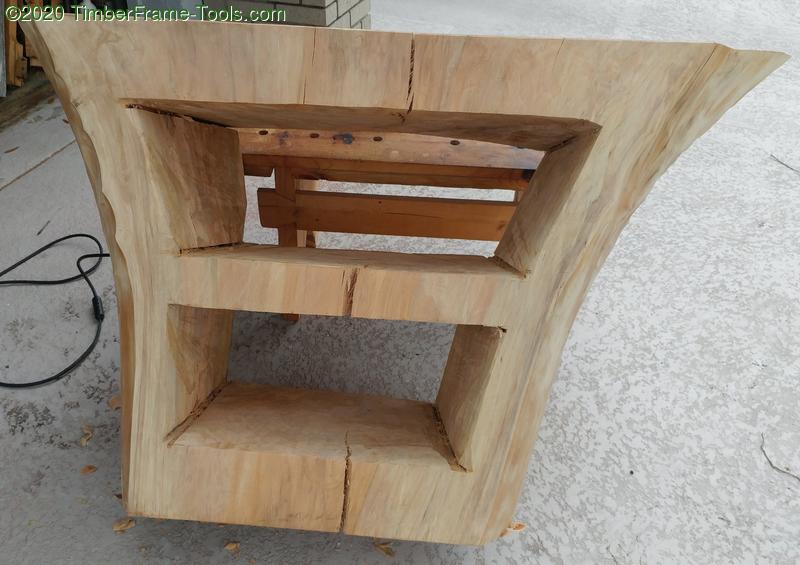
So I started sketching ideas for what it could look like as a console or buffet type table. I sketched a few ideas and decided upon the one on the right with the inner walls of the shelves matching the slope of the outside.
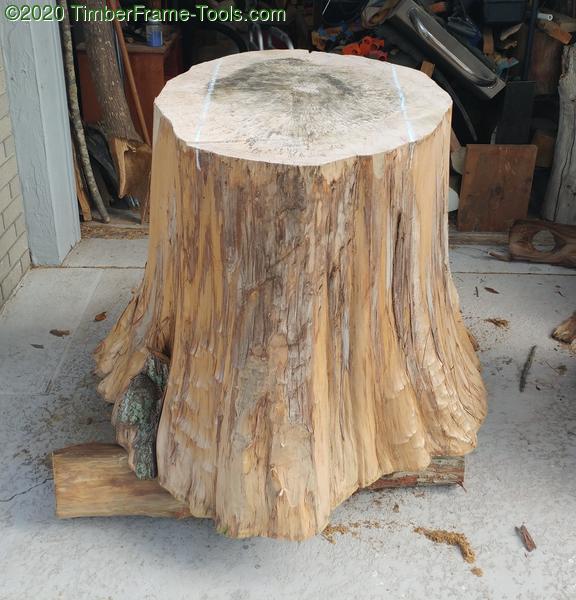
I marked it up with chalk on the top to indicate where I would be making the parallel cuts to make the front and the back faces.
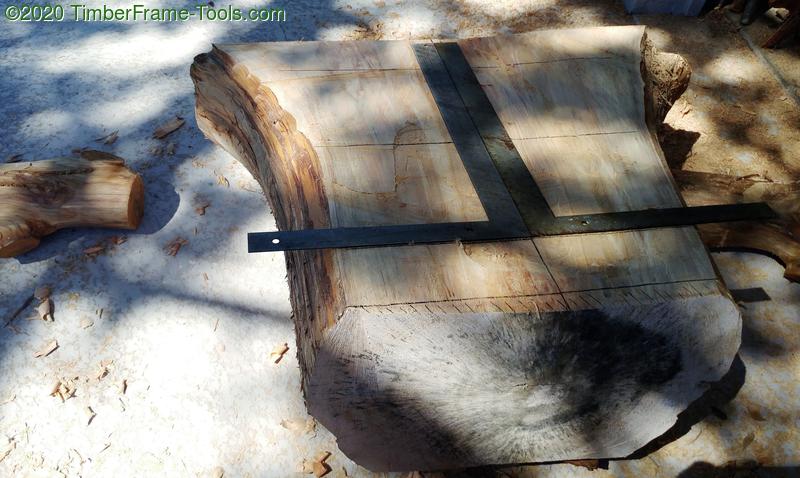
With the sides cut off I was able to start laying out the openings using a pair of framing squares.
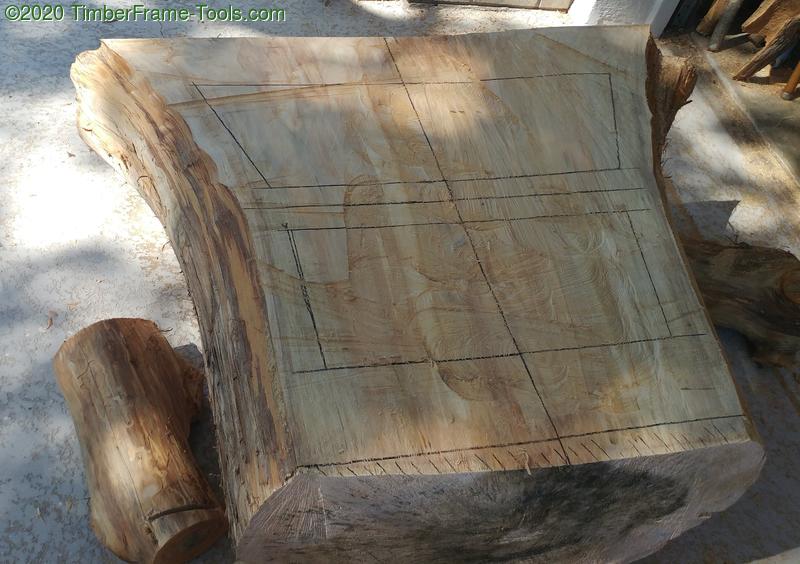
With the guidelines marked out on one side, I could start cutting and removing the chunks that would create the shelf cavities.
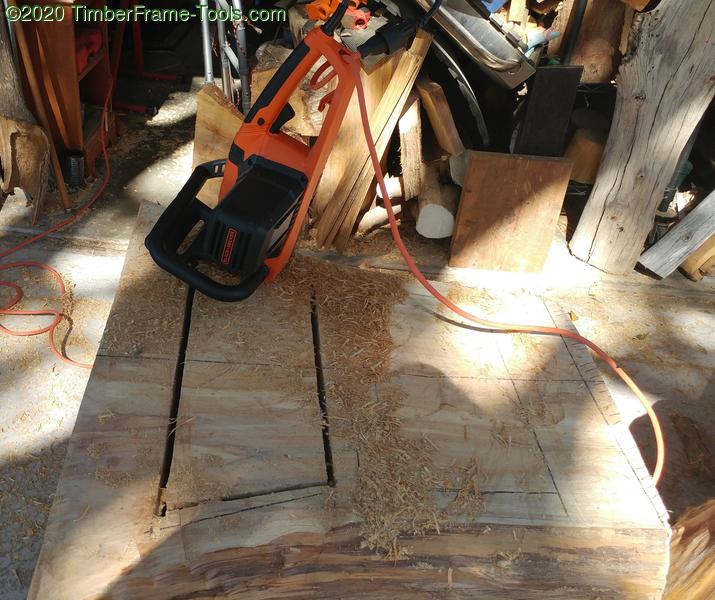
I used my Black And Decker 18" electric chain saw to make the cuts. I really can’t say enough good things about this saw. It worked great.

I took a bit of work to get the cuts to intersect so the chunks could be removed.
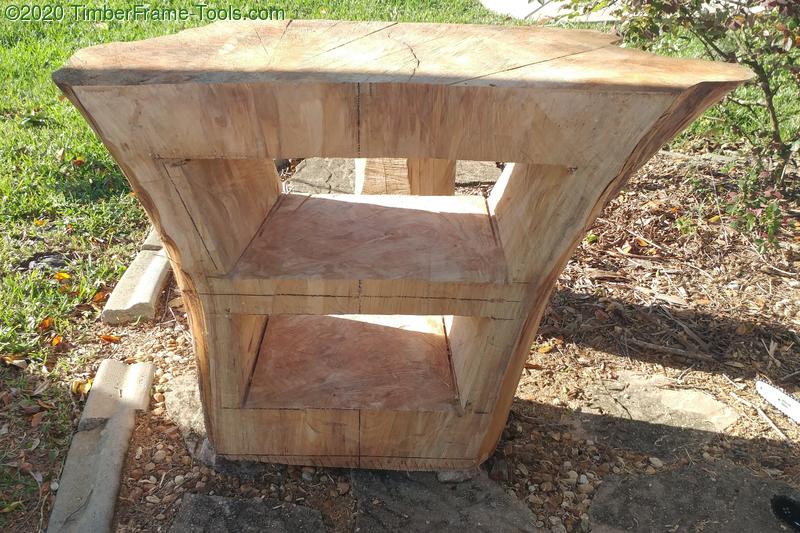
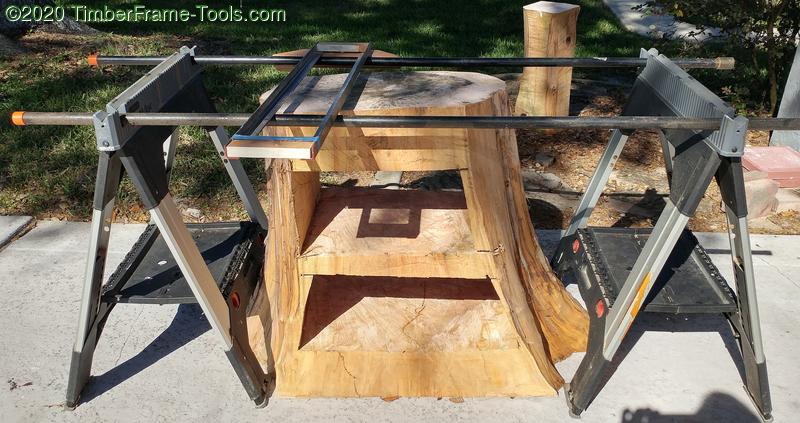
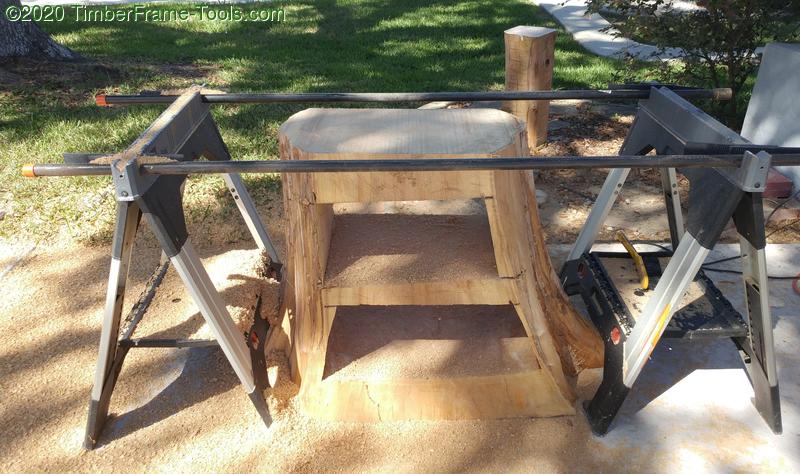
With the chunks removed, it was already starting to look like the finished product. Removing the chunks also made it quite a bit lighter. It was still heavy but at least now I could move it around on my own.
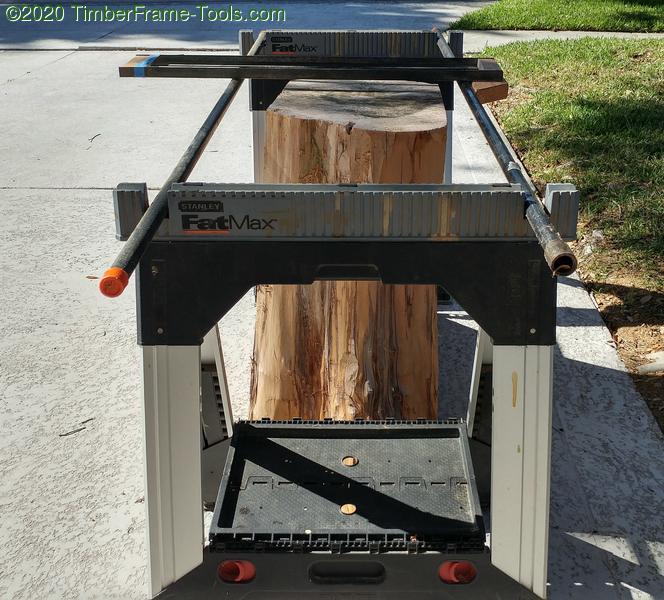
For flattening the top and bottom and making them parallel, I took advantage of my driveway. The driveway is flat, but not level. I set up my Stanley Fat Max sawhorses and ran a pair of pipes across the top. The pipes make a reliable surface to run my router sled along.
I started with the “top” of the table against the driveway because any amount that I remove from the top, decreases the width of the top. So I wanted to keep the loss to a minimum. Starting on the bottom means that all the main removal will come off the bottom.
At this point the bottom is flat and automatically parallel to the top. After flipping it over, only a few light passes were needed to fully level the top.

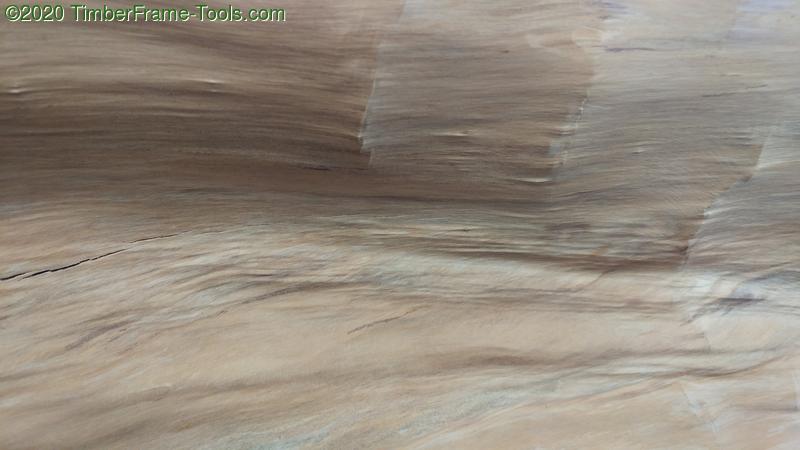
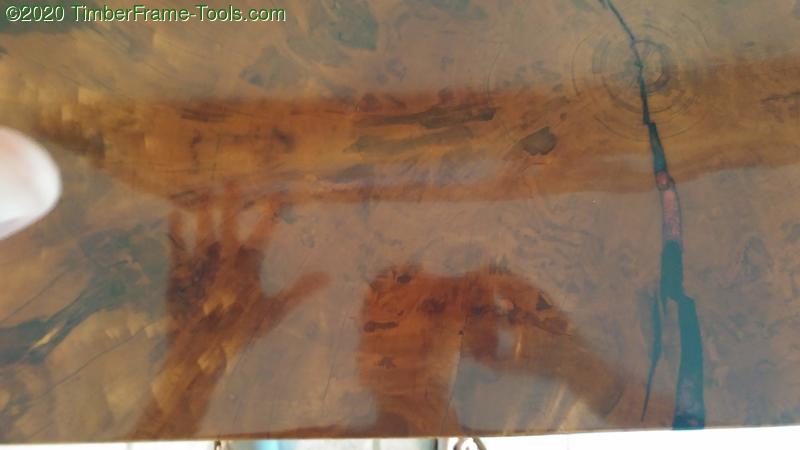
Here is the top all leveled. You can already see the large variation in the color of the wood. Not to give away the ending, but it is interesting to note that what are the lighter tones now, will become the darker tones later. Notice at this stage in the drying process that there is only one crack or check in the wood (the dark line above the ruler).

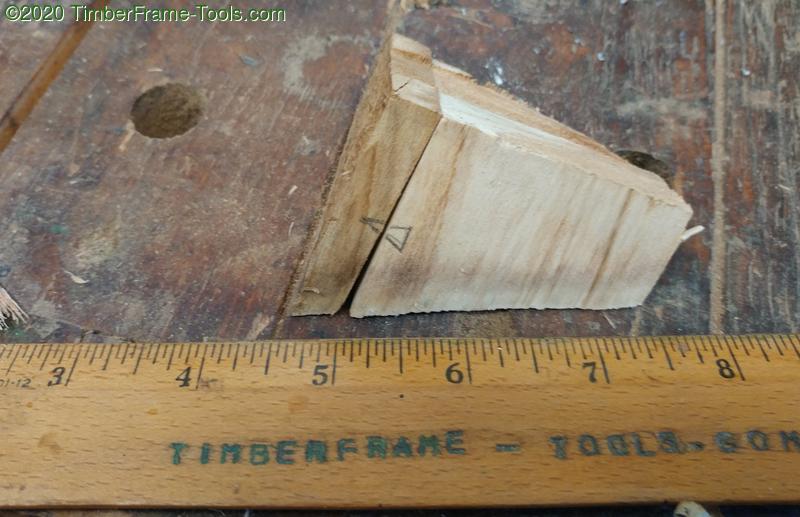
This one dark spot seemed to be … err… more dead??? than the rest of the trunk. It wasn’t punky, but it was definitely more porous than the surrounding wood.
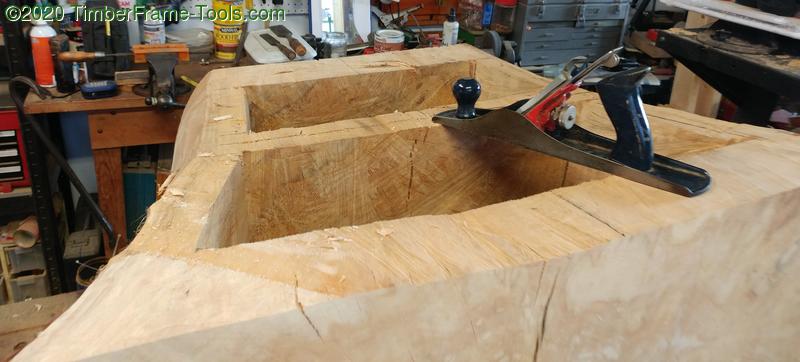
With the top and bottoms now flat and parallel, I turned my attention to the front and back. They needed to be largely parallel though not quite as critical as the top and bottom. A scrub plane worked pretty well for hogging off a lot of the wood. I then later switched to a jointer plane to get it completely flat.

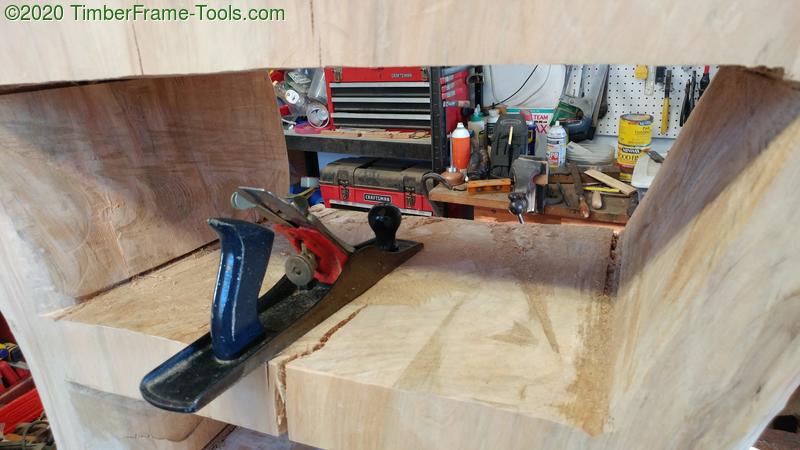
I used my timber framing slick to level the interior sides. It worked pretty well, but the socket prevents the slick from going farther into the opening. I need to make a cranked necked slick but I don’t have an extra one laying around.

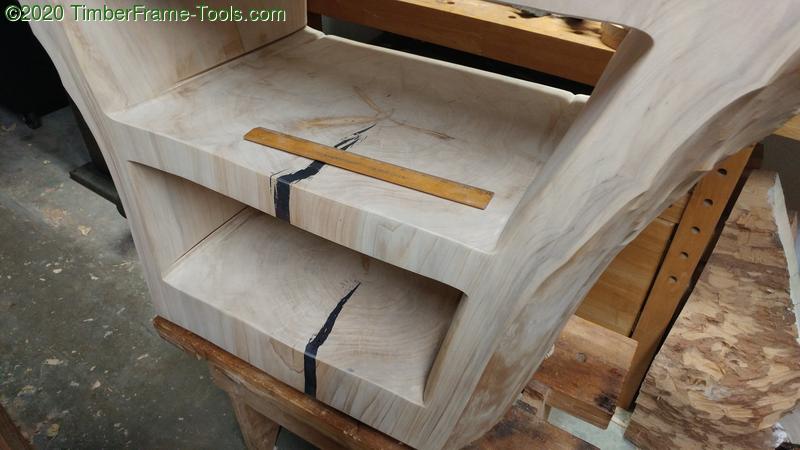
More use of the slick to make things flat. Notice that more drying and shrinking has happened and a large check has opened up on the middle shelf.
I also used the scrub plane to do a bit of levelling on some areas that I could get to.
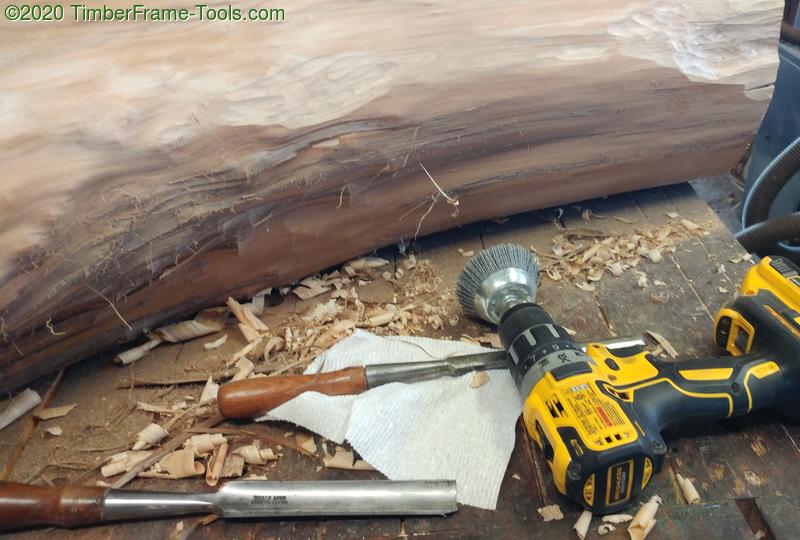
With the shelves in and the flattening that could be done with hand tools complete, I turned my attention to the outside. I had peeled the bark from the stump when the log was freshly cut. So on most of the outside, the wood has its natural shape and smoothness. However there were a couple spots that were unnatural (upper right corner of the photo). One was caused by jaws from the skid steer that moved it, and a couple were caused by me being impatient and using a hatchet to start removing the bark. To repair these damaged areas I used a combination of gouges a couple of Dico Nyalox brushes (highly recommended) along with some hand sanding. I was able to get the damaged areas to blend in with the rest of the stump.

Part way through the repairs at this point.

There were also two oopses where I had cut too far with the chainsaw and cut through at the back. Here you can see some patches that I cut to match the grain and fill in the chainsaw kerfs.
I wanted the outside to be smooth to the touch, but the trunk also had some great natural features that I did not want to obliterate with sanding. So I had to try to limit my sanding.
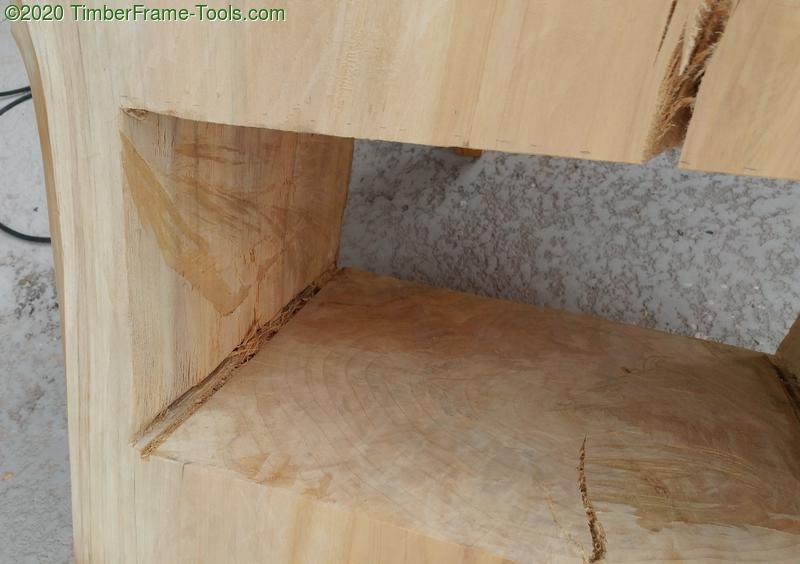
The interior cavities needed some sanding as well. I used a combination of belt sander and random orbit sander. This photo is just prior to sanding.
At this point where I am just starting to sand, you can see that enough drying has taken place to cause checks to open up on all three levels now.
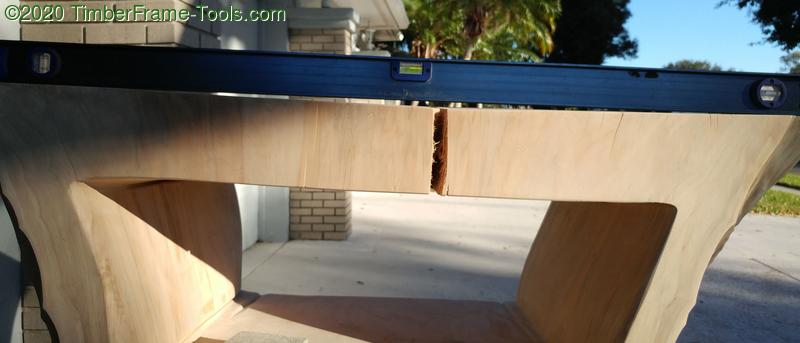
The top that was originally flat has also started to warp some. You can see the table top sag beneath the 4' long level put across the top.
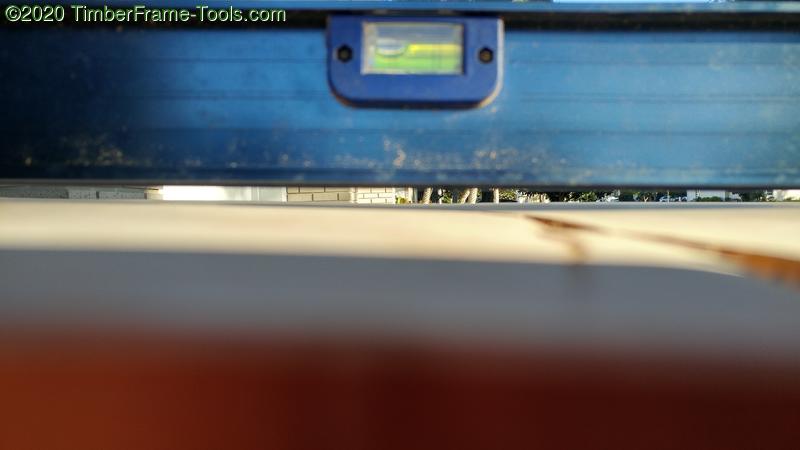
It dropped a little more than 1/4″. Wood moves.
When I deal with wood that will continue to shrink and check, I want the the color to be a bit deep, so that if there are small checks, I don’t want the exposed wood in the check to be lighter than the rest of the wood and attract undue attention.
Too help with a color that runs deep and also gets into existing checks, I use ammonia to fume the wood. In the photo above, the piece of cypress on the right is un-fumed and the piece on the left, spent a week fuming in a container with ammonia fumes. The color is not drastically different, but it is definitely a deeper color and it runs quite deep into the wood. There are not many tannins in cypress so you don’t get crazy color transformations like you get with oak.
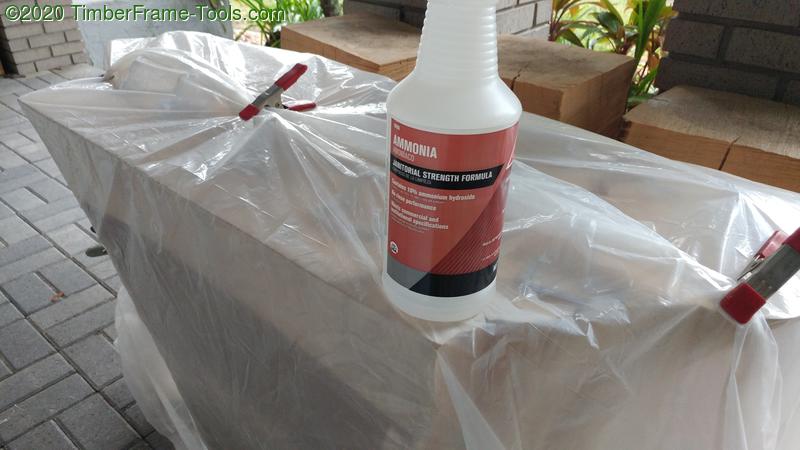
I wrapped up the stump in a plastic drop cloth. Then I put janitorial strength ammonia from the hardware store into an open cup (like a cottage cheese container) and placed the cup inside the plastic drop cloth wrappings. Every few days I would add more ammonia. I kept this up for 2 weeks.
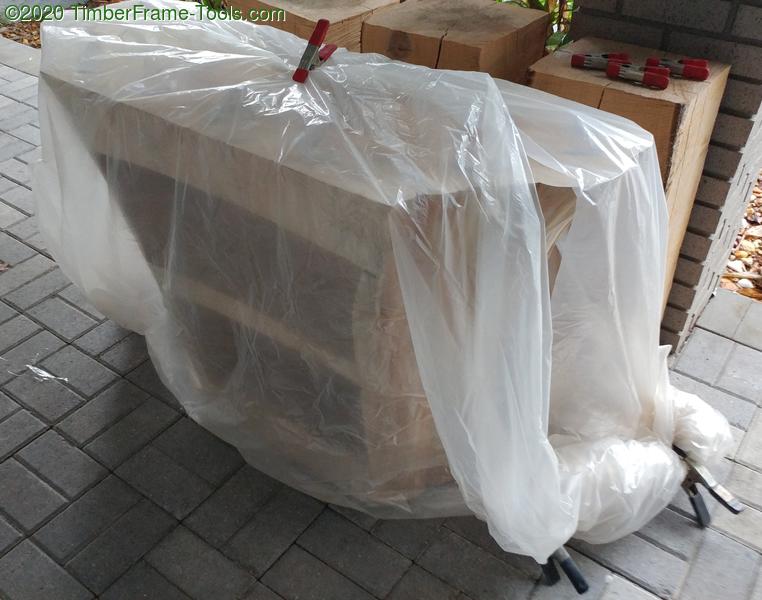
The added benefit of the long fuming with ammonia is that it seems to get rid of any bugs that may have inhabited the wood.
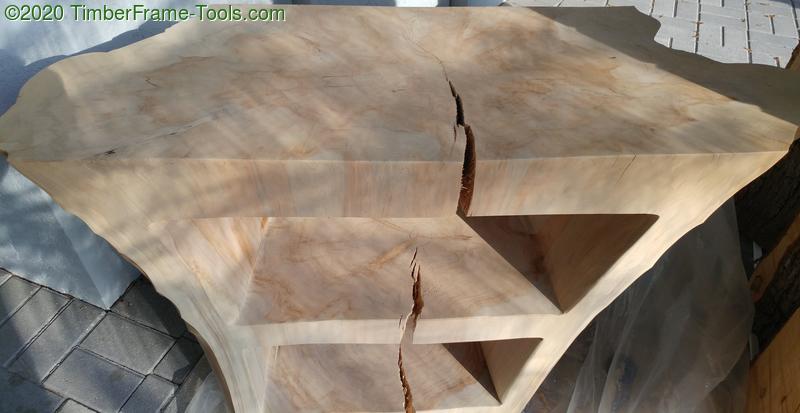
With the fuming completed and more drying taking place, you can see the checks have now fully opened up.

In preparation for filling the big checks with epoxy, I taped off the checks and used a 2″x4″ and some clamps to try to encourage the table top to go back to being flat. This worked to some degree. It wasn’t perfectly flat, but cot back to around only 1/8″ of deflection.
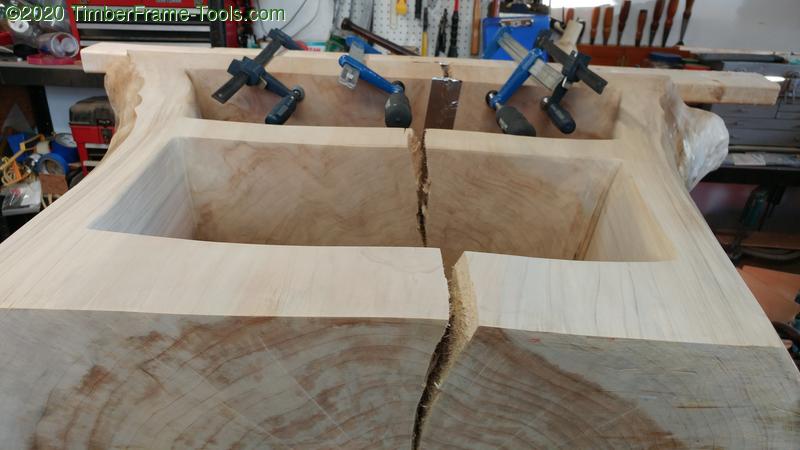
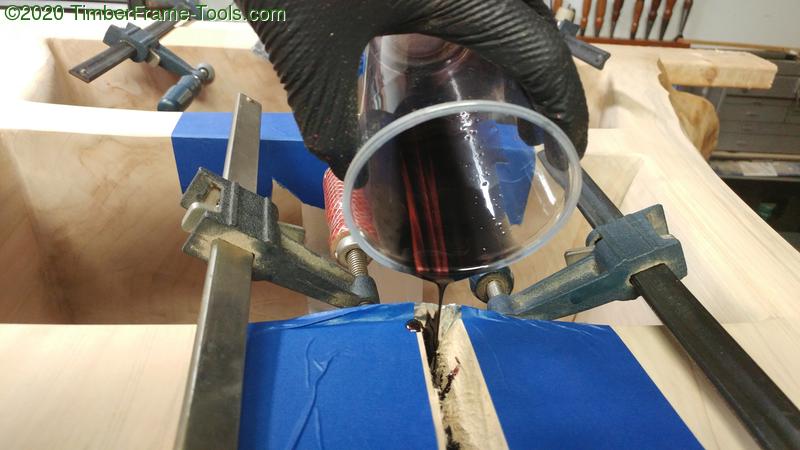
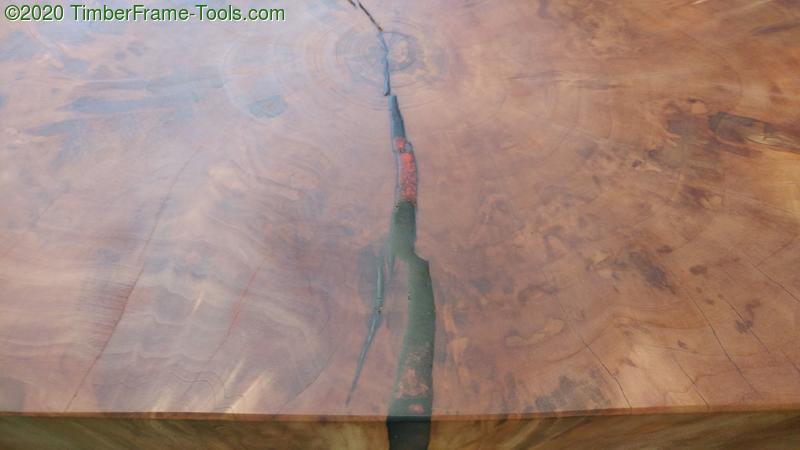
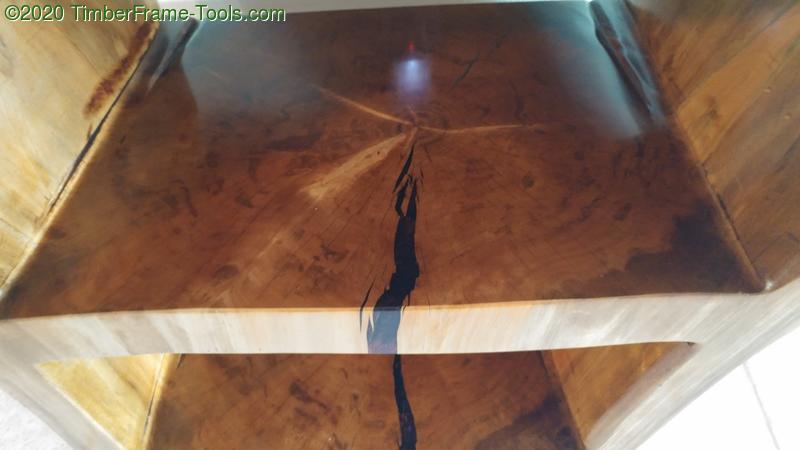
I wanted the epoxy to be understated, but I did not want to go with just plain black. I have done plain black on some other pieces, but in hindsight I have found the plain black to look too odd. The black jumps out as unnatural or something. So I went with small amounts of ruby red epoxy mixed with larger amounts of black epoxy.
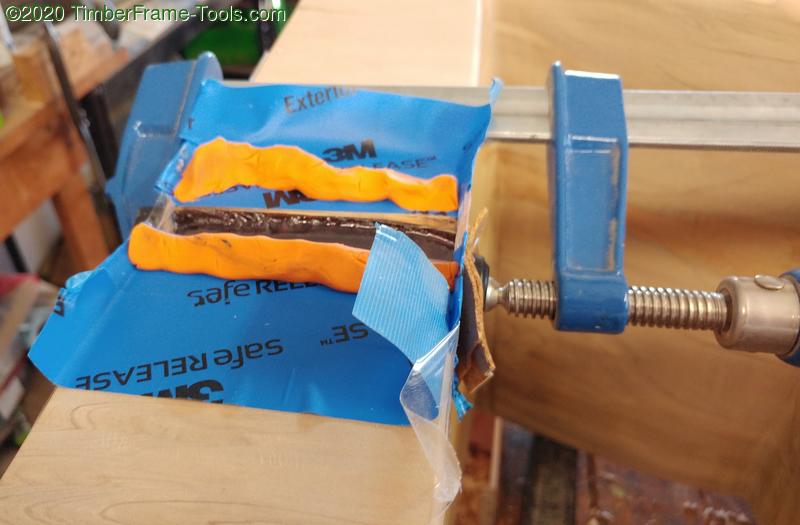
I used some modeling clay to create some dams to keep the epoxy to the level I wanted it.
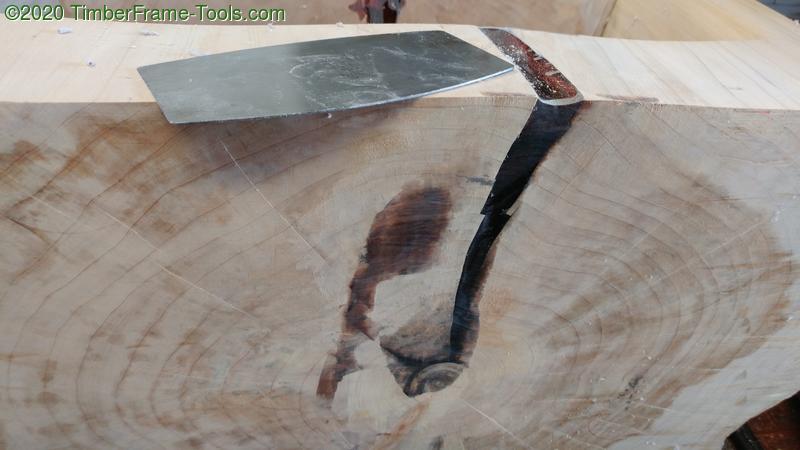
I used a combination of card scrapers and sanding to level out the epoxy to the wood.
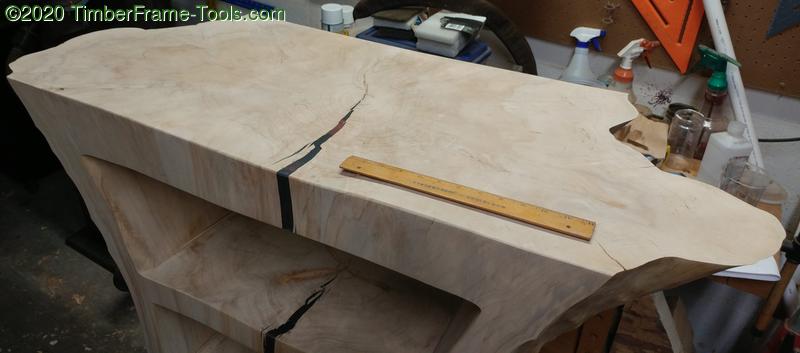
Sanded and ready for finish. The shelf surfaces are sanded to 320 grit. The walls were only sanded to 220 grit. Sanding to 320 with the random orbital sander left some of the little tiny checks in the top rather crisp and they felt sharp as you ran your hand along them. So I used a gray 3m sanding pad to finish the sanding on the shelves. It had the tendency to round off the corners of the minor checks and make them more soft on the hands.
Finishing
I wanted this to have a darker yet natural looking finish. I have used Dark Half tung oil made by the Milk Paint Co in the past. I used it on the legs of my Son’s desk and was really happy with it, so I used it again here. It is a pure tung oil that is cut in half with orange oil as a solvent. It also has some dark colored resins that act as a stain.
Two coats of the Dark Half tung oil got me to the color I wanted. so I continued with several more coats of Half and Half tung oil from the Milk Paint Co, which is pure tung oil cut with citrus solvent. This added more depth and sheen without adding color.
Tung oil can actually build to a nice sheen as you apply more coats, each one about 5 to 7 days apart. It is also pretty good at water resistance.
Overall I was very happy with how it was progressing. It had beautiful color variations and most areas were building a nice sheen.

However, due to this table being one massive collection of end grain, it started to become clear that some areas were just not building a sheen. Most areas were… but a few areas just would not and it looked splotchy of texture. I kept adding more coats with the same results. If you look closely you can see the dull gray regions above.
Eventually I grew weary of the dull areas and decided to go with a shellac french polish on the top and shelves. It took a lot of work to get a smooth finish across it, padding only a little shellac on at time. Eventually all the figure 8 patterns with the pad paid off.
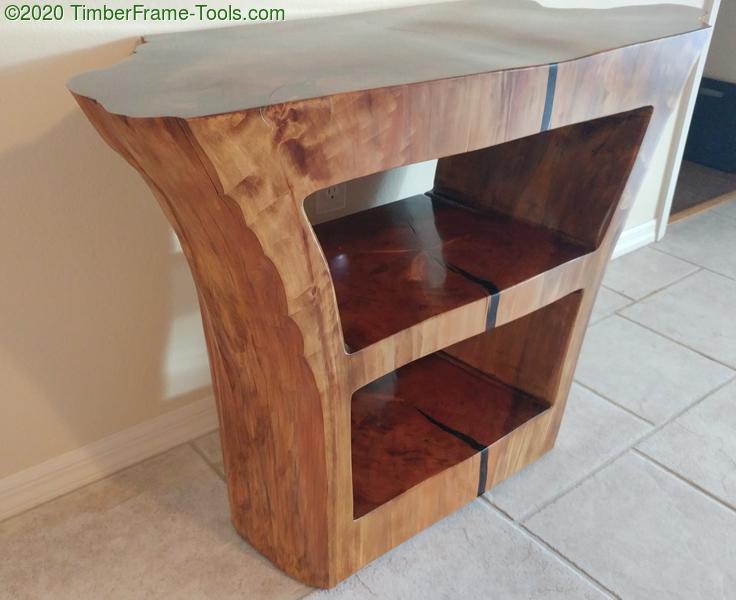
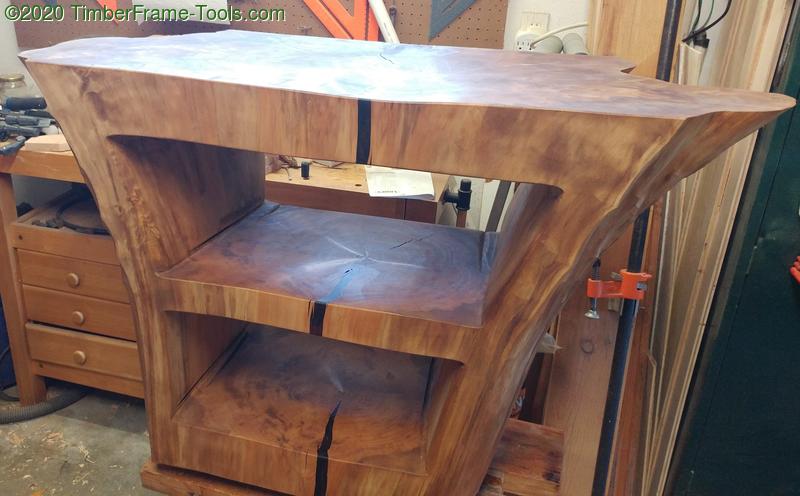
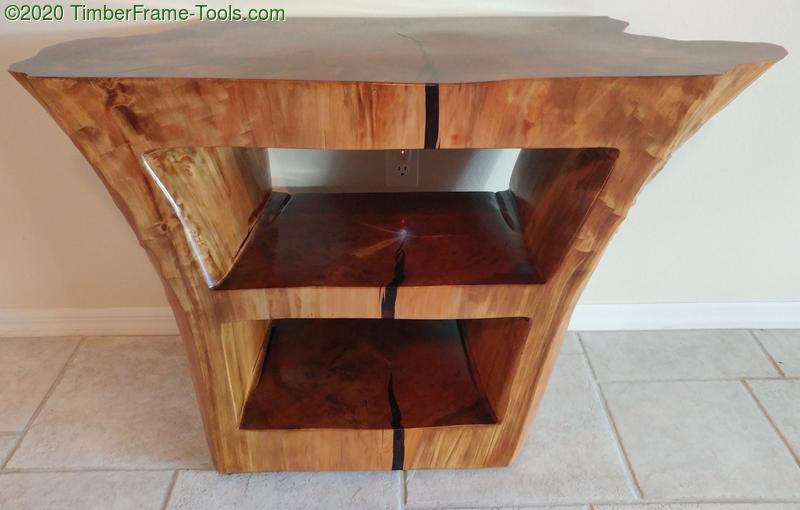
Here is the finished console in place. 45″w x 29″h x 16″d (114cm w x 73cm h x 40cm d)
I used 4 nail on plastic feet underneath it.

I am really happy with the color created by the fuming and the dark tung oil.
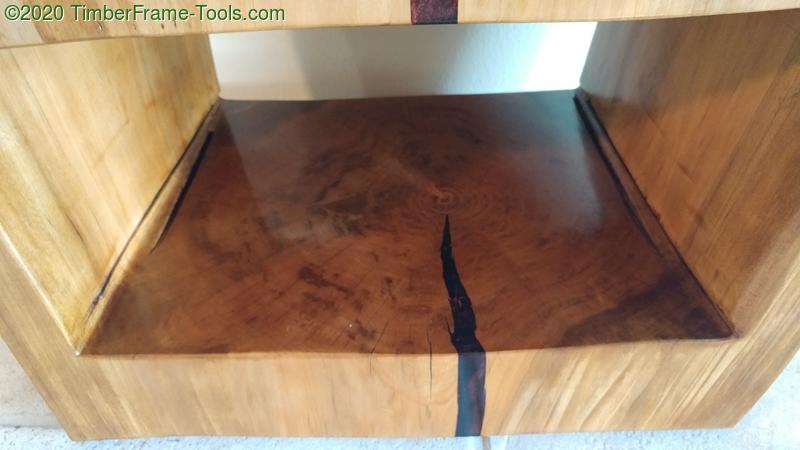
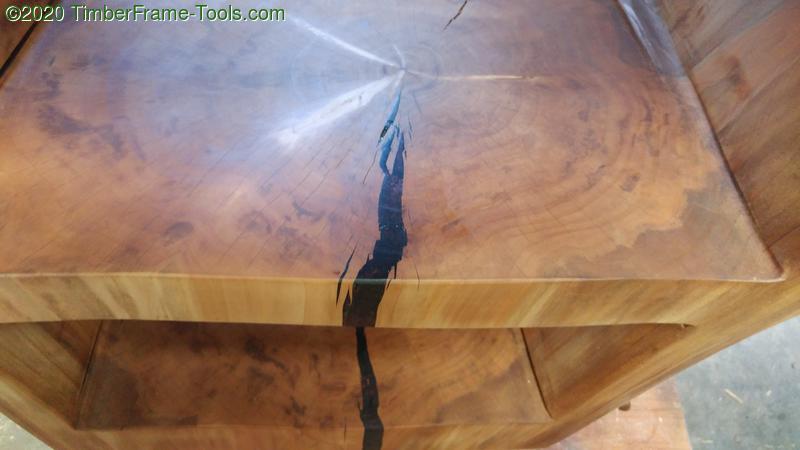
The shellac french polish creates a nice even and not plastic looking sheen. The amazing color variations in the end grain are easy to see from nearly all angles.
The limb inclusions that show up as light stripes add a lot of character and visual interest.
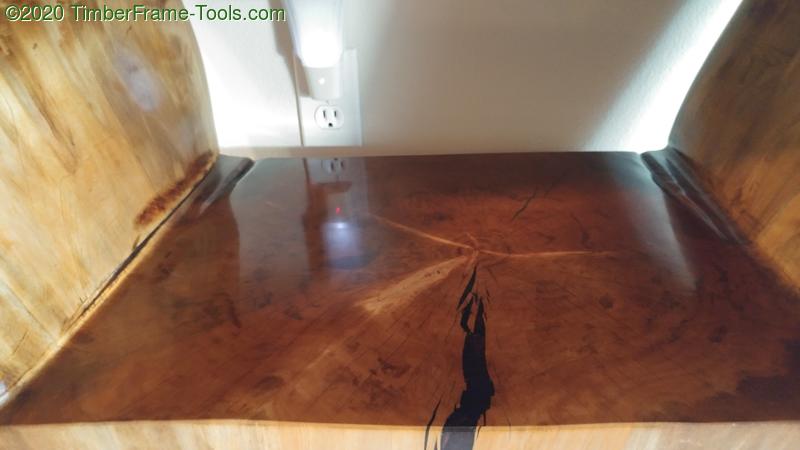
It is not until you can see something in the reflection that you notice the incredibly smooth finish. (Notice the reflection of the electrical outlet.)

The live edge sides ended up with a nice uniform coloration that maintains the natural undulating surface that cypress are known for.
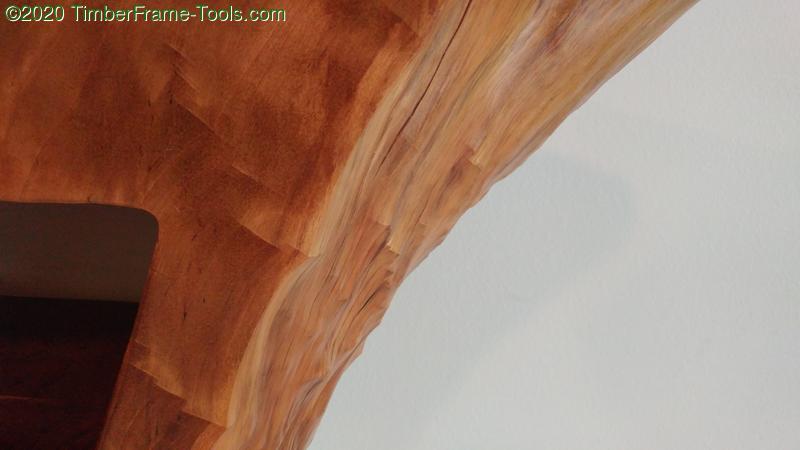
This is a cool optical illusion. The bumps on the right side are visibly raised, you can feel them and see them. What appear to be similar bumps on the left are planed perfectly flat, but the grain of the wood makes them look 3D.

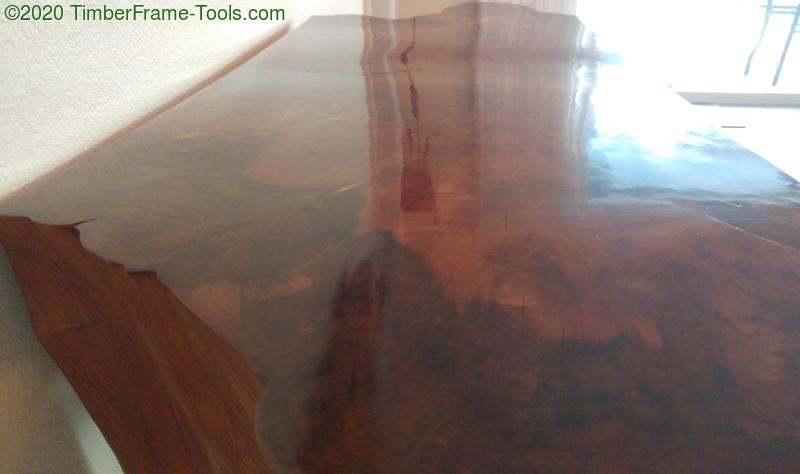
The massiveness of the table pales in comparison to the amazing colors and patterns that appear in the top surface.
The shellac french polish is probably fine as it is. But to add a bit of protection I wiped on and buffed off a coat of Odie's Oil an oil and hard wax blend.

The color variations are magical to me. Almost like the Northern Lights. They dance and move as you change your position.
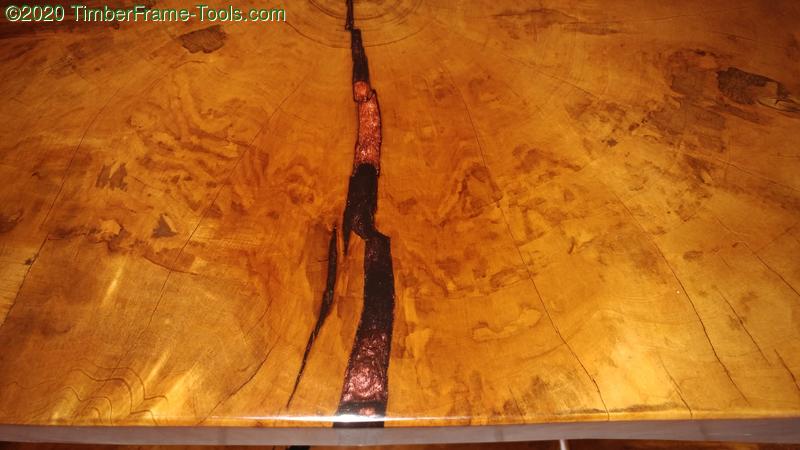
I liked the way the rose gold color in the epoxy helped make the epoxy look a bit more organic and played along with all the variations of color in the wood.
I could not resist a selfie with my reflection in the french polish.
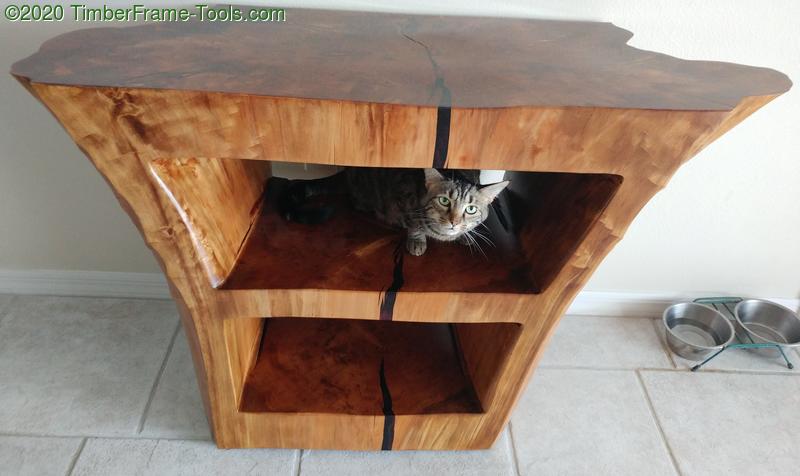
Cat approved.

I didn’t have to welcome this table to the house, because it has lived on this property longer than I have.