A few years ago, my son went on a school trip to St. Augustine FL. One of the things they visited was a blacksmith shop. He was intrigued, so we entered into adding some ironworking to our shop. Back in March 2019 we decided to make a propane bucket forge and then make a knife.
The bucket forge started with a good, made in the USA, steel pail made by Behrens and 4 carriage bolts to act as legs.
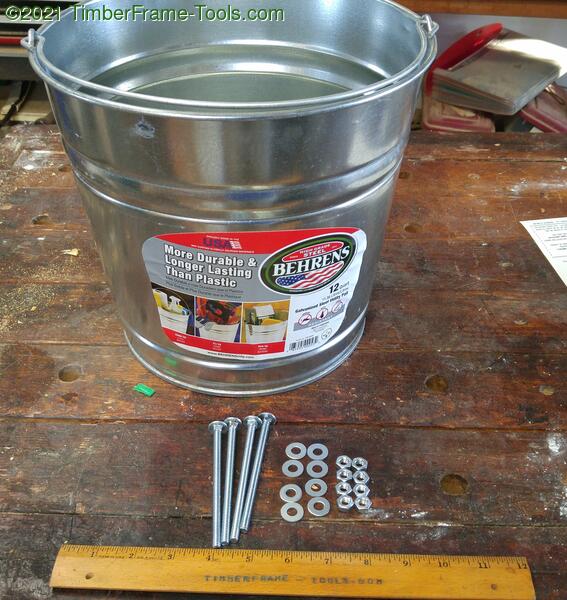
I picked these along with the sand and plaster of paris up at my local Lowes. I just used a hand drill to make the holes for the carriage bolts. I eyeballed the location. It was not critical because the leg length can be adjusted to make it sit level on a table. In addition to the legs, I had to drill a hole in both the bottom and side. The hole in the bottom is to allow clearance for longer items, while the hole in the side is for a short segment of 1″ steel pipe to act as a port for the torch.
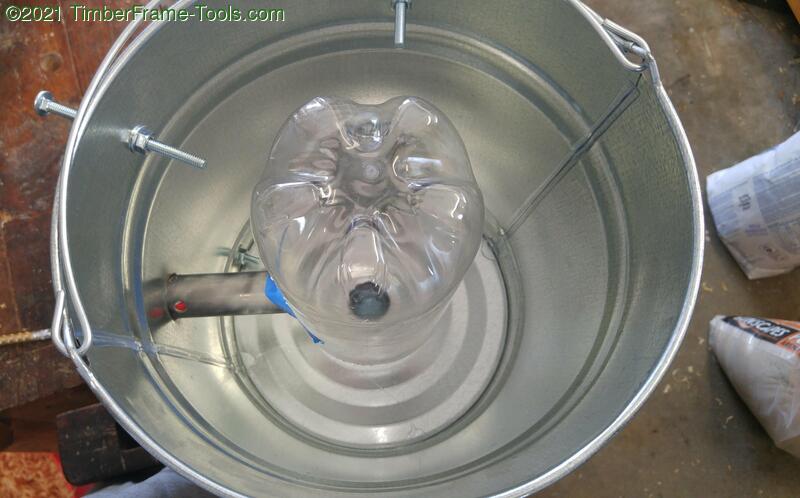
I used a two liter bottle to both block the hole at the bottom and hold the space that will become the forge while the plaster and sand mix hardens. I didn’t get any photos while pouring in the plaster and sand mix. After the mix was solid, we pulled out the bottle.
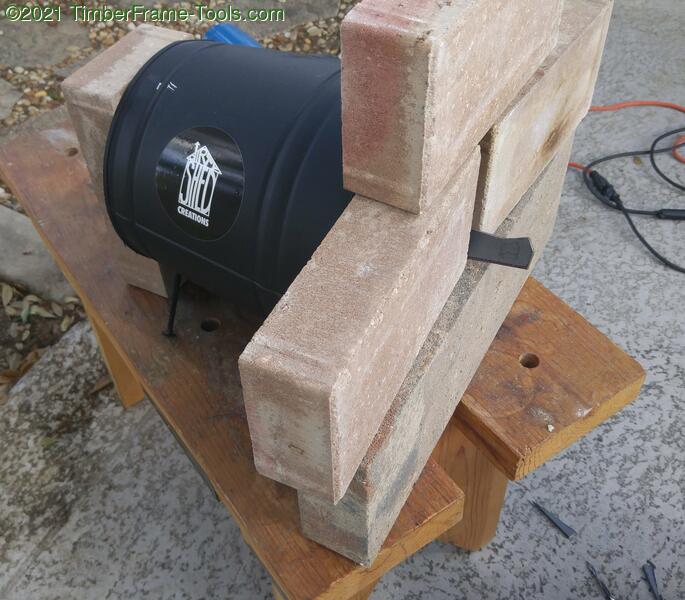
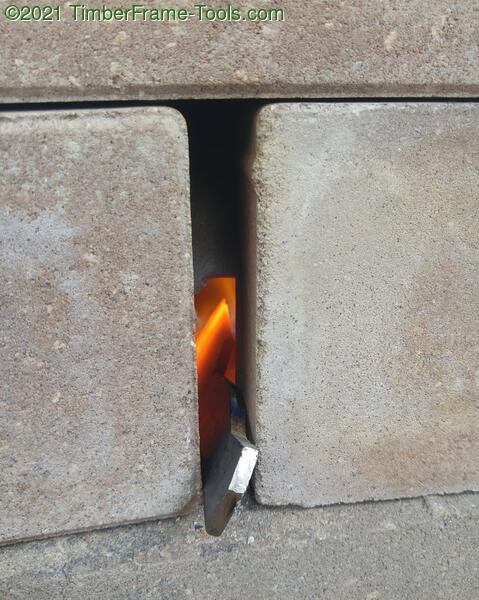
We used some pavers to create an aperture because we didn’t have any fire-brick. They are not very efficient and they break over time, but they worked for this initial foray into metal work.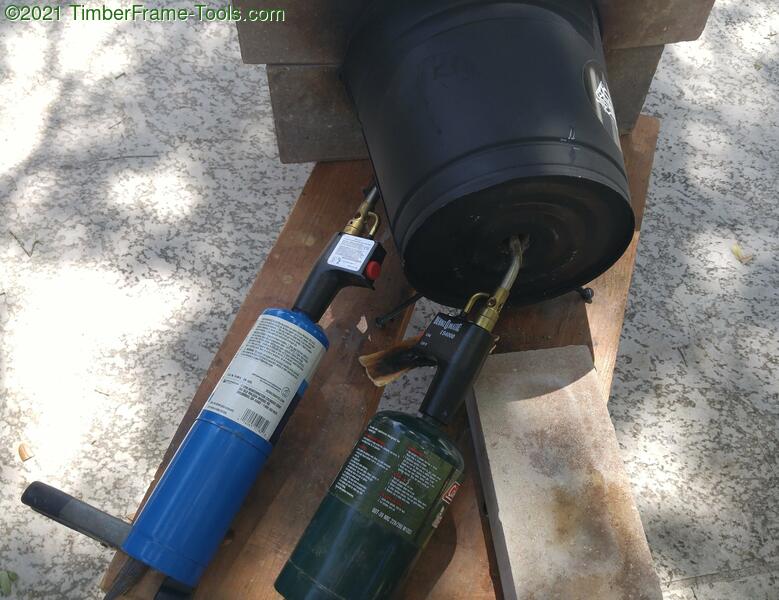
I think if we had actual fire-brick we could have run this with only one torch. Warning, if you do this with a push button igniter torch, it will ruin the igniter because it melts the insulation on the connecting wire. However, I was able to pull them apart, replace the wire, and get them running again. From this time forward we switched to simple torch heads that had to be lit by hand.
 This knife blank I cut from a piece of weld steel from Lowes. This knife was just a test to see if we could do it. We knew going into that it was not going to harden enough to hold an edge. My son sketched out the shape of the knife he wanted on paper and I transferred it to the blank. Then I cut out the shape with a cutting disk on my angle grinder.
We’d heat the blank, I’d hold it in the tongs and my son would hammer on it trying to draw out and taper the edge a bit. I have no photos of this because I was holding hot iron and was just out of my element enough that I forgot to take them.
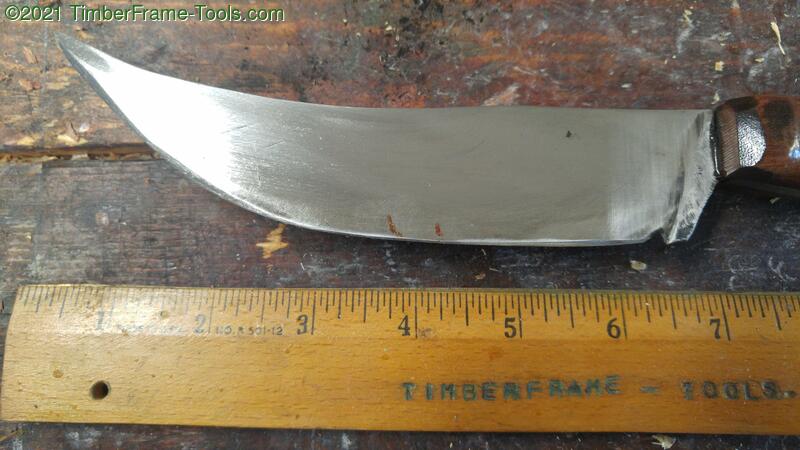
As we tapered the blade a bit it started getting an elfish sort of curve to it. We decided to keep it because A) I was too much of nube to know how to fix it, and B) my son thought it was cool with the curve.
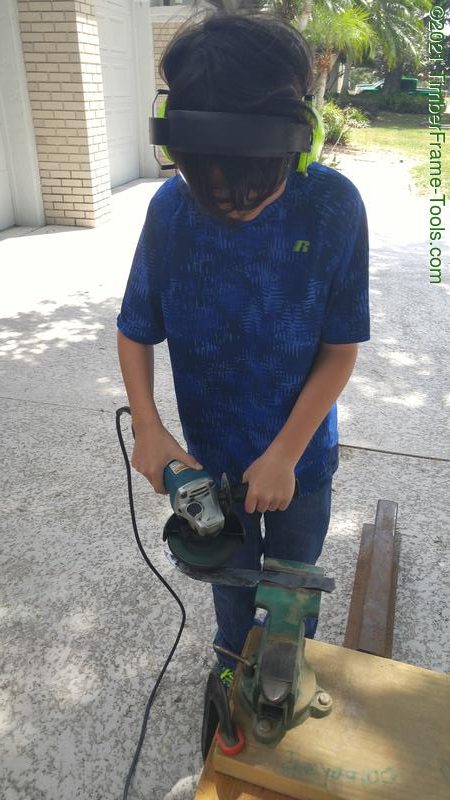
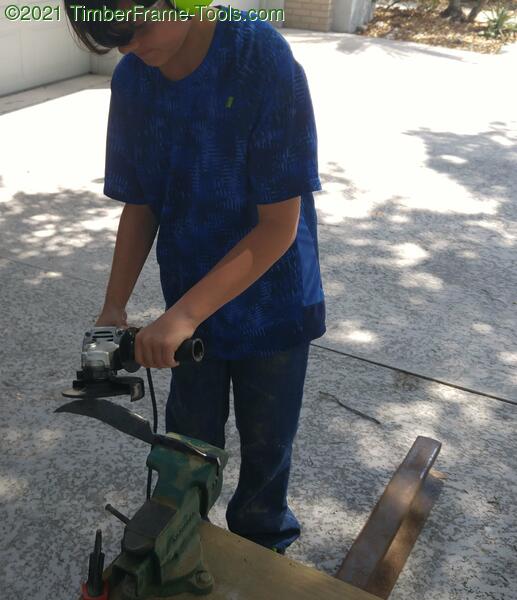 Here we are using the angle grinder to refine the and and shape it a bit. The railroad iron by his foot is our anvil.
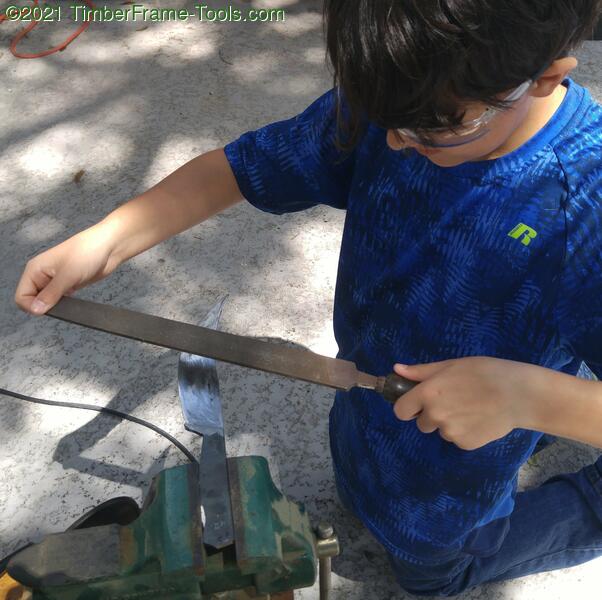
We used a file to refine the shape and taper of the blade.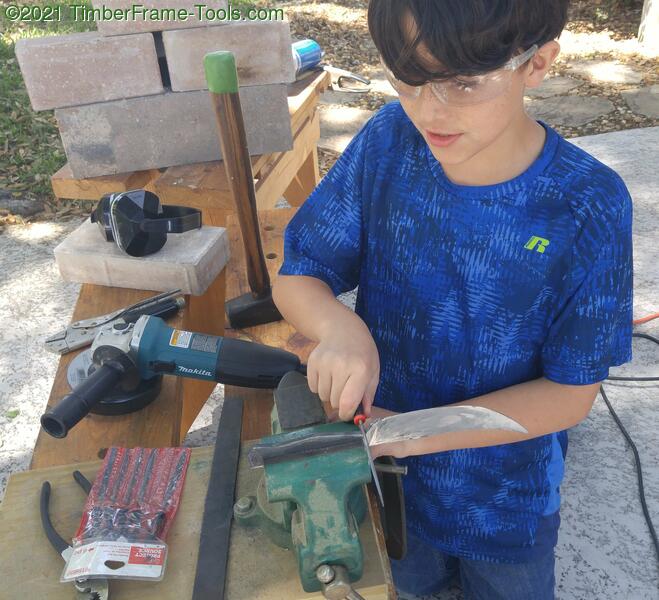
Here we used some smaller files to shape the integrated bolster. 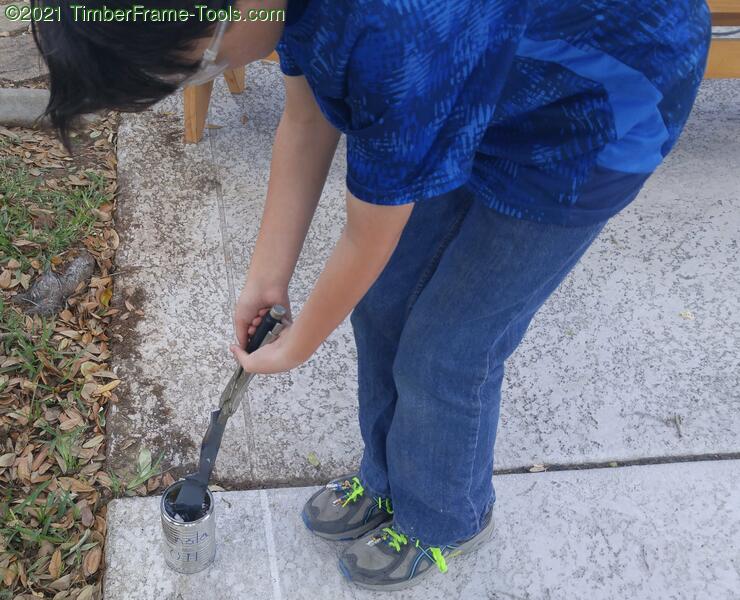
With all the shaping and rough sharpening done, we heated the knife blade to an orange heat, then quenched it in canola oil to harden it. We did not bother tempering it because it is weld steel (low carbon) and should not be capable of getting hard enough to be brittle.
Here my son is polishing up the blade with a flap disk. Notice the scales which are made out of Australian Pine are being held on with clamps while the epoxy cures. The epoxy was probably not needed since we did widen the iron pins with some hammer blows, but we used epoxy just to be sure.
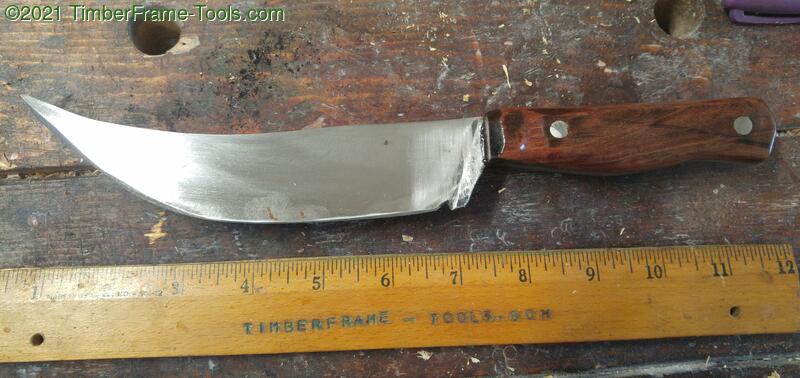
Here is the finished elf knife. We put a bit of pure Tung oil on the scales and called it done.
We should have buffed the blade for a better shine…. but that would require that I own a buffer, so this was as far as we took it.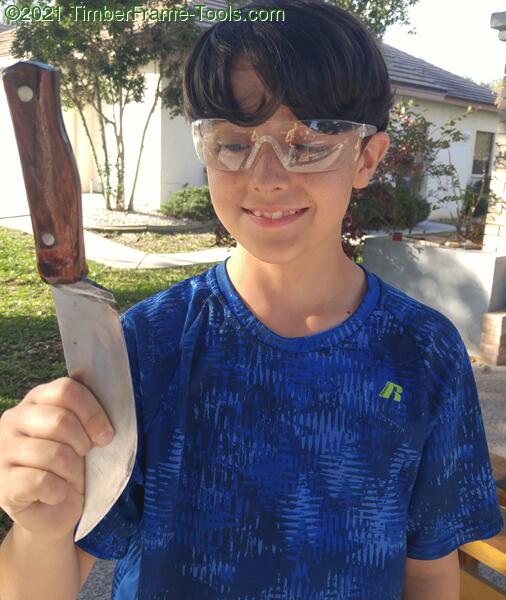
We could have spent a bit more time shaping the scales and perfecting the fit and finish, but we had to keep reminding ourselves that this was just a proof of concept to see if we could do the steps. It was not worth making it perfect, with steel that would not hold an edge. Still, even 2 year laster, my son is proud of this knife.
Fast forward two years to 2021
We have not made another knife, however we did purchase both a real anvil and a proper propane forge. My wife had planned a trip to the Smoky Mountains and found a blacksmithing class in Pigeon Forge TN where you make a knife from a horse shoe, so she signed us up. We were pretty excited to get some actual training instead of just the stuff you find online.
In my head I was hoping for a nice educational class where I’d be taught some techniques around blacksmithing and knife making. When we pulled into Iron Mountain Metal Craft I quickly realized this was more of a touristy thing than the educational experience I was hoping for. The smith who was our guide had the horse shoes already cut in half and ready for the forge. He showed us where we would be hammering. Then put them in the forge. When they were hot, he straightened them a bit. Then it was our turn. We each took turns striking the blade end and drawing it out. 3 heats a piece while he held the tongs and we hammered. He performed an additional bit of light shaping and evening out the surface.
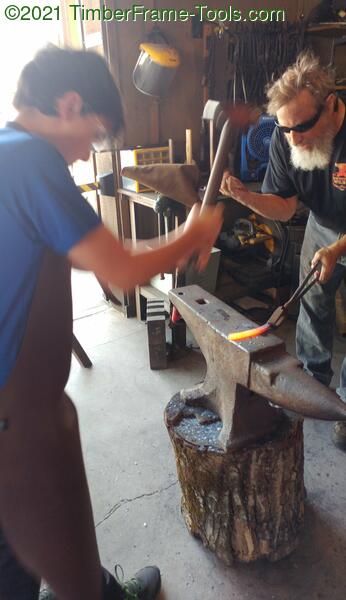
Ten minutes later we were done with the forge…. yep 10 minutes total for three knives. He handed us off to the people running the belt grinders who shaped our knives while we … errr… watched. Then they handed us our knives and pointed out the hammer mark they left on our blades to remind us that we made them. I didn’t point out that WE didn’t make them. We were nothing more than power hammers who left not knowing much more than when we walked in.
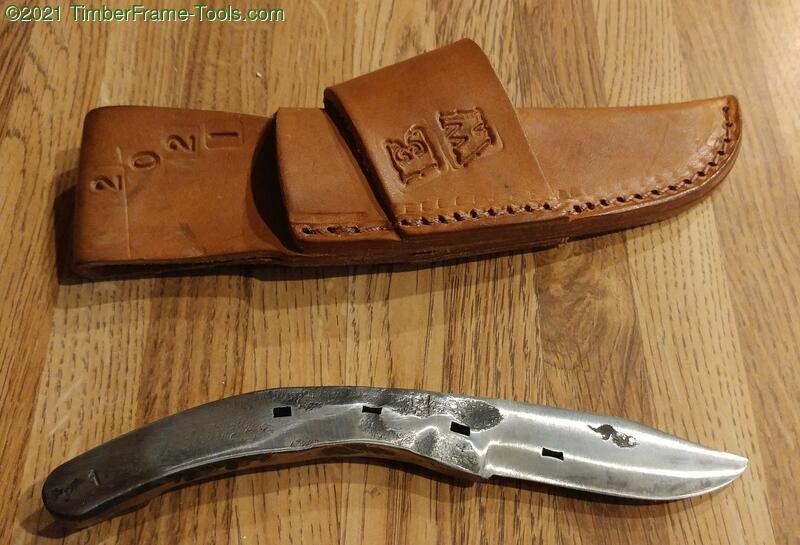
The knives each came with a handmade sheath made by Laying J Leather, which was a shop in the same plaza. We were able to take the sheath to the shop hand have them embellish them with our choice of stamps.
While I was disappointed with the “class”, I do credit it with re-igniting my son’s interest in the craft and that all three of us (my wife included) got to share an experience of making something. Pounding on orange hot metal and watching sparks fly is always fun. We may try to add some wood scales to the knife to dress them up a bit and make them a little more comfortable to use.
I have a nine year old who would be happy to spend her whole day watching tv. As such, a short “class” sounds like a great way to get her to try something. It would be better than one of those Build A Bear stores. Hope this spurs your son to want to do more. Even if not what you expected it sounds like a fun day was had by all.
You are absolutely right Joe. Way better than TV/computer and much better than build a bear.