- Floating Top River Desk with Slab Sides – Intro
- Epoxy River Desktop
- Stretchers for a Floating Desktop
- Slab Side Legs
- Finished: Slab sided floating top river-desk
The desk top for my son’s river desk is kiln dried Southern Yellow Pine. The uprights for it are 2″+ thick red oak that was cut and milled less than a year ago. Most woodworkers will advise not to build with wood until it has dried at least a year per inch. that is probably decent advice for traditional designs. I have other plans in mind. If I build the desk so that it allows for the uprights to move, then there should be no problem. I need the stretchers for the desk top to move independently of both the desk top and the sides of the desk.
Others will point out that the build of the desk top did not show any breadboard ends to keep the top flat. I account for that with some battens 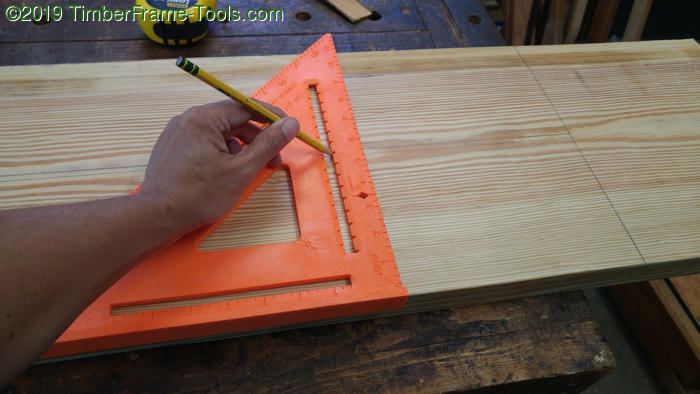
The stretchers are made from 2″ x 10″ Southern Yellow Pine like the desk top. I used a large Swanson speed square to quickly mark my lines for rip sawing out the stretchers.
To keep them from being plain looking, I wanted to give them some texture. I had never textured wood before (other than some unintentional donkey tracks while nailing) so I wanted to do some test patterns first to see what I liked.
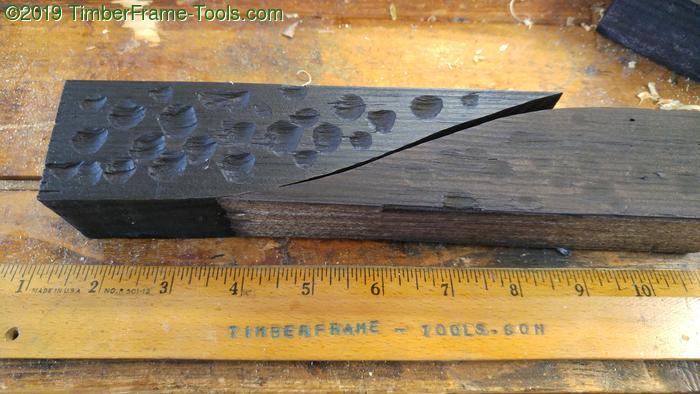
The stretchers were going to dark. At this point I was not sure if I was going for black or really dark brown. This test convinced me I wanted black (ebonized). I played around with dimpling with a gouge and spacing between the dimples. I definitely favored the dimples being closer together rather than far apart.

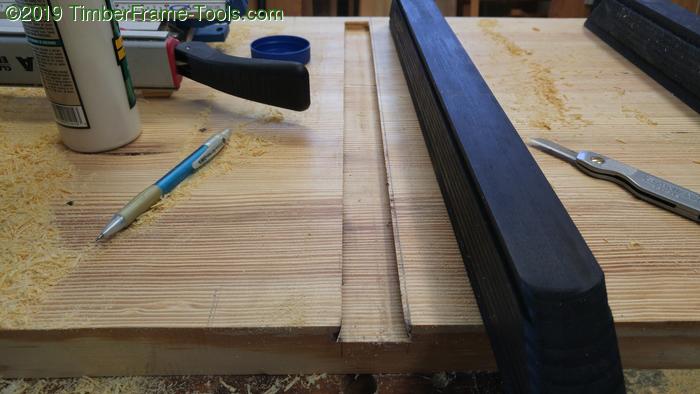
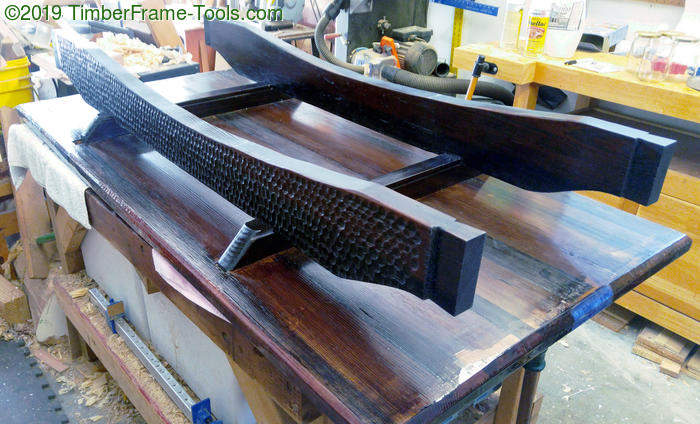
To give the illusion for the floating top, I needed to taper the ends of the stretchers consistently. I uses a piece of 1mm thick plastic from a milk jug to cut a template I could use to draw in the curve at each end. In this photo the 1.5″ offset from the end is where the dovetail (condor tail) will be cut.

With the stretchers cut to shape I proceeded to add the texture one row at a time with the gouge.
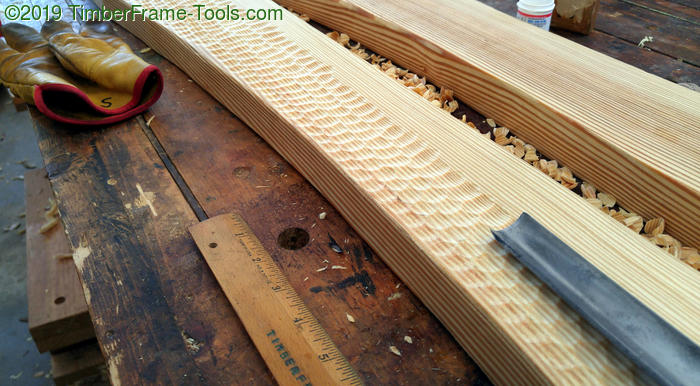
It’s a bit tedious but once you start, you’ve got to continue on until it’s done.
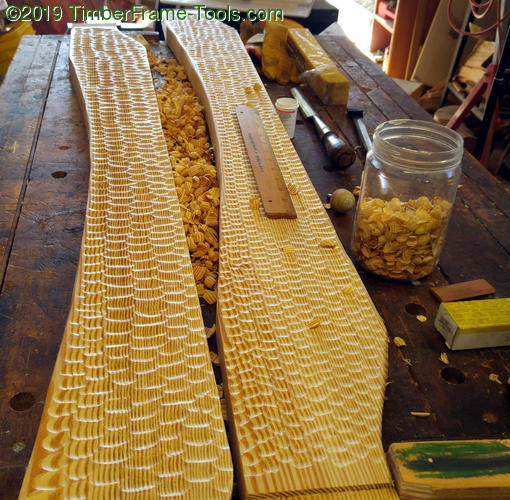
You can see I was not very consistent in my pattern from one stretcher to the next. I liked the look of the smaller dimples on the right, so that made me decide which stretcher would face front and which would face the wall.
The gouge left pretty smooth cuts in the wood, even with the large variations in hardness between the early wood and late wood that is typical in SYP. The cusps between each dimple were a little sharp so I used a blue Nyalox wheel in my drill. It softened the feel quite a bit.
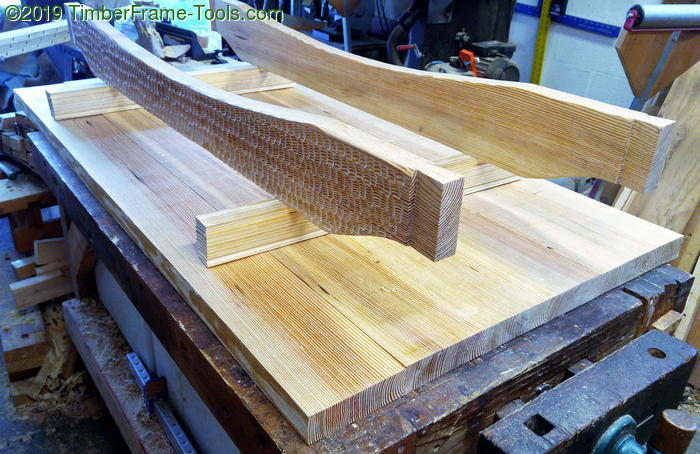
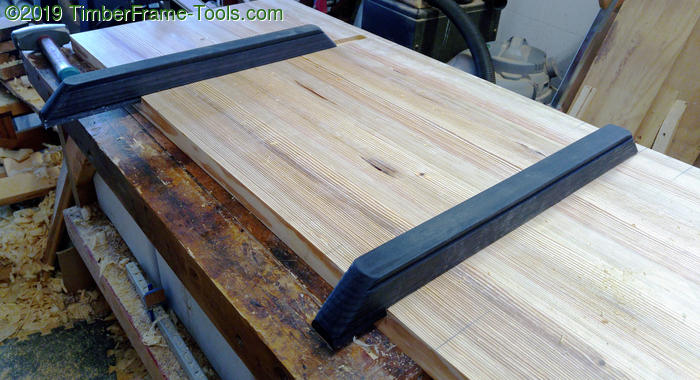
This was taken back before I assembled the desk top but it gives a good view of the arrangement. The bottom of the desk top is going to have two battens with sliding dovetails inserted. This should keep the top flat in the same way breadboard ends do, yet still allow seasonal movement of the wood because they are not glued in. The stretchers then attach to the battens with another set of sliding dovetails. This allows for the stretchers to move as the sides undergo seasonal movement. The stretchers will attach to the sides with the condor tails you see at the end of the stretchers. Not only are there no metal fasteners in the entire desk, but the only glue is that used in holding the desktop boards to each other. 🙂
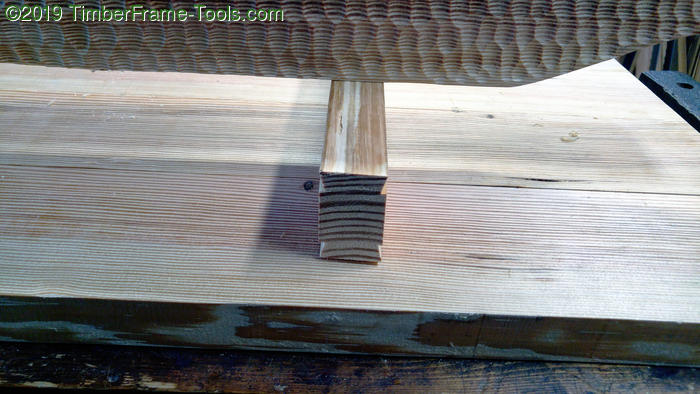
Here is another view of the batten so you can see the profile with the dovetails on both top and bottom. Also made of Southern Yellow Pine.
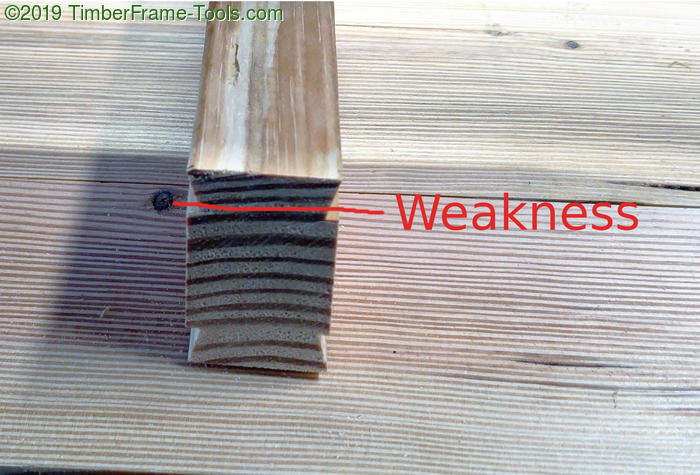
Here is what I think is the major mistake I made. Unfortunately it did not occur to me that it was a mistake until the desk was finished. I but both battens in the wrong orientation. The annular growth rings make the plane of weakness in the same line as the dovetail. I should have oriented the rings up and down. Most likely if anyone tries to pick up the desk or move it carelessly, one or both of the battens are going to split. Resolving the split could either be real easy, or nearly impossible depending on whether the split is the one in the table or the one out of the table. It is not a weakness for normal use of the desk, only for moving it. I’ll have to hope for the best, and remember not to repeat this mistake.
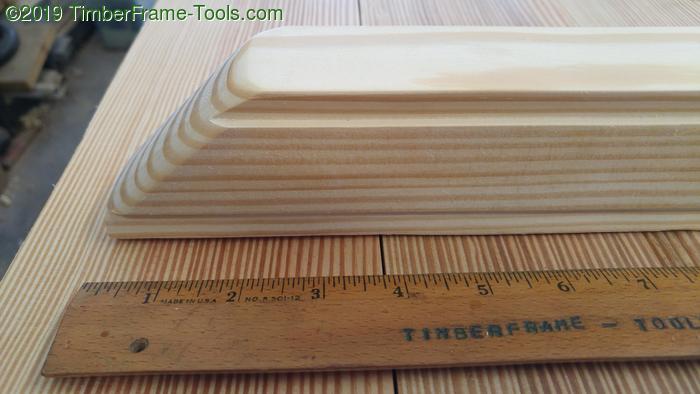
This is the final shape of the battens.

I used my Porter Cable router and guide to cut the housing for the sliding dovetail. It used the same dovetail bit that I used in the router table to make the battens. I used black RIT dye in alcohol to make the battens black.
Here you can see the battens sliding in to place. These will not be glued in as they need to float to allow the top to expand and contract with seasonal movement.
Once the battens are in, the last board that makes up the desktop is glued to the others. This traps the batten in place. Notice the extra space in the dovetail housing to allow for movement.
Here is my son spraying alcohol based black RIT dye on the stretchers. The color worked pretty nicely after a couple of coats. Once the dye was dry, I sprayed it with a few coats of Zinsser Spray Shellac. In hindsight, after some more experience with Shou Sugi Ban, I wish I had done that. Burning the wood with the torch, then brushing would have given me both the color and the softer texture I wanted. It would have been a very cool effect on top of the texture from the gouge.
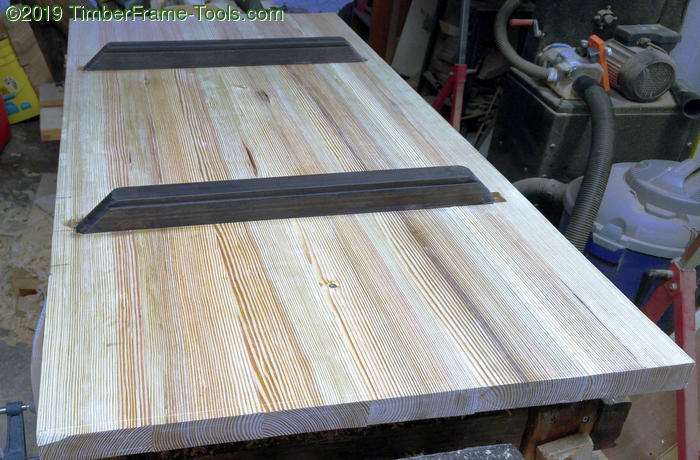
Here are the stretchers in place on the battens and all finished.

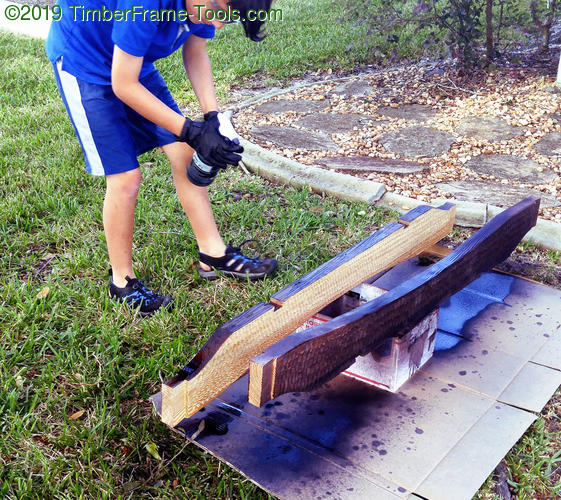
There is also a lower stretcher that will go between the two sides to keep them from racking. I did go with Shou Sugi Ban for this one. Here is my son using the propane torch to create both a black color and a smooth texture.
This wraps up the treatment of the stretchers. In my next post, it will bring it all together as I build the sides and join them to the top.
it wouldnt be the worst thing in the world to reinforce the mis-oriented battens… either with glues in dowels, or even screws. I wont tell 🙂
otherwise, really nice work. that quarter sawn tight grained section of SYP is sweet.
I like that idea a lot. A few dowels glued in at varying angles would give it enough strength to give me some piece of mind. Thanks for that suggestion.