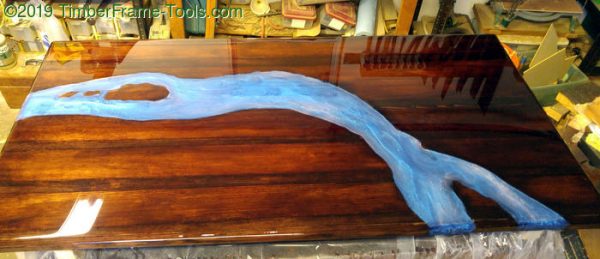
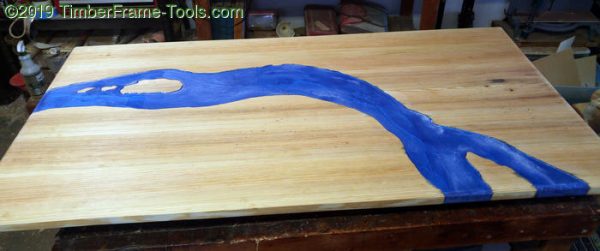
My son was pretty adamant that he wanted his new desk to have an epoxy river on it. He has enjoyed the few times we have used epoxy to fill gaps in the past and he wanted to do more. We were going to be making the desktop out of Southern Yellow Pine so the river would be artificial, rather than filling in the gap between two Live Edges. The photo above shows the end results, but what will follow is a depiction of the process.
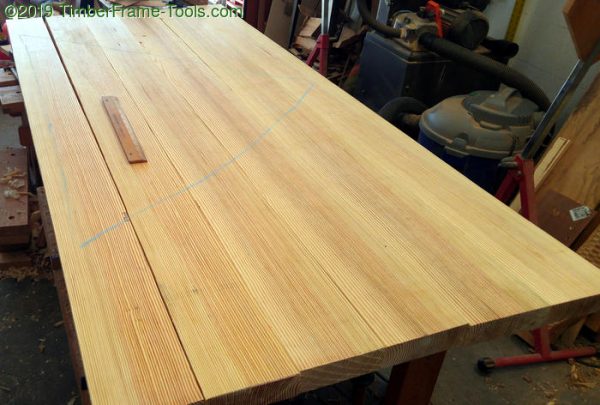
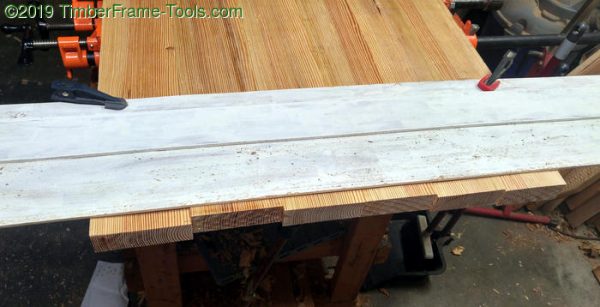
I purchased 2″x12″ at the big box store. I deliberately picked out only boards that had the pith in the center, which means I get quarter sawn sections on each side of the pith. I used my bandsaw to cut out the the few inches that contained the pith. I used my jointer plan (Stanley #7) to joint the edges of each for gluing.
I laid them out in what I thought was an appealing pattern with alternating bands of heartwood and sapwood. This was a mistake that I did not realize until later in the finishing.
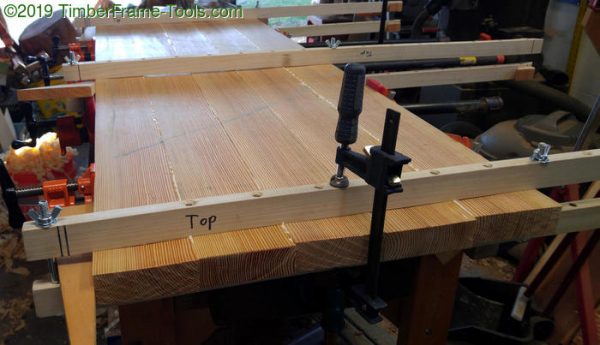
Rather than use breadboard ends to hold this flat, I am going to be putting in battens with sliding dovetails. To pull this off, I am only gluing 5 out of 6 boards together so that I can cut the sliding dovetail into the housing then glue on the last board.
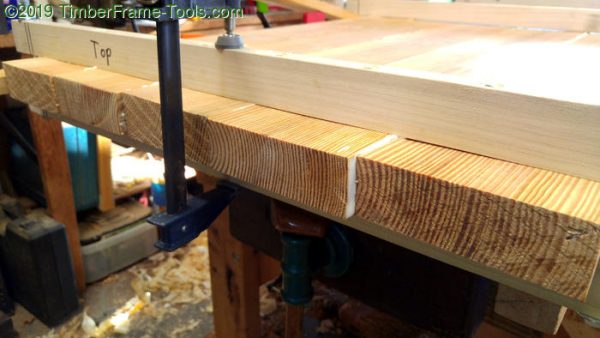
I used pipe clamps and my clamping cauls to keep everything flat.
After the glue up was done, I flipped the top over and cut the sliding dovetails and put in the battens (this part of the process will be covered in a separate post).
I used my poor man’s track saw to cleanly and accurately cut off the ends of the table.
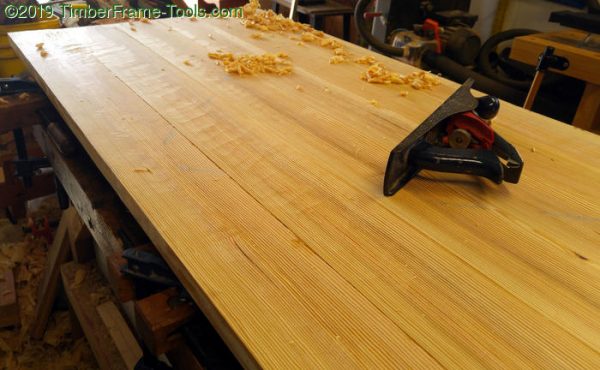
The desktop is now resting on the battens that are in place in sliding dovetails and I was able to start final flattening with a scrub plane working diagonally across the desk and then switched to a jack plane, followed by a jointer plane. The quarter sawn alignment made for relatively easy planing with little tear out.
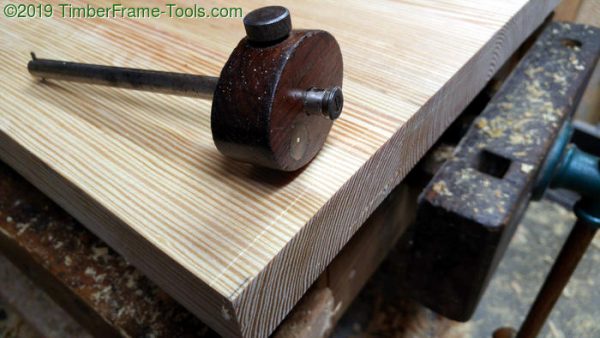
With the top flattened, I was able to start working on marking the chamfers that would go around the perimeter of the desktop. I tried several depths on some sample boards and then had my son try resting his arms on the edges as though he were typing. We decided on 1/2″ 45 degree chamfers. So I used a marking gauge set to a half an inch, and marked the edges both vertically and horizontally.
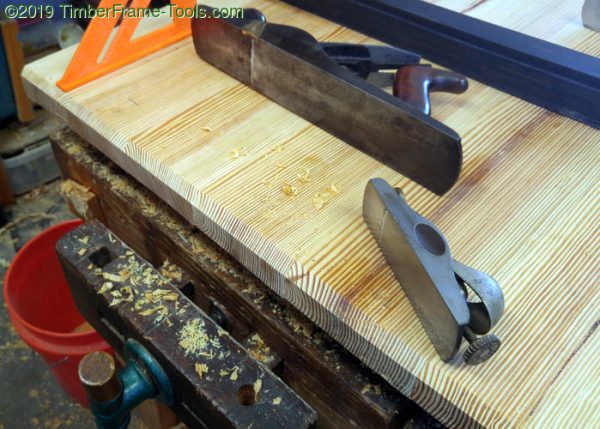
For the front and back that run parallel to the grain, I used a jack plane held at a 45 degree angle. The orange speed square is a good visual reference to get close to the angle, and then make final adjustments as you get close to the gauge lines. Where the edge runs perpendicular to the grain, I used a low angle block plane, as it handles the endgrain a little more smoothly. The chamfers were cut on both the top and bottom of the desktop.
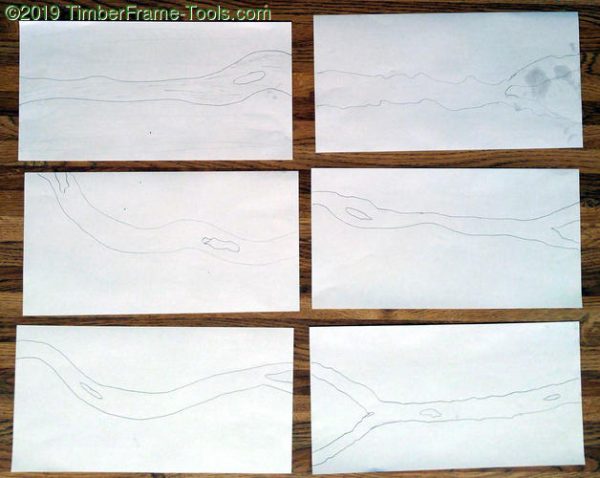
I cut some paper to the same proportions as the desktop and had my son keep sketching river ideas until he could identify one that he liked best.
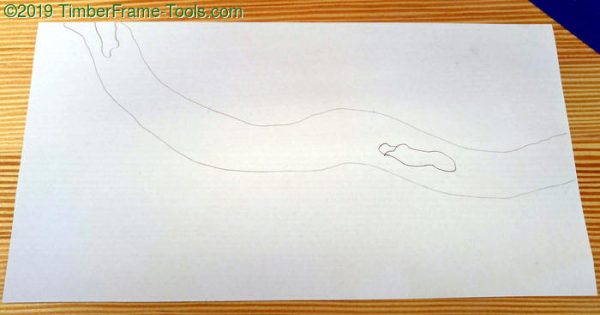
Once he picked the design he liked best, I started transferring it to the actual desktop.
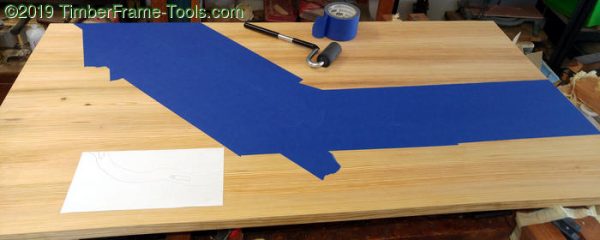
First I laid down blue painter’s tape so that it could serve as a mask for the epoxy. I needed to be careful with the epoxy since I had not stained the top yet and epoxy drips would block the stain.
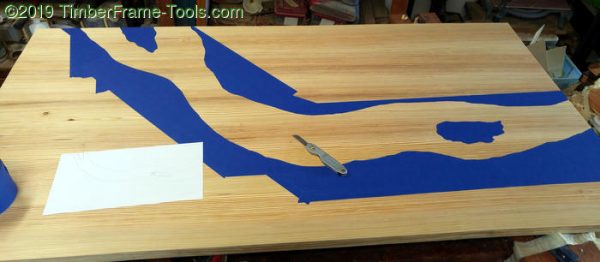
I sketched on the tape, a shape to match the paper model. Then I used my Stanley marking knife to cut along the pencil lines and removed the river portion.
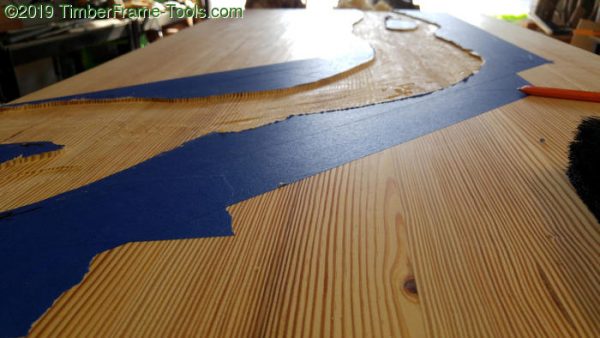
I used my Porter Cable fixed base router with a half inch straight bit to rout out the river approximately 1/4″ deep.
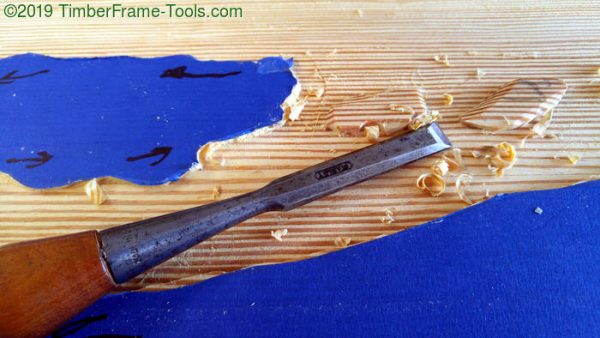
On places of the riverbank and islands, I used a half inch chisel to create some sloping gradual shorelines.
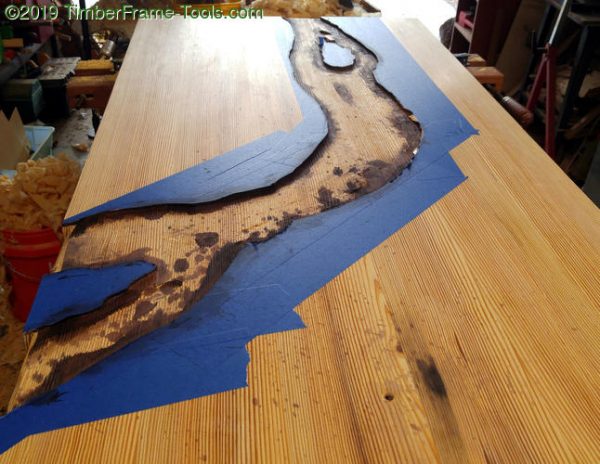
I wanted the boundaries of the river to match the final color of the rest of the table so I gave it a few spritzes of TransTint Dark Walnut dye mixed with denatured alcohol.

For the places where the river met the edges, I wanted them to look like waterfalls, so I used a coping saw to cut back the wood a bit to make room for the epoxy.
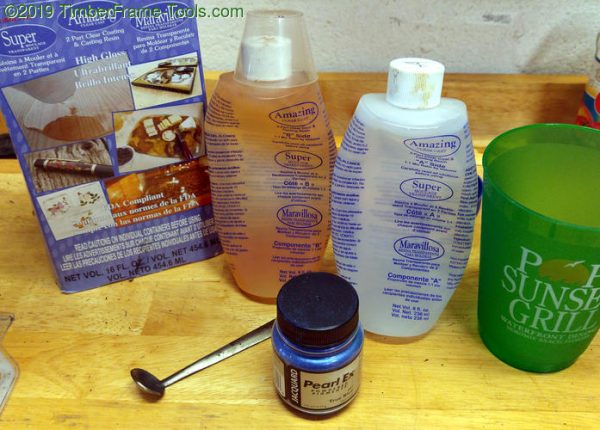
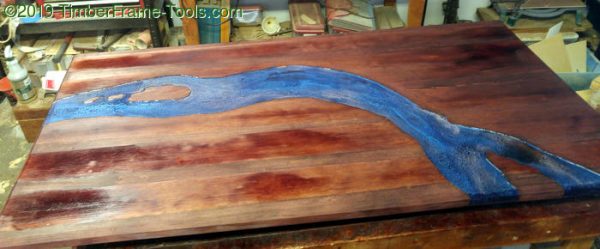
For the river portion of the pour I used Alumilite Amazing Clear Cast because I had some on hand and I have used it successfully before. For the color I used Pearl Ex Blue.
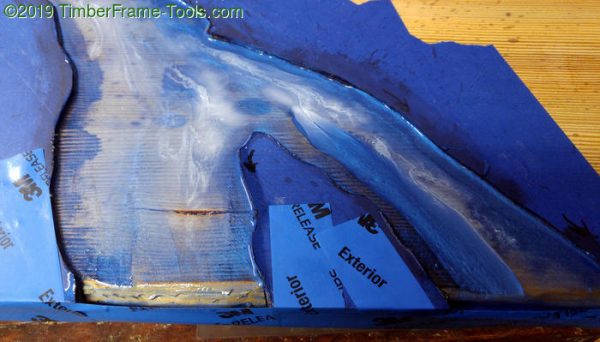
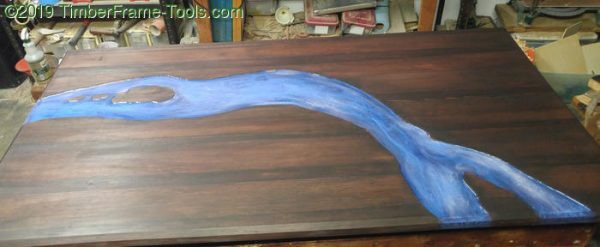
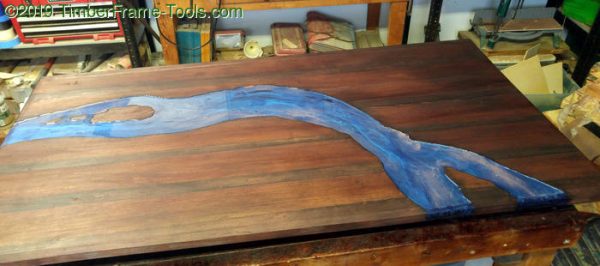
The first pour is just a thin coat to seal the wood so that there are fewer air bubbles in the deeper pour. The first coat is so thin you can easily see wood grain through it. The woodgrain through the water will become invisible with the next thicker pour.
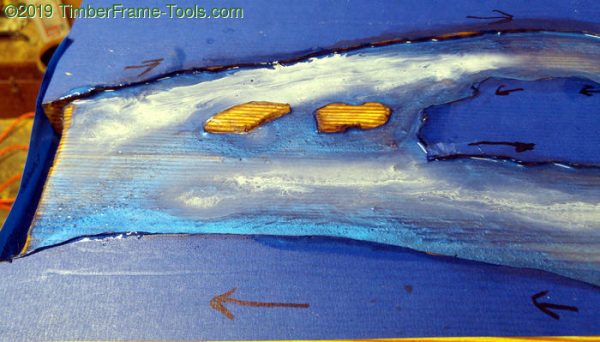
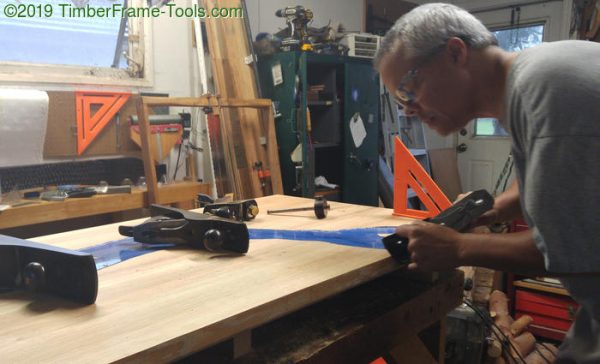
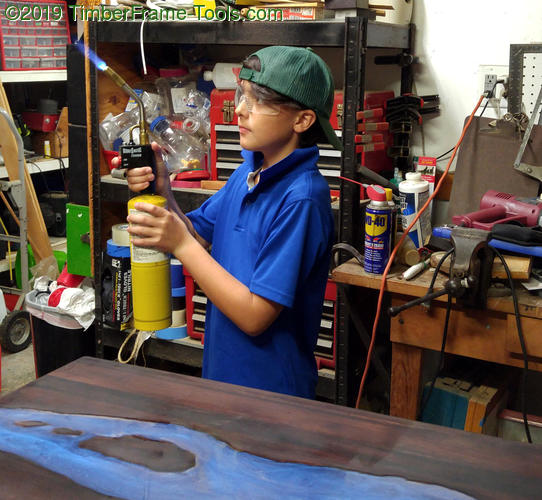
To create the look of some turbulence, I took some white spray paint and sprayed it on a paint stick, and then dragged it through the wet epoxy. Hitting the epoxy with a heat gun moved the paint around in a natural way to give some realism to the epoxy.
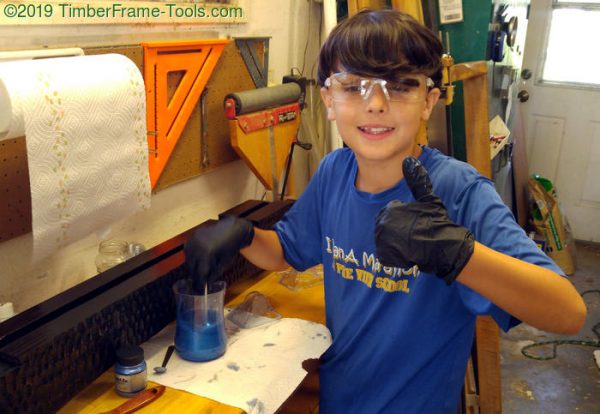
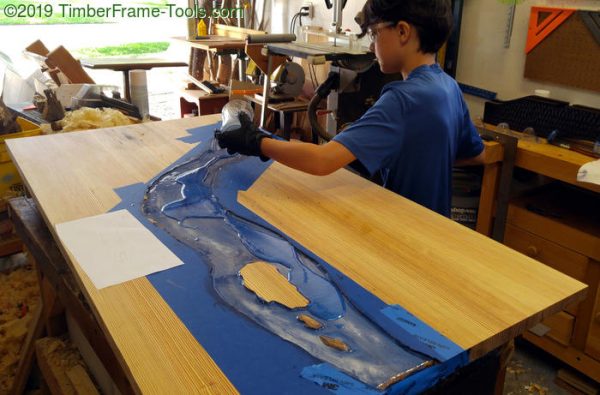
I had some assistance with my pours. I think he enjoyed taking part in the making of his desk.
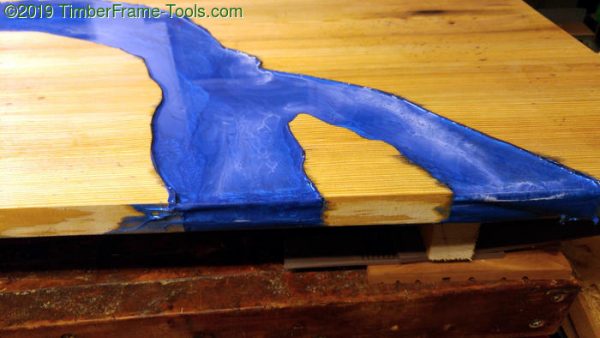
We poured the blue epoxy so it sat below the level of the table top. I hoped this would give it a little touch of realism, since streams always sit a bit lower than the surface they are flowing through.
Now that the river was completely poured and the edges chamfered, it was time to die the wood. To choose a color I had done some samples using the offcuts from this table.
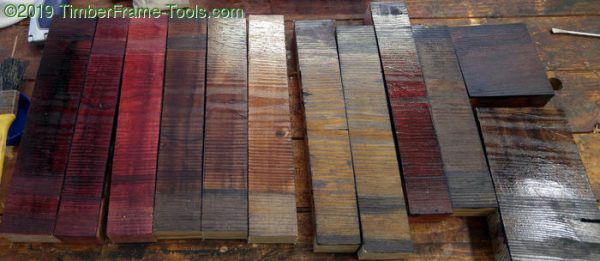
My son picked his favorite which was from the recipe 1 treatment of TransTint Red Mahogany and two treatments of TransTint Dark Walnut So I used TransTint thinned with Isopropyl Alcohol in a spray bottle to coat the wood.
The alcohol causes the dye to dry pretty rapidly.

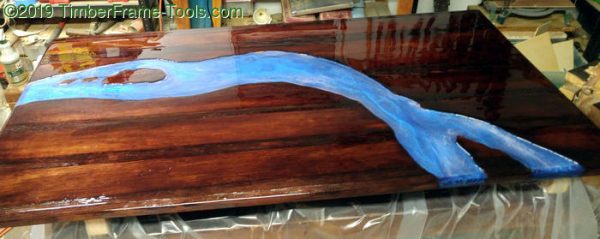
For the top of the desk I needed something durable and a bit durable against UV light. Based on a lot of great videos from YouTube, I chose Stone Coat Countertops resin. I was impressed by a durability test video they did. Overall I was very happy with this epoxy.

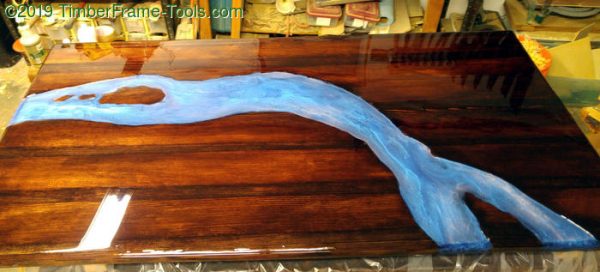
Here you can definitely see the “banding” caused by the sapwood absorbing dye more than the the heartwood.
With the final coat of epoxy, the top was glass smooth. Unfortunately it had a bug and a stray hair on it too.

A little work with a card scraper was all it took to remove the remove the bug and the hair. A bit of buffing of these sections has it resolved.

With the top done, there were epoxy drips along the underside edge of the desk all the way around. A jack plane made short work of flattening the drips.
Putting some coating on the underside of the desktop will appear in the next entry.