As my son has gotten older, his homework time has stretched later into the evening when light is fading. He clearly needed more photons.
We had a few requirements:
- It had to look good with his custom desk, and book cabinet. His desk is in our family room, so it had to look good.
- It had to light up his desk, but not blind the rest of us who are doing other Family roomy type things. The photons had to target his desk, but not scatter aimlessly around the room.
- It had to not hit him directly in the eyes while he was at his desk.
- It had to not take up much room on his already crowded desk.
To meet that criteria I sketched up some options.

This is the one that won out. Some wall mountains that would look decorative on the wall during the day. By hanging on the wall it would be high enough not to beam him in the eyes and would not take up space on his crowded desk.
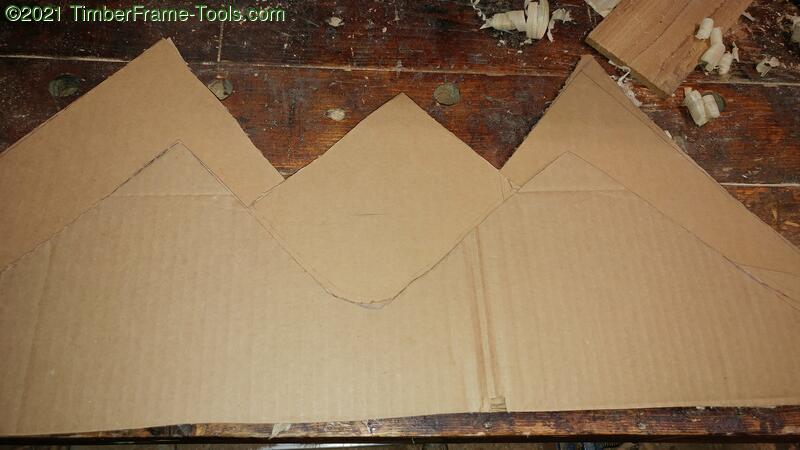
I mocked up some cardboard mountains as a quick prototype to gauge size and shape. I find the model not only helps me think it through, but it helps me sell the idea to those in charge. 🙂
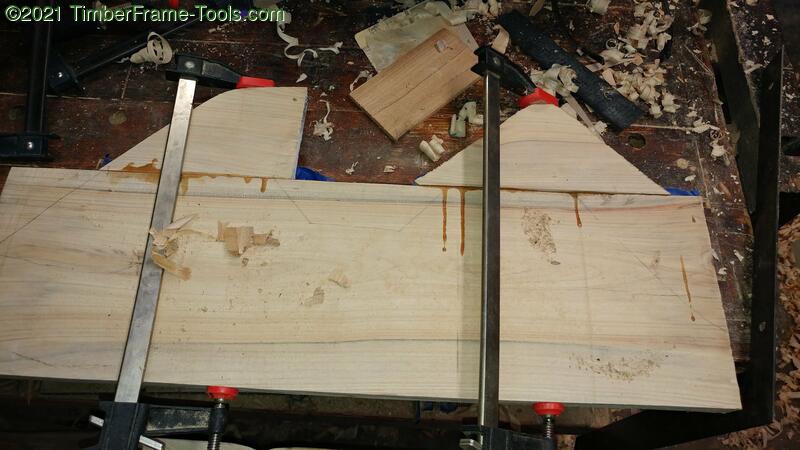
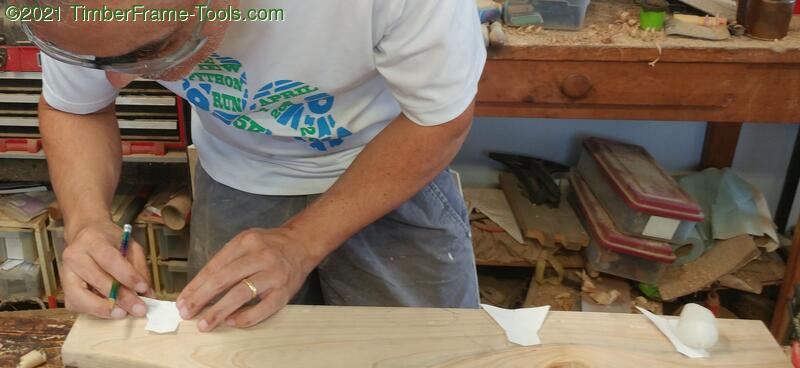
I had some pieces of Cypress that came from a couple of trees that once sat in our backyard. They were long enough, but did not have the width needed to make the mountain peaks, so I had to glue some pieces on.
Then I used the cardboard model to mark out the slopes.
Now that had three layers of mountains, it was time to work on the lighting. I spent some time researching light sets and I finally chose this set of dimmable LED mini spotlights from Amazon. I liked that is had all the dimensions defined and seemed like they would provide the kind of light we were hoping for.

I was happy with the purchase. They seem to be solidly made with aluminum housings and were very easy to work with. They come in sets of 2, 4, or 6 and are pretty versatile. If they last, I’ll be happy.
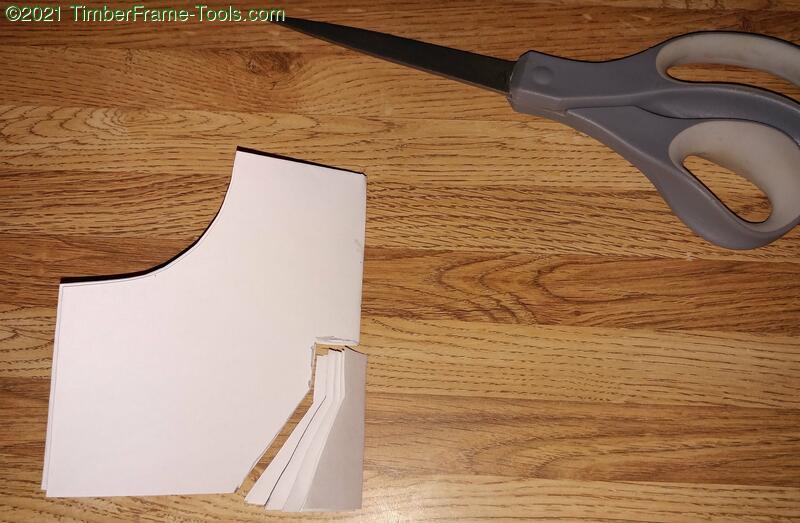
I wanted to be able to lay out the openings for the lights and see what that might look like. The min-spotlights can pivot on a little ball joint, so I had to create a template that allowed for that. I folded a piece of paper in half twice, to give me four layers. I set one light on the folded paper and marked out the limit of the swing from center to one side.

Then I folded the paper one more time to give me symmetry (like folding paper once and cutting out a heart shape), I cut along the lines I marked and it created 4 exact copies that were symmetrical along their center line.
I mistakenly took this picture after the cutting the paper, but it shows how I marked out the shape of the limits of movement on the lights.
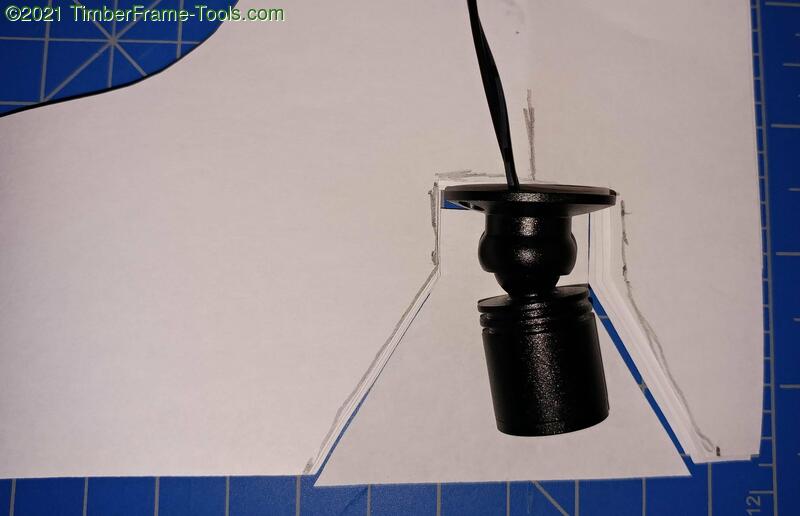
Here I am playing around with the spacing of the light templates to see what looks the best.

Before cutting, I double check that the light’s angles are not going to be restricted by the wood when I cut out that pattern.
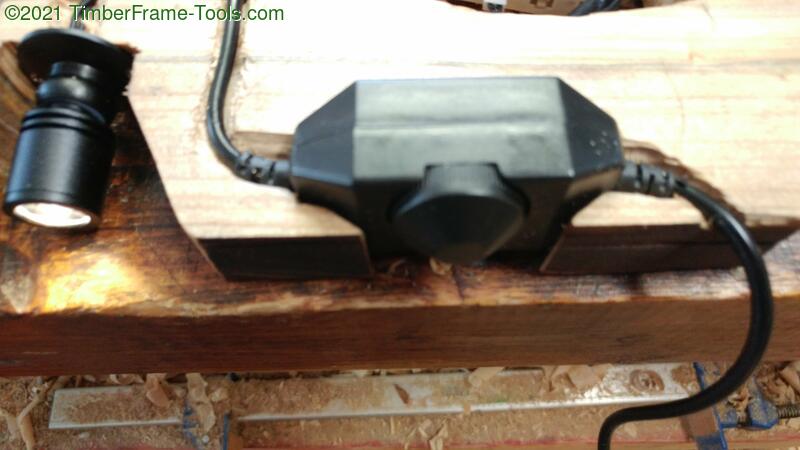
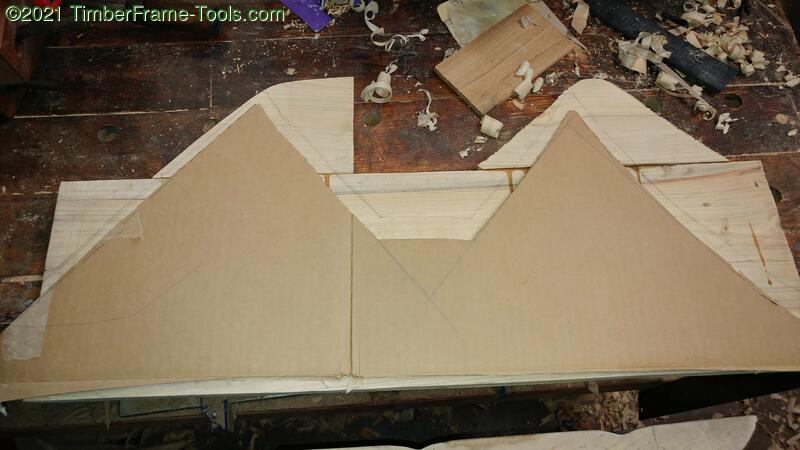
The mountains are made up from three different layers of wood. The back two layers contain the lights and the switch. I taped the two back layers together to make the cuts for the lights and the switch using my bandsaw. Here is the switch and the lights in place.
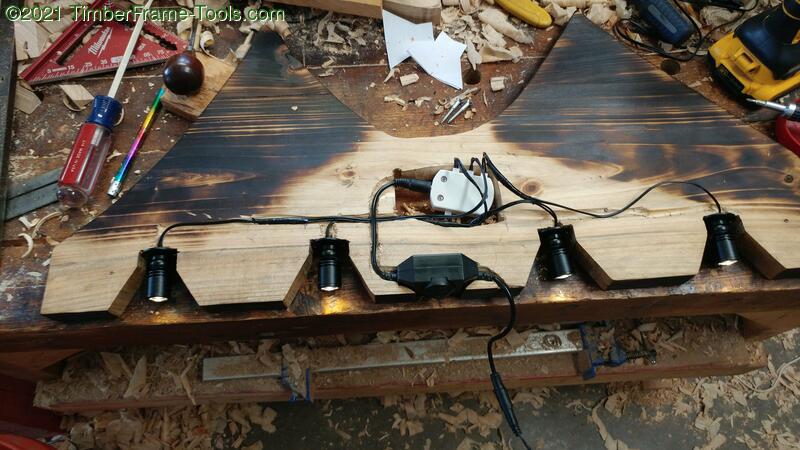
I used a small palm gouge to cut the chases for the wires to the lights in the back layer, and used my coping saw to cut the central recess for the electrical junction hub. The back layer gets screwed to the middle layer so that in the event of electrical replacements are needed, I can get to everything.
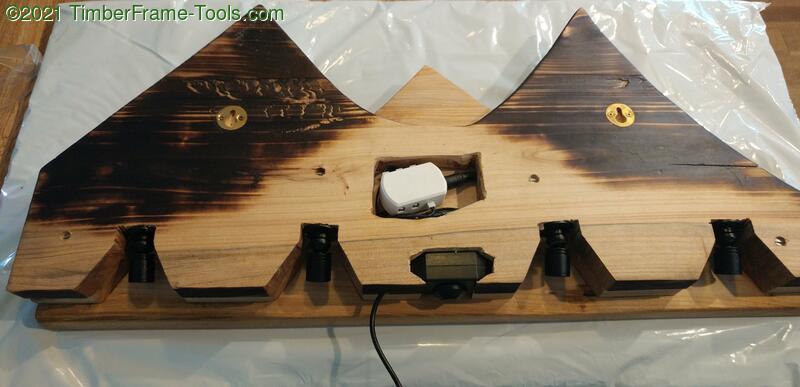
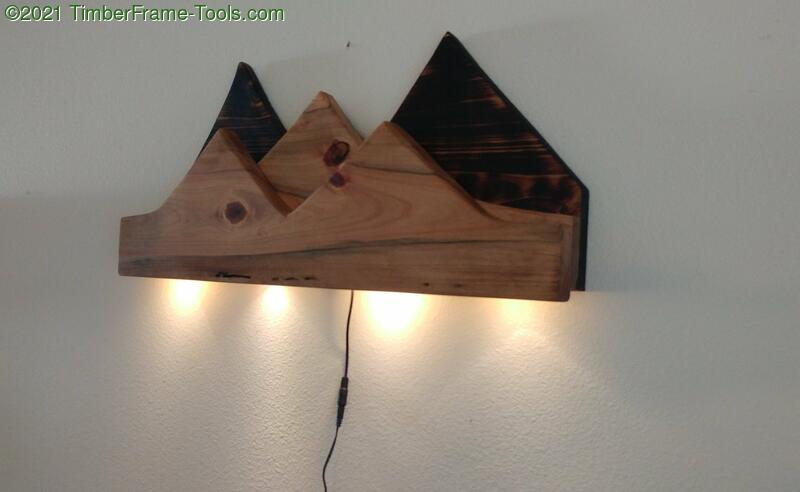
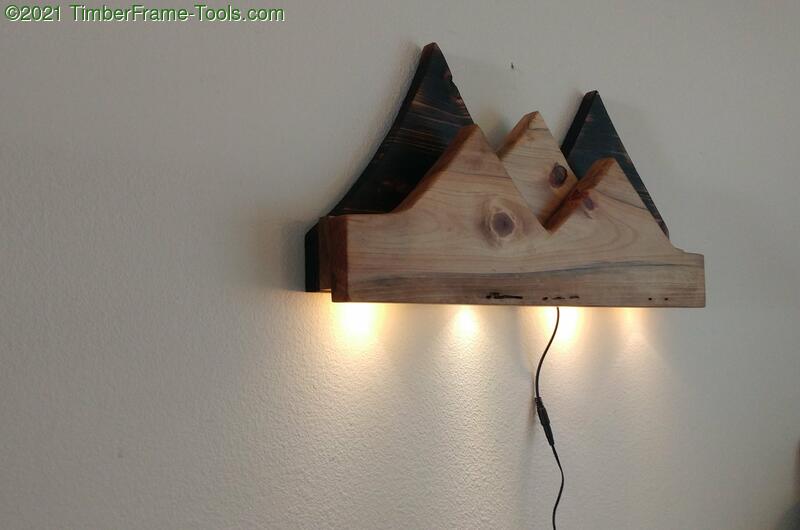
Here is the back of the back layer. This goes against the wall. You can see the two brass hanging keyhole mounts. The front layer has already been glued to the middle layer and the back layer screwed to the middle. Notice that the front layer (the one in the bottom of the stack shown) extends down farther than the back two layers. This is what keeps the lights from being directly visible and blinding.
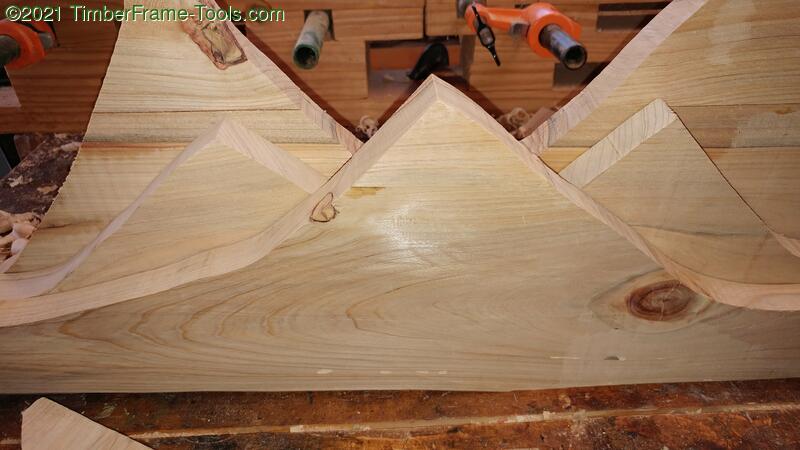
I should point out that to provide contrast, the visible parts of the back mountains have been torched and then oiled with Real Milk Paint Co. Tung Oil. The middle mountains were oiled on the exposed parts, but not on the areas where they were to be glued to the front layer. The front layers was oiled with Real Milk Co Dark Tung Oil to provide a darker contrast to the middle layer, but not as dark as the back layer.
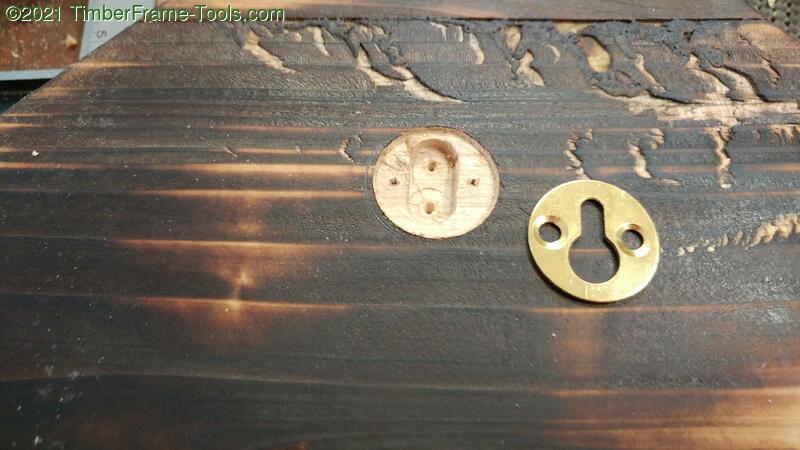
Since the light has the dimmer switch on it, it will need to endure being touched. So I had to suspend it from two points rather than hang it from a while like a picture. I used these brass plated keyhole hangers. They work pretty well. The screws they come with are pretty short so I upgraded them to some slightly longer screws. They are easy to mount with a 1″ forstner bit and then a 3/8″ bit to cut the screw slot.

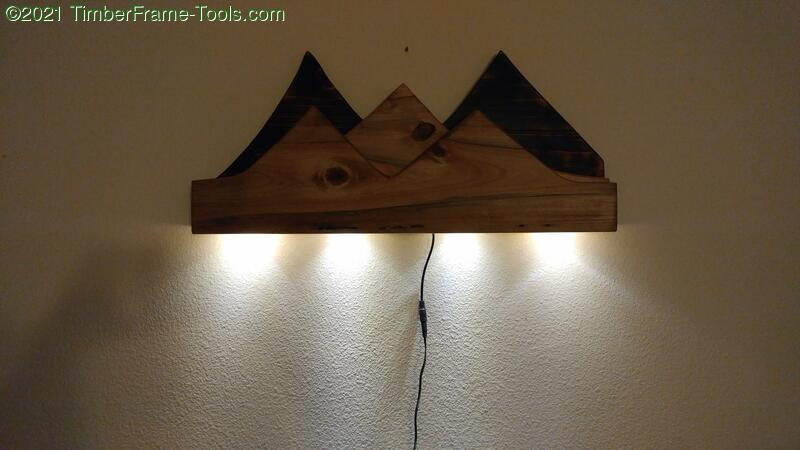
It is decorative enough to look good when it is off.

Then it really shines with the lights on. (sorry for the Dad pun)
It quickly became obvious that it would look better if I ran the wire through the wall. (It’s on my todo list.)
If I was going to build another one of these, I would put ends on it that are continuous grain wrap of what is on the front. That would hide the ends of the three layers of wood and make it look a bit more polished.
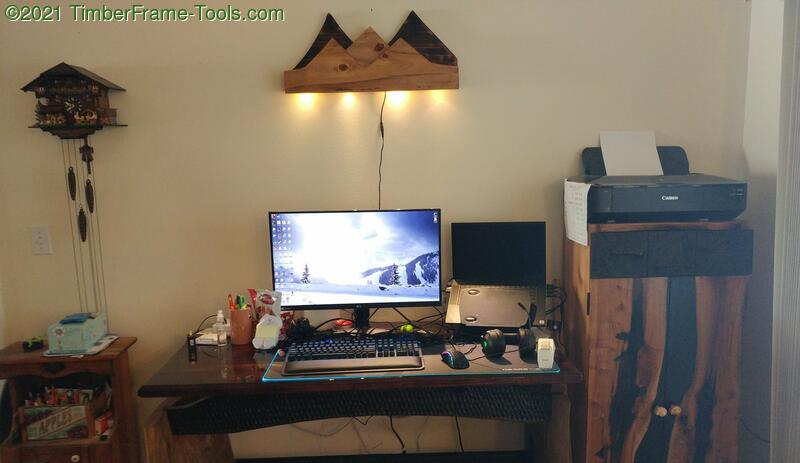
I am really happy with how this fits in with my son’s desk and book cabinet. It is a bonus that it fits the motif of the alpine cuckcoo clock too.
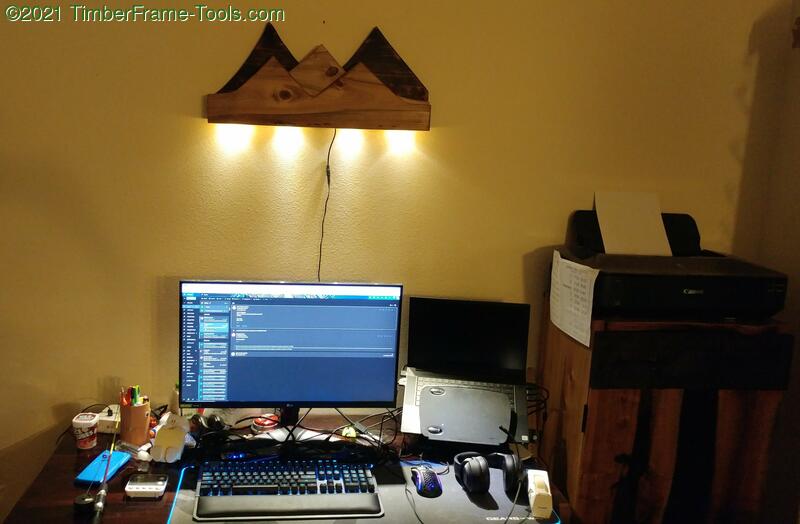
You can see in this last photo the quality of the light that it casts on his desktop.
Great idea. Thanks for sharing. I can see where something like this (three layers of wood, carve out the back two to fit lights, have front longer to hid lights and not blind you, etc) may come in very handy for my daughter’s desk in our home as well.
Thanks Joe. That is one of the cool things about this light. It doesn’t have to be mountains. It could be anything that looks good as silhouettes. Cats, coyotes, hearts, stars, houses, bats, unicorns, fish… you get the idea. Have fun with it if you decide to make one.