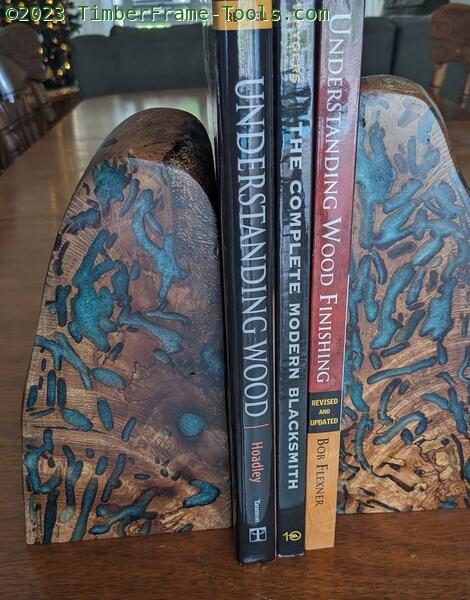
Bookends from epoxy filled, bug damaged, oak.
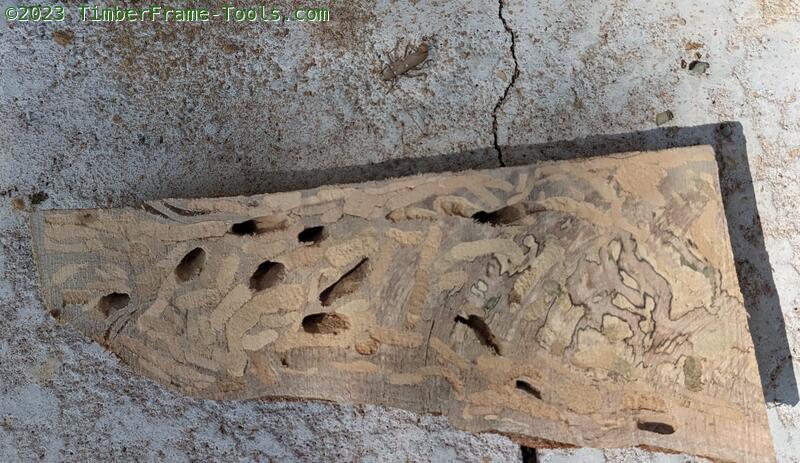
I had some oak from a neighborhood tree. While it sat in my porch or in my workshop, developed a bit of a bug problem. I could see exist holes and little piles of sawdust coming from it, so I knew it had to go. I decided to run a piece of it through the bandsaw just to see how bad it was. It was so bad, it was cool. There were tunnels upon tunnels. So I cut a few pieces that I thought might be fun to make bookends or candle holders from.
You can see one of these beetles just above the piece of wood. They have little white dots that look like they are painted on.I knocked it out of one of the holes, took a photo then killed it so it could not spread.
The bug in question were Ivory Marked Longhorn Beetles, which are destructive to any tree they find their way into. They can live in the wood for a couple years as larvae and then turn into the beetle. The sawdust … errr… sawpoop fills in the holes as the bug moves forward.
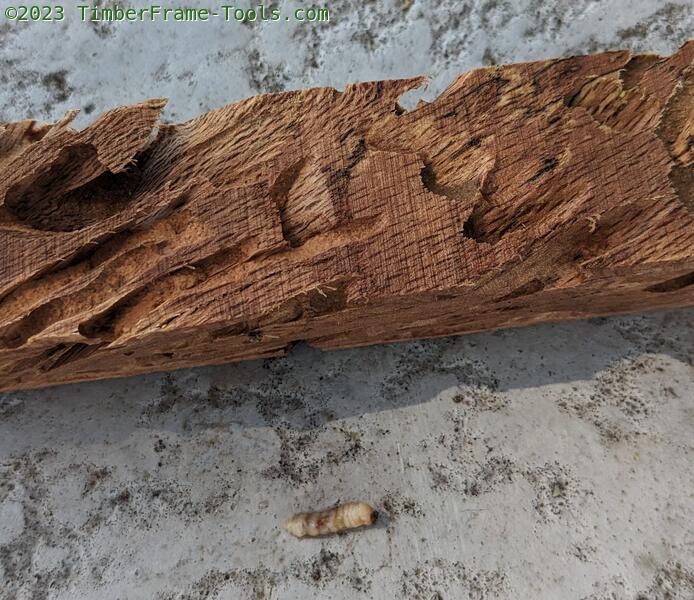
Here is a larvae from the same piece of wood. To kill off anything in the wood, I put the pieces in the toaster oven in my shop for a few hours on 300 degrees.
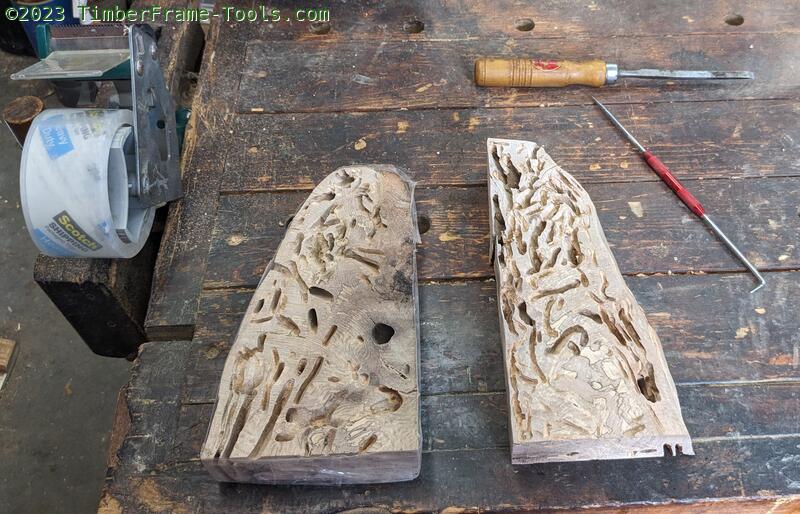
After the wood came out of the oven I uses a pick and small chisel clear out many of the holes and tunnels as I could.
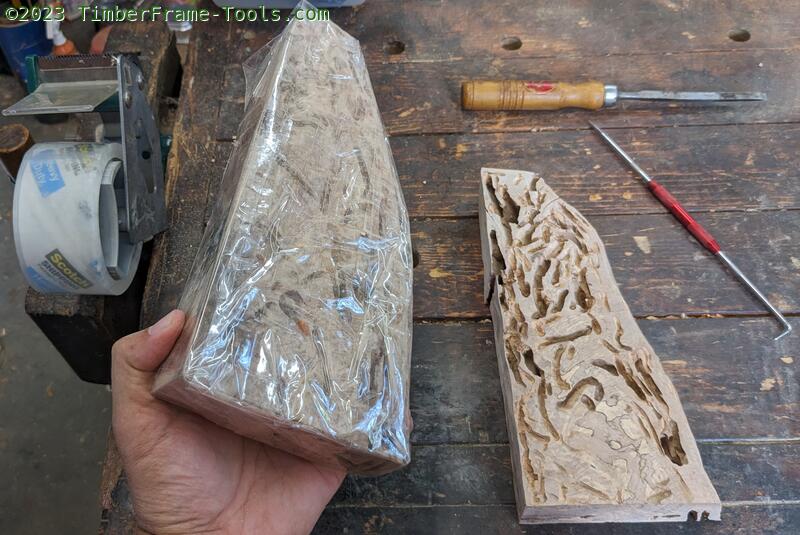
I used packing tape to tape off the bottom and sides of each piece.
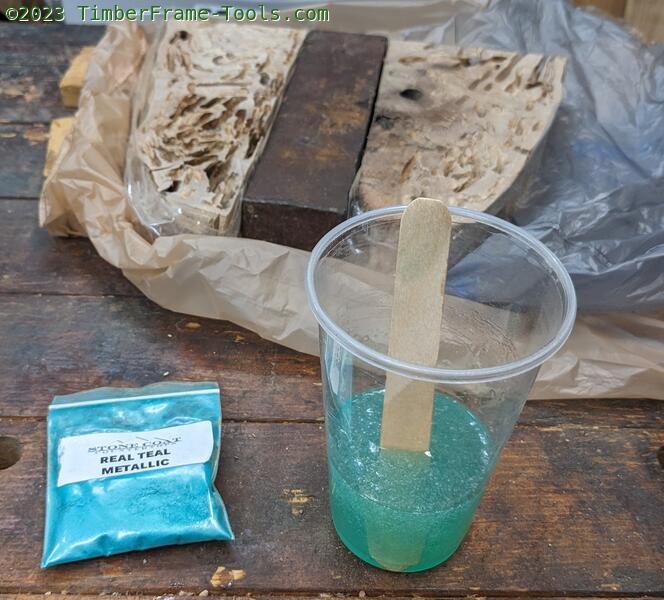
Then I mixed up some metallic teal colored epoxy. I went real light with the pigment because I wanted it to be translucent.
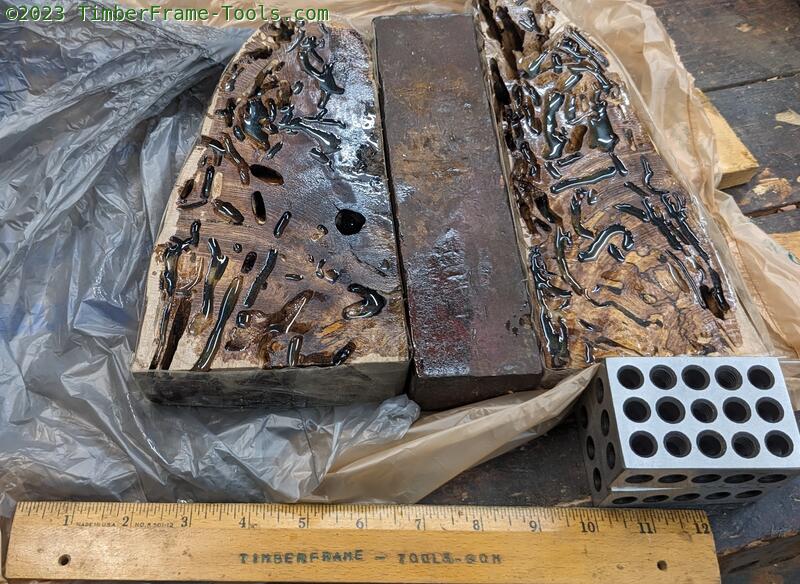
First epoxy pour. I put the taped up pieces on top of a plastic bag, as double protection to keep from epoxying the thing to my workbench. It kept underestimating the amount of epoxy that I needed, because it is hard to imagine how many holes there are inside the wood.
The second epoxy pour got a little closer, but still had lost of voids.

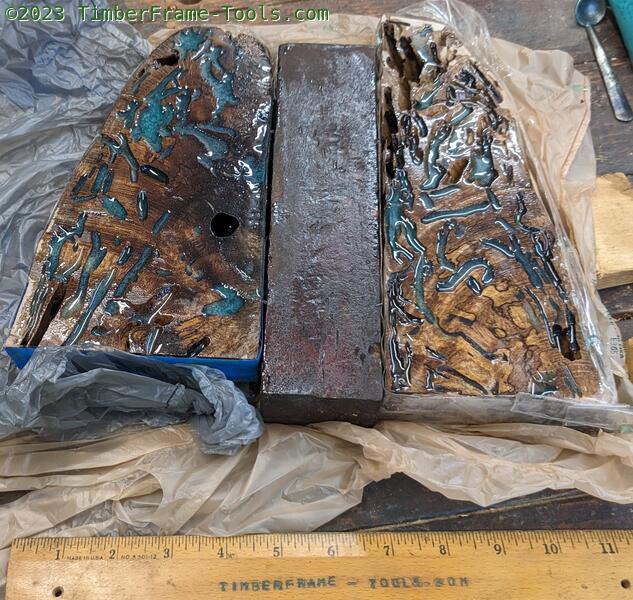
The third pour was the charm. Finally got them all poured level.
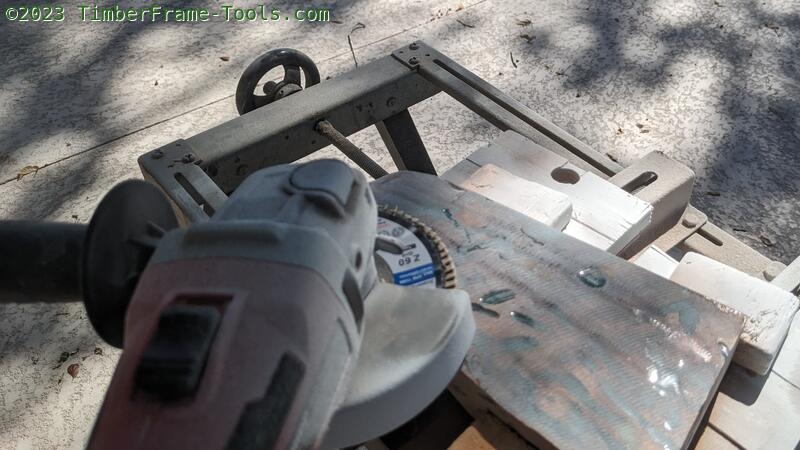
Some spots on the epoxy were pretty deep so needed a lot of removal. I used my cordless angle grander with a flap disk on it. This worked pretty well as the wheel did not load up with epoxy. Is I got it closer to wood, then I switched to using an random orbit sander an going up through the grits.
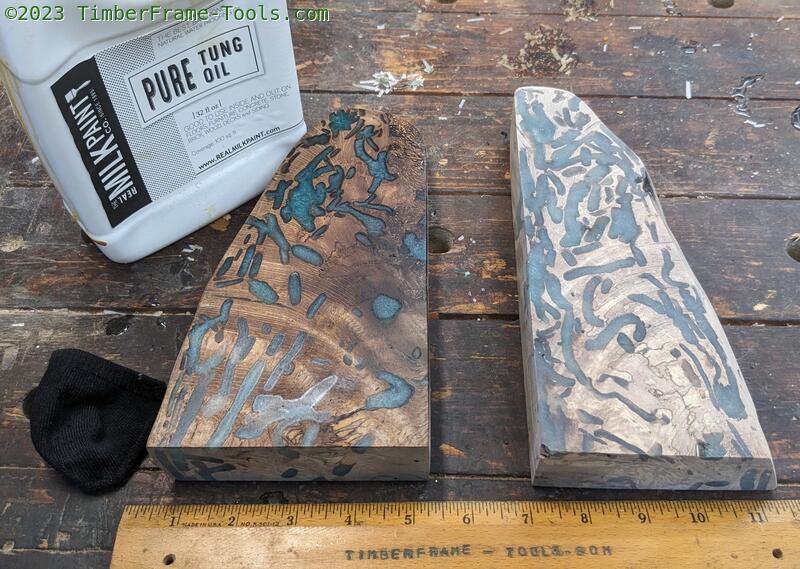
For a finish, I went with my go to Pure Tung Oil (affiliate, not sponsored). Here is the first coat on the left. I like the color and the way the spalting is surfaced. Six more thin coats with full sunshine in-between and the bookends are complete.
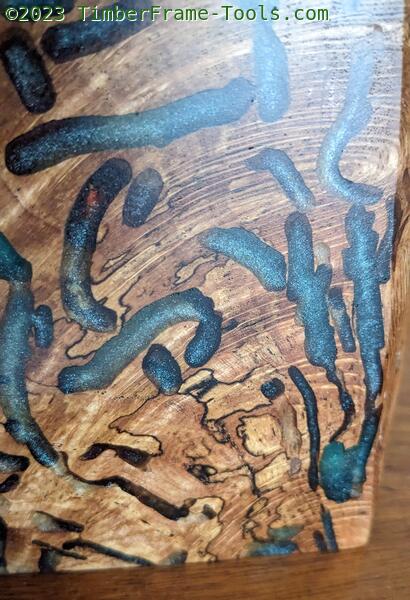
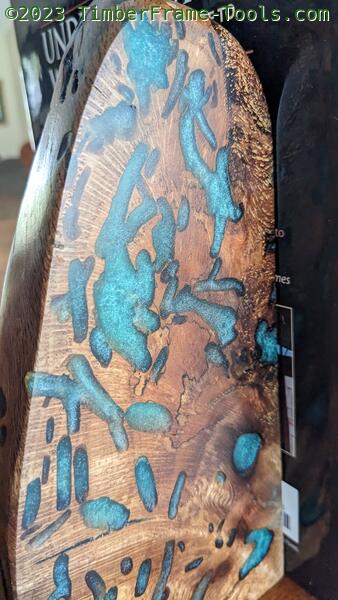
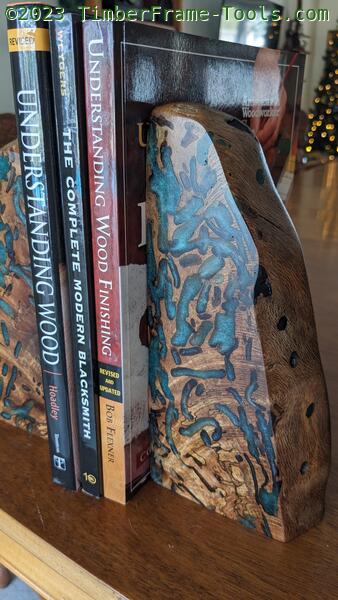
The figure and spalting in the oak is beautiful all by itself, but then seeing it all mix among the chaos of the bug tunnels is even more cool.
The figure and spalting in the oak is pretty cool, but then seeing it all mix among the chaos of the bug tunnels is pretty cool.
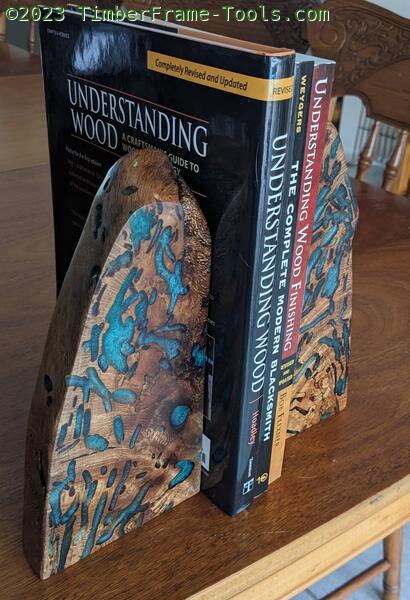
Supports the books with a bit of style.
I like these bookends. They aren’t robust enough to hold up a large stack, but they do the job for a few books.
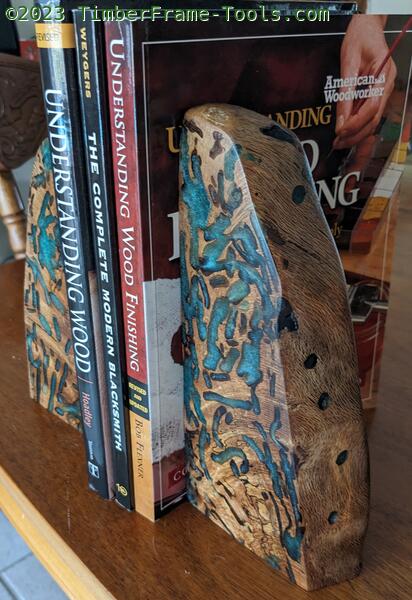
Note the exit holes on the outside of the wood.
I really hate the longhorn beetles, but I have to admit, the result is pretty cool.