My son and I were on our way to the grocery store the other day, and on the way there, we saw a sign for a barn sale. I got a big smile on my face and said, “Do you want to go see if they have any old tools?” … he answered… I’m pretty sure it was “Yes,” but I was already pulling into the driveway. The barn was poorly lit and as I looked around for any sign of tools, I saw a few hand saws hanging on the wall. Nothing remarkable, no Disstons and certainly nothing in a configuration I needed. I did see a small 20″ handsaw and thought it would make a cute saw for my son, so I took a closer look. It had a nice handle that was well rounded. The lack of flats on the sides of the tote was a good indication that it was pre-war. I had to take the saw outside for better light to see what the medallion said. I could make out “Atkins” on both the etch and the medallion. The masking tape on the saw read $5. Sold.
I had heard of the Atkins name and knew that they were not as big a saw manufacturer as Disston, but knew they generally had a good reputation as a saw maker. About this time, my son started getting impatient with my history lesson and wanted to put the saw to work. The history will have to wait until he goes down for his nap.
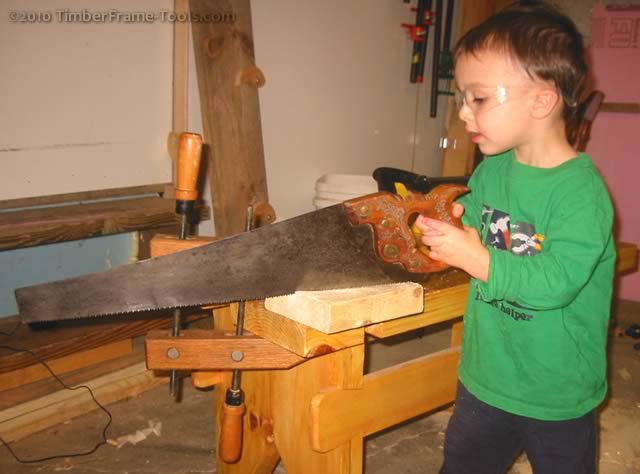
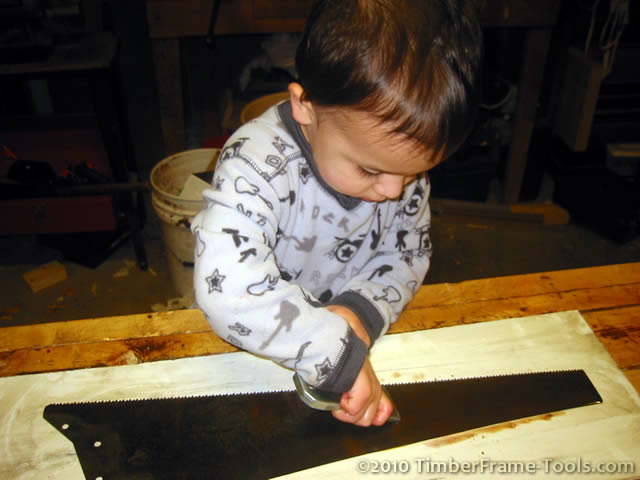
My son with his 20 inch Atkins. He says it cuts easy... which is his way of saying it is easy to push because it is dull.
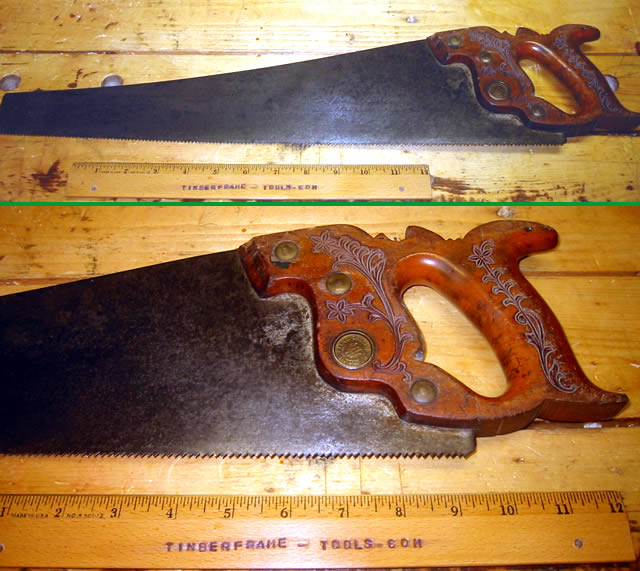
Unfortunately it seems that E.C. Atkins saws are not as well documented as the Disstons’. I have been unable to find any online resource that lets you date the saw by looking at the medallion or any other features. The etch has a Patent Date of July 7, 1896 which is the (pat D25,763 as pdf) patent on the “Damaskeened” finish on the blade. The date on my saw’s medallion has a patent date of Dec 27, 1887 which is the Glover patent for the saw screw (pat 375350 as pdf). As near as I can tell this saw also has what is known as the “Perfection Handle” with early flower embossing as opposed to what later became wheat embossing. So I do know the saw was made after 1896 and am sure it was before 1952 when the handles were all flat sided after Borg-Warner acquired the company.
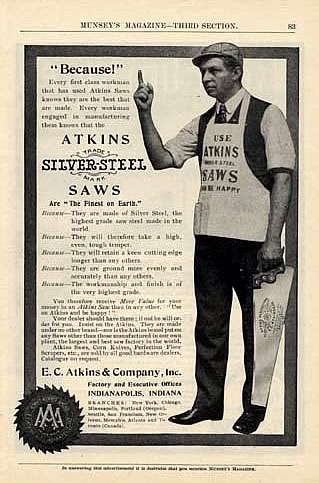
The E.C. Atkins No. 53 was intended to be an everyday user’s saw (as far as I can tell). The”Silver Steel” was a trademark of Atkins saws as was the “Perfection Handle” and the “Damaskeen Polish.” Beyond that, I have not found a lot of info related to the merits of the characteristics.
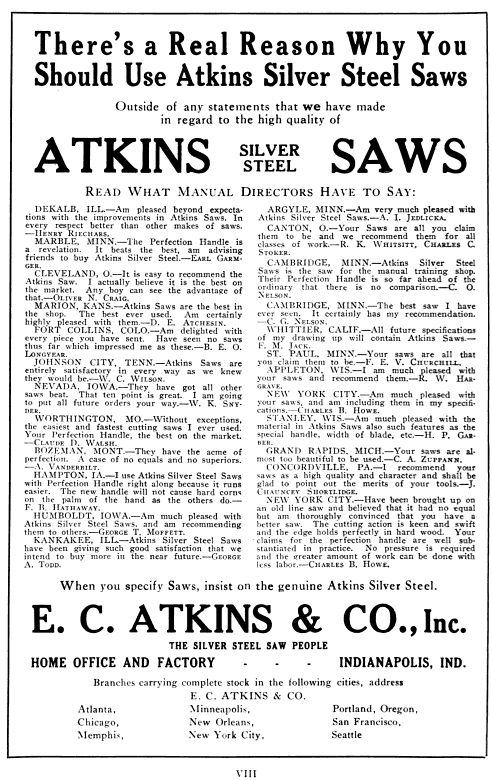
In the 1913 equivalent of online reviews we have published reviews from the Manual Training, a journal for people who taught or ran schools for woodworking.
So enough of the history and promotions of E.C. Atkins & Co. Inc. On with the cleaning up of my … errr… my son’s saw.
Atkins 53 Saw Handle
The tote on this saw was in reasonably good condition. It did have some scrapes and dings that made it a little rough to hold and the top and bottom horns had some broken bits that were prone to splitting out, so it needed more than a simple cleaning to turn it into a safe and comfortable user.
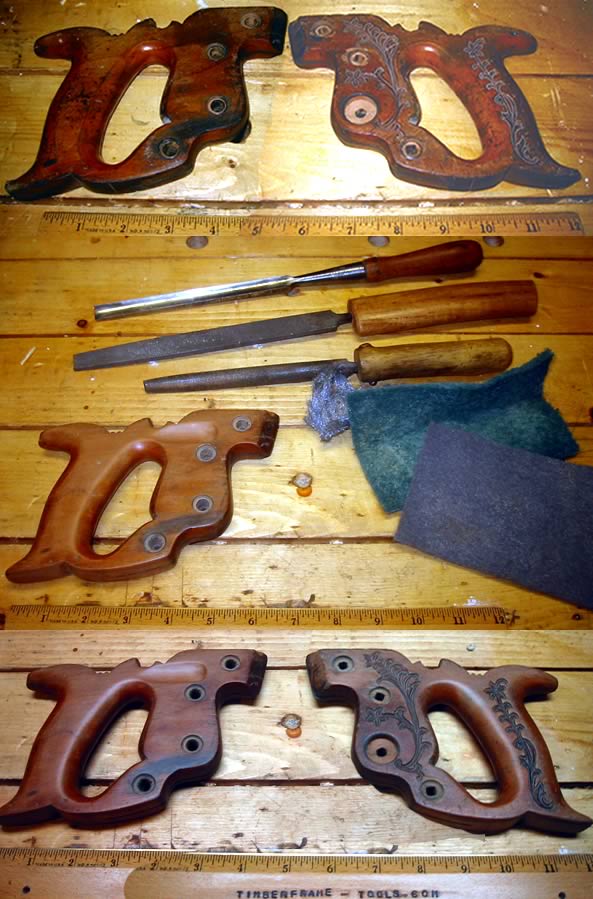
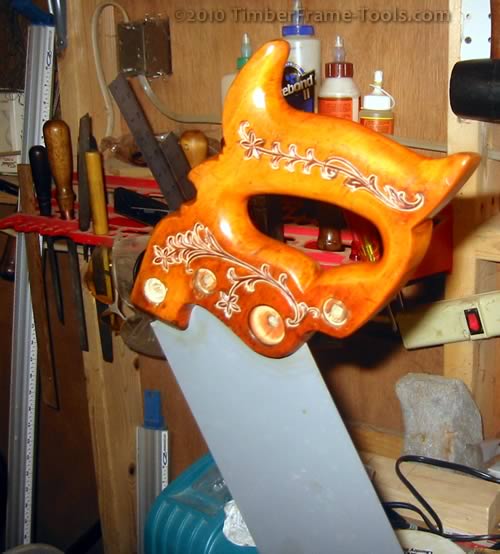
The top shows the tote as found. The middle shows the tools I used, and the bottom shows the results of the cleaning and shaping, but not finishing.
I used some files to remove the slightly damaged bits of the horns. I took them down to where the wood was solid and then shaped them smooth. I also sanded down some of the other sections that had scratches or dings that made the saw less comfortable to hold. I rubbed down most of it with coarse steel wool, and then some scotch sanding pads. I was trying to make it comfortable, but yet not remove some of the stains and indications of wear. I was not trying to make it look new.
Then I committed what some restorer’s will consider a sin. I held the tote in my hand and used a pencil to trace where my index finger resided. I then used a gouge to make an impression for my index finger to rest in. I have done this on a few saws and I like the feeling of it. This saw is a USER and I will do what makes it more comfortable for me…errr… my son to use. I smoothed the curve into the rest of the tote with a bit of steel wool and then got ready to finish it.
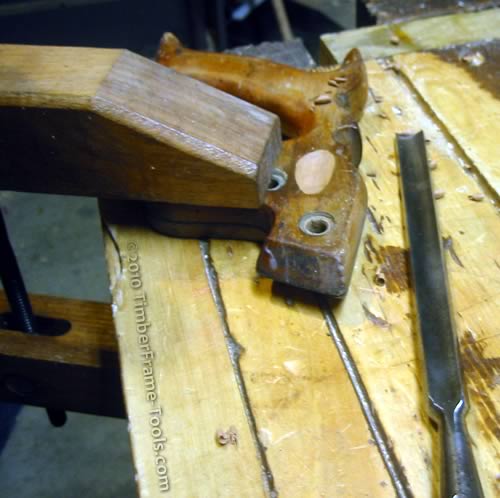
I used a bit of amber shellac with a bit of boiled linseed oil mixed in to make it easier to wipe on. I slide the handle onto a piece of flat steel and then clamp the steel into a vise. This securely holds the tote while I apply the finish.
While the finish was drying, I worked on cleaning up the medallion and the saw nuts. I am not into having them shine, but they were un-evenly dirty so I wanted them each to look alike. They are brass and I used Bar Keeper’s Friend which is a powder but non-abrasive cleaner. I just wipe it on with a damp sponge (not the abrasive side) and then wipe it off a few seconds later and rinse well with water.
Atkins 53 Saw Plate
The saw plate on this saw was in pretty good condition to begin with. It didn’t have a lot of rust and mainly needed just a good cleaning.
For cleaning the saw, I lay it on a piece of white bathtub surround. I do this because it is flat and it keeps the ooze from getting all over my bench. I then spray the saw plate with a lot of WD-40 (I know a lot of people use mineral spirits but I can’t use that inside). After it soaks with WD-40 on it for 10 minutes or more, I use a razorblade scraper with a new blade in it, to scrape from heel to toe and work the crud to the end. Then I continue that a few more times, applying WD-40 as needed to keep it wet. Every so often I mop up the slurry of oil and rust and crud then do it again.
Caution: I don’t try to get to0 close to the holes for the saw nuts with the scraper because there is always a burr around the holes that will ding the razor blade which will then leave scratches on the saw plate. So I always do the region around the saw nut holes last. Usually this area needs less cleaning anyway because it is protected by the tote. Replace razor blades often.
When the one side of the saw plate looks free of grunge, I flip it over and do the other side. The razor blade should cause no harm to the etch on the saw plate. Usually I find when you think you are done scraping, you can actually do a couple more rounds of it. The more you do, the less work will need to follow.
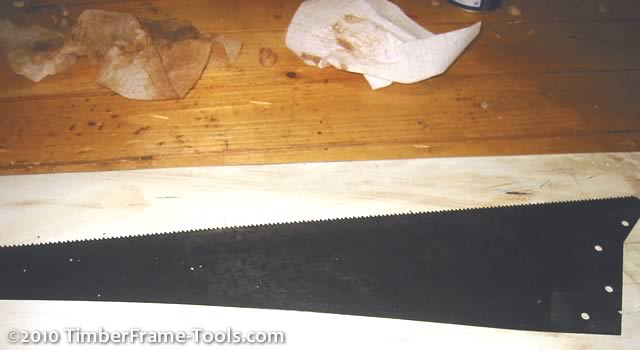
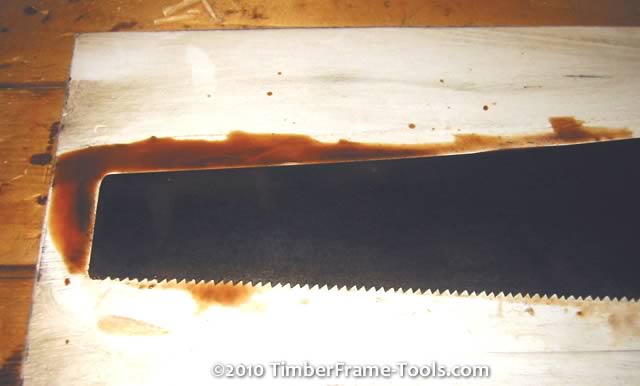
Here is the saw plate after scraping has been completed. This blade is actually fairly bright but it doesn't show that way in the photo.
If the rust scale has been removed, you could turn to electrolysis, naval jelly, or evapo-rust to brighten the plate and get rid of any rust that may be inside pits. I’m a fan of Evapo-rust, but this saw didn’t really need it. So I just used a bit of Bar Keeper’s Friend on it. Again this is a non-abrasive cleaning. If I were concerned about preserving the etch, I would not use the cleanser on it because I think it may fade it some. (To have a polished blade AND preserve an etch you have to use a flat sanding block and work from 22o wet dry paper on up.)
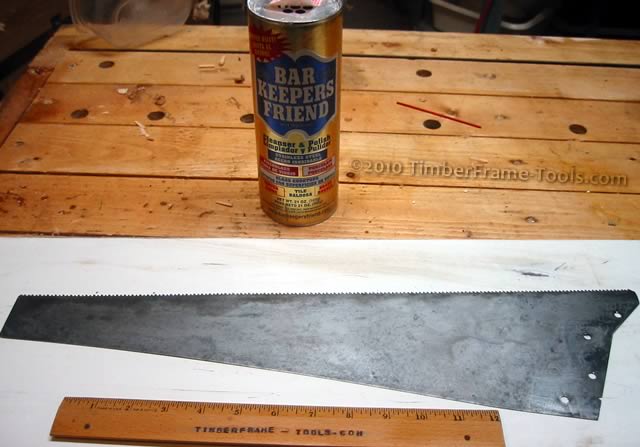
This is what the plate looks like after rubbing in some Bar Keeper's Friend with a non-abrasive sponge.
I am happy with the way the saw plate looks at this point so I stop. If I wanted a shinier and smoother blade I would have to turn to wet-dry sandpaper on a flat sanding block with an oil lubricant. There is more than just a superficial benefit to the shiny smooth blade, it should have less friction in the cut, and be more resistant to rust.
Sharpening the Teeth
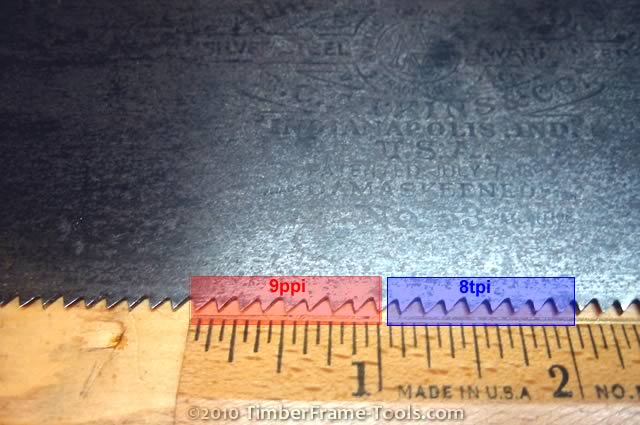
I have a few crosscut saws and a few large teeth rip saws. What I lack is a rip saw that has finer teeth that can cut deeper than my dovetail saw. So I made the decision to re-shape these teeth to rip rather than crosscut to fill a gap in my saw nest… err … my son’s saw nest. This saw is 9 Points Per Inch (8 Teeth Per Inch) and I intend to keep the same number of teeth, just alter the rake and remove the fleam. This will convert them from little cutting knives into little chisels.
This is not a lesson on saw sharpening, for that go to VintageSaws sharpening primer.
First I jointed the teeth with a file to get them all to the same flat.
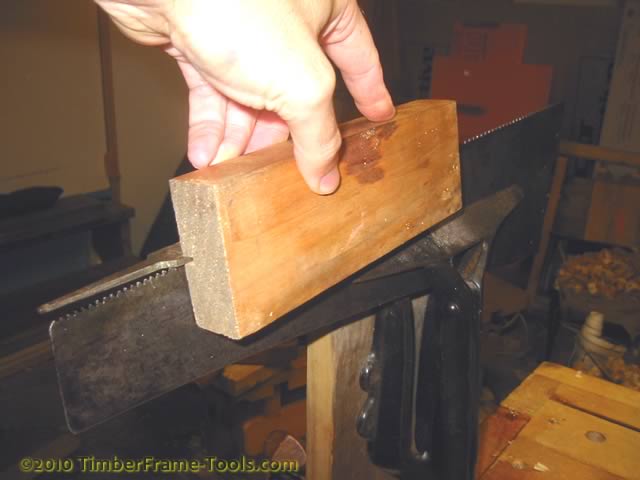
Saw jointer working on flattening the teeth tips. (not square in photo due to good hand taking the photo)
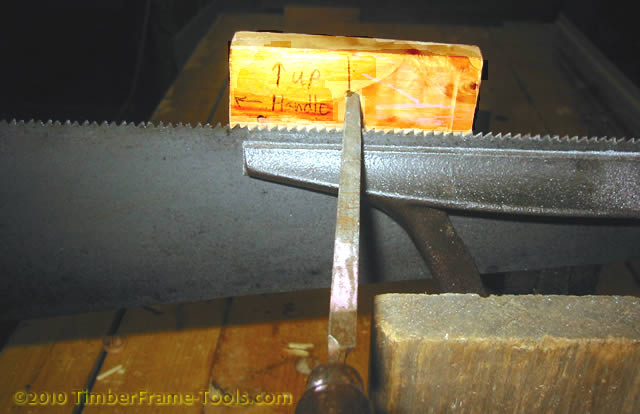
Then I used an extra slim taper file to shape the teeth, working to remove half the flat in each direction. The filing motion is straight across the teeth, and my guide block helps me keep a consistent rake.
After shaping all the teeth, I then did a light joint and sharpened them which is essentially the same movements, just with a much lighter touch, and a fresh file. Since I have never made a finer toothed rip saw for something other than dovetailing (no set) I was unsure how much set this saw would require. I chose to just use their existing set for now and see how it goes as I use it some. I dragged the side of the teeth along a fine sharpening stone to remove any burrs.
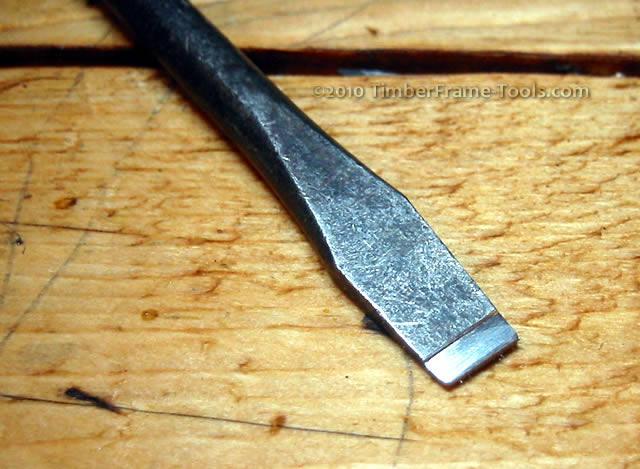
I then reassembled my …err… my son’s saw using my modified “Saw nut” screwdriver, which is nothing more than an old screwdriver with the tip filed more narrow along the flats of the blade. For some reason, old saw nuts (not the split nuts) have larger heads, but very narrow slots.
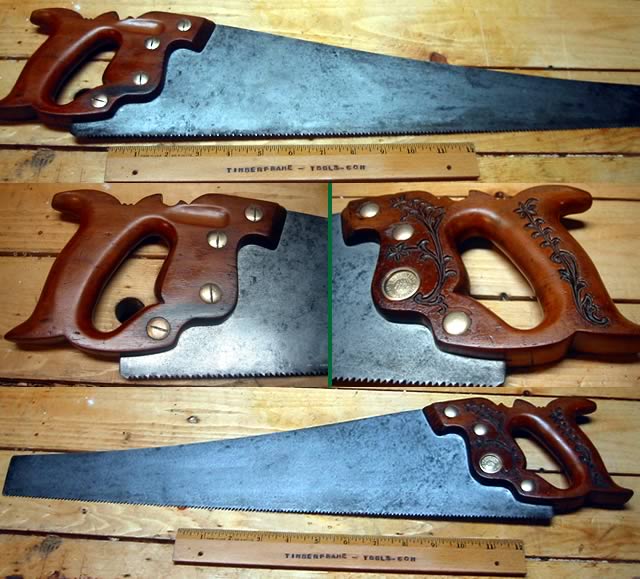
Okay enough close-ups of screwdrivers, here is the finished 20″ Atkins 53 Saw. It makes a fine addition to my …err… my son’s collection.
Thanks for following along. This turned out to be a much longer post than I intended. 😉
Atkins Saw Resources
- Atkins Saw Sense – scans of an old pamphlet put out by E.C. Atkins & Co. Inc
- Atkins Saw Advertisement in Popular Science March 1924 and another from June 1924
- Atkins catalog from 1894 from Rosewood Antique Tools (pdf 9.9MB)
- Atkins Saw Farm book 1931 from Rosewood Antique Tools (pdf 11.6MB)
- Company history and other publications on wkfinetools.com
- E.C. Atkins & Co history on OldWoodWorking Machines
- Saw Cleaning Instructions from VintageSaws.com
- Sharpening Instructions from VintageSaws.com


Neat. I’m a bit of a saw snob myself and I’m finding that I prefer the Atkinses over the Disstons. Did a No. 53 over at Sawmill creek. Those are really good saws; the steel they used was excellent and I think the taper is ground better than on a Disston. I haven’t found a panel-saw sized Atkins like that yet. I’d date it to about 1890 – 1905 from the embossed floral print. It’s kind of midwestern art nouveaux. If you haven’t had a 20″ size yet you’ll find it’s really handy around the workbench.
Thanks Jay, I appreciate the help with the date. Is there a reference you use for dating Atkins saws? I saw that 26″ saw you did over there… at least I think this is yours? It looks great and there was lots of good info in that thread.
Thanks also for not calling me a heretic for filing the little saw rip and carving in a finger rest. 😉
Nouveau. Sorry.
Yeah, that’s me over there. As for the date, I’m going by advertising and style. I’ve got some files clipped from the internet, but they’re mainly from the same sources you’ve got. Darryl Weir scanned a catalog and posted the pages.
A panel saw with 6-7 tpi filed rip would be great for the bench top; there are a lot of situations where you need to do a rip cut 5+ inches long in a relatively short piece of stock, maybe in your end vise, and in that case a back saw’s back would get in the way. I did a 26-inch No. 65 Atkins rip saw with, I think, 5.5 TPI, and man that thing is sooo good. It’s got a very subtly progressive tooth pattern and despite my mediocre sawing skills, I was able to pull off a waste piece 1/32″ inch thick. I’m doing a sort of informal survey of all saws ever made, and so far I just like the Atkins saws better than the Disstons. I guess it’s sort of a Ford/GM thing, and I like the Fords.
8 TPI is a bit on the fine side I’d guess, but maybe it’s a good bridge between a 4-5 TPI full-size 28″ rip saw and a 10-12 TPI carcase saw filed rip. Get a 15 TPI dovetail saw, and your cabinet making ripping arsenal is complete! Whether it works is the most important thing, and if you’ve taken some test cuts and it suits your purposes, what’s not to like?
You are right, 8tpi is a bit on the small side. I have a 4-1/2 and a 5 and they are great (Disstons), but sometimes just too big. I didn’t want to undertake re-toothing this one so I kept the same tooth count. I re-toothed a 9 to make a 4-1/2 once by taking out every other tooth. It was fun…but I’m not planning to do it again any time soon.
http://www.mvr1.com/atkinssaws.html