My workshop in FL is still not ready yet, so here is one from a collection of things from my time in NY that I had not gotten around to posting.
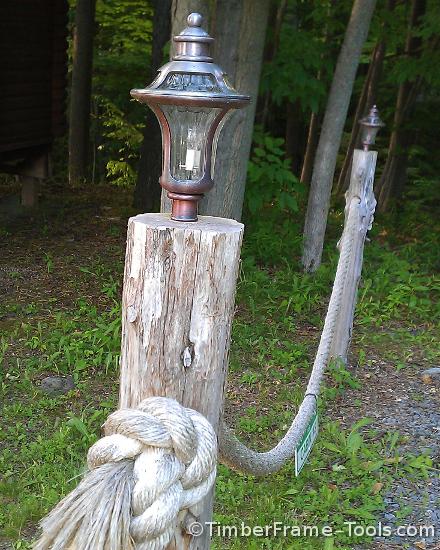
On our property I needed some outdoor lighting to keep our B&B guests from bumping into things in the dark. Any of the modern outdoor light-posts you could buy in the store just didn’t seem to match the style of our Log Home in the woods. So it was up to me to make something. Fortunately I had all these naturally harvested cedar logs (they fell down on their own in the woods). They are naturally rot resistant and fit right in with the style of our property. The challenge was in how to run the electrical wire up through the log. The posts were going to stick up above the ground 4 and a half feet, plus another 3 feet below ground. I had no drill bit that could bore through 7 feet of log in one shot. So I looked for alternatives.
One option was to rout a slot up the side of the log. That would have been pretty visible, difficult to do safely on a log that is not flat, and would have ruined a router bit from routing through all the dirt that is often present in the surface of the cedar.
The second option was to use a 16″ bit and zig-zag my way from one end to the other. I went with that option as it was more easily achievable and would not be all that visible.
The Lamp Drilling Technique
- I started with each log cut to 7 feet in length.
- The lights I was using were low voltage stick in the ground style. I cut the 12″ long pipes they came with, down to 4″.

By unscrewing the base pole, you can remove the wire, and cut the pole down to 4 inches, then put it back together.
- In the top of the post, drill a hole that has a diameter that matches the diameter of the pipe that makes up the base of the lamp. Use care to make this as straight in line with the cedar post to keep the light from looking crooked.
- Use a 16″ long 1/2″ spade bit to drill a hole starting at the base of the hole made for the lamp pipe. Angle the hole enough so that the bit will exit through the side of the log.
- Use the exit hole as the entry point for the drill and drill down toward the bottom of the log, angled such that the bit will exit the side of the log. (see animation below)

This animation shows the progression of drilling in a zig-zag pattern down the lamp post.
- The last exit hole needs to be just a few inches below ground level.
- Once the holes are drilled you can start feeding the wire from the lamp down toward the bottom of the lamp post.

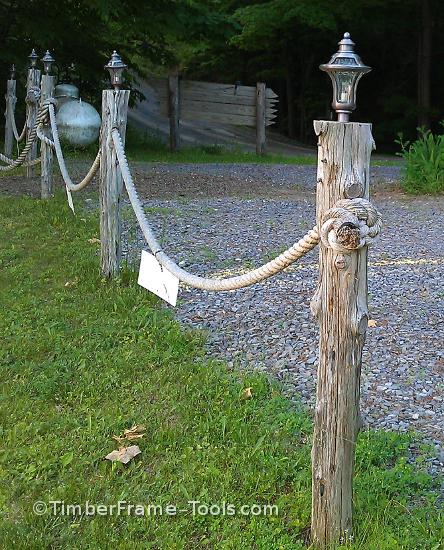
Here you see a row of rustic lamp posts. complete with 2" manila rope running between them.
In our case, we wanted 2″ diameter manila rope to string from one to the next. I measured down from the top of each post and marked where I wanted the hole. I then used a hand auger to bore the hole in each post. The hand auger has enough force to split the cedar posts, so I used a large handscrew clamp to clamp the sides of the log on each side of the hole while I bored.
I learned something I never knew before. When manila ropes get wet, they swell and twist. This causes them to shorten in length considerably (like 10% or more). The extreme sag you see in the photo above will completely disappear and the rope will become taut after a rain storm. If I shortened the rope to remove some of the sag when dry, the wet rope would pull the end posts enough to make them lean.

The natural rot resistance of these cedar posts will let then last for many years.
I used a clamshell type post hole digger. If you have several posts to do, I highly recommend getting the more expensive versions with the handles that bow out a bit to keep your knucles from knocking together and the double scissor pivots that let you get more dirt in each mouthful. They are worth the extra $20. If you are working in rocky soil, I also recommend an iron digging bar for busting or prying rocks. I prefer the ones with the hardened spike point on one end for busting rocks, and the chisel tip on the other end for prying rocks. I dug the holes down about 3 ft, then used a water level to get posts level by starting with the one that was currently lowest, and then digging each of the others lower. I just used crushed rock around each post to allow for some drainage, as opposed to concrete which would keep the posts constantly wet.

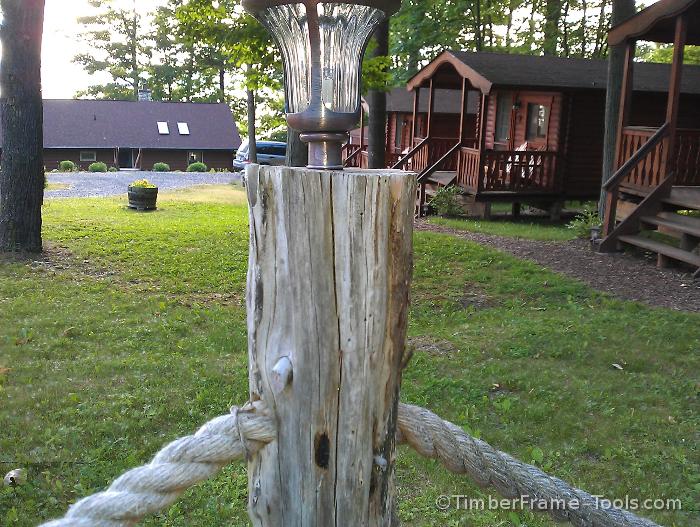
Rustic, recycled, solid.
With this project completed, I was anxious to watch nightfall roll in so I could see how they looked …. perhaps a beer to pass the time. Four years later we sold the place, but at that time, the posts still seemed plenty solid and still looked great.
Good to hear from you again. Get back to making stuff 🙂
Thanks David. I hear you… I need to get back to making stuff. Right now my shop needs a lot of work and is not conducive to getting anything done. Change is coming though.