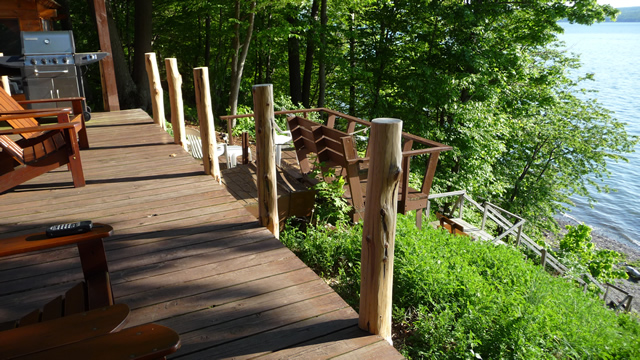
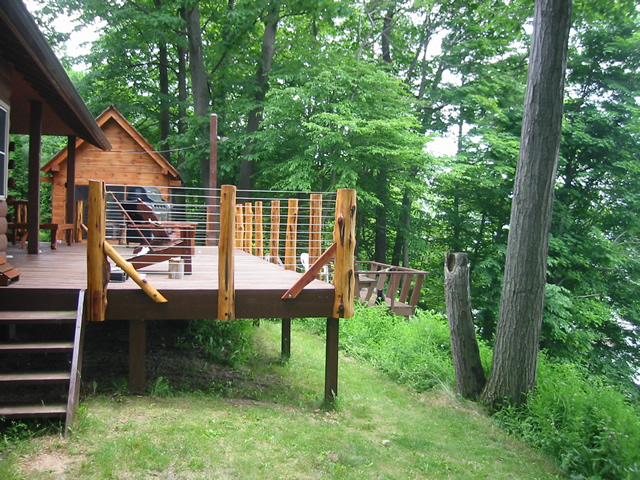
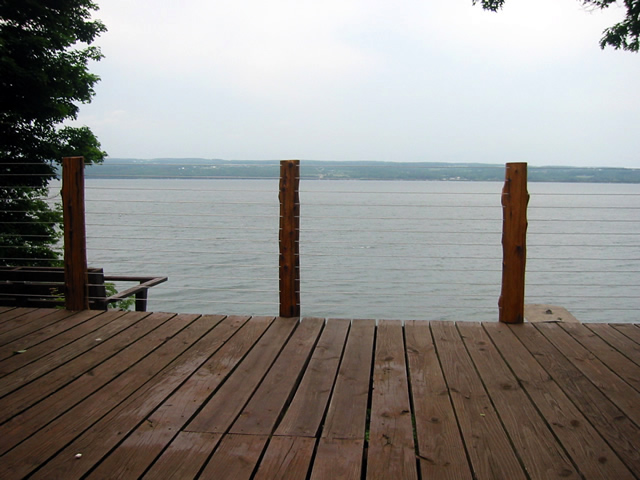
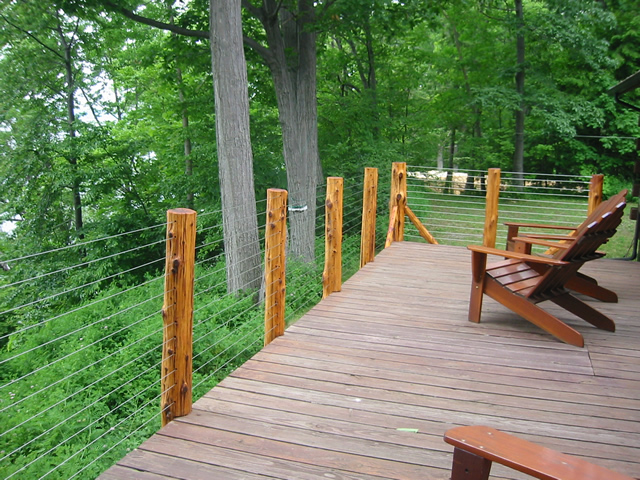
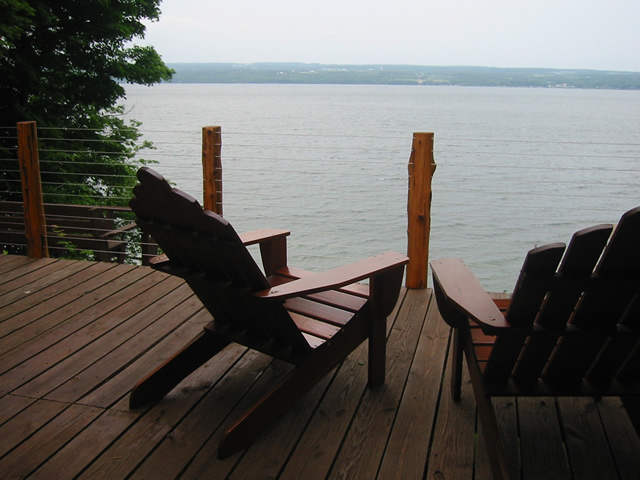
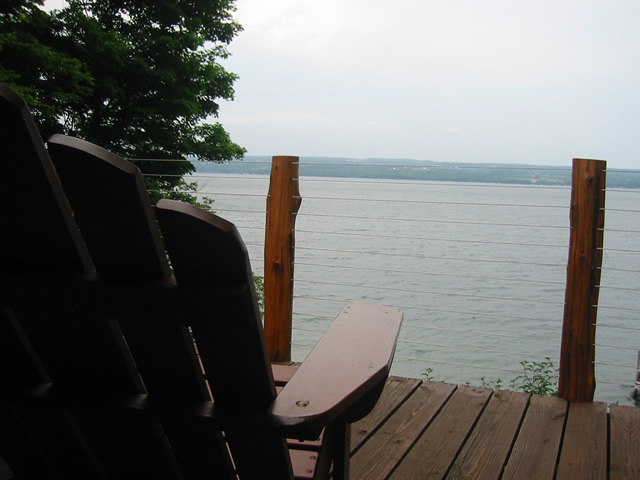
The deck on our log home overlooks the lake. It needed a railing for safety but we didn’t want a railing that would block our view. So we decided to use stainless steel cable railing, but needed the posts to fit the style of our log home.
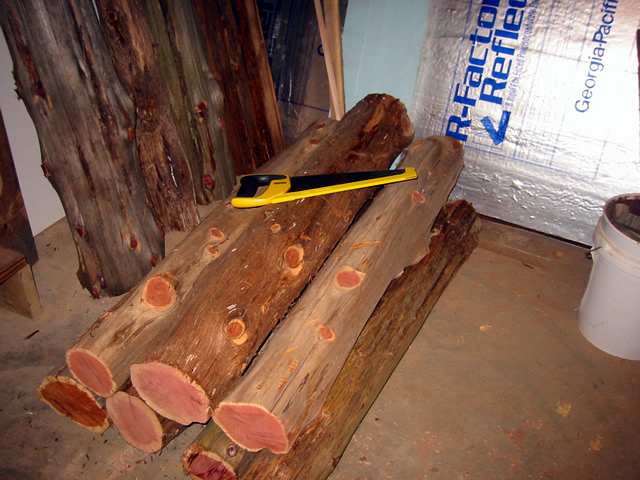
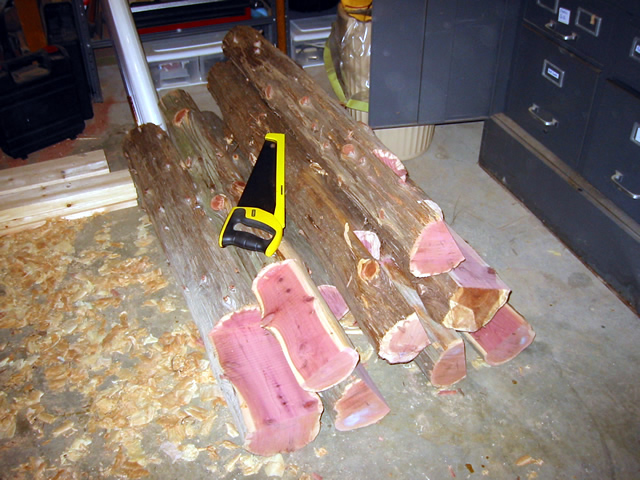
The forest around our home is primarily tall pines and a variety of oak, walnut and other tall trees. It is also full of old, dead cedar trees that were unable to compete with the faster growing trees and at some point just couldn’t survive all the shade. They sit in the forest and remain solid and un-rotted. They were the perfect choice for railing uprights. So I harvested 14 4′ sections.
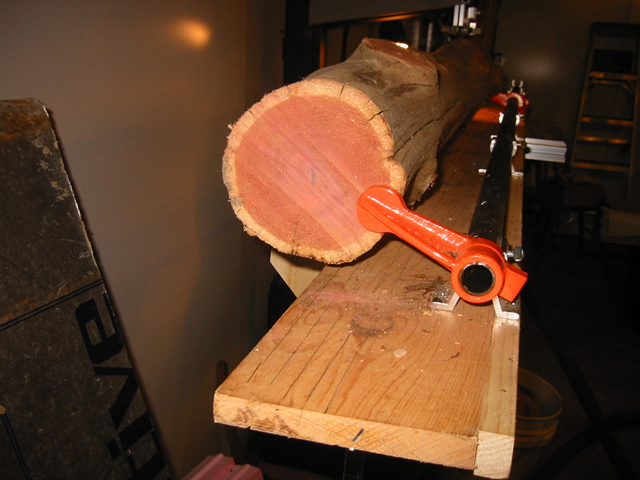
Once trimmed to length, I needed to notch the end of them so they could sit on the edge of the deck and get bolted to the deck frame. I needed these cuts to be parallel to the vertical axis of the post otherwise they would be crooked. The problem is trying to remain true to a line when the item has no flat side. It is not easy and a bit of an exercise in aggravation. My hope is that any lack of precision will get hidden by the natural appearance of the logs.
I used a sled with a pipe clamp attached to hold the post while I ran it into the bandsaw 11″ (I’ll cover more of the details of the sled in another post)
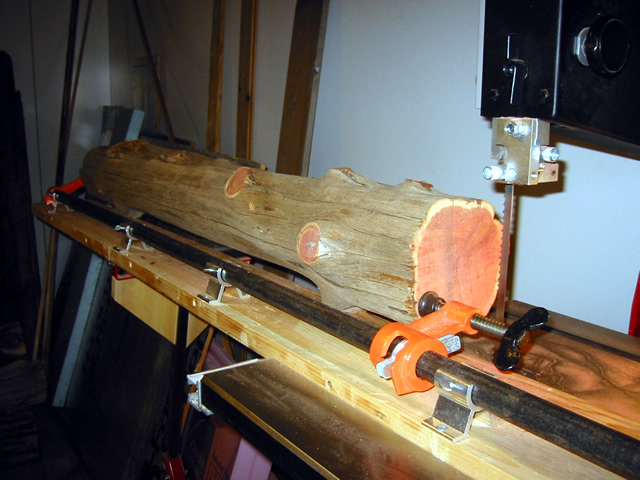
With the line cut vertically through the post, I used the handsaw to remove the segment to make the notch (more like a half-lap actually)
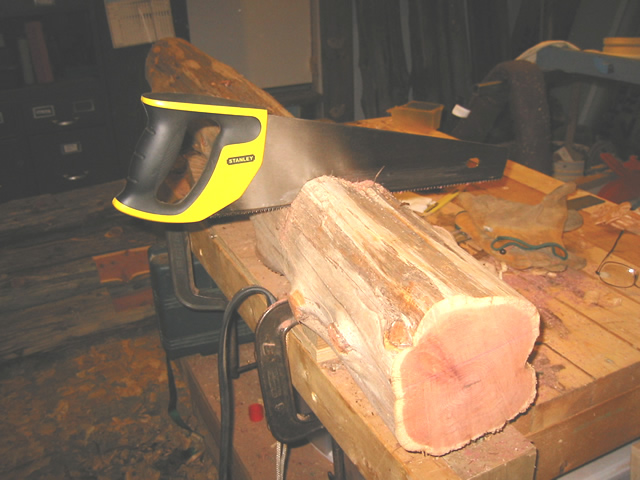
These toolbox sharptooth saws by Stanley are great. They cut well (on both the pull and push stroke) and they are rigid enough to not bend when you are in the middle of a cut.
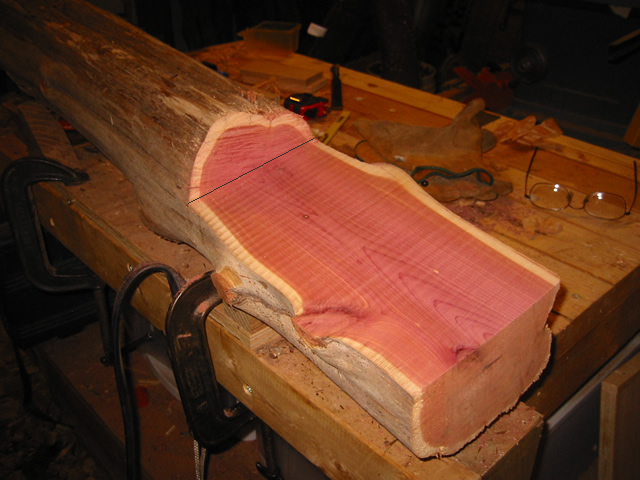
The cedars even though they are old and gray on the outside are still very red on the inside. Some of these timbers have probably been lying on the forest floor for a decade or two, but you can’t tell by looking at the wood.
With 13 posts ready to go, it is time to start cleaning them up a bit.
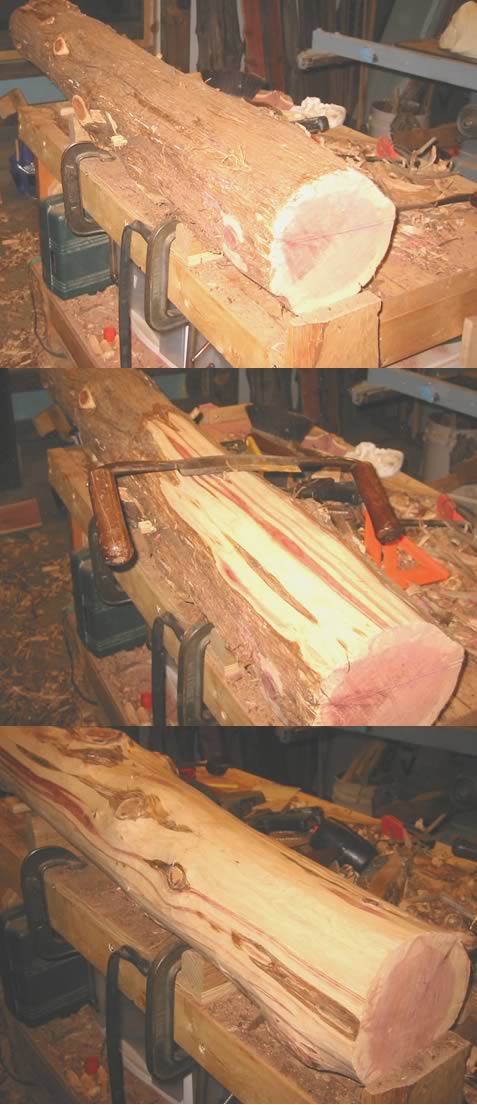
The drawknife (drawshave) does a great job of removing any bark that remains or any weathered gray wood and leaves a smooth finish. The wavy grain around the knots and the knots themselves are sometimes a challenge. I also kept an old wide chisel (a beater, not a good one) close by for hacking down some of the knots.
With all the posts cleaned up it was time to bolt them to the deck. I used 5/16″ carriage bolts and counter sunk them using a Forstner bit.
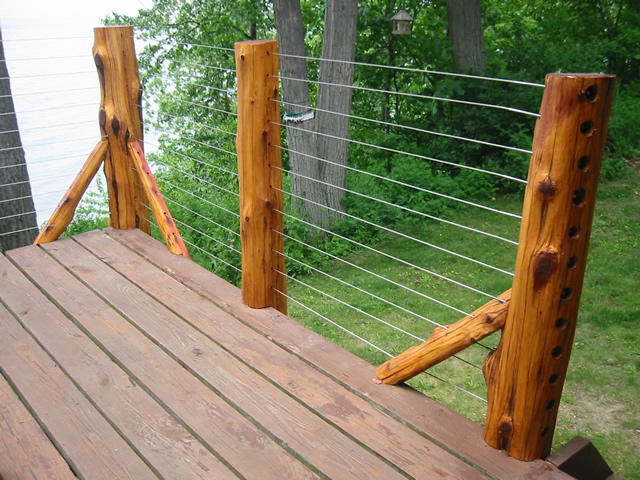
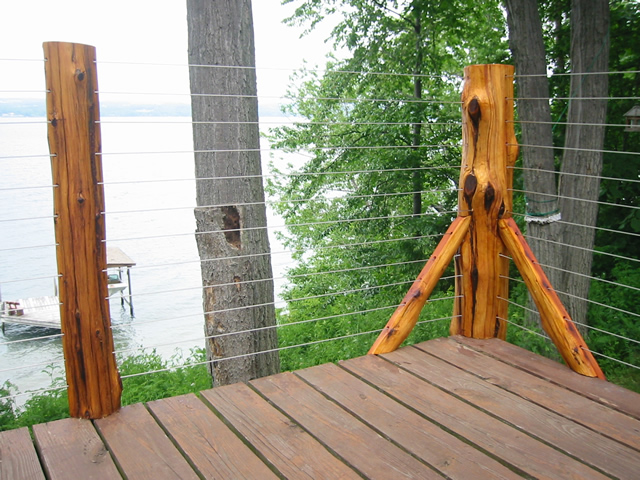
The end and corner posts needed some braces since the cables will need to be drawn tight and may put extra stress on them.
The cables had to be placed three inches apart and here is where, once again, trying to remain plumb and level and parallel to an irregularly shaped object like a tree is a bit of a challenge. You can’t exactly use a drill press for consistent results.
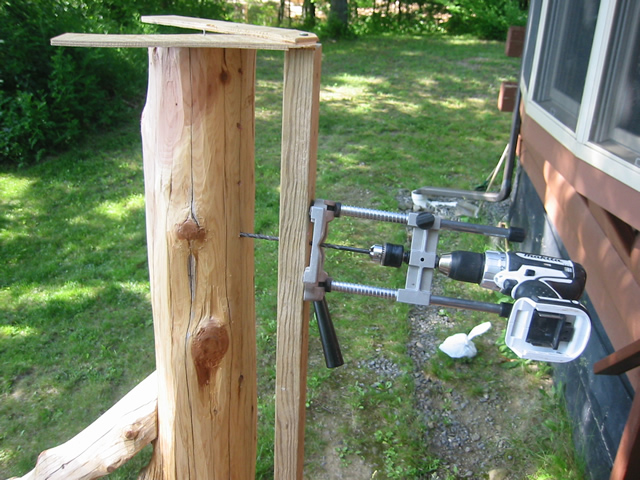
I built a bit of a jig that I fastened to each post as I went along so that I could drill a dozen holes in each one. The bit was a 10″ long 1/4″ diameter and it had a tendency to wander as it encountered knots and grain variations. There was not a lot of perfection here..but the errors are not very noticeable… I hope.
The jig was simply a 2×4 that I used drill press in my shop to drill guide holes every 3″. The bottom had a notch that would sit on the deck and tab that would make sure it was aligned to the front edge of the deck. A finishing nail allowed me to tack the bottom in place. Two small scraps of plywood nailed to the end of the 2×4 allowed me to tack the top in place after using a level to make sure the jig was plumb and square. The hand-held press then kept the drill reasonably square to the face of the jig. The long drill bit made it fairly easy to sight down to the front face of the deck and keep the bit aligned to that.
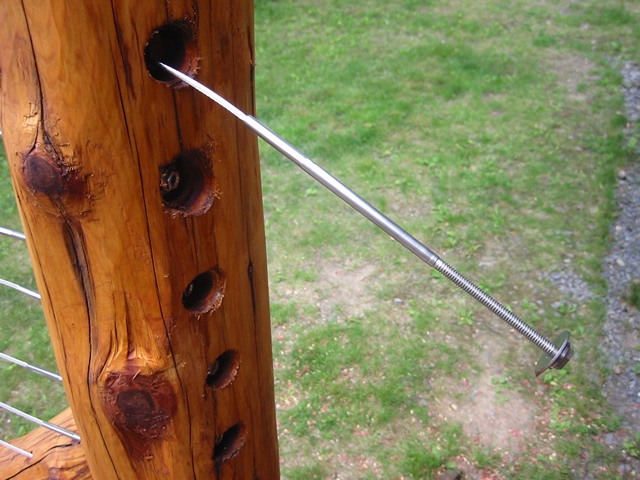
The cable system I used (Cable Rail by Feeney Architechtural) has a threaded terminal and a nut on one end to do the heavy tensioning of the cable.

The other end has a proprietary fitting that allows 1/8″ the stainless steel cable to be pulled through one way, and grabs on tight when it is pulled in the other direction. (a one-way valve for the cable). The system is made of all stainless steel and is one of the more expensive systems out there, but the hardware and design made it all worth it.

Once all the cables are threaded through, your pull them tight with a pair of vice grips (as tight as you can pull by hand), then you go to the threaded terminal and tighten them with a wrench.
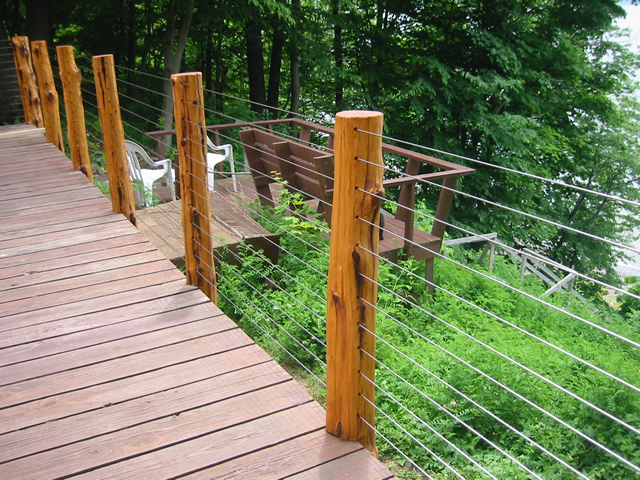
When you are done, you have a safe deck railing that blocks very little of the view and should last for a very long time.

When it came time to treating the posts, I chose my favorite stain for outdoor use, Sikkens Cetol SRD. Unlike Cetol-1, Cetol-SRD does not build up a finish. It simply colors and protects the wood in one coat. I have used it on the gazebo and on the cabins and have been very happy with it.
great site – loved this deck design thnx for the source links
Thanks Byron, The deck railing is now a year old and the cable is still holding up great. Looks brand new.
Great job on the deck. It looks like a masterpiece.
This is really great, you did a wonderful job, where did you buy the stain? And if you don’t mind me asking how much did you pay for all the cable railings?
Thanks Jacquie,
The cables and fittings were around $1500. The cost is dependent on length so you order just what you need plus an extra foot or so. Sikkens (the stain) is not sold in the stores like Home Depot/Lowes. But in most towns there are paint specific stores that carry it. In North America you can find a dealer by going here http://www.nam.sikkens.com/find-a-dealer.cfm
Hi.
I love the look of this! But I have a question, we have two curved decks on our home, one on the first story and one on the second story. We need to replace the railing and are having trouble finding something affordable due to curved nature of the original railing. I think a cable system like the one you have here could work nicely but I wonder if it would feeling scary, especially on the second floor without a top rail. Your railing looks totally safe but I wonder how it would feel higher up off the ground. Does it feel safe when you’re on it? And what do you think about putting something similar on a second story deck?
Any feedback would be much appreciated!
thanks!
Jennifer, The cable railing is safe and feels safe. The technical requirements for the cable railing is that the posts are connected to each other by a top solid rail. Because ours is only 3-4 feet off the ground I felt safe leaving the top rail off. If I were putting it on a second story, I would be more inclined to follow the manufacturer recommendations and put a top rail in.
Another thing to keep in mind is that the cable will not follow a curve. It will go straight from one post to the next. So it will take your curve and make it more like an octagon. The more posts you have, the closer it will get to approximating the curve.
Very cool, thanks for the feedback! I think we’re going to try this (or something like it) in the Spring.
🙂