It is said often enough that “Necessity is the Mother of Invention,” and I believe that is true. I am also a believer that Thriftiness is the Father of Invention. This dock bench I made is a perfect example.

Here on Seneca Lake the wind can build up quite a head of steam and it has had a history of blowing any piece of outdoor furniture off the dock and into the lake, where the waves can then beat the crap out of it. That was the case until I built these windproof dock benches. These benches have been on the dock for seven years old now and have not once even come close to being blown off the dock, or even toppled over.
Typical dock furniture either has to be screwed or bolted down to keep it from going in the lake. I didn’t want to fix it in place, I wanted people to be able to move the seating as needed. So it had to be heavy enough to stay put on its own, but still be able to be dragged around by an adult.
Father Thrifty Comes Home
After building our cabins, we had a lot of ends of Pressure treated 6×6’s that were less than 2′ long. We also had left over boards (oddly shaped 3″x4″) that were used in the shipping of the cabin logs. They had a groove down the middle of them where the metal band that strapped the pile together ran. I didn’t want to burn the Pressure treated scraps (no good for humans or the environment) and I also didn’t want to send them off to a landfill. The strap blocks were too cool to waste as well.
So I hatched a plan to build the legs of the benches with the 6×6 scraps and then use the strap blocks for the seat. Of course I also had this goal of not using any metal (a common theme for me I am afraid)

So I cut the 6×6’s to 18″ in length and stacked them up. 3 high makes for a pretty comfortable height. I notched out the bottom 6×6 to give it some feet to make it more steady on the less than perfectly flat dock.
The blocks would be held to one another by 3/4″ diameter dowel pegs. But first one piece of support had to be dovetailed into the lower portion of the middle block.
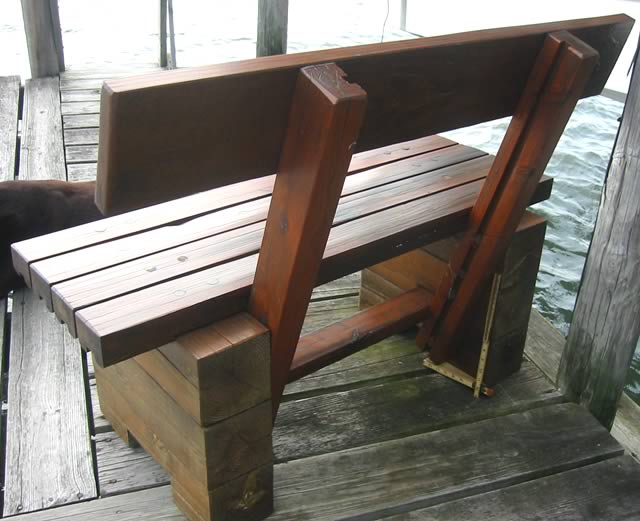
In the picture above, the horizontal 2×4 keeps the sides from racking. This stretcher could be simply notched in and pegged in place with a peg or it could be dovetailed with one giant tail. I made one bench with notch and peg and the other with dovetail. I can’t tell the difference between them in stability, but in the end, the dovetail one was actually easier to create and should be the stronger of the two.
So with the stretcher dovetailed into the bottoms of the middle blocks it is time to join the blocks together. Stacking the middle block on top of the bottom block (the one with the feet) made it easy to drill the holes for the dowel. Using a long 3/4″ spade bit I drilled down through the middle block into the bottom block, then pounded in a 3/4″ dowel and cut it flush. The pegs end up being about 8-9″ long.
As just about all pegging I do, the pegs were not parallel to each other. I skew them a few degrees in opposite directions so that as the wood shrinks, it actually pulls them tighter together. I put three pegs from the middle block into the bottom block. Then I stacked the top block and repeated the process to connect the top block to the middle block. I could have gotten a longer bit and drilled them all the way through, but that is a long way to have to drive a long peg and if it got stuck only part way through it could have been a mess to get apart to fix.
Care needs to be taken in the placement of the pegs that connect the top block to the middle block. You want them to be in a location where they don’t interfere with the pegs that hold the bench slats in (which are visible so need to be consistently spaced).
At this point the backrest supports can be put in place. The support tips back roughly 5″ for 12″ of rise. This support is held in place by 4 angled pegs. I chose to put Gorilla Glue on these pegs as an added measure of safety.
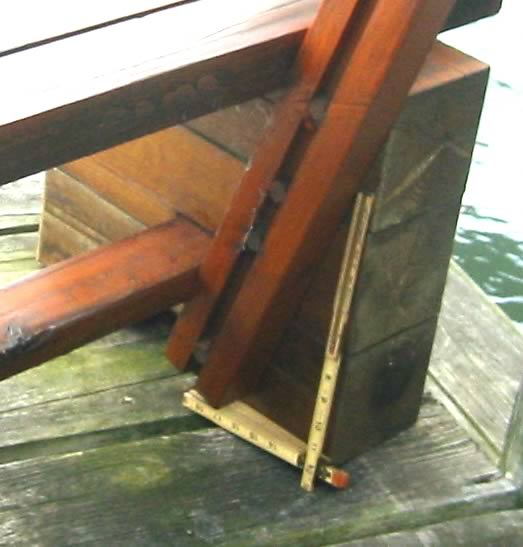
The groove visible in the photo is not required, it just happened to be present in the strapping scraps. These scraps were 3×5 and one of those 3×5 landscaping timbers would have been just as easy to use (I think a 2×4 would be too weak).
Notice that the pegs have to be spaced to not land into a gap between two blocks.
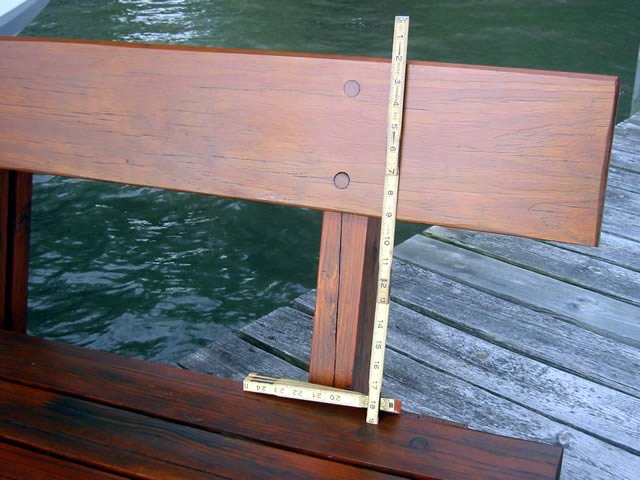
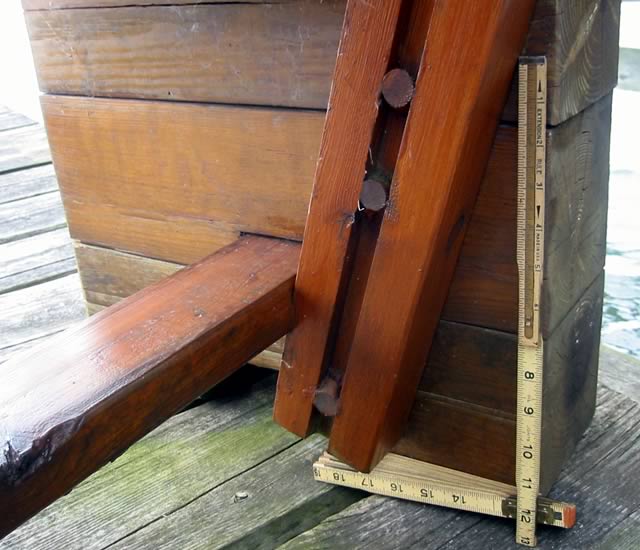
The backrest is a 2×8 that is pegged (with Gorilla Glue) to the supports. On a different bench I used a 2×6. It worked, but the extra width of the 2×8 is more comfortable. A bit of work with either a plane, sander, or router to ease the edges of this board does a lot to improve the comfort. (note that if I had used 3×5 landscape timber for the supports, it would have been necessary to notch the end so that the backrest mated up to a flat surface. The notch would also help give some strength.) From the carpenter’s rule in the photo you can see that the top of the backrest extends about 16″ above the surface of the seat.
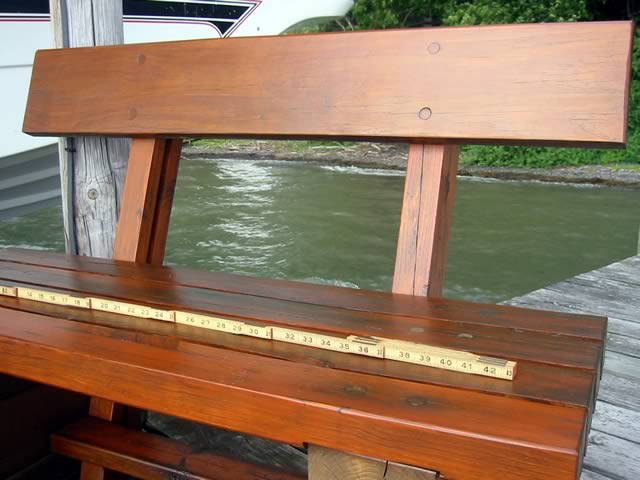
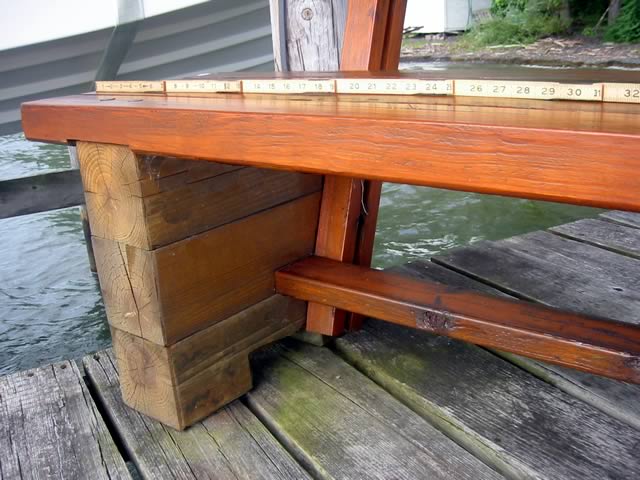
This particular bench is roughly 46″ long. I used the 3×5 strapping scraps for the top of the bench, though ordinary 2×4 would also have worked or 3×5 landscaping timbers. Notice that for each board their are two pegs into each of the two sides. I chose not to use glue on these pegs, but in hindsight I should have. They do creep a bit and need to be whacked down with a hammer once a year.
In the very bottom right of the photo you can see that I created a shallow dado in that matches the width of the 6×6 leg. It is probably not required, but I do feel that it ads some extra strength to the bench. If I had used 2×4 for the bench top, I would probably not have made the dado or at least would have made it much more shallow, like maybe 1/8″ deep.
 I finished the bench with 3 coats of Sikkens Cetol 1. This is a built-up breathable finish that is perfect for outdoor furniture. These benches sit on my dock all year long and take a beating from rain, sun, snow and hail. Every other year I wipe them down with a piece of #000 steel wool (to clean off any debris) then put on an additional coat of Cetol 1. They look as good today as the day I made them. The finish protects their look, and their weight keeps them from ending up in the lake during a windstorm.
Parts list:
- Six 18″ long pressure treated 6×6 (ends up being 9 feet)
- One 4′ 2×8 (does not have to be pressure treated, but can be)
- One 8′ 3×5 landscaping timber for the back supports
- Four 4′ 2×4 or 3×5 landscaping timbers for the bench seat (two 8 footers – does not have to be pressure treated.)
- One 4′ section 2×4 for the stretcher.
- Approximately 7′ of 3/4″ dowel
- Gorilla Glue