My clamps have been pretty much an accident waiting to happen. They’ve been hanging from various pieces of floor joist from the ceiling of my basement shop. It’s been on my to-do list for a while to make a clamp rack. It is funny how sometimes things just cause certain items on a to-do list to jump to the top. In this case, I found some cool wood in my firewood pile and started thinking.

Three pieces of curvy bug riddled camp firewood become shelf brackets with the help of a scrub plane.
A few years ago a neighbor of mine had a huge tree that had been cut down. It was laying on its side for a few years. The odd creepy thing was that when you were standing near it, it would make noise. It would erk, squeak and drrrk like I do after too much chili. When he cut into it, he found grubs. Grubs about the size of my finger were working their way around in the log and you could hear them. He eventually cut the log up and offered it to me for campfirewood. So I split it and stacked it down by the beach. That was a few years ago. Recently I was down stacking some more firewood and re-stacking some of the old piles and found a few sections from that old grub infested tree. There were three sections that had a cool curve to them. It occurred to me that they would make great brackets for a shelf. It also occurred to me that the love of my life would never allow grub eaten wood to reside in her living room. So I decided to use them in the shop for what would essentially be a clamp shelf.
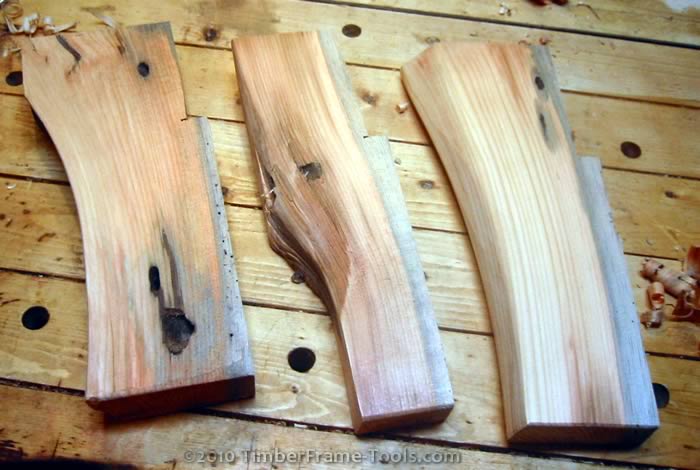
Notches cut in the backs to allow for French Cleat
I wanted the rack to be attached to the wall with a French cleat because I wanted to be able to move it if I found a better location for it. So I had to cut notches at the top to allow for the wall cleat to fit into it.
With the brackets finished, I needed to make the cleat, which is a piece of 3/4″ thick pine with a 45° chamfer cut along the bottom edge. Of course the my little shop helper was napping, so how would I cut the chamfer without waking him…with the jack plane.
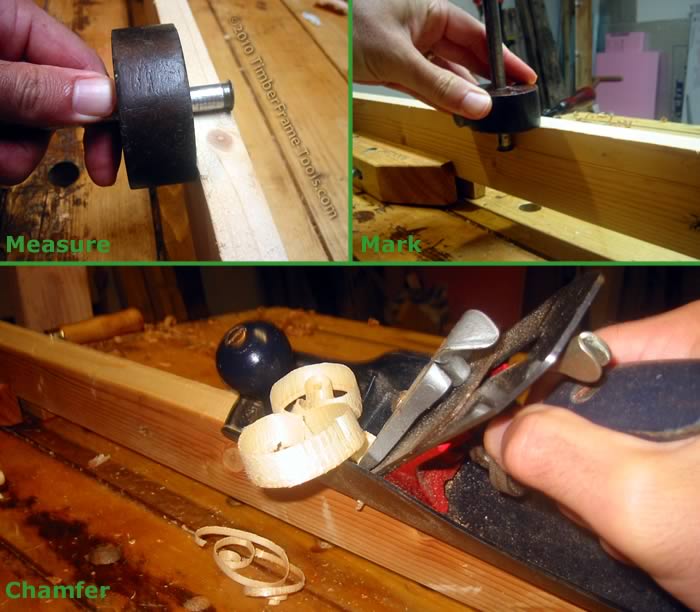
A chamfer cut as deep as it is wide will be 45 degrees.
I used my marking gauge and set it to the thickness of the board. Then I turned it and scribed the line on the adjacent face. Planing to hit both the depth and the width at the same time means I hit 45°. The deeply set iron on my jack / scrub plane made it go pretty fast.
The top of the clamp rack is made from 2 pieces of 5/16″ thick plywood that I glued together to get 5/8″. That gives it the rigidity it would need and the multiple grain directions it would need to keep the “fingers” from breaking off. To make the fingers I used a 5/8″ Forstner bit in my drill press to drill holes 2″ apart. I also staggered the holes by an inch front to back to keep from creating on long plane of weakness.
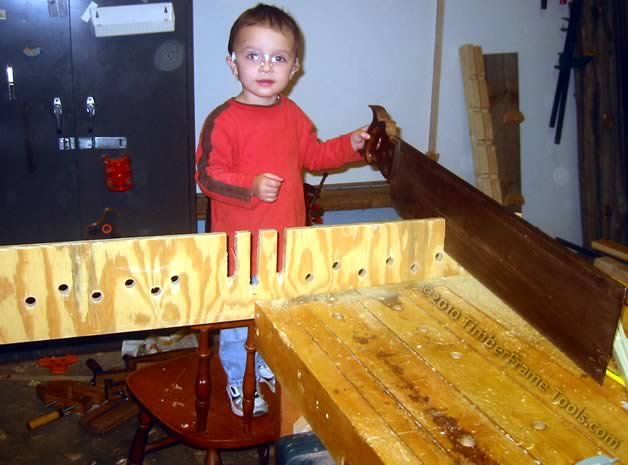
Cutting the slots out with a really big back saw.
With the holes all drilled, I used my newly acquired Disston 4 to cut the slots out to the holes. Sure this backsaw is 27″ long and 100 years old, but in only a few full-length passes it would cut the 4″ to the hole. And of course you can see in the photo that my son was up from his nap now so he had fun with it too. For some reason he just lights up when he gets to hold a saw that is bigger than he is. 😉
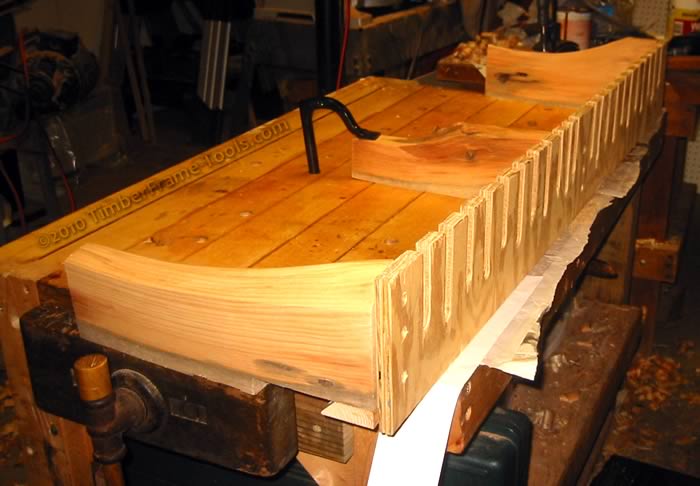
Gluing and screwing the parts of the clamp rack together.
Looking at the back you can see how the notch cut in the back leaves room for the wall cleat.
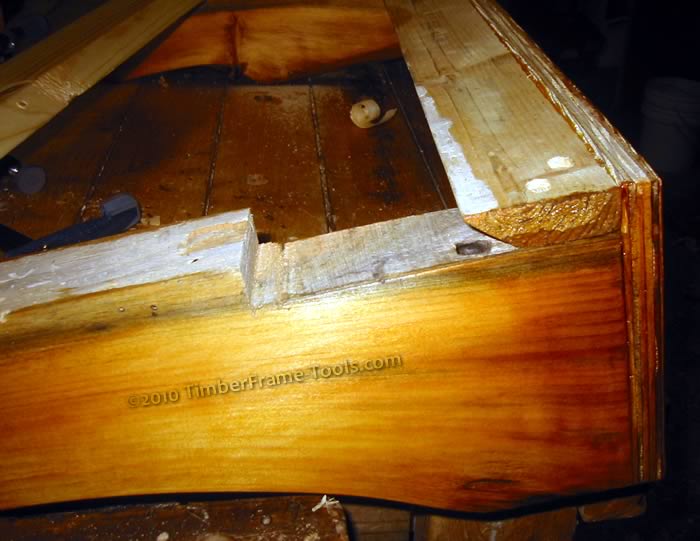
Remaining space for the wall-cleat.
I put on a quick coat of amber shellac and called it done.
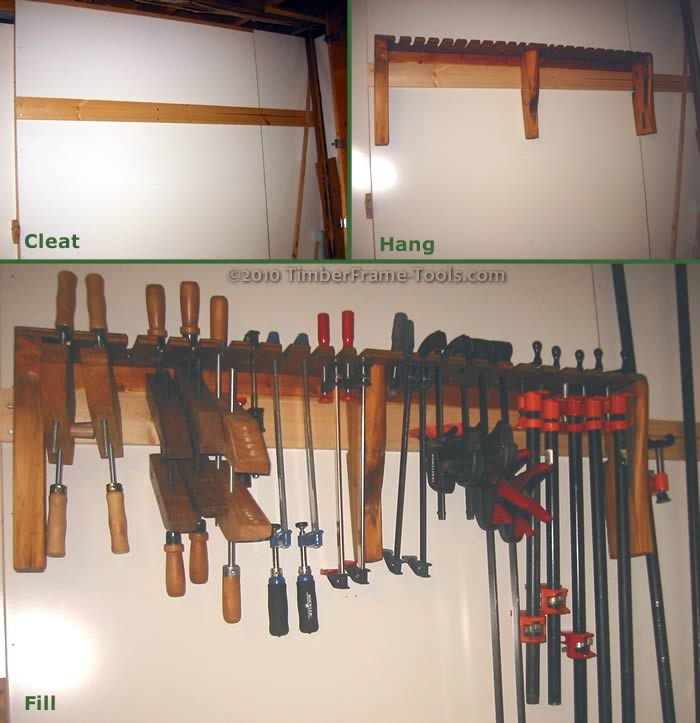
A full clamp rack is a happy clamp rack.
This clamp rack holds my handscrew clamps, my F-clamps, quick clamps, and pipe clamps. The only down side is that it is full already and I didn’t leave room for clamps I haven’t purchased yet.