There were several times when working on my timber frame project that I used a card scraper to clean up a bit of wood that had some nice grain or knot detail that I wanted to bring out. In the soft semi-green pine, the scraper worked pretty well without requiring me to pay a lot of attention to how sharp the edge was or how well the burr was drawn and rolled.
As I have transitioned to building indoor furniture and dried wood, I quickly realized that the questionable methods I was using to prepare my scraper were not going to produce good results. So I started doing some research. I came across two lengthy videos (more than an hour in total) of Chris Schwarz (of Popular Woodworking) addressing his research and approach to sharpening card scrapers (the videos appear at the end of this post if you are interested). I also watched Brian Boggs (Fine Woodworking) show some of his methods. After watching and listening to both of these masters, I came to a few conclusions that really helped me.
- Sharpening methods need to be consistent and repeatable (jigs really help)
- The burnisher needs to be considerably harder than the card scraper.
- The angle of the burr is not as important as the quality of the burr.
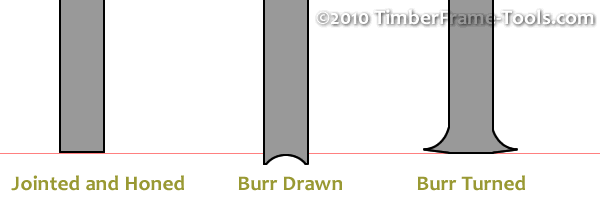
Here are the results of the process as they appear by looking at the edge of the scraper (enlarged for detail). Jointing the edge and flattening the faces results in a square edge. Drawing the burr off the faces of the scraper provides material to be rolled. Turning or rolling the burr creates the hook that is used for scraping.
So here are the basic steps for sharpening a card scraper, complete with a few sharpening jigs I put into play.
1) Joint the edge of the card scraper using a mill file. Use a jig to hold the file at 90° to the scraper (0° to the edge)
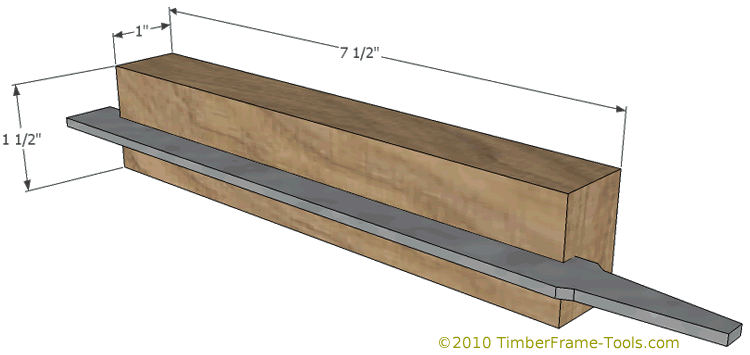
This sharpening jig is made by cutting a saw kerf in the side of a hardwood block and mounting a mill file into the kerf.
The dimensions on the sharpening jig are approximate, but there are a couple of things I found. The distance from the file to the bottom of the block needs to be long enough to create a fence to register nicely against the card scraper face and short enough to allow roughly half of the scraper to be placed in a bench vise.
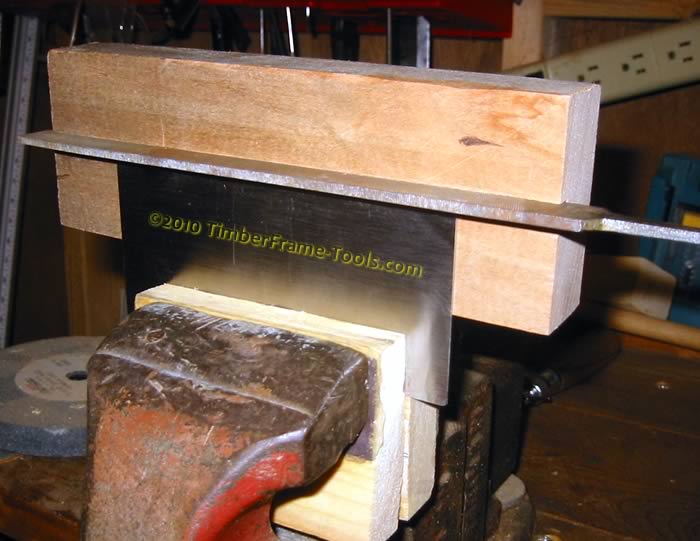
The fence should be pressed against the face of the card scraper and the scraper supported on the other side by your fingers. The file should be pushed only in the forward direction, then lifted, repositioned and pushed forward again. (It should not be pushed back and forth while in contact with the edge.)
When it appears that the edge is fully jointed, mark the entire edge with a permanent marker. Then make two more passes with the file. If no ink remains on the edge, then it is fully jointed.
2) Now the faces of the scraper need to be flattened (similar to flattening the back of plane iron). Chris recommended using the thin metal ruler trick to make the flattening of just the metal nearest the edge easier. Start with a medium stone or 400 grit sand paper and work up through finer abrasives until you have a mirror-like polish all along the faces near the edge of the scraper.
[Photo missing]
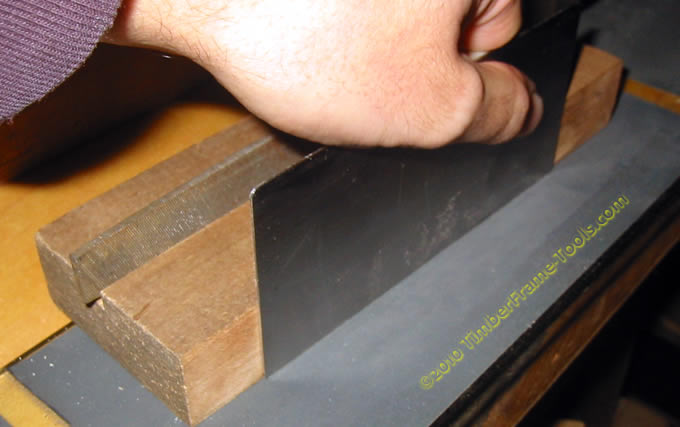
3) Place the jointing block on top of the abrasive surface and using it to keep the card scraper perfectly vertical. Slide the card back and forth on the abrasive. To prevent uneven wear on the abrasive, move the block to a new position every few swipes. Progress to finer and finer grits.
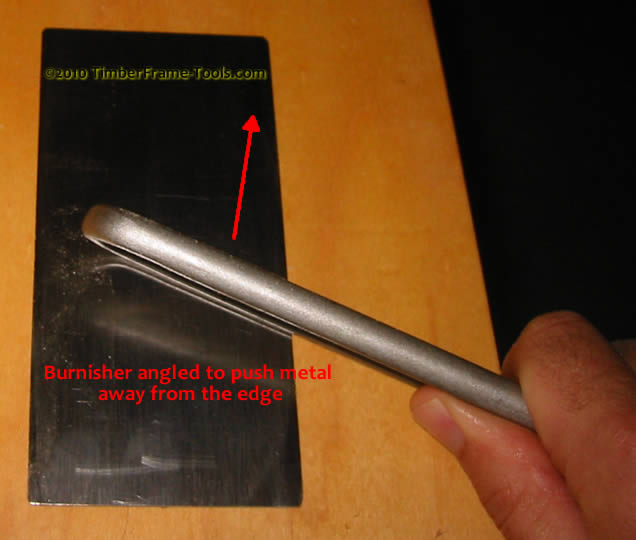
4) Draw the burr by placing the card scarper on a flat surface and running a burnisher (must be hard and highly polished) only in one direction with the burnisher aligned nearly parallel the the face but angled so that it is drawing metal away from the edge, not pushing it back to the scraper (Think snow plow angled to get snow to the edge of the road.) This elongates the edge slightly and work hardens the corner of the edge (Draws a burr). Flip the card over and repeat in order to draw a burr on both sides of the same edge.
5) Now place the card scraper back in the vise. At this point many sites show how to hold a burnisher and run the burnisher along the edge at a slight angle. The problem is that angle is not very consistent and can create a rolled burr that has a lot of variation in it. Chris Schwarz spoke highly of the Veritas Burnisher which is basically a jig that allows you to dial in a specific angle and keep it there. However, he also mentioned that he found no one angle that was ideal (meaning the specific angle is not as important as it just being consistent) so I decided I could build a jig that would have a consistent angle, but would lack the adjust-ability.
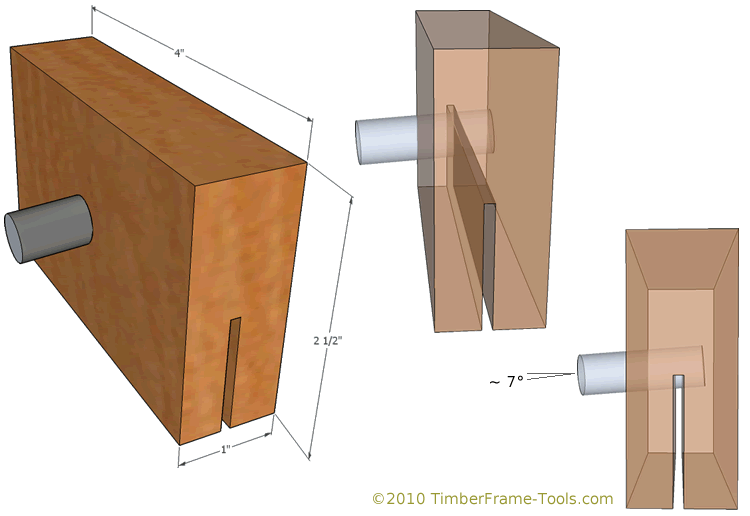
This jig is built by taking a block of hardwood and using a hand saw to create a saw kerf that is at least an inch and a half deep. A 1/4 inch diameter hole is drilled so that it is ~7 degrees of normal (83 degrees to the surface). A 1/4 inch carbide router or drill bit shank is then inserted into the hole.
If adjust-ability were an important requirement, a series of holes could be drilled, each with a different angle. By moving the router bit to a different hole, you would be selecting that angle.
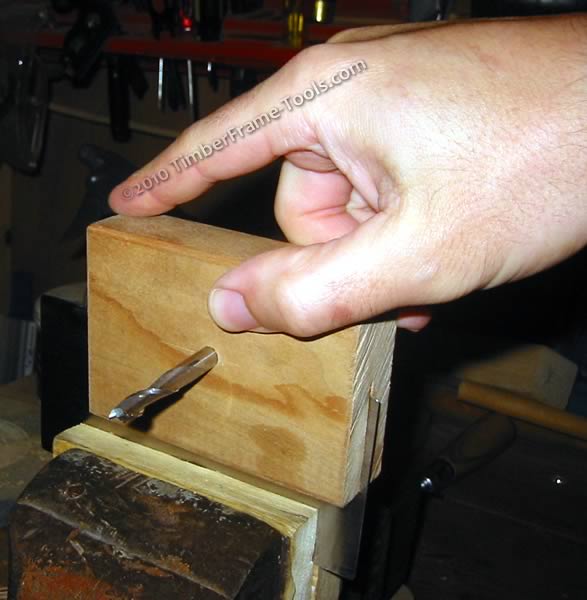
The carbide router bit shank is already very hard and polished, so it makes a good burnisher. By dropping this jig over the edge of the card scraper and running it back and forth along the edge a few times, it will roll that burr over to a constent angle. A bit of oil on the edge of the scraper is essential to keep the burr from galling (little tears or bumps caused by the unnecessary friction). This is not a motion that needs excessive downward force. White knuckles should not be the result.
The card scraper should now be ready take nice wispy little shavings and produce a glassy smooth surface, even on troublesome grain patterns.
Below are the Chris Schwarz videos and a link to the Brian Boggs sharpening video (here) and his video on using a card scraper (here). If you want to read a condensed description of what Chris advises for tuning a card scraper you can find it here.