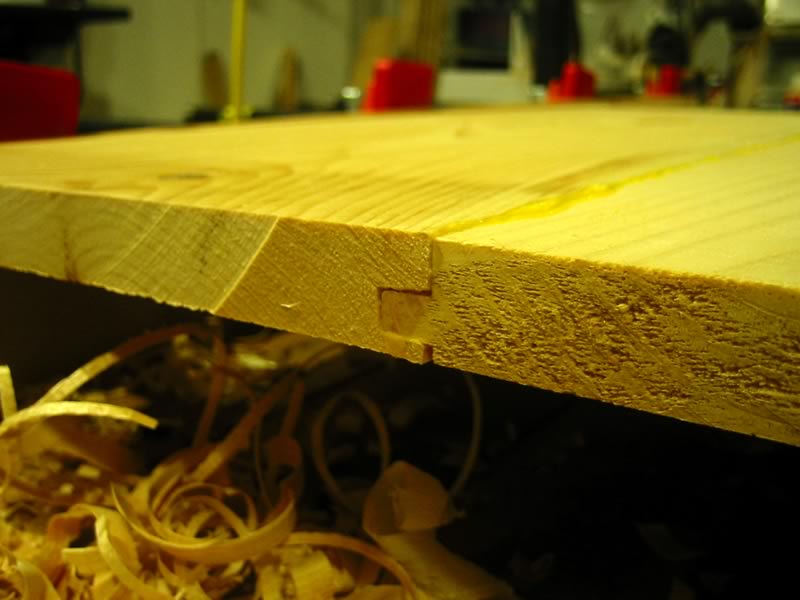
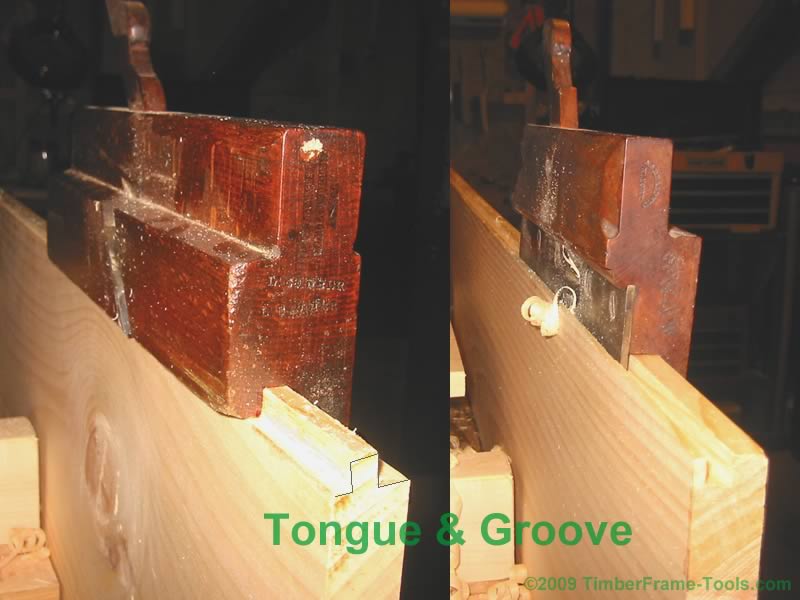
Tongue and Groove is a method of joining boards that predates modern wood glue, biscuits and doweling jigs. I’ve seen Norm Abrams demonstrate how he creates tongue & groove using a table saw with a dado set installed, and I’ve seen others use a router table with a tongue and groove pair of router bits to create it. In each case, I wonder why they never show it being created with a set of match planes. It is so easy and a bit of fun too.
A pair of match planes (one to cut the tongue and one the groove) take no time to set up and in a very short amount of time can create the edges ready to be glued up, or left loose depending on the application. If you only have 3 or 4 boards to prepare, you can be done with the tongue and groove planes before even getting the dado head installed on the table saw and set up just to make the tongues. I imagine that the machines might only win out if you had more than 10 boards to process.
I was fortunate enough to stop by the Hulls Cove Tool Barn just outside of Bar Harbor Maine and picked up a an old mismatched pair of wooden match planes for under $50. I call them mis-matched because the tongue and groove widths matched, but the placement from the edge was not quite identical. The main requirement was to make sure the width of the groove iron matched the gap in the tongue iron…which they did. I was able to carefully use a rabbet plane to alter the depth and position of the grooving plane to match the location and length of the tongue.
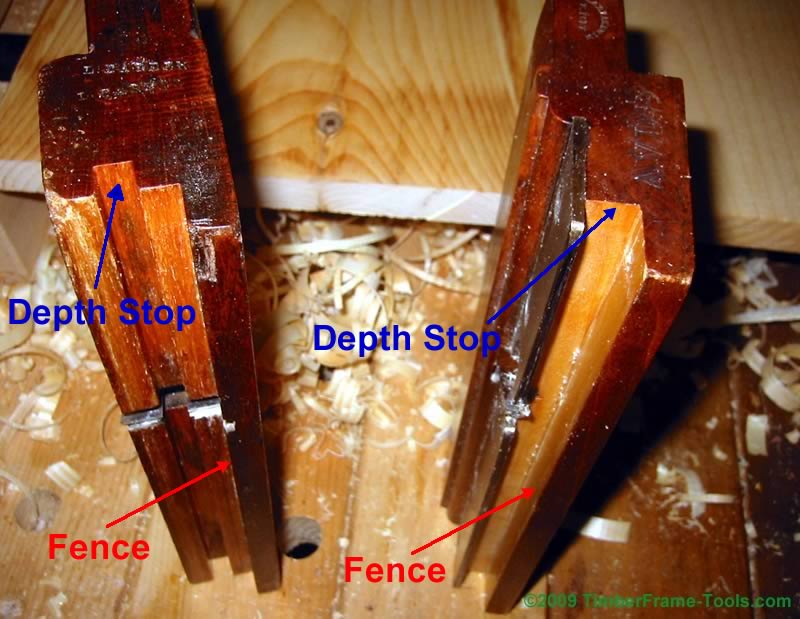
By design, Match planes each have a fence that registers against the outside face of the board being prepared. As long as you consistently register the fence against the outside face of the board, the two boards when joined together will align with no ridge. The planes I have were designed for true 1″ thick wood, but they handle modern 1″ lumber which is closer to 3/4″ thick without a problem. The tongue is not centered, but that is not as critical as many home woodworking shows will lead you to believe.
Each plane also has its own depth stop, so when you no longer get a stream of shavings exiting the plane, you have gone far enough. You’ll notice in the photo above that the Grooving plane on the right has some whiter wood showing. That is where I used a rabbet plane to remove some wood from the fence and the depth stop to make it truly match the tongue plane.
In use, there are a few tips I recommend.
- Make sure the edges you are going to use are straight (freshly jointed)
- Apply pressure with your left hand sideways to keep the plane’s fence tight against the outside surface of the board. This is especially critical for the first couple of passes with the plane, to make sure that the tongue or groove does not wander.
- Use a block plane to make a light pass over each corner of the tongue to put a chamfer on it. This will make the tongue slide more easily into the groove.
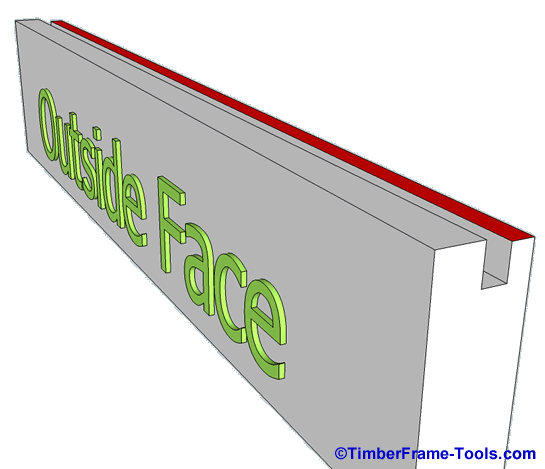
- If the exposed face (outside face) of the boards needs to have a truly tight joint (no visible gap) take a rabbet plane and make one light pass along the inside edge of the board with the groove (the red surface in the diagram below). This will ensure that the outer edge is the one that butts up tight to the other board.
This video shows an old pair of match planes at work. Unfortunately the person talks while planing, so you can’t hear much of what he is saying. Notice how rapidly these planes remove the stock to create the profile.
If you can’t find a set of wooden match planes, there are old planes by Stanley #48, 49, 148 and many of the Stanley plow planes had tongue and groove cutters. Recently Lie Nielsen has introduced their version of the Stanley #48 and #49. They are really nice looking planes. Here is video of them. The video has some great tips for using the plane as well.


