I have a nice tiny patio outside the front door of my workshop. When I have been planing or sawing and worked up a sweat, I’d like to be able sit and rest while my heart settles down. I tried putting chairs there, but they are too comfortable and I settle too long. I need something only moderately comfortable. A bench will do. I also want to be able to use it as a sawbench, so I don’t have to drag out my sawbenches for just a quick cut. Just to keep things interesting, I decided to make it without any metal hardware. What to build it from was the next question.

About 5 years ago my brother (from NY) decided to surprise me for my birthday. He found a wood carver near me that made big chainsaw carvings (dolphin, manatee, octopus…) and so my brother stopped and asked if he had any logs he could buy for his wood-nut little brother. My understanding is, there was no extra charge for the ants either. Shortly thereafter my brother showed up on my doorstep with this cool Red Cedar log. The log had an interesting shape that I liked, but just could not lock in on what it wanted to become. So it sat quietly taking up space in my tiny little shop.
Five years later, I decided part of it needed to be a bench so I could rest my behind.
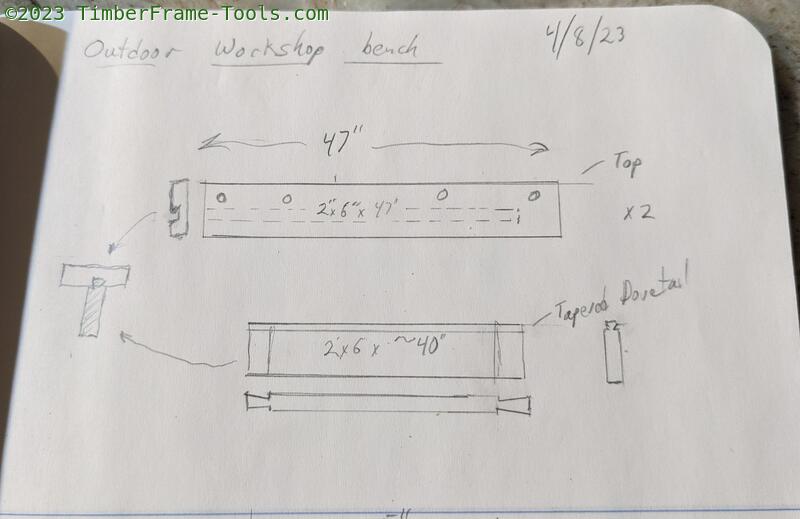
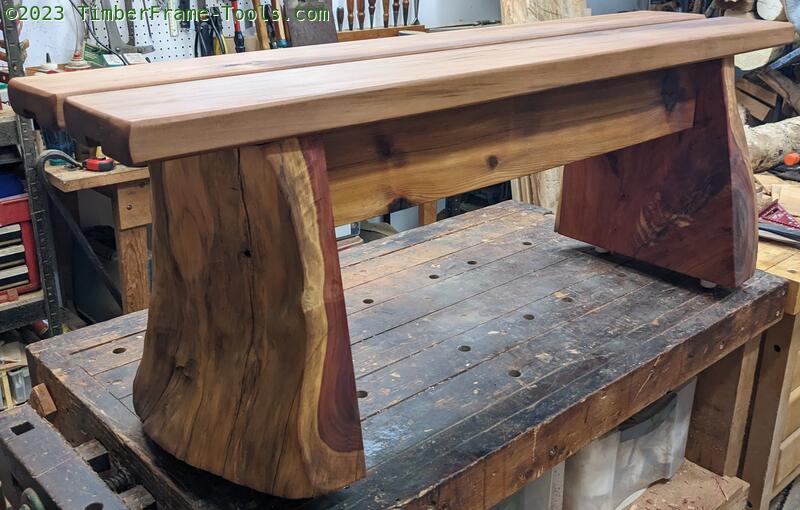
I sketched up the idea. It would have stretchers that would attach to the seat with sliding dovetails. Then condor tails on the ends of the stretchers would slide into some slab legs.
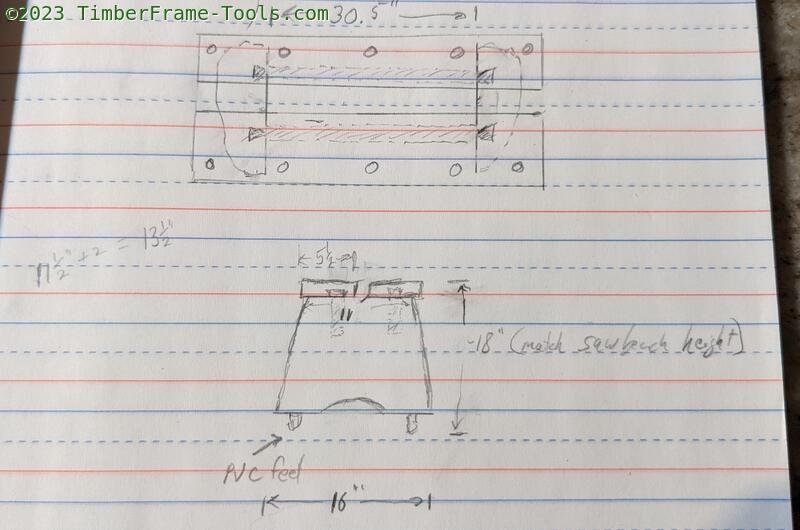
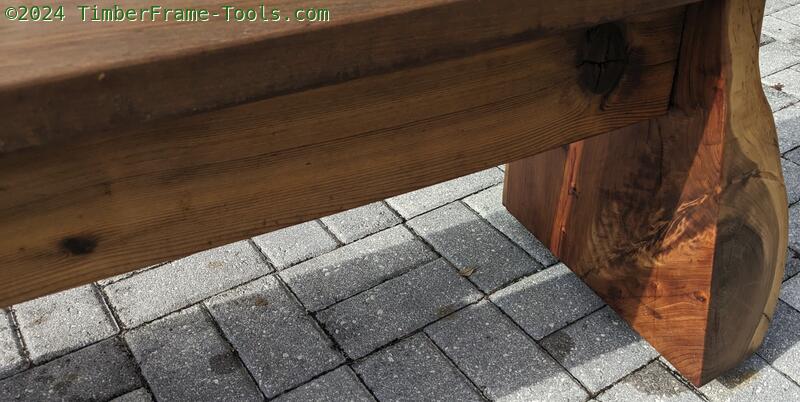
Cedar is great because it is rot resistant, but I did not want the end grain of the slab legs to sit on the wet ground and suck up water, so I planned to use PVC feet to keep it a bit off the ground. The total height of the bench had to be 18 inches so it would be a match to my other sawbenches for times when I needed to use them together for a big piece. The circles drawn in the top were supposed to be placement of dog holes. I chose not to use them. I can always add them later if I feel like I need them.
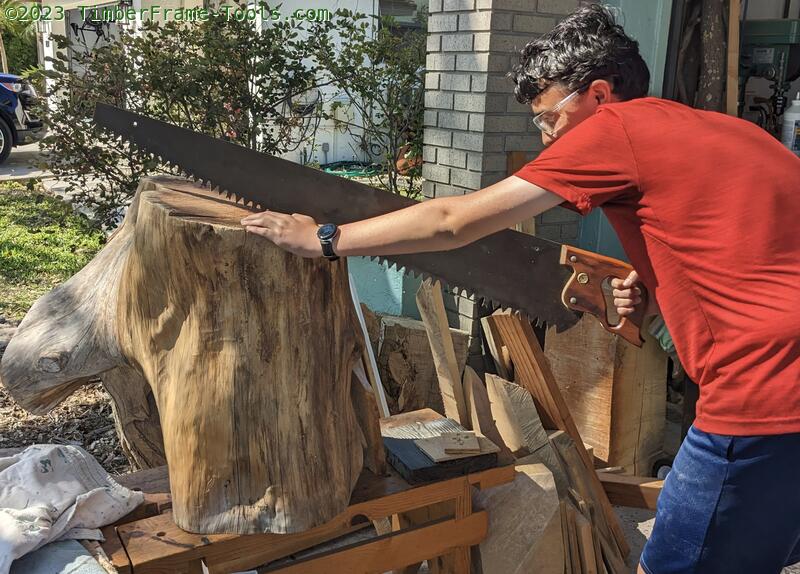
My son got me started by making the majority of the first cut on the log. Dusty the old saw, re-filed to rip, made a pretty nice clean cut… and a few gallons of sweat.
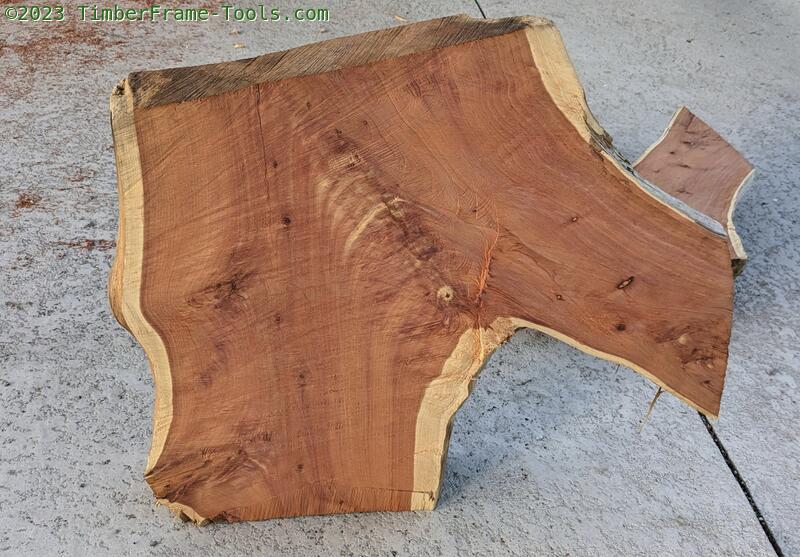
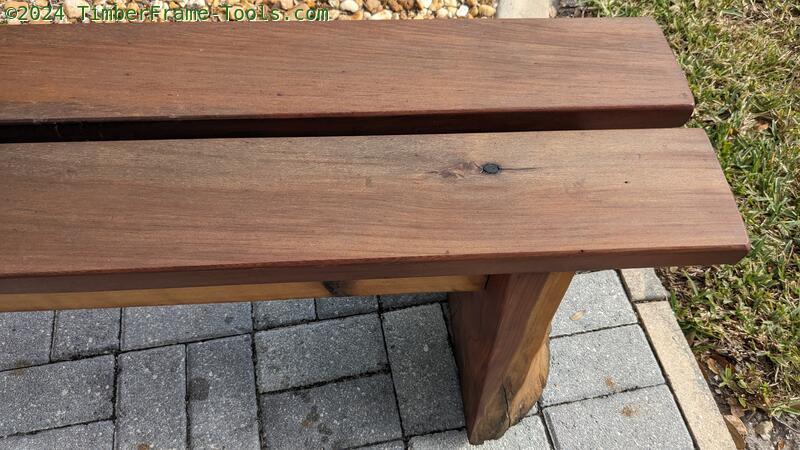
Red cedar sure is pretty.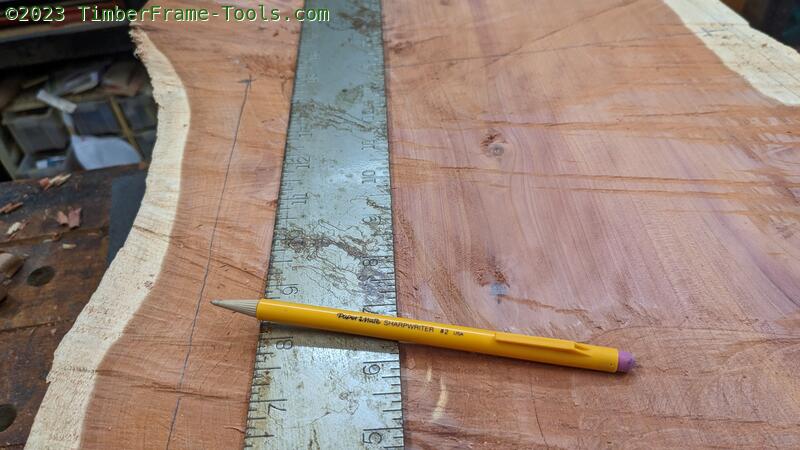
I laid out some cut lines to guide me in making the slab legs with a framing square and my favorite shop pencil.
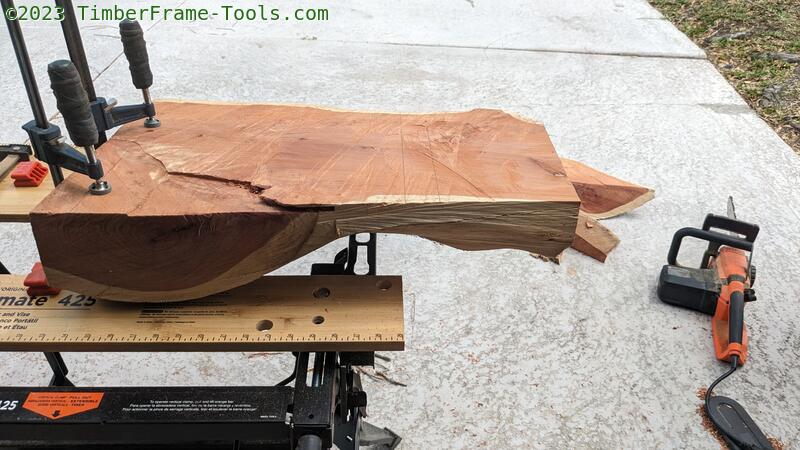
Clamping the odd shape of the slab was difficult, and not secure enough for the back-and-forth forces of hand sawing, so I had to switch to using my Black+Decker 18" chainsaw to do the crosscutting.
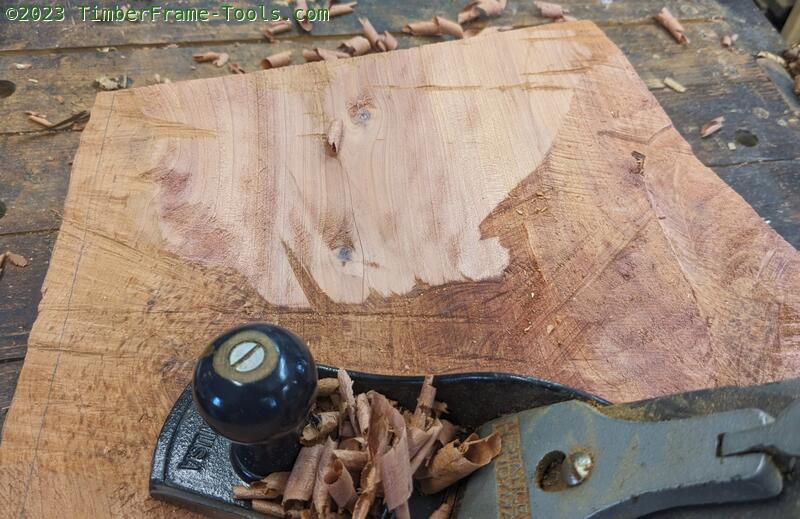
I used my scrub plane to clean up the surface.
With the slab legs cut and dressed, I turned my attention to the boards for the bench top/seat and the stretchers. I had a few choice red cedar rough sawn 2″x6″s from Home Depot that had been sitting in my garage for many years. They planed up pretty nicely. Red Cedar is kind of quarrelsome to plane because it is prone to tear-out or chipping.
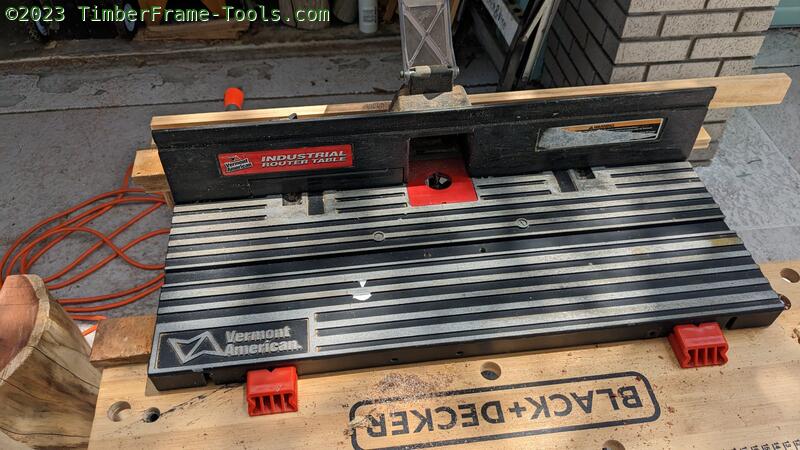
To cut the sliding dovetail on the top of the stretchers, I used my router table with a dovetail bit. I clamped my router table into my Black+Decker Workmate 450. One pass on each side of the stretcher creates a very long and very useable dovetail on the top of the stretcher.
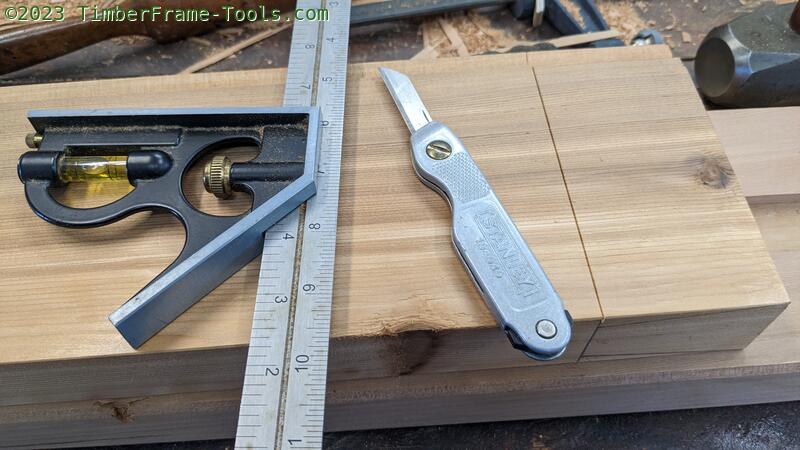
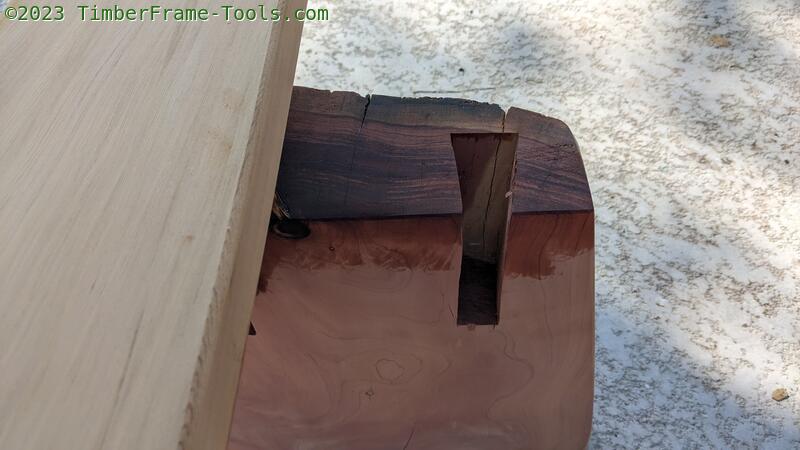
I used my combination square and Stanley 10-049 knife to mark out the large dovetail (condor tail) on each end of the stretcher.
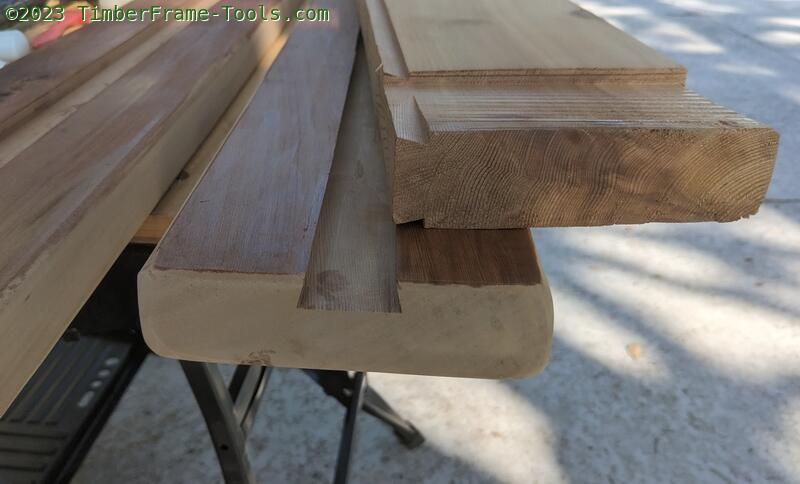
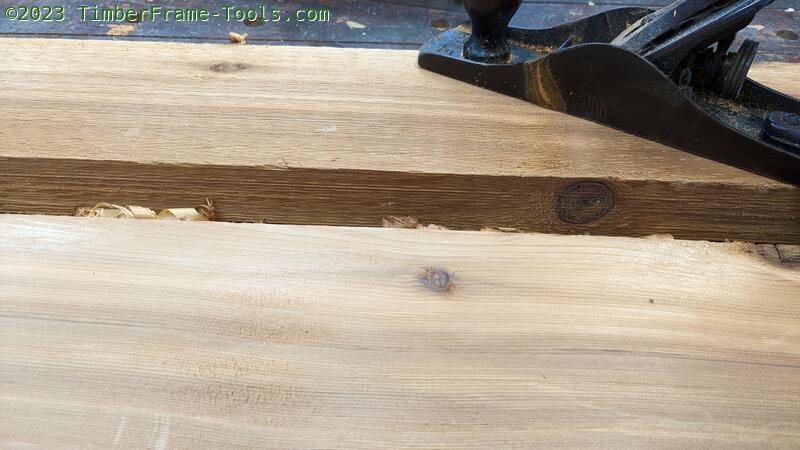
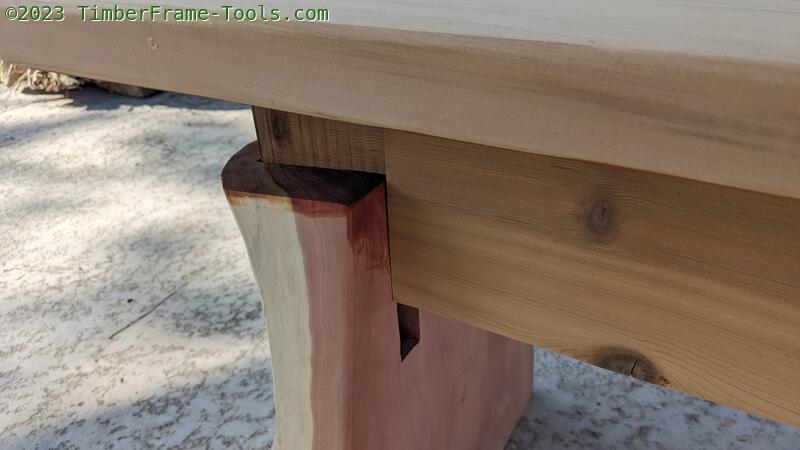
Here you can see the sliding dovetail and condor tail on the stretcher and the sliding dovetail socket on what will be the underside of the bench seat.
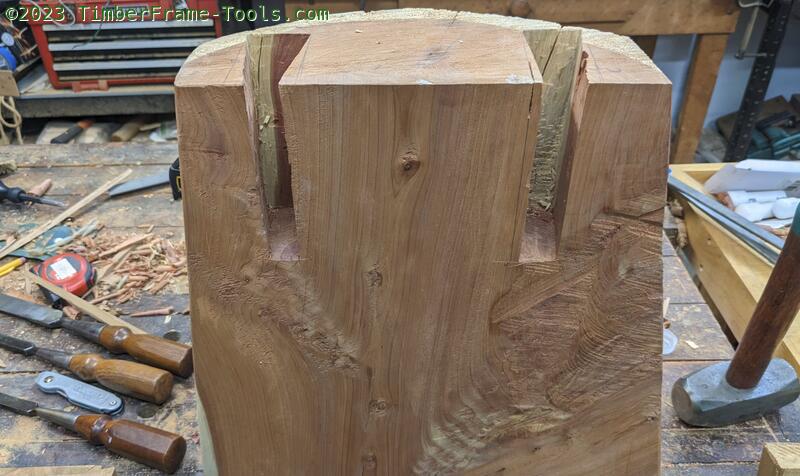
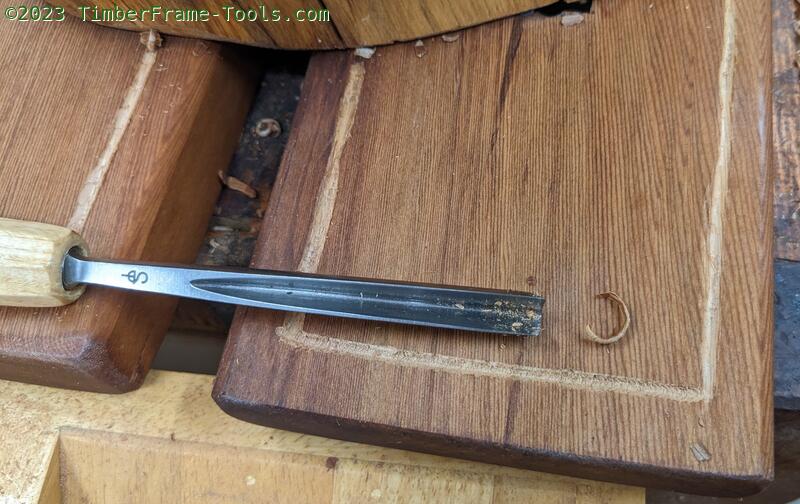
Then I used a saw, chisels, mallet and knife to cut out the condor tail sockets on the slab legs.
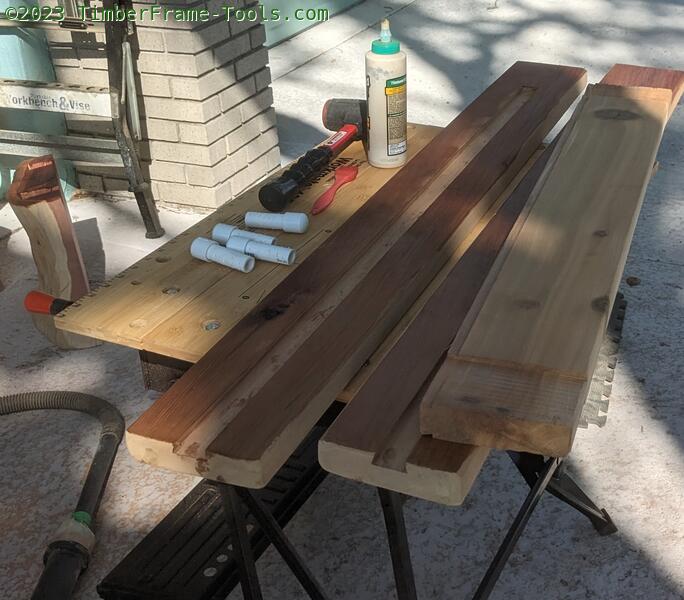
Now it is time to mate the sliding dovetail on the stretcher to the seat board. Technically, all the joints in this are strong enough to be assembled without glue. It was my original intent not to use it, but since this sawbench is going to see a lot of action, I decided glue as an insurance policy was not a bad idea. I used Tightbond 3 for its outdoor rating.
They slid together pretty well and only needed a few taps from the mallet.

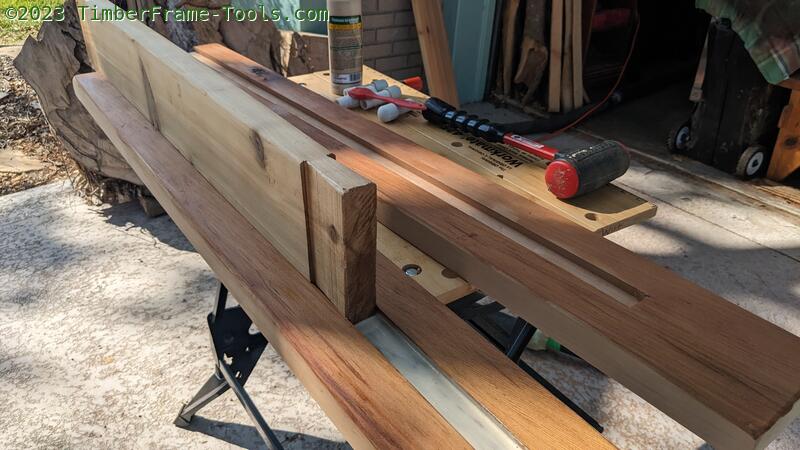
Before tapping the condor tails into place, I put Tung Oil on the top and bottom (endgrain) of the legs to help protect the wood from the water.
A few dabs of glue and I tapped all the condor tails into place.
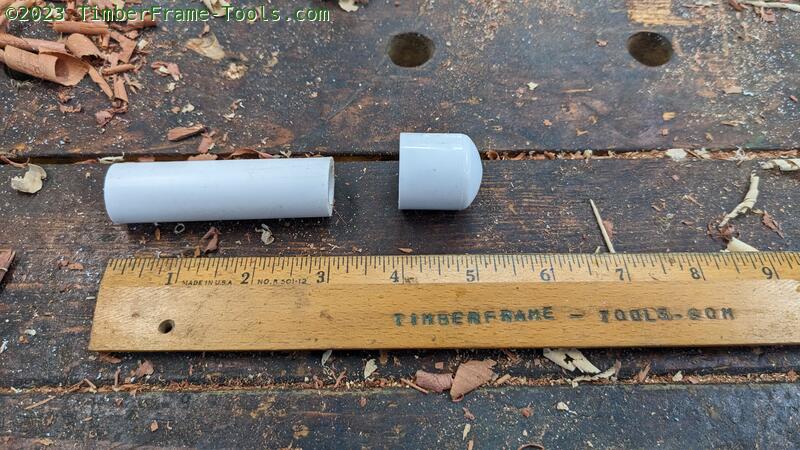
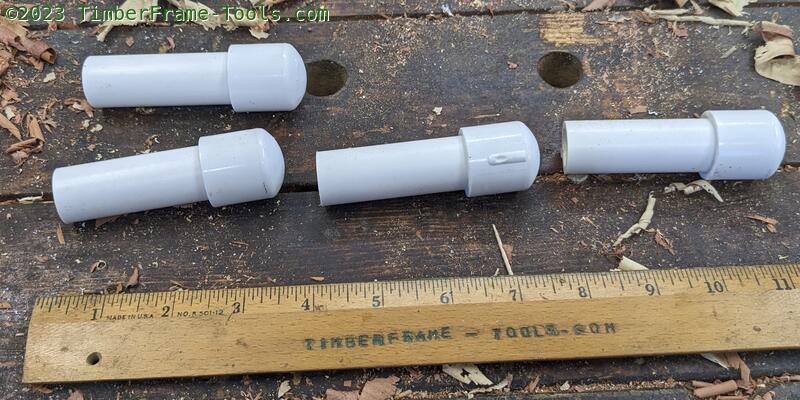
The feet are made of PVC pipe with endcaps. A bit of wood glue holds them in the holes. The feet keep the wood off the damp ground yet are largely invisible when the bench is on its feet.
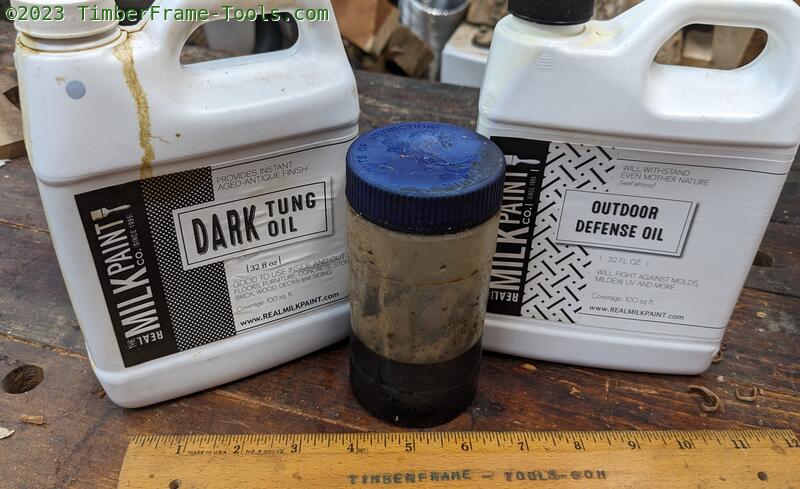
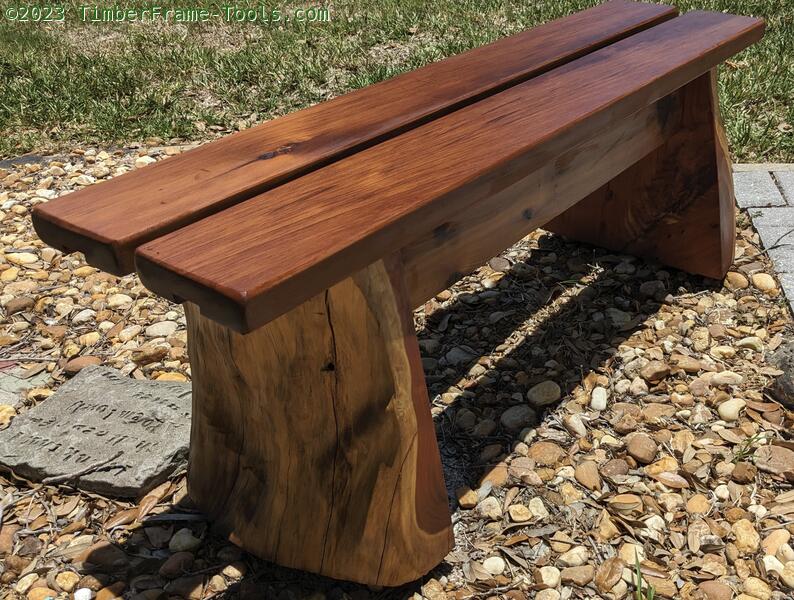
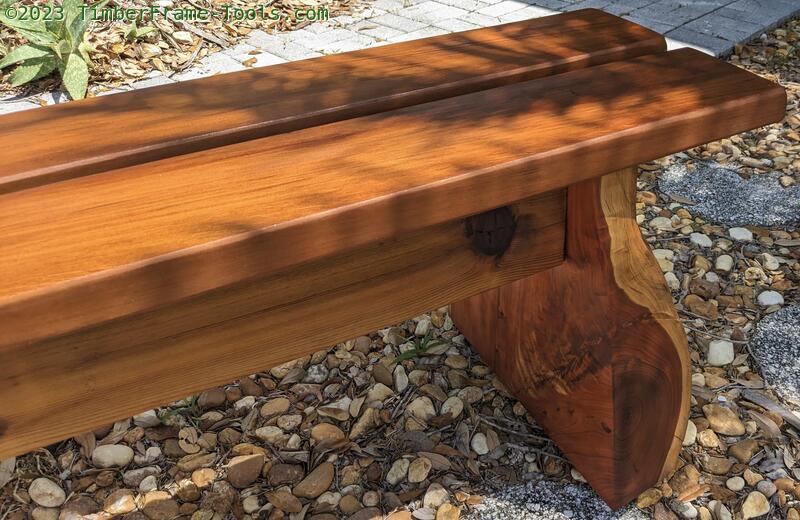
This bench is going to sit outside in the sun and rain of Florida. The area outside my workshop is not under cover. The finish needs to protect if from the elements and be renewable, since I am likely to be working this bench pretty hard. I used a mixture of Milk Paint' Co's Outdoor Defense Oil and Dark Tung Oil. The Outdoor Defense Oil has Zinc in it to protect against the sun, but it tends to color everything a bit orange, so I soften it with the Dark Tung oil. I mix the two about 50/50. It’s a waterproof finish that holds up quite well and can be easily repaired. In total, I put on six thin coats of the Tung Oil the right way.
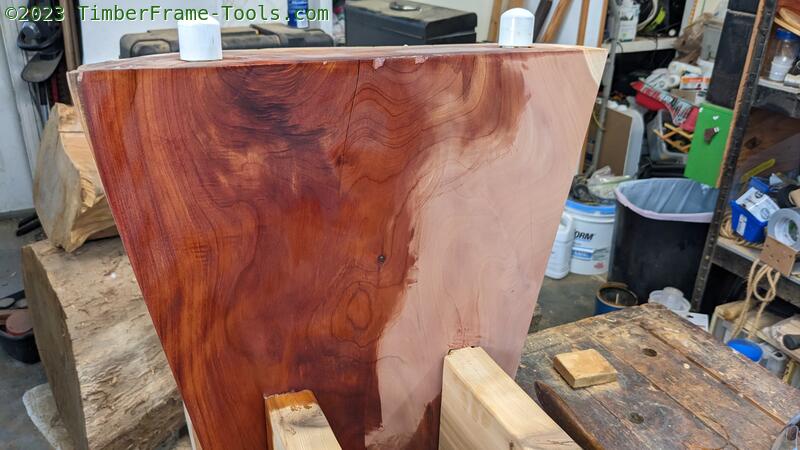
The color is pretty awesome as it goes on and I am instantly happy with it. Here the bench is upside down and you can see the PVC legs sticking out the top (really the bottom).
The cedar from the store is not quite as colorful as the slabs from the log. So the color change is not as flamboyant but I am still happy with the tone the Tung oil mix gives it.
On the underside of the bench, I used my V gouge to cut a groove around the seat board. When rainwater flows over the bench top and then down the bottom, when it hits the groove, it will fall off. This keeps it from continuing to flow and get between the endgrain of the leg and the top, where it would sit and rot.
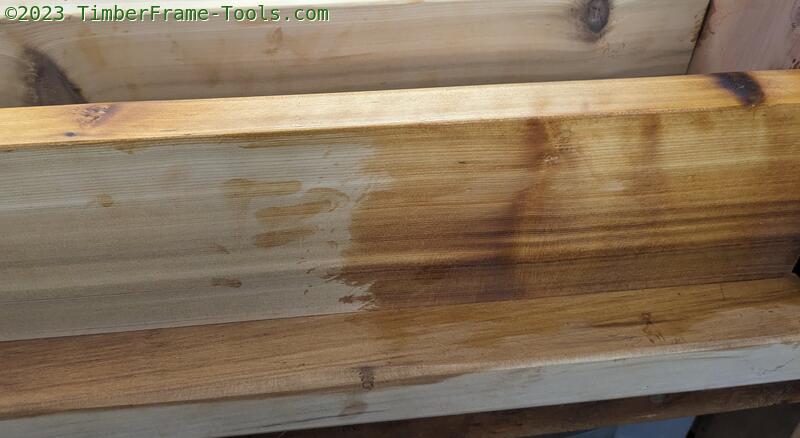
Here’s the bench after the first coat of oil.
Six coats later and it looks like this. The color is rich and the finish has just a wee bit of sheen to it.
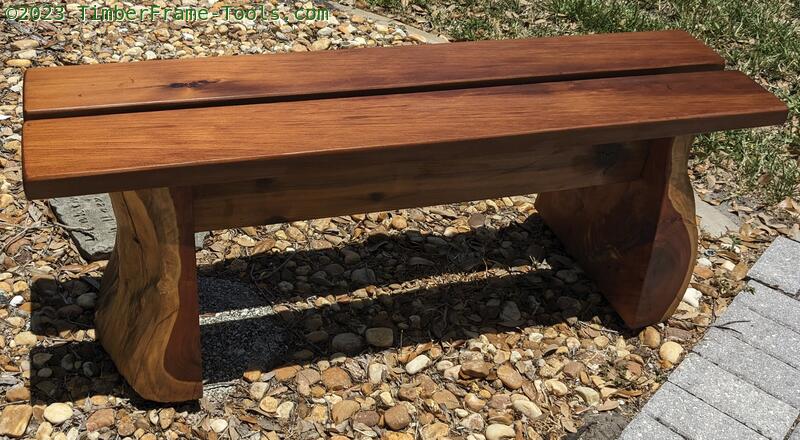
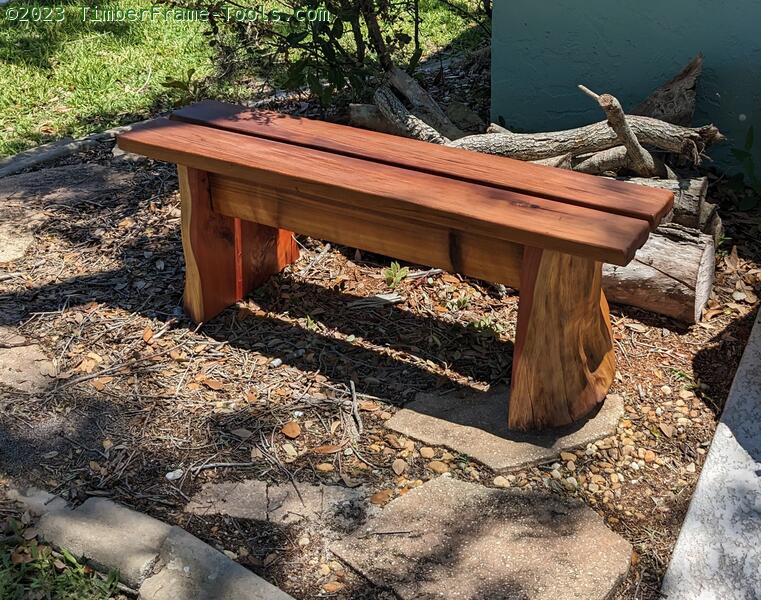
Here it is in the spot by my workshop. Every so often I look at it and think, that looks so good, it ought to be inside. I am very pleased with how it turned out.
6 month update Jan 1/2024
The bench has been sitting outside my workshop since June 2023. It is now January 2024, 6 months and 1 smallish hurricane (Idalia) later here is what the finish looks like after giving is a wash with water to get the dirt off it. I have used is a few times for sawing and it has held up pretty well, but mostly it gets beat on by the sun and the rain. The Tung oil is holding up pretty well, but there were a few scratches and dings form me working on it, so I gave it a wipedown with more Tung oil after these photos were taken. I’ll re-visit it again at the 1 year mark.