While doing the preparation for building a cedar double chaise lounge, I had collected several old fallen red cedar logs from the forest surrounding our home. It seemed that one of the logs turned out to be more than my bandsaw could handle (8.5" re-saw clearance) . The log was close to 14" in diameter. It was too good a source to waste. A log this size could provide all the wood I needed for the slats ... must have it.
So I ran through my options for making it smaller. None of them seemed appropriate ... except maybe that old bucking saw that has been hanging around for decades without being used.

My saw vice seems woefully undersized for this job.
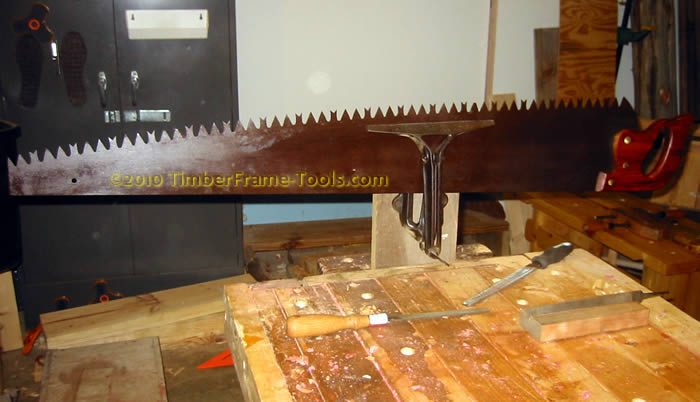
It was originally designed for crosscutting logs and its end-handle had long gone missing. I would need to clean off the rust, re-shape the teeth for ripping, and sharpen them. Sounds like fun. I used a razor blade scraper and some paint thinner to remove the crud and rust. Initially the paint thinner didn't seem to be touching the saw... just sort of running off it the way water runs off a duck's back. So I sprayed it with a mixture of ammonia and water and let that sit followed by a little scraping. The ammonia
(a good degreaser) cut through the old oil and made it so following treatments of paint thinner could do its job. Most of the rust came off quite well. After it was all scraped, I used an abrasive pad to remove even more crud. After that I washed the saw with detergent and water and set it in the sun to dry. While it was drying, I cleaned up the handle with a card scraper and a sanding sponge. For a quick finish, I applied a few coats of shellac. When the blade was dry, I oiled it and re-attached the handle.
The teeth were pretty rusted and angled for crosscutting. I used a couple of different files to get them down to bare metal and remove the fleam (the angle put on them for crosscutting-
saw teeth reference). Then jointed them and sharpened them. All in all I had invested about 2 hours in reviving this saw.
(My son named it "Dusty" after the character in his Handy Manny books.) Saws like this do cut on both the pull and the push stroke, since they were intended to have two different pull strokes, one from each side.
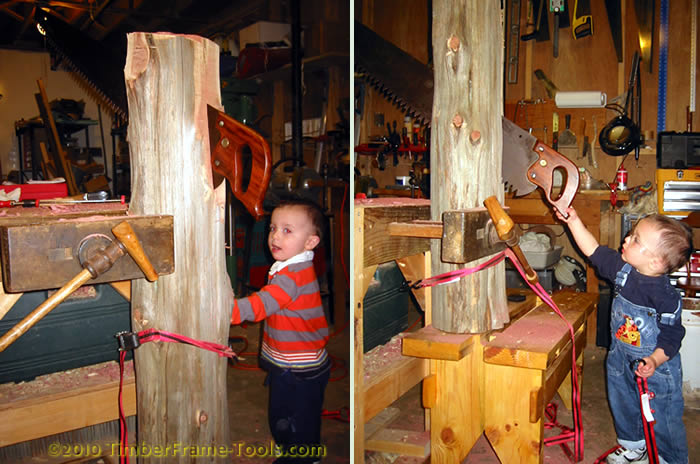
With the saw tuned, it was time to get ripping. errr... rather is was time to figure out how to secure this log so I could get sawing. I used a couple of ratcheting straps to secure it to the leg of my bench, and then used the edge of my vice to add enough hold to keep it from wobbling side to side.

All this sawing made me feel young again 🙂
When I got down to where the saw was going to start cutting into my bench, I put the log on top of a
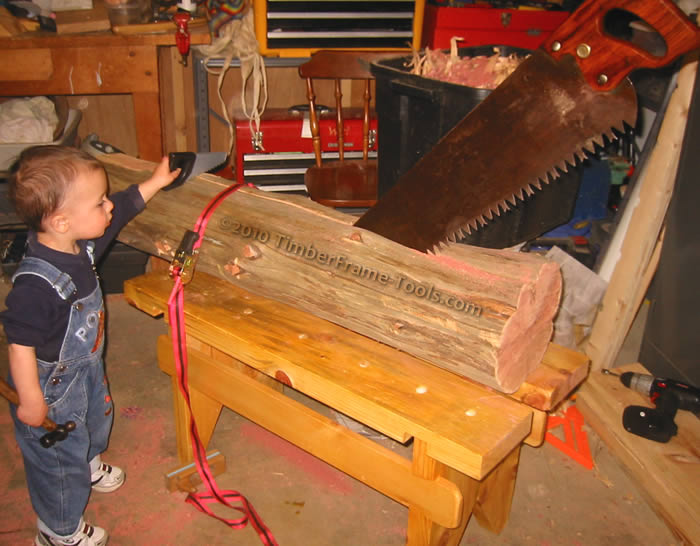
saw bench then re-attached the straps and the vice. It wasn't perfect, but it worked well enough. When I got down to where the saw was again going to start cutting into the bench, I had change the approach.

This wasn't what I had in mind for using the ripping slot when I built the saw bench.
I strapped the log horizontally to the saw bench and was careful to align the saw with the ripping slot down the middle of the bench. As I got closer to the end of the log and closer to the legs of the bench, I laid the saw almost horizontal.

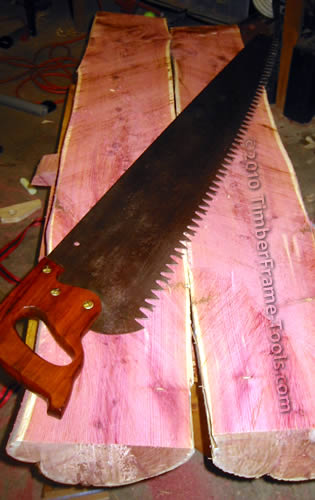
The wood was pink and the shop smelled wonderful.
When it was all done the log lay there ripped in two. The cut was relatively straight. The sawing itself was quite fun. If I had a secure way to hold it from start to finish, the actual cutting would have only taken 15 or 20 minutes. However with the various adjustments
(err... failed attempts) to secure the log, and re-secure the log. It took a few hours start to finish. Fortunately since I only get 20 minutes of workshop time a day, the sawing spanned a couple of days.
Dusty, the overly large rip saw, is now hanging on the wall in the shop
(rather than out in my shed) and has earned a place with all the other workshop tools. He probably won't get used again, but you never know. He now has a bit of family history with my son and I, so it will be more meaningful than it was for me, when I was a kid and it was hanging in the garage of our family home. My saw is an antique, but if you wanted to save yourself from the restoration work, you can purchase a new
one-man crosscut saw.
Next up, resawing the slats for the chaise lounge on the band saw and building the
double chaise lounge.
1 2>>


Hi there,
I found your site from an article someone posted to a question I asked on woodworkingtalk.com (http://www.woodworkingtalk.com/f11/anyone-ever-rip-cross-cut-saw-35879/#post310105). Basically, I’m looking to rip saw a fairly big long log (18″ x 5′) and they sent me to your article “rip sawing an old log”. You did it! I must say, I’ve been looking into this for quite a while now and turns out no one does that. At this point I guess most logs were ripped either by a huge two man pit saw or maybe everything was riven. You can find piles of one man cross-cut saws on ebay but no big rip saws.
I was about to buy one (again, on ebay) but thought I’d ask you first, since you’ve actually done it. Do you like the champion tooth pattern? Or do you think that a plain tooth pattern would be better? And would you recommend resharpening a crosscut saw into a rip saw like you did? Was it worth the effort? If you have any close up pictures of the teeth, I’d be darn curious to see exactly what that means – I’m starting from the premise that crosscut teeth are more like knives and rip teeth more like chisels and I’m trying to picture it..
I don’t mean to be asking too much, I’m just super curious as to how to go about making boards from logs…any help would be much appreciated. Fantastic article and fantastic website!
Thanks a bunch!
Ari
Hi Ari,
Sounds like a fun project. As you probably already read, the most difficult part was securing the log while sawing it. The saw itself worked really well. I have my suspicion that the raker teeth did the majority of the work, so I would bet that just filing them to act like chisels would get you most of the way there. The problem is getting a file to work those teeth (the ones that look like fish tails). What ended up working best for those was a small cylindrical grind stone (about 3/8″ in diameter) on a Dremel tool. Sure the pointed teeth did some of the work, but the angle of them is all off….still I got them to work by keeping the saw with a pretty shallow angle of attack (see the photos above). The shallow angle also helped make sure the saw was tracking well along the length of the log (not perfect, but use-able).
If I was in the mood to experiment, and also wanted to still be able to use the saw for crosscuts, I would just file the raker teeth for rip and leave the others shaped for crosscut. After a minute or two of sawing you would know whether it was enough or whether you needed to reshape the others. Incidentally, the filing (on the acute angle teeth) and grinding (on the rakers) all had the same geometry for me it was all done at a right angle to the saw blade (filing straight across) basically what I was going was removing all the fleam from each tooth. Also, there is no need to remove all the fleam from the entire tooth, just the tip is all that is needed.
My only other recommendation, wear ear protection. Those long teeth make a lot of noise when you run a file across them.
I hope this helps.
-Steve