When I was designing my first bungee lathe in my head, there was a competing idea kicking around in there. I chose to build the lathe using the pipe clamps because it gave me unlimited length. I was perfectly happy with that lathe and I needed nothing more, but this other idea, kept kicking around. My brain wouldn’t let it rest. I had no need for this second lathe. Yes it would be smaller, and it would be fewer parts, but I had no need for a mini bungee lathe. Unfortunately the idea would not go away. I had to build it for no other reason than to let the idea escape the active and nagging part of my brain.
This lathe uses the same treadle and bungee arrangement as the larger lathe. The only difference is that instead of being made up of 2×4’s and two pipe clamps, this lathe would be made up of a large handscrew clamp, a barn spike, 4 nuts and 2 bolts. It also requires use of 2 F-clamps instead of 4. Here is the finished mini bungee lathe
A 12" handscrew becomes the frame of the vice, a barn spike becomes the tool rest, and the bolt becomes the dead centers.
For the creation of this bungee mini-lathe, the hardest part was drilling the holes. Total time to build it (not including the treadle and the bungee mounting (because that was already done from the previous project) was about 35 minutes.
Steps to build the handscrew bungee mini lathe
- Get a 12″ handscrew (don’t worry, it will still function as a handscrew clamp when you are done), 2 3″ long 1/4-20 bolts, 4 nuts, and a 12″ long 3/8″ diameter smooth shank barn spike.
- Put 2 nuts on each bolt then cut the head off the bolts with a hacksaw. I put them on first so I don’t have to mess with trying to get them on after buggering up the threads. Chuck the bolt in a drill and run the drill while holding the tip at an angle to the bench grinder
-
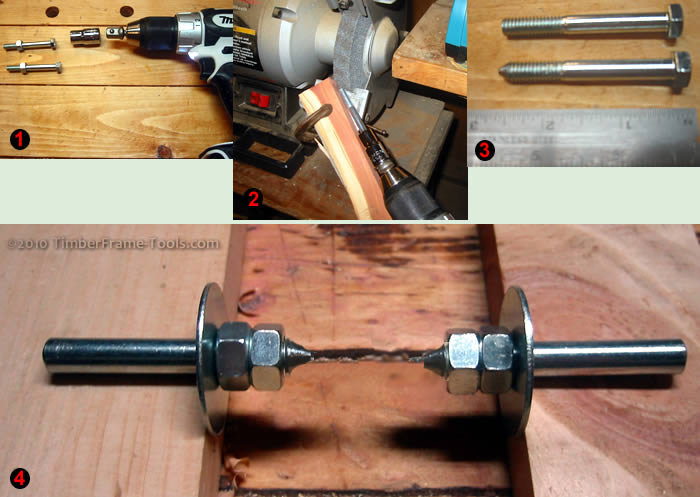
The rough sequence for making the bolts. You don't need a nut driver on the end, just cut the head off the bolt and chuck the shaft directly in the drill.
Since the distance is so short between the jaws of the handscrew clamp, lock the nuts together as close to the end of the point as you can. You can also ignore the washer if you want to.
- Now close up the handscrew so that both jaws are tight, flush and parallel with each other. Then mark the center line along the jaws of the chuck using a marking gauge or a combination square. This will be the axis that the tool rest holes will be drilled along.
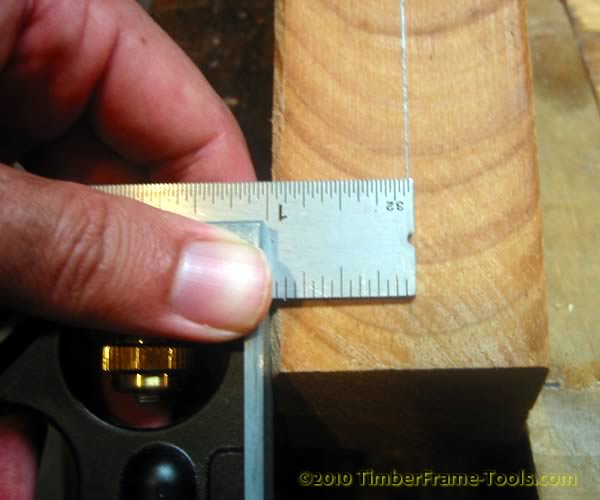
- Determine the location of the first hole for the tool rest. This will actually be the furthest out location from the spindle. Leave enough space so the hole does not split out at the end of the clamp. I came in 5/8″.
-
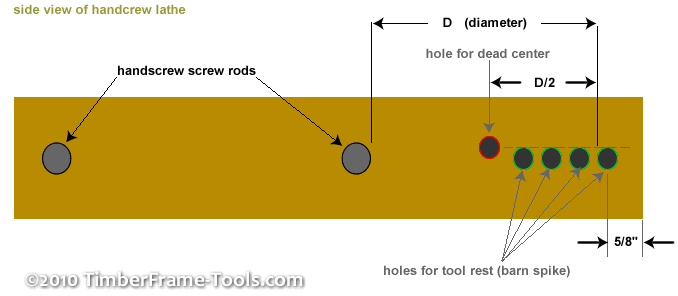
All of the locations for the othe tool rest holes and the dead center holes are determined based on the outer most tool rest hole.
Transferring these locations to the handscrew is a little tricky because the outside edge of the clamp is angled. I held the ruler to the square face and did my best to project the locations straight down. (The parallax from the camera lens makes it look like I did a worse job than I it actually was.)
-
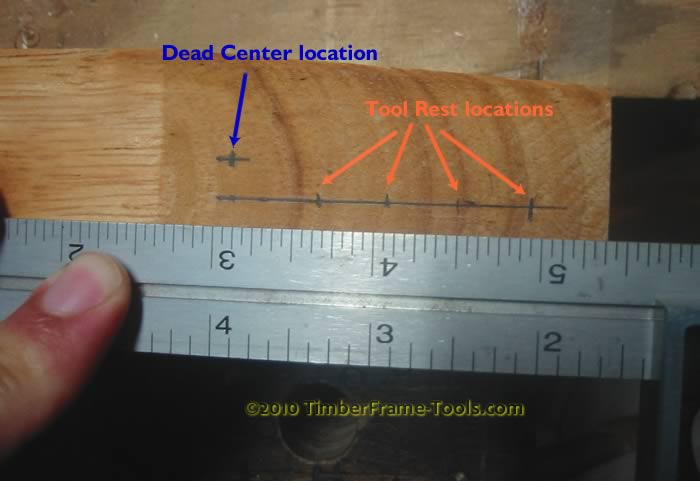
The dead center must be located midway between the threads of the handscrew and the inside edge of where the tool rest / barn spike would located when in its farthest location.
Based on the dimensions of your handscrew clamp, you will have to decide whether you could get away with four tool rest holes or three. These holes all need to be as parallel to each other as they can be so a drill press is required.
-
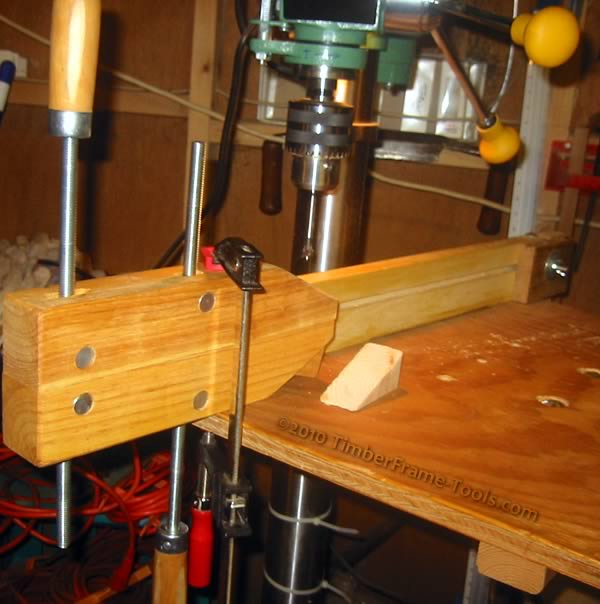
Use a wedge under the nose of the clamp to keep the drill from splitting out he wood as it exits.
With the holes all drilled, the lathe is pretty much ready for use. I prepped the barn spike by using the grinder to round over the pointy end a little. Mainly I did this to protect my toes in the event I accidentally drop it. I also used some 220 grit wet dry paper to polish the spike. The smoother surface on the spike makes the lathe tools slide over it better. After the barn spike was smooth, I rubbed it with a block of paraffin wax to provide an even slicker surface and help keep it from binding in the holes.
-
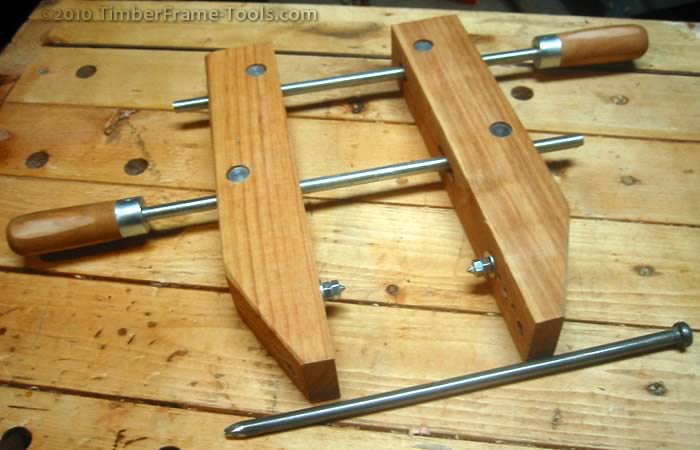
The parts of the mini bungee lathe are ready to go.
Nothing left to do now but use a pair of F-clamps to clamp it to the bench underneath the bungee.
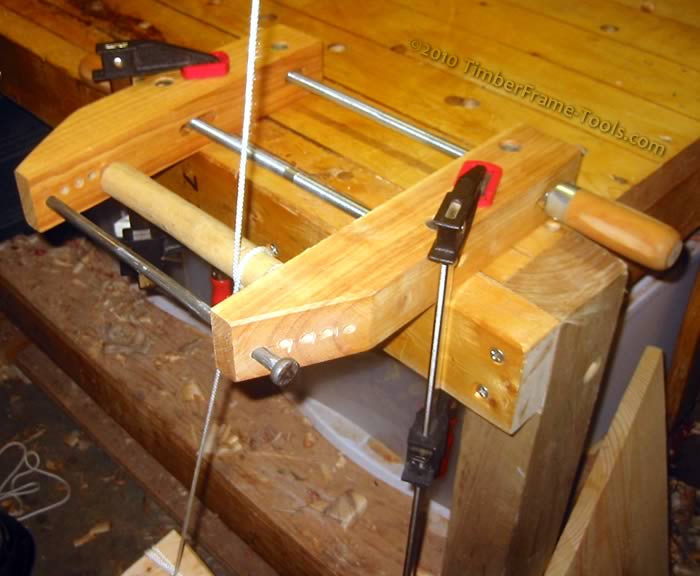
Here's the bungee bench lathe in place. The two F--clamps do a fine job of holding it securely.
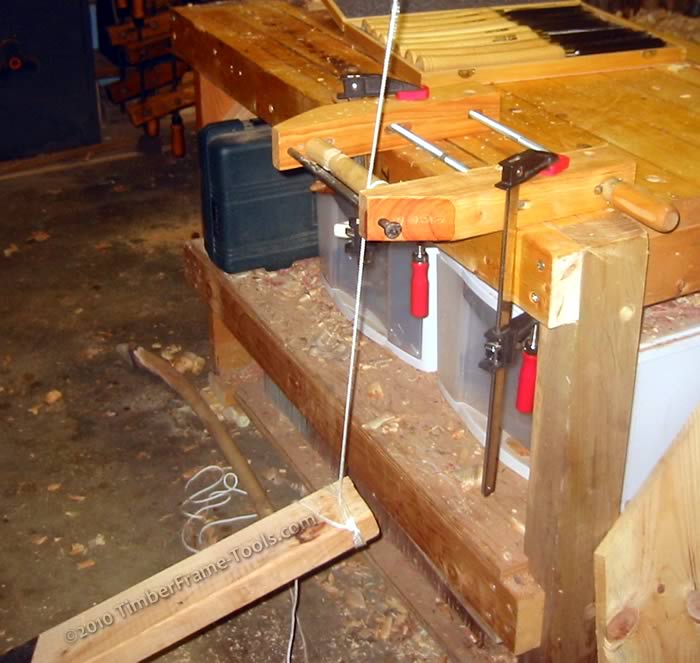
The lathe uses the same bungee, power cord, and treadle as my larger bungee lathe, so I won’t repeat the details here.
This lathe works quite well for short items. This particular 12″ handscrew allowed the creation of a 5″ swing (the maximum diameter it can spin) and 7.5″ between the centers.
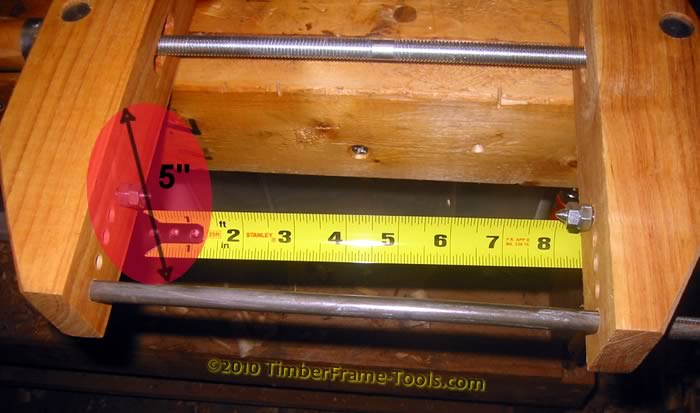
The working dimensions of this mini lathe are 5"x7.5"
If you needed to maximize the length you could opt to use only one nut on each center and lock it with epoxy or lock-tite. This would result in 8″ between centers.
This version of the mini-bungee lathe works quite well. It is faster to set up and take down than my larger version. It seems to be just as stable and has only the limitation of length as its weakness.
The best part about it is that when it is not being used, it can be put to work doing plenty of other jobs in the woodshop.
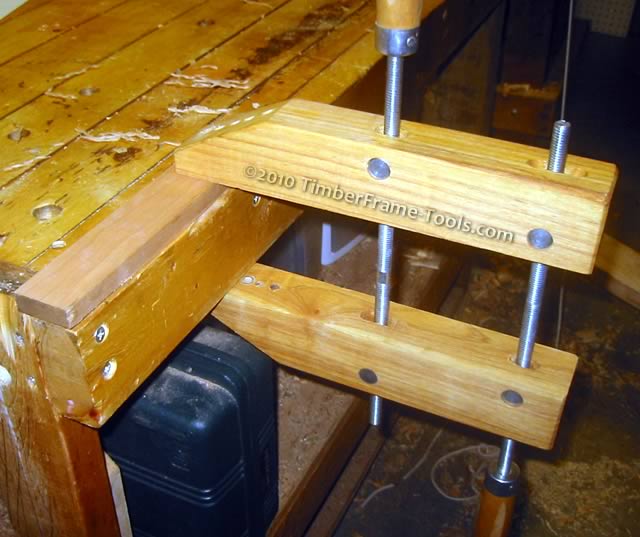
The holes in the jaws of the vice do not keep it from doing its other job.
A nifty idea – presumably you used a sky hook to hold the top of the bungee cord.
I imagine that if it were to be frequently used, some kind of guide for the treadle would be useful.
Jeff
Thanks Jeff,
The bungee (horizontal) is just attached to the screw eyes with the hooks that wre standard on the bungee. The power cord attaches to the bungee with a snap swivel clip like you would find on the end of a dog leash. The ground part of the treadle clips to the foot of my other workbench. The other end floats a bit which allows my leg to track something other than a straight line which adds a bit of comfort.
Since i wrote this originally I have added a hook on a block of wood to help keep the power chord tracking in the sqme are of the work piece. I’ll have to get a picture of this little addition because it helped a lot.