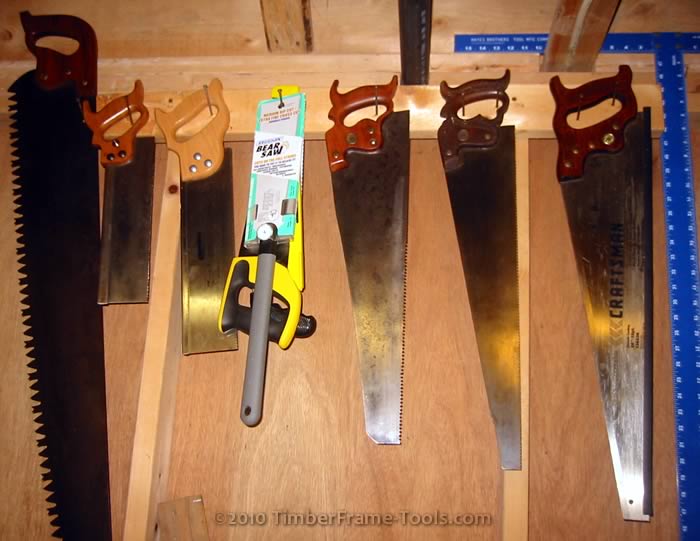
My current saw holder was troubled. It was nothing more than a series of 10D nails pounded into a 2×4 mounted to the wall. This was fine when I only had a couple of saws, but as I added more saws and began using them more, it became cumbersome. It suffered from a few problems:
- It took up too much room on the wall
- I had to grab the saws by the blades in order to hang them up or take them down
- I had to stack saws on top of each other
- The head of the nail dinged up my saw totes in uncomfortable places
I needed something better. My new saw till needed to take up less room, allow me to hang a variety of saws both western and eastern, and I wanted it to allow me to grab the handle of the saw for both taking the saw down and putting it away. I looked at a variety of styles but they all suffered from either forcing me to change my grip on the saw or would not hold eastern saws. I saw a tip in a woodworking magazine a few years back that suggested using a rubber ball and a wedge to bind the saw in a slot. This allowed for saws to be hung vertically and it really didn’t matter what saw it was. If it had a blade, it could hold it. In preparing to build this particular saw rack I was unable to find the magazine where I originally saw this tip, nor was I able to find it online. So I had to start with just the basic concept and go from there. Here is what the finished product looked like.
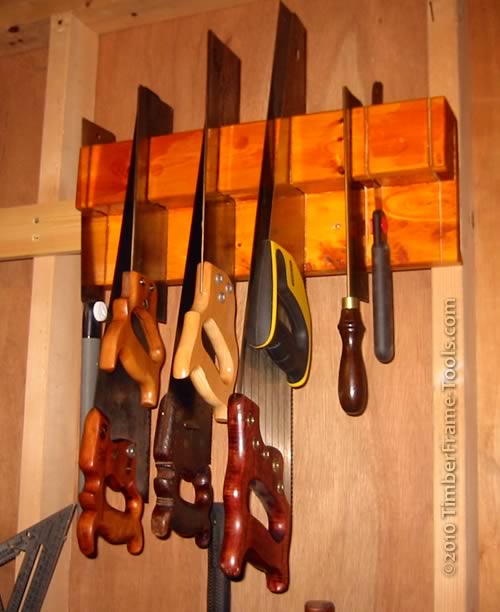
This till is only 20" wide but holds all the saws that once spanned 4' wide.
The saw till seems almost magical. You slide the saw into the slot in an upward motion, then pull down just a bit to lock it in place. When you are ready to use the saw, simply grab the handle and slide it up a bit while pulling it out of the slot. With a one-handed grip I can grab the saw, make the cut, and return the saw to the rack without ever re-adjusting my grip on the saw’s tote.
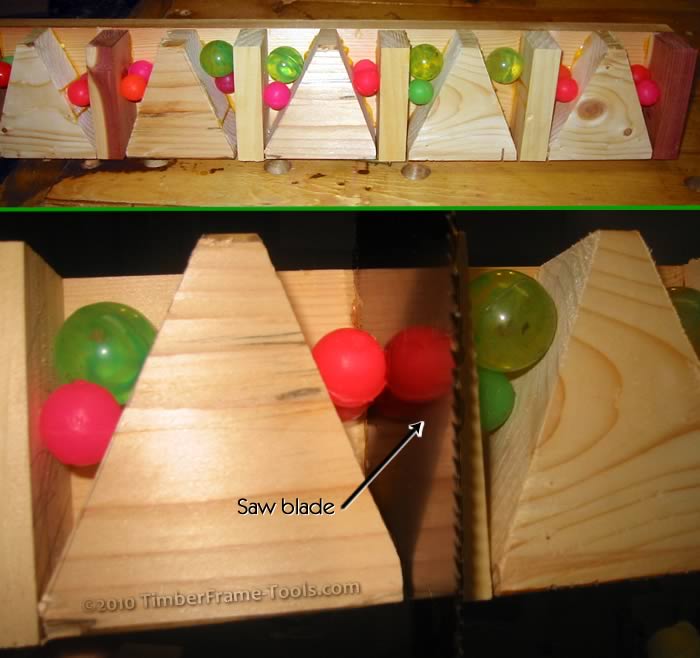
The rubber ball rides against the saw blade and when pulled down, wedges itself in. NOTE this photo shows two balls per section. I later went with just one ball per section.
Here is the basic idea. The saw goes into a slot created between a wedge and straight block of wood. A rubber ball resides on the wedge side and when the saw is pulled down, it wedges itself between the wedge and the saw blade, forcing the blade against the straight block of wood. The harder you pull down, the stronger the wedging action. Pushing the blade up, releases the ball from the wedge and releases the saw at the same time. In my early trials I tried putting two balls in each section, thinking that two would be better than one. On occasion however the two balls would wedge against each other and either prevent wedging the saw in place or it would prevent the releasing the saw on the up-stroke. So the photo above should not be followed. Only one ball should be used per saw.
I started by cutting up the blocks of scrap 2″x4″ you see in the top photo above. The angle I used was about 25° but the angle you choose will depend upon the rubber balls you are using.
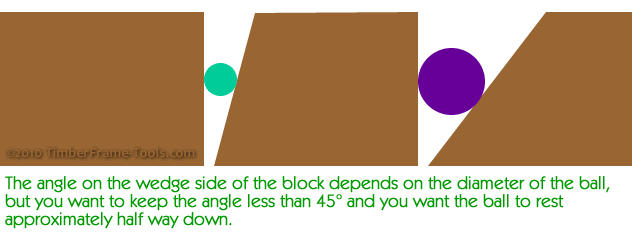 If you have the choice, smaller balls work better than larger ones because they can use a steeper wedge and create more force. I used 3/4″ and 1″ diameter and both worked fine. I would not suggest going smaller than 1/2″ or larger than 1-1/4″ .
When I cut up the blocks, I thought I was being clever by cutting the angles on both sides of the blocks so that I could just use a straight spacer in between. This was a big mistake! While it saved me a little on space, it made the spacing irregular and created a thin finger that is more prone to bending and subsequently binding the blade in the kerf. Please don’t do what I did.
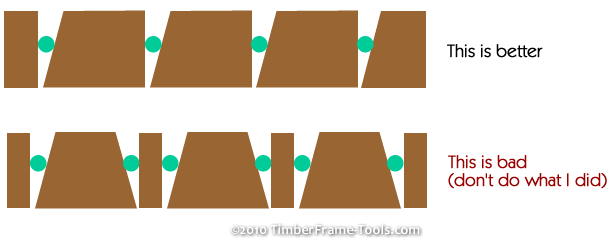
If I had it to do over again I would use a block that had the wedge cut out on just the one side. The spacing would be uniform and the structure would be stronger.
With the blocks all cut, I glued them to a 1″x4″ using shims between the blocks to represent the thickness of the thickest saw I have.
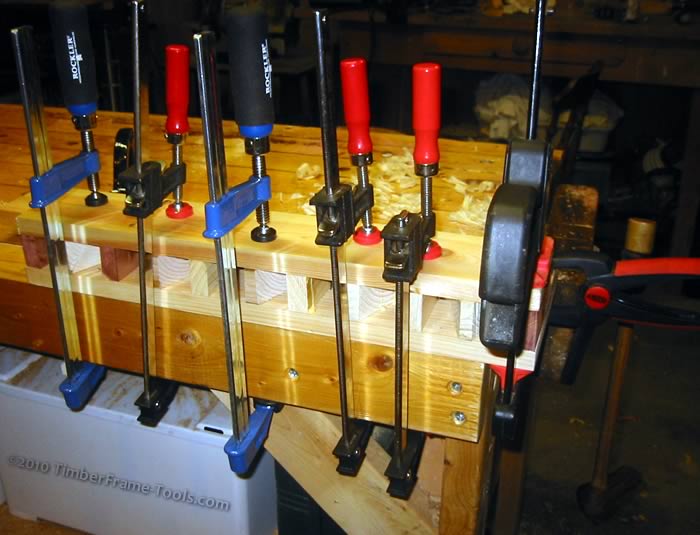 After the glue set up between the blocks and the front of the till, I glued them to a 1″x8″ that forms the back of the saw rack. When the glue dried, I proceeded to use a combination square to transfer the location of the kerfs to the front of the rack.
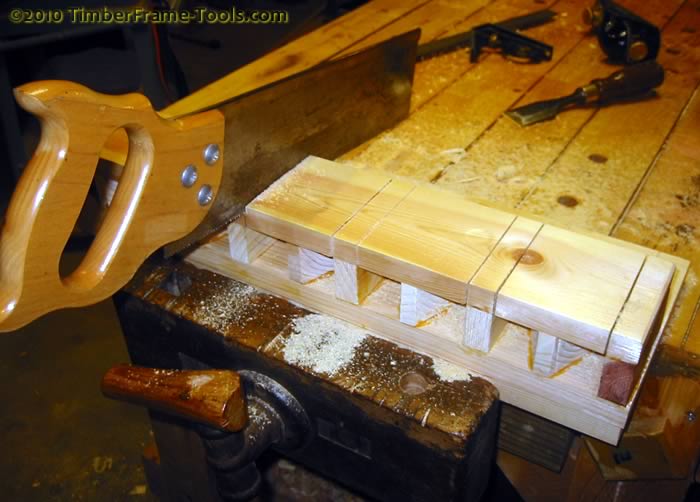
I then went through my saws and chose the crosscut saw that has the widest kerf and used that to cut all the slots for all of the saws.
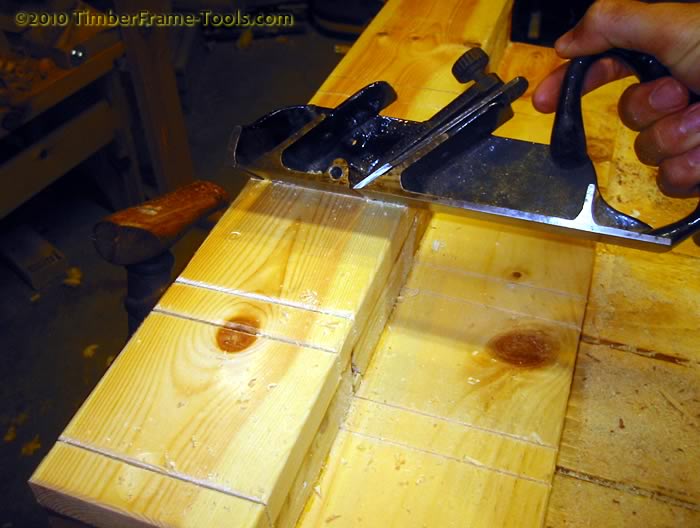
 I then used my Stanley Duplex Rabbet plane held at a 45° angle to chamfer the slots for the saws, which will make it easier to guide them into their slots.
 To hang the saw rack from the wall I used a french cleat so that I could move it around more easily as my shop continues to change. The long cleat on the wall has a 45° angle cut on the top, facing the wall and the back of this saw till has a matching cleat facing down.
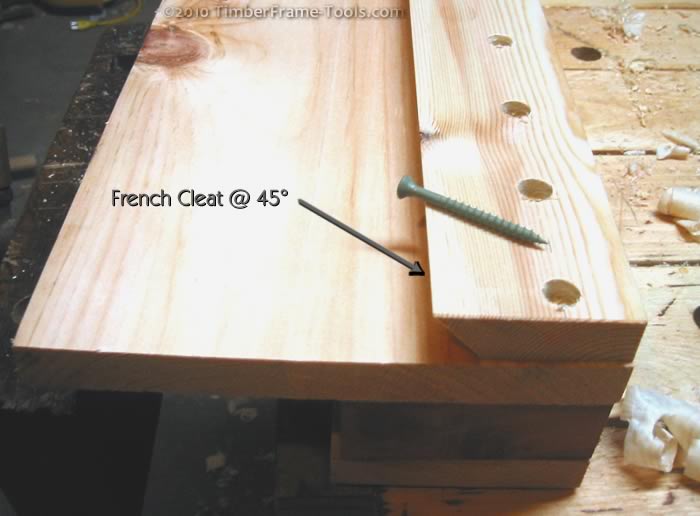 Probably simply gluing the cleat to the back of the saw till would have been enough, but I didn’t want to take any chances so I counter sunk a screw into every large block to help make sure they stay put as well. The photo doesn’t show it, but I also put a one inch thick strip along the bottom of the rack to bring it out to the same distance as the cleat so that it can rest against the wall.
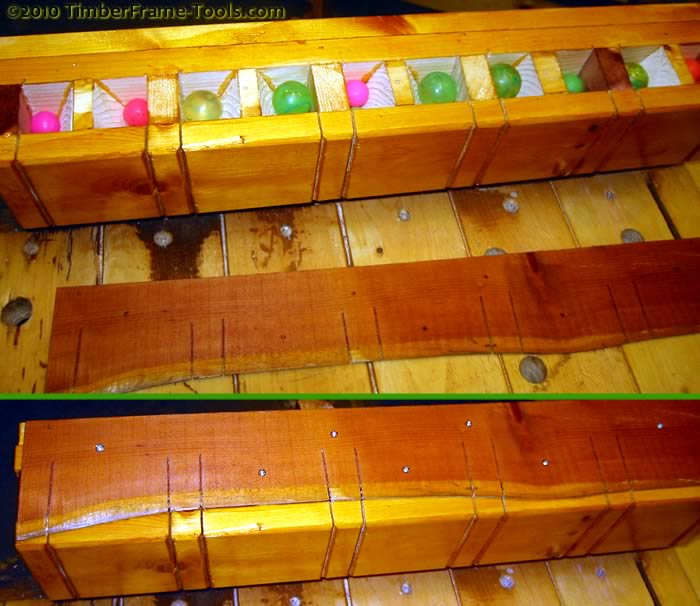
The top of the photo shows the balls in place, and the bottom shows the dust cover screwed on.
I put a couple of coats of shellac on it, just to dress it up a little. Then I put the balls in place. Sawdust on the balls would prevent them from having enough grip to hold the saws, so I made a thin cover to go over the top to keep the balls in place and keep sawdust out. I made the top removable so that I can take the balls out and wash them if they start loosing their grip.
Hanging the rack on the cleat was easy and I could slide it around. As I was putting the saws in, they were going in a little tough, and coming out a little tough too. It was not as smooth as it should be. I needed to widen the kerfs considerably. I had used my thickest saw…what to do now? Well there is one that was quite a bit thicker….errr NO not that….well, it might work.
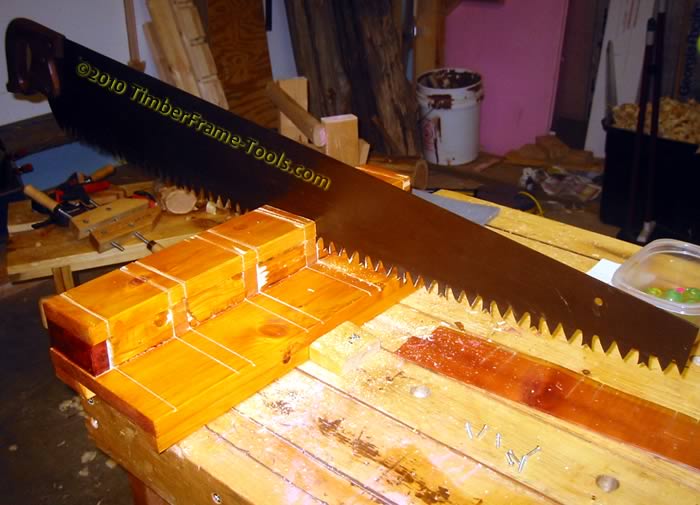
Hmmm a tree saw filed rip, to widen a crosscut kerf?? It worked, but look at the tear out left in its wake.
Okay so using the timber saw widened the kerf (and made a mess of the finish I had put on due to all the tearout). Now it hung on the wall and I was able to get the saws in and out more easily. One addition I made was to sink two brass screws into the back so that they emerge just beneath the french cleat on the wall. Since you have to push the saw up to get it to release, I didn’t want to inadvertently push the saw rack off the top of the cleat and have the whole thing come down on my head. So the two screws coming out just below the cleat, prevent the rack from lifting off the cleat.
Saw Till Evaluation
Overall I am very happy with how this saw till works. It can hold all of my western saws, back saws, ryoba, gents saw, shark saw, toolbox saw and even my coping saw. The only saw it can’t hold is my Zona Razor saw because the little backsaw is not deep enough to engage the ball. If I had used some thinner stock for the front of the rack, then it would have worked for the Zona saw too.
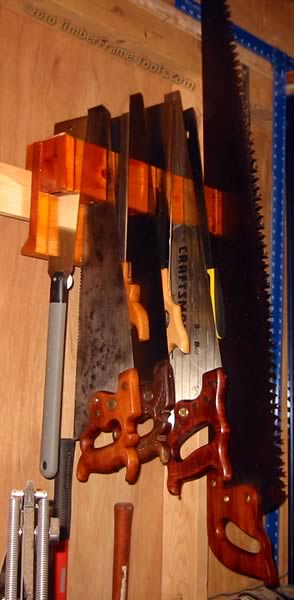
This saw rack can even hold the BIG saw!!
How secure do I think the system is? Can it hold a heavy saw? Seeing is believing. It can hold my timber saw, but the teeth need to stick out because they are too long and don’t engage the ball properly. The saw was secure and in place, however I do have to point out that I don’t store the saw there. Those sharp teeth sticking out are just too easy to hit with my hand as I am reaching for some other saw. Also the thought of that saw getting bumped out and falling, it could easily kill someone, since it is not equipped with Sawstop technology. I keep the timber saw hanging securely on a nail on the other side of the workshop.
I did notice after oiling a saw recently that it would not engage the ball. On further inspection, I realized there was more oil on the blade than I wanted on there. So I wiped it with a cloth and put it back into the rack and this time the ball grabbed it just fine. I’m interested to find out how the balls stand up to the test of time. I have fears that the oil may make them deteriorate or lose their grip, but so far so good.
Hindsight : Now that the saw rack is built, here is what I would change.
1) the shape of the wedge blocks (as I indicated earlier)
2) Instead of gluing a solid 1×4 on the front then cutting the kerfs, I would have cut 1/2″x4″ or thinner, to match the longest width of each wedge block and glued them individually to the wedge blocks. That way I could just glue the blocks in place and adjust the width of the slot to be 3x the thickness of the saw blades rather than mess around trying to kerf them in. There is no good reason for the slots to be overly narrow.
3) Made it wider so that I had more slots for saws I haven’t acquired yet. 😉
Thanks for the presentation, it is a great idea. It’s the first saw rack I see and want to build.
Awesome! Just last night, I was doing some cleaning in the shop (still kinda too hot during the day to consider big projects!) I looked at my stack of 3 Western saws and 7 Japanese saws thinking there has to be a better way to make these readily accessible without chewing up wall space.
This is the ticket; excellent timing.