A neighbor was cutting down an oak tree back in April 2016. I stopped to help, and some pieces followed me home. Then they started talking to me.
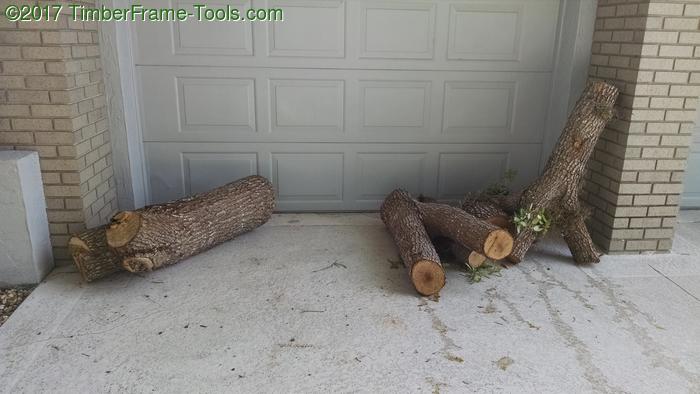
The log on the left said, “I want to be live edge slabs.” The one standing up on the right said, “I want to be and end table base.” First I ripped the slabs by hand and set them aside to dry. While they were curing, Impatience set in, and by November (~6 months later) I set to work on the table base.

I started with a drawknife (DR Barton) to remove most of the bark and a cheap beater chisel. The wood has some neat swirling patterns just under to bark that I wanted to try to preserve. I also wanted to preserve some of the “muscular” appearance of the wood so I didn’t want to be too aggressive with the drawknife. 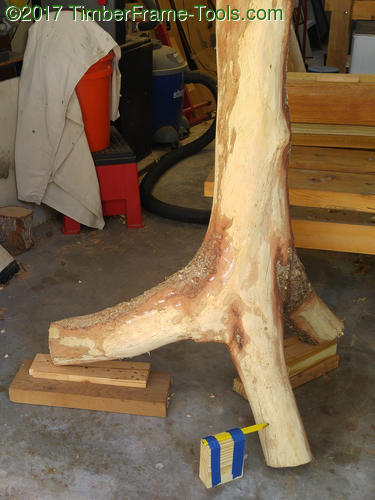
Before going too far, I needed to make it more stable on the bench. It was time to level the feet. I propped the legs up until I got it standing the way I wanted it to. Then I found a block of wood that matched the height of the highest leg. I taped a pencil to the block and was able to mark all the legs for cutting.
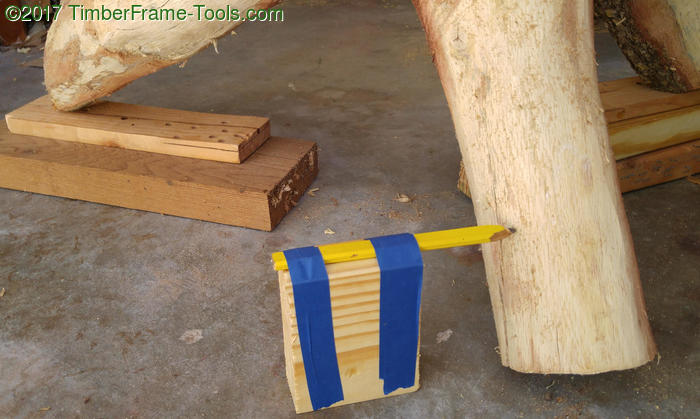
I run the pencil all the way around each leg. Then sawed off the leg at the pencil mark.
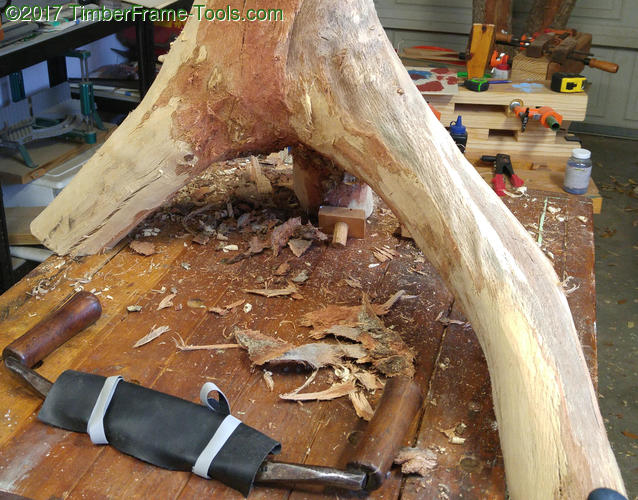
With it standing more stable, I went back to work on cleaning up the surface.

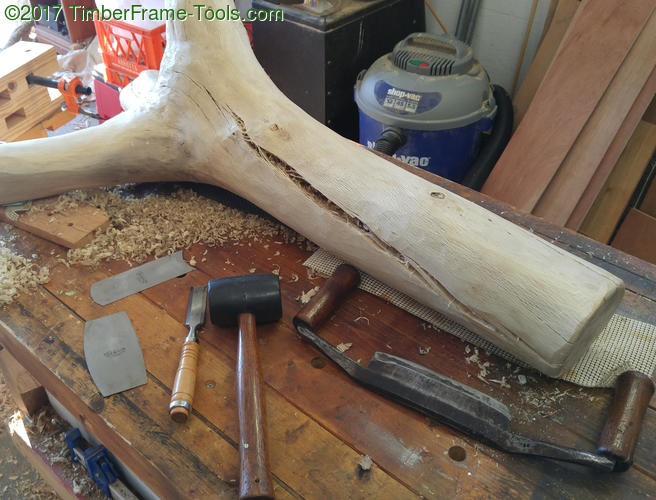
I worked at it with drawknife, beater chisel and then two different shaped card scrapers.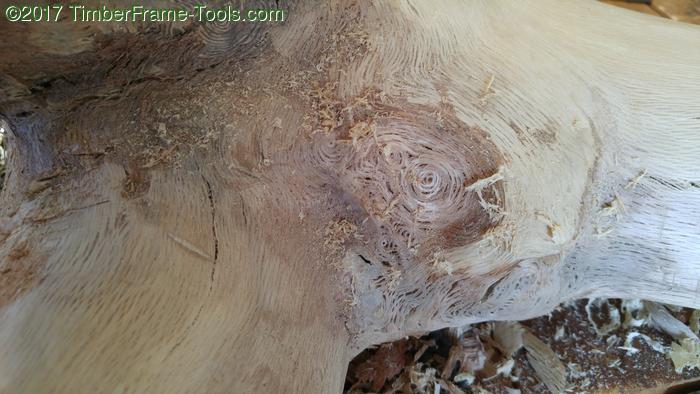
Here are some of the cool swirls I wanted to preserve. 
I spent a long time scraping. It worked pretty well and left a nice surface behind. It cut pretty well over most knots, though I did get some tearout on some of them.

To quickly get a sense for where I wanted the slab to sit, I took a photo and printed it in black and white. Then I cut strip of paper with the rough relative dimensions of the top. I then played around with moving the paper slab up and down on the photo until I got what seemed to be pleasing to my eye. I ended up preferring it like the image on the right. (Someone will probably point out how that is a close match to the golden ratio.) I find this method of paper doll modelling to be pretty fast and easy. If this were all dimensional lumber, it could be drawn out in Sketchup, but that’s not really an option for natural shaped stuff.
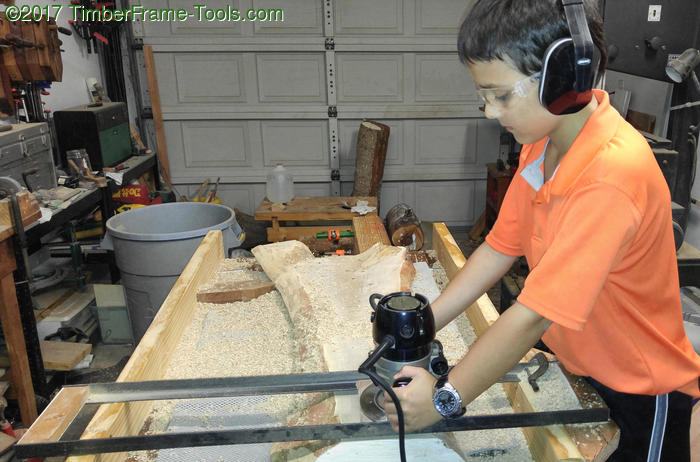
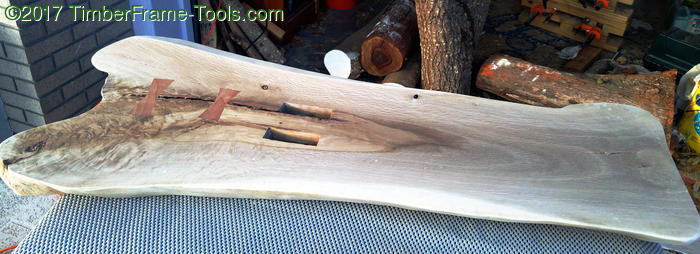
Time to work on the slab. My son and I used my router sled and rails to flatten one of the slabs I had cut off. By this point the slab had been drying for about 9 months, which is only ~15 months shy of its “2 years to dry” timeline. I told myself that drying in my hot Florida garage for 9 months had to be equivalent to spending 2 years drying some place else. That probably is complete nonsense since the humidity probably makes it less likely to dry. I was impatient.
The slab had some nice coloration and patterns to it as well as some burl like patterns on the right lobe. It also had a pretty large crack / bark inclusion that needed stabilizing. 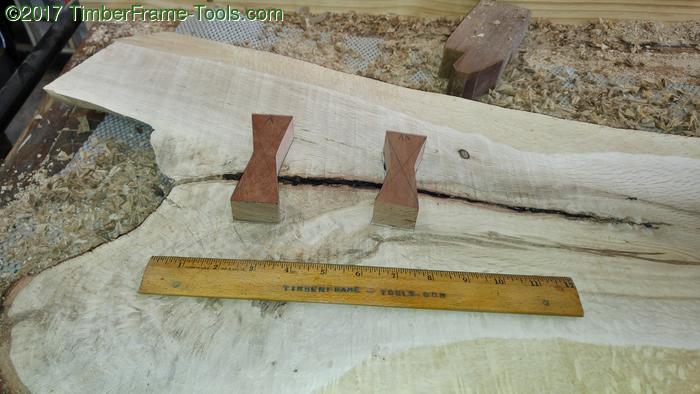
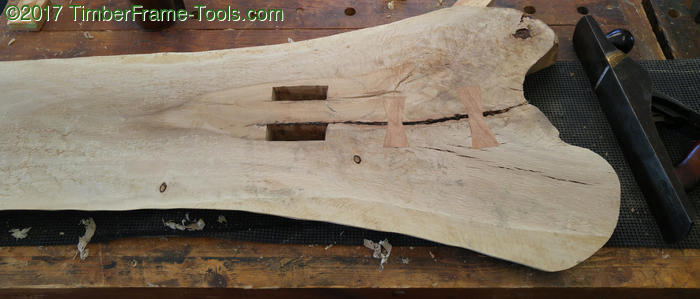
I cut a pair of keys from some cherry and set to mortising them in. I first drilled them out with an auger…whose lead screw often stripped out in the Oak so also used a Forstner bit to hog out the waste. Then I used a chisel to define the edges.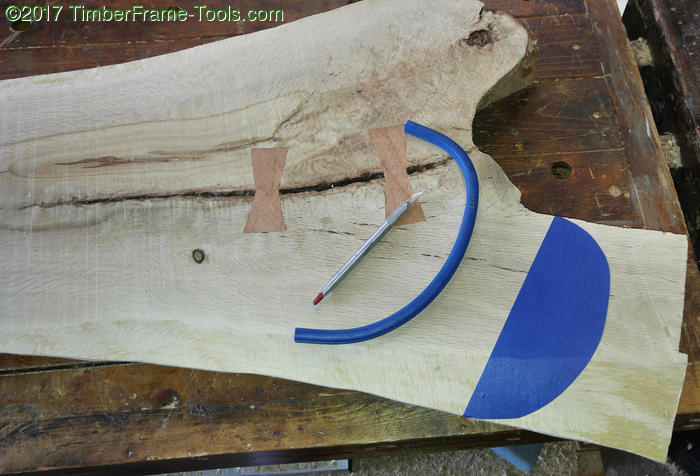
I wanted the two lobes of the slab to be somewhat symmetrical. So I used my Staedtler Flexible Curve to come up with a shape, then masked it with some painters tape to make sure I liked it. The painters tape also served as a visual guide to my sawing. (I saw Izzy Swan recommend this method for a jigsaw, so I figured it must help for a coping saw too.)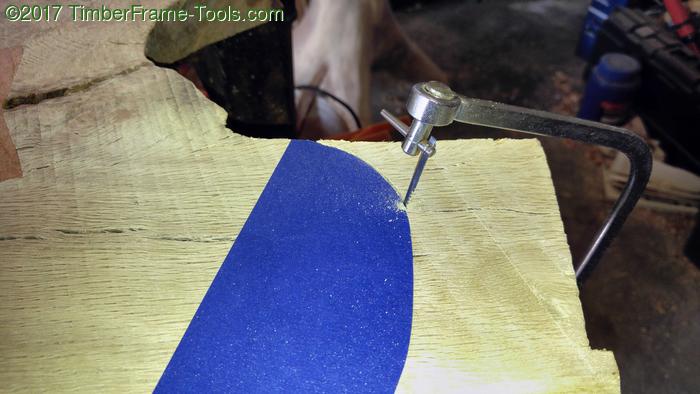
I angled the cut in so that the end would blend in to the live edge of the rest of the slab.
This little coping saw in 6/4 Oak is a bit of a workout. 😉
Now it was time to cut the base to the right height. What I don’t have photos for his how I marked the height all the way around.

I took a Stanley Cubix Laser Level which is an awesome little self-levelling crosshair device. I mounted it on my camera tripod and adjusted it to the height I wanted. Then I pointed it at the log while it was standing. From there I just marked along the laser line with a pencil. I rotated the base to mark the next side, and just kept turning the base and marking with the pencil. It worked great.
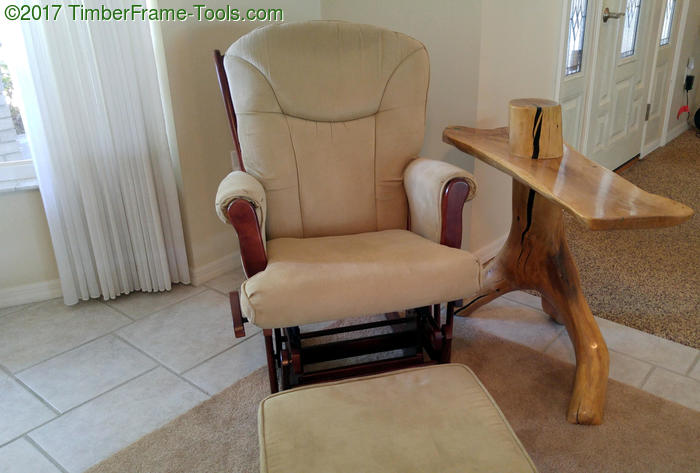
I ended up going a little lower with the table than I had planned from my paper modeling. The reason was just so the end table did not sit higher than the edge of the couch or chair.
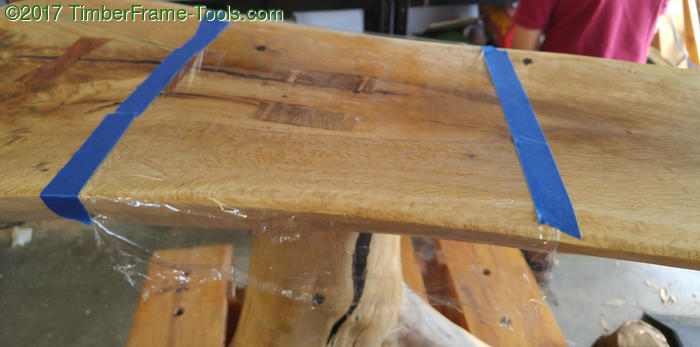
I was able to just balance the slab on top of the base. Then I spent at least an hour walking around and looking at it from all angles. Then putting the top of the log back in place, and removing it, putting it back…

All this time spent just trying to decide whether to put the head of the log on there, or go more traditional and leave it off. I ultimately decided to put it on, because that was more unique looking. My attempt at being “artistic” or maybe rebellious. Either way, it stressed me out more than it should have 😉

To attach the table to the base, I needed some pretty beefy mortises to match some pretty beefy tenons. They would be wedged for extra security. I cut the mortises first, so that I could use them to mark the tenons.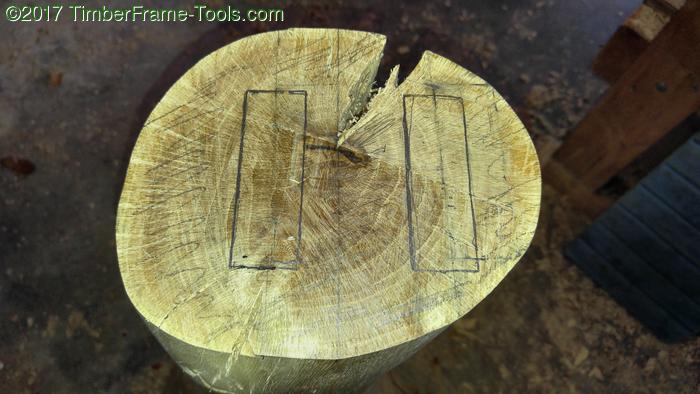
After marking the tenon location and making sure not to have the tenon land on the giant crack (check) in the log it was time to cut.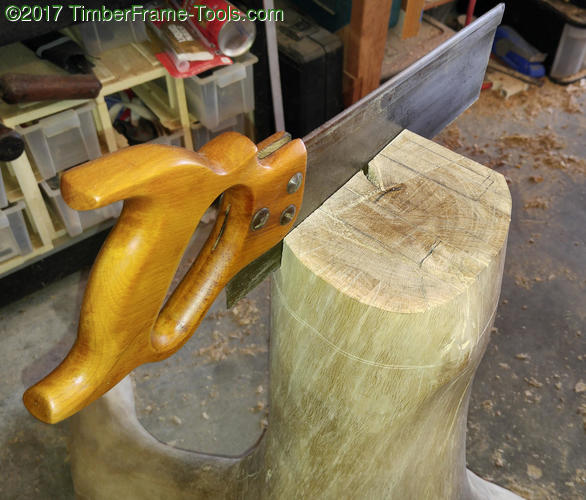
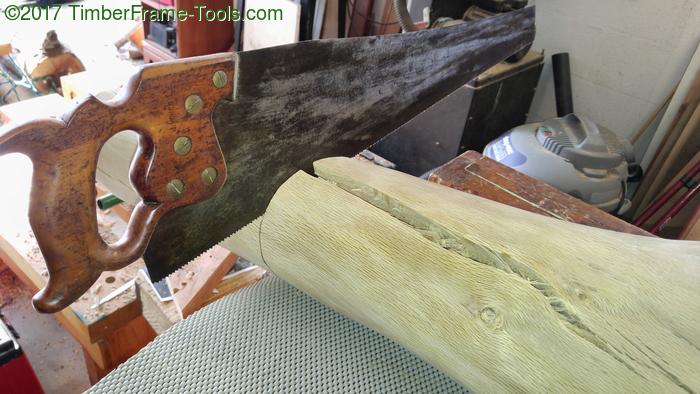
The vertical cuts were pretty simple. This backsaw was a little short, but it worked just fine.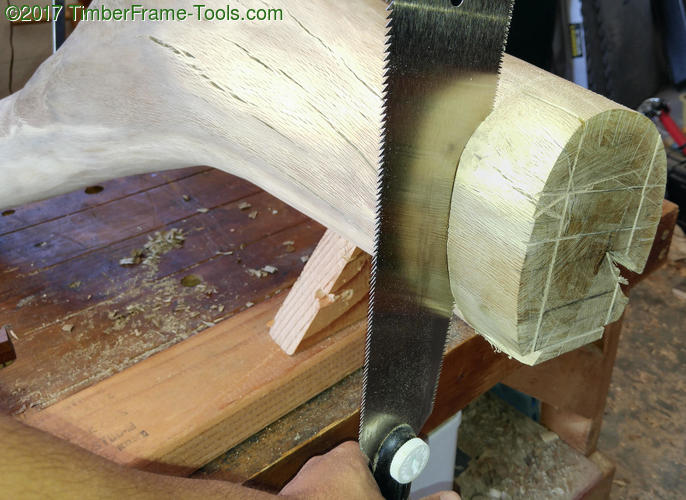
Cutting off the cheeks of the tenon took a bit more care to make sure I was cutting level shoulders. This is hard to judge when you are cutting on a round surface.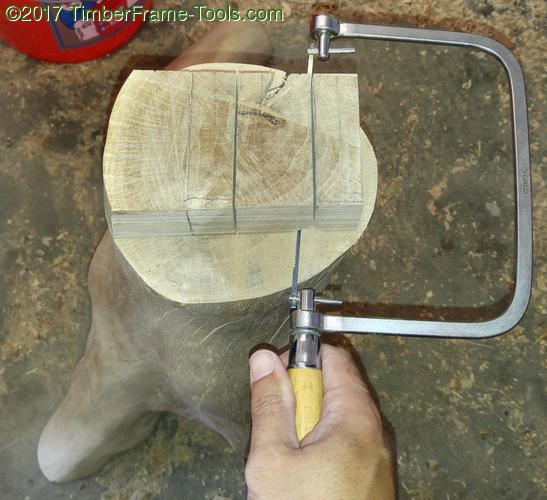
This remaining cut of sawing out the waste between to the two tenons was painful. I could only run the coping saw back and forth a little over an inch. It took a long time to go just the roughly 2 inches between the two tenons.
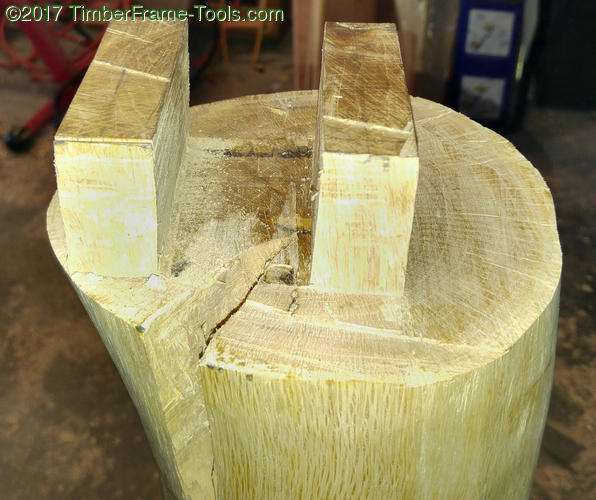
Here is what it looked like before I cleaned up the shoulders with a block plane and chisel. I needed to get them smooth and level so that the table would be fully supported.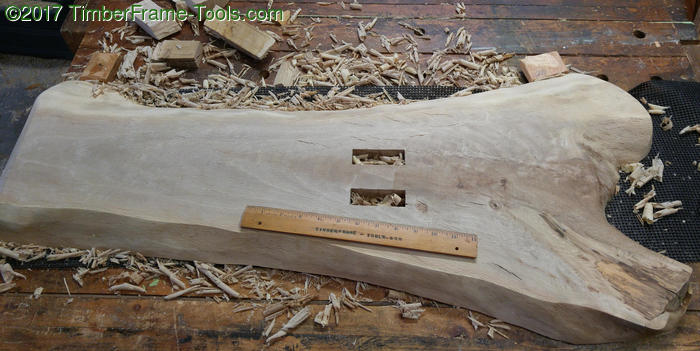
I thought I was clear of artistic decision after I decided to have the log appear to go through the table. Now I had to decide which side was going to be the top of the table. On this side I had some cool spalted wood from a limb that had been cut off and the tree started forming over it. I also had a cool set of three knots that looked like a coyote’s face. The detractor from this side was that the live edge was facing up, which resulted in a smaller surface, and curves at the edges that were more likely to have a misplaced drink go toppling off the side.
The opposite side had the burl-like patterns, the bark inclusion, the cherry keys, and the wider flat surface. So I chose that side to be facing up.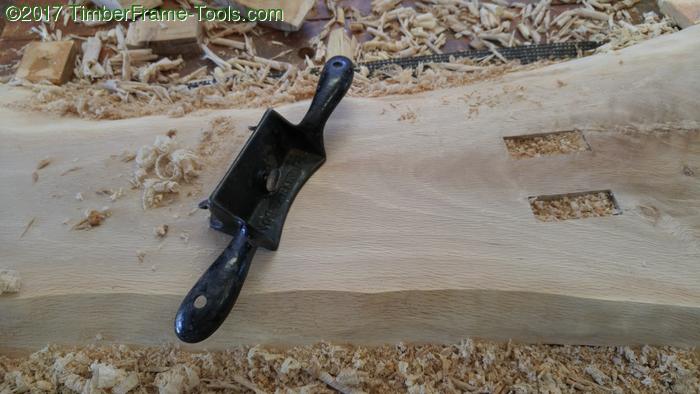
This Oak surprised me in that it was fairly prone to tear out with a plane. I had hoped to plane it all the way to a nice smooth surface, but I could not get there with a plane. I resorted to a combination of Stanley 81 cabinet scraper and card scrapers. Both worked very well.
Prior to sanding and filling the cracks with epoxy, I need to apply some stain. The stain I used was my alcohol based tea stain. I sprayed on three coats , letting it dry in between. I needed to get that on before applying the epoxy because the epoxy might block absorption of the stain. In hindsight I should have done more applications of the stain, because I actually wanted it to be a little darker. The tea stain could have gotten me there, I just needed to put more on.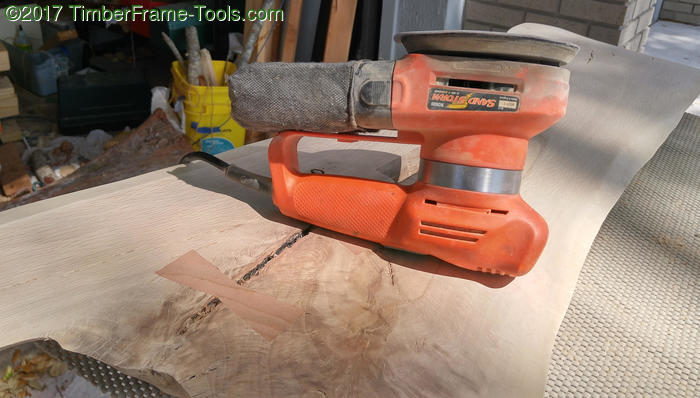
Even though the tea stain is alcohol based, it still raised the grain a little bit. I think that is because I used the 70% alcohol instead of the anhydrous stuff. So I needed to do a little sanding to get knock the grain back. Unfortunately, that little task was the nail in the coffin of my Black and Decker Sandstorm. I believe the brushes wore out, and are not replaceable. 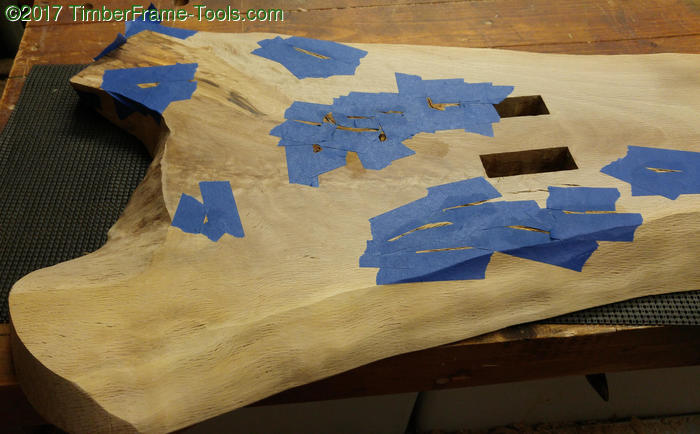
I used painters tape to mask off the cracks that I wanted to fill. This makes cleanup easier and also prevents the epoxy overflow from filling the pores.
For the epoxy I started using Bob Smith Slow cure epoxy and it worked well enough, but I needed a lot more. So I also tried Alumilite Amazing Clear Cast which is a more economical casting resin and has a much longer open time. It is also a little thinner and flows into cracks better. If I had to choose one, I prefer the Amazing Clear Cast unless I can’t afford to wait 12 hours for it to harden. For the black coloring I used Gamblin Dry Pigment -Mars Black. It produces a great super black color. For a little splash of color, I used Pearl Ex – Emerald which produced awesome iridescent patterns in the epoxy/resin.

Filling the cracks with black and emerald. The trick to filling the cracks is to leave one end unfilled so the air can escape and then go back and fill it in all the way. I used a heat gun to raise any bubbles out of the epoxy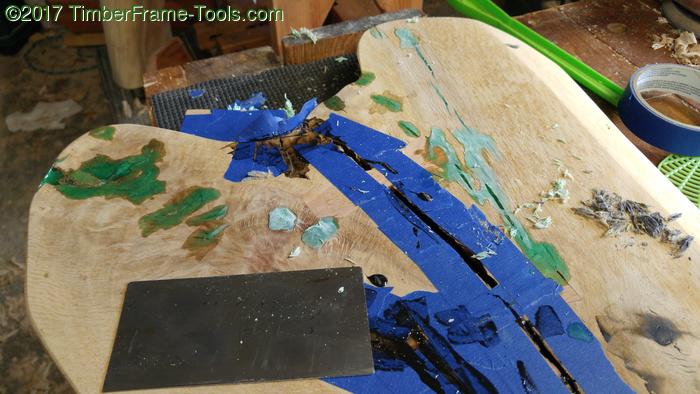
Once the material is cured, a scraper removes the excess pretty easily. The Alumalite takes about 12 hours to cure to solid, but takes closer to 24 hours for a full cure. I found that scraping it was easier at the 12 hour mark, but sanding goes better after the 24 hour mark.
I ended up really liking the green for filling cracks. Though I do think they don’t all need to be colored. I think the balance looks better when most of them are filled black, and only a couple are green. You can see above where I scraped and sanded away some of the stain. I re-applied some.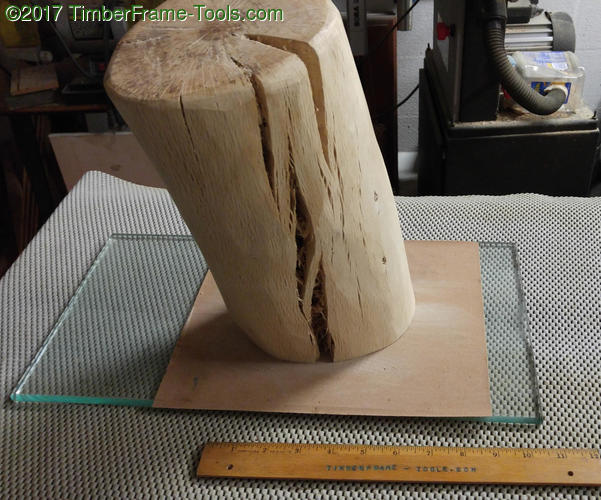
I spent a long time flattening the base of the “head” so that it would mate to the table’s surface perfectly. I did this by attaching a piece of 80 grit sandpaper to a glass plate with some spray glue.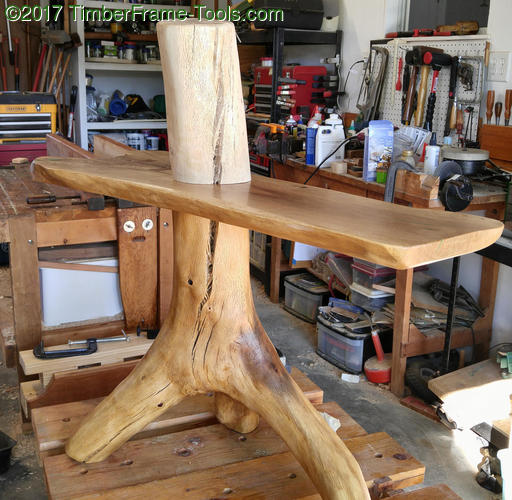
Since I had lowered the table to match the arm of the couch or chair, the head was longer than what seemed balanced in my earlier paper model. So I needed a way to cut the head shorter, and make the top of it level with the base (coplanar) .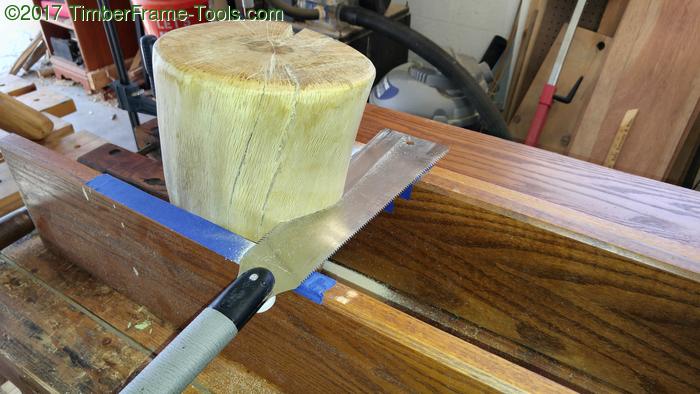
I set up some 1″x6″ to act as a cutting guide, then started cutting. This was a bit slow, but worked pretty well.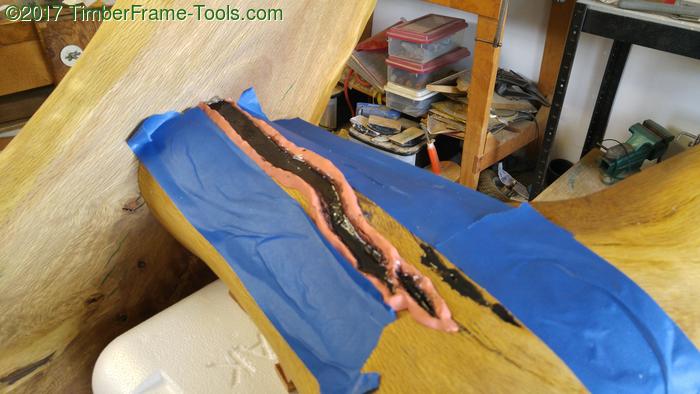
Originally I had decided not to fill the big vertical cracks in the log base. The more I looked at it though, the more I thought it was a good idea. Of course I had already glued and wedged the table top to the base at this point. So I tipped the table on its side and used some modeling clay to create levees around the crack, then I poured in some black epoxy. The clay peels away from the cured epoxy when you are done. A card scraper makes the epoxy match the contours of the wood.
All the work I had done earlier to flatten the bottom of the head to mate to the table …. well that was a bit wasted. The table after scraping and sanding was no longer perfectly flat. It was nothing you’d notice by looking at it, but when you put the perfectly flat head on it, it wobbled. So I decided to use a small bit of black epoxy just to make the two surfaces mate perfectly. I did not want the epoxy to adhere the two parts together though. So I put down a piece of kitchen plastic wrap and smoothed it out flat against the table. That will keep the casting resin from sticking to the table top.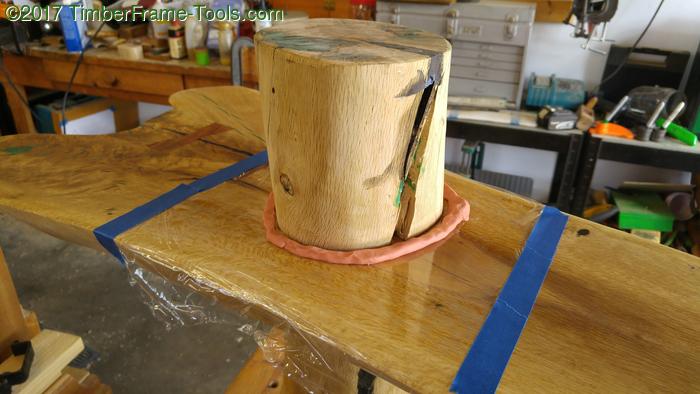
Then I positioned the head where it needed to reside. I built a levee of modelling clay around it, leaving just enough gap to be able to pour the casting resin. Then I poured a small amount all the way around and let is seep underneath. When it was all cured, I peeled it off the plastic wrap. After that I filled in the major cracks on the head with some black and green resins.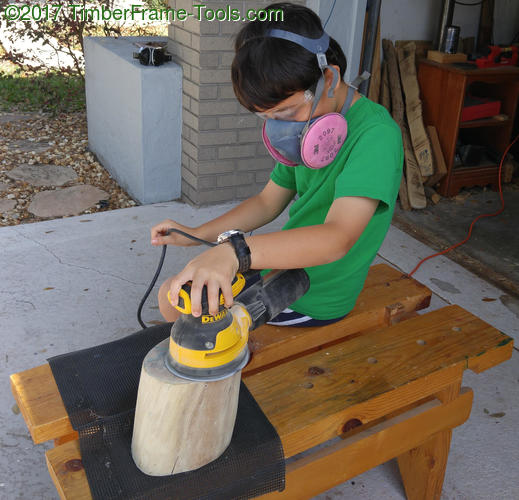
Here is my son in full safety gear trying out the new DeWalt sander (DWE6421K). It works nicely with a lot less vibration and was just a lot more comfortable to use than my old Black and Decker.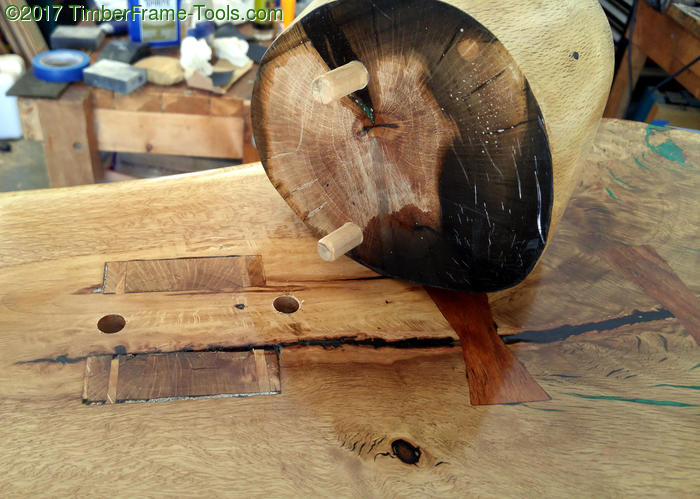
To attach the head to the table I just used some 3/8″ dowel and glue. Here you can see the black resin on the bottom of the head, which is a perfect match to the surface of the table. You can also see the wedged tenons that secure the table top to the base.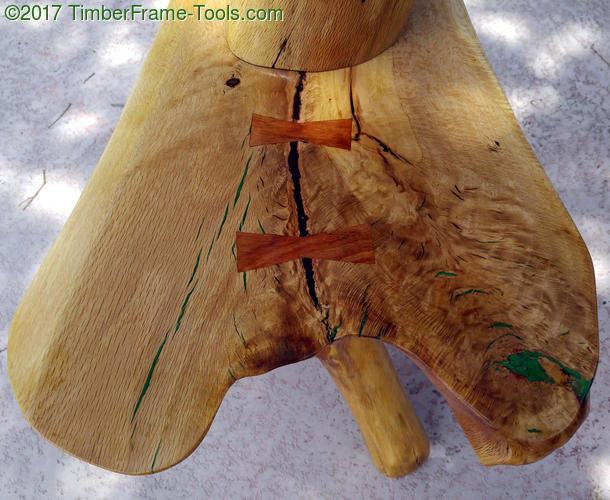
Here are some finished photos of the table top. You can see the striking difference between the relatively straight grain on the left and the swirling grain on the right.

Here is a close-up of one of the bark inclusions that I filled with emerald casting resin. The photo doesn’t really do it justice. The green has a swirling iridescence that is lost in the photo.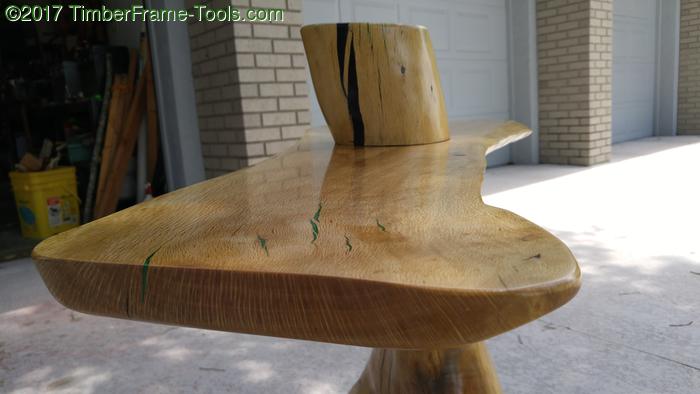
For a finish I used a blend of equal parts mineral spirits, Hope's pure tung oil, and Helmsman Spar Polyurethane. I applied roughly a dozen coats and wet sanded it out to 1200 grit. Then I applied a coat of Johnson's paste wax. The finish turned out a little glassier than I wanted. It is super smooth to the touch and looks glassy, but not thick.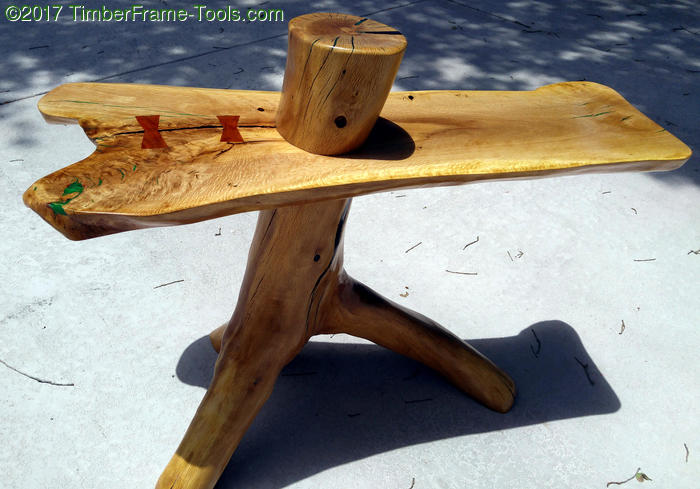
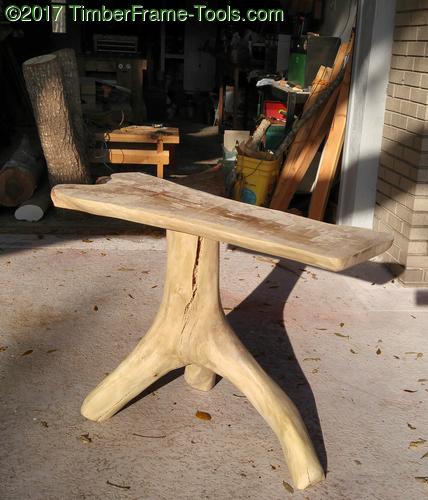
Here it is in the sun. I like how this photo shows the full range of the grain.
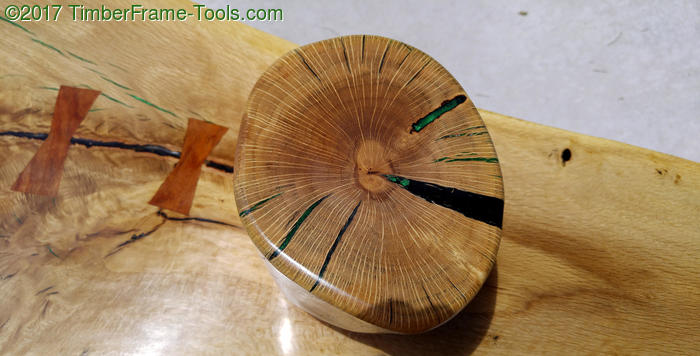
The top of the head has some great rays. All the major gaps filled with casting resin.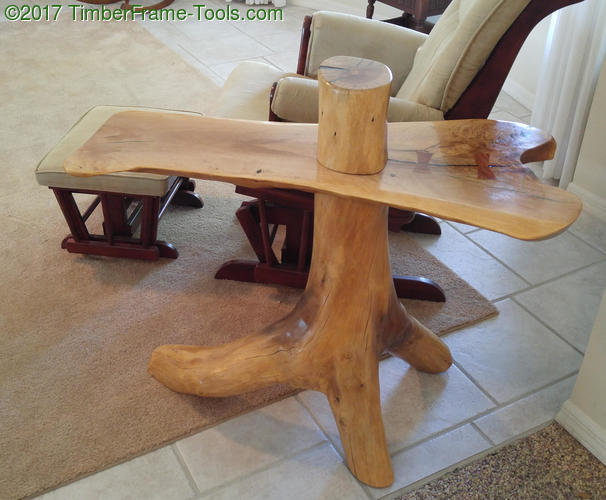
I guess I have at least 100 hours into this… maybe more. It was a challenging project, but in a fun way. Now it is time to start working on the matching coffee table. 🙂
It made a very nice side table.
Thanks for the good write up.
ken
Thanks Ken.