I decided it would be nice to make a pair of Adirondack chairs for my front porch. Most designs have a back that leans back pretty far and a pair of back legs that stick out pretty far too. I didn’t think I had that kind of space on my front porch, So I wanted rear legs that were more like a traditional chair. The other challenge I set for myself was no metal, all wood. Here is what I came up with after working on them for more than 1 yr on and off.

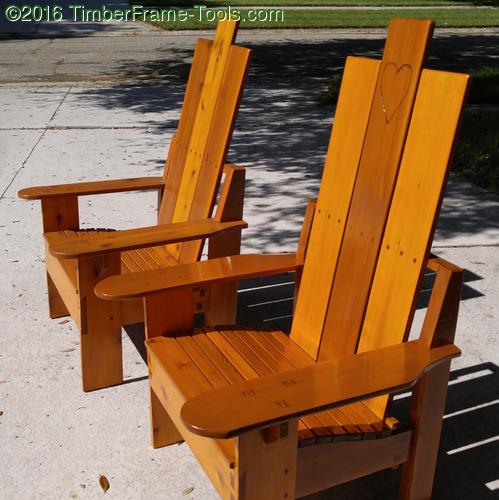
They are made from 2×6 rough sawn cedar from Home Depot (yes you have to sort a bit through the pile to find some good ones). They are finished with Sikkens Cetol Marine and have only wood and glue joinery.
Feel free to follow along with all the details if you’d like.
Stock Preparation: Adirondack Chairs
Home Depot sells 2″x6″x8′ rough sawn cedar. It is quite affordable and if you dig through the pile on repeated trips, you can collect a nice set to work with.
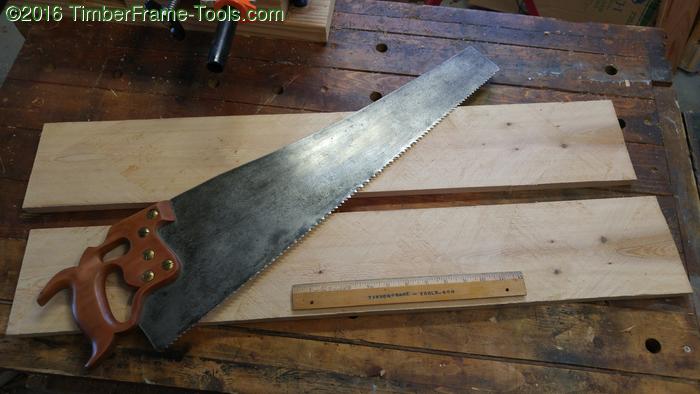
I planed it all by hand using a scrub plane and a jack plane. Even though cedar is pretty rot resistand, it is not very dense, and its fibers don’t hold to each other very well. It planes easily, but not cleanly. There can be a lot of tearout near knots. So I made smooth what I could with the plane but didn’t spend a lot of effort making it finish ready. I knew it would need some sanding.
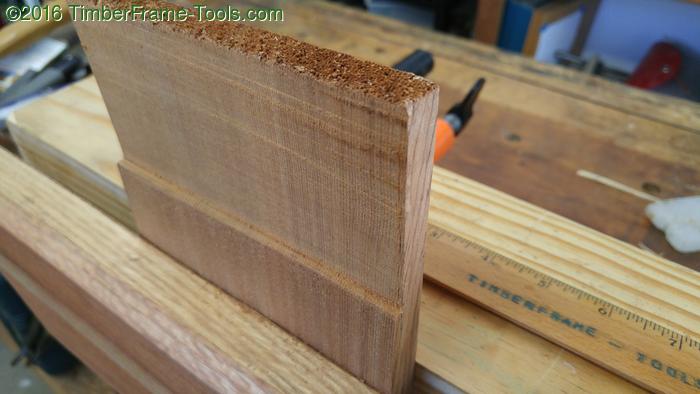
The back legs were the only pieces that were due to be 2″ thick. Everything else would be 3/4″-ish. So I had to resaw all of them. I used a homemade center marking gauge to mark the center of the edges on both sides
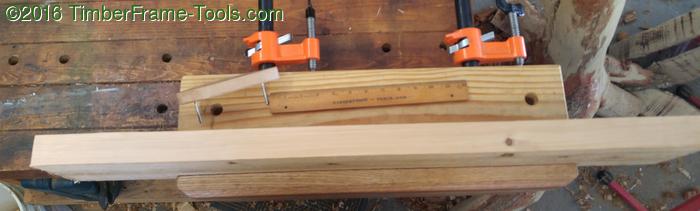
My Bulloxon vise worked great for resawing. Starting on the corners I worked my way down, flipping the board over every 15-ish strokes.
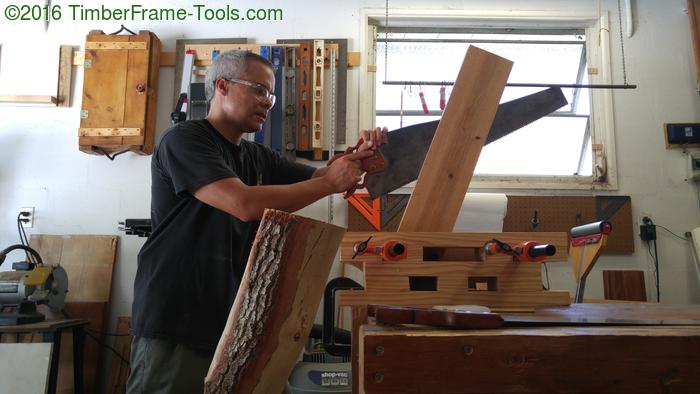
The results are pretty clean and needed to be planed. Full disclosure, It was pretty hot here in Florida this summer, so I elected to let my bandsaw do more of the resawing than I did by hand. The method was the same though, Mark the edge, then run it through the bandsaw by eye.
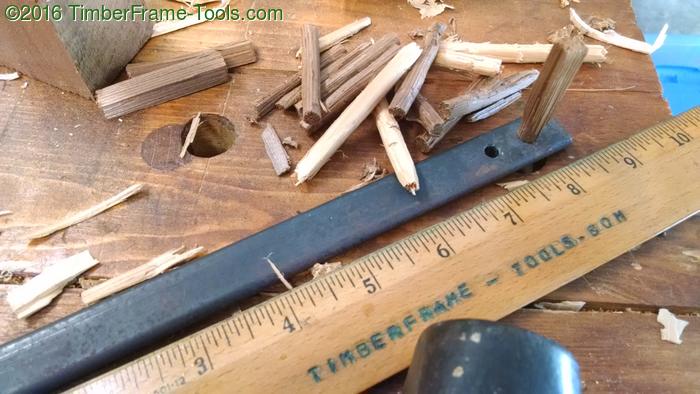
I had the idea to make dowel by hand. Cut some blanks and pound them through a hole in a metal bar. I’ve done it before with hardwood and it works quite well. The cedar however was no so cooperative. It was too soft to give consistent results. FAIL! Oh well, I’d deal with that later.
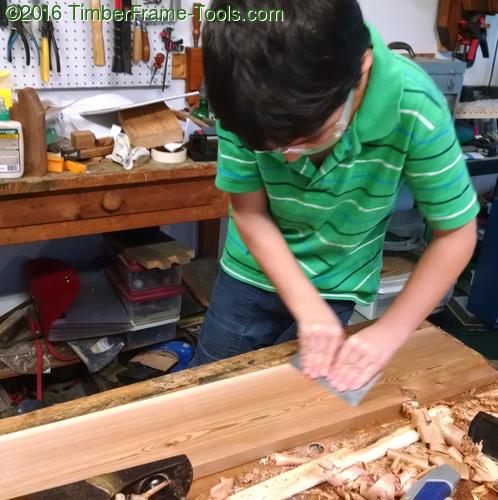
My son was enjoying trying out the card scraper. It does a better job than the plane when near the knots or other wild grain. However, even with a good sharp burr, there were still sections of rising grain that kept tearing out due to cedar’s quirkiness. Those would have to feel the wrath of the sandpaper.
Joinery: Adirondack Chair
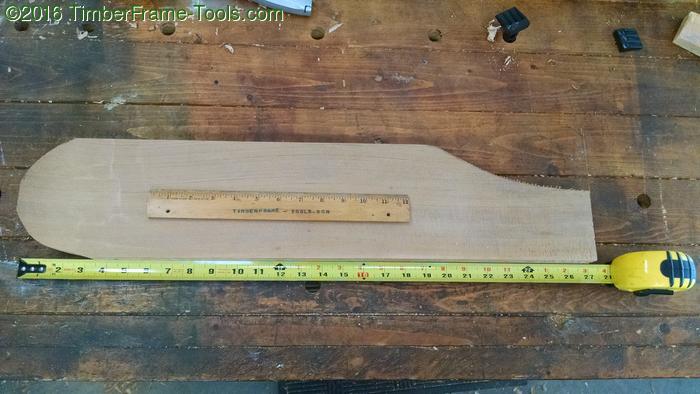
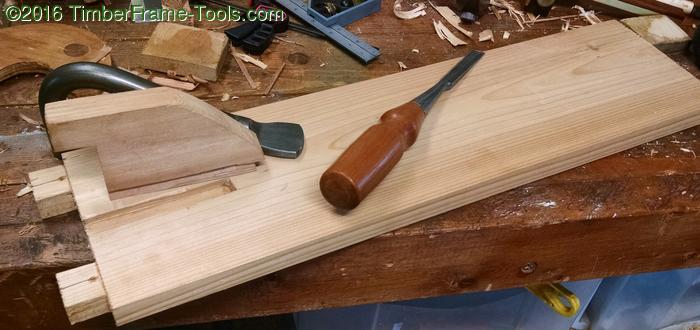
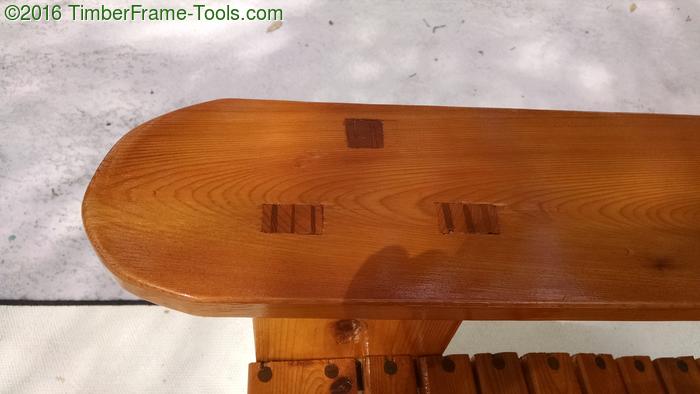
Adirondack chairs have signature arms. They have to be wide like an aircraft carrier deck… errr.. they need to be able to hold beverages and snacks, or they should be sent back to the woodpile. I sawed out the rough shape on the bandsaw.
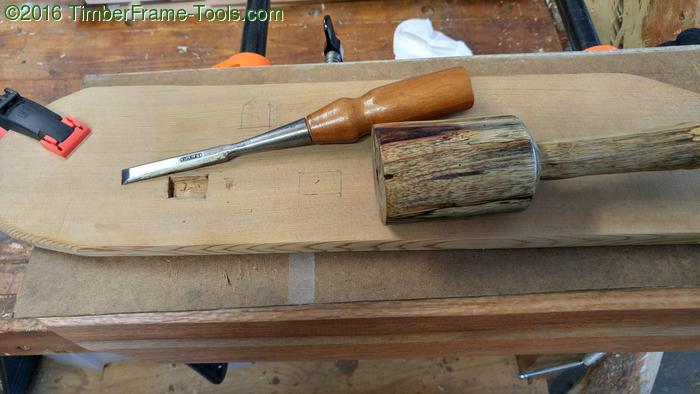
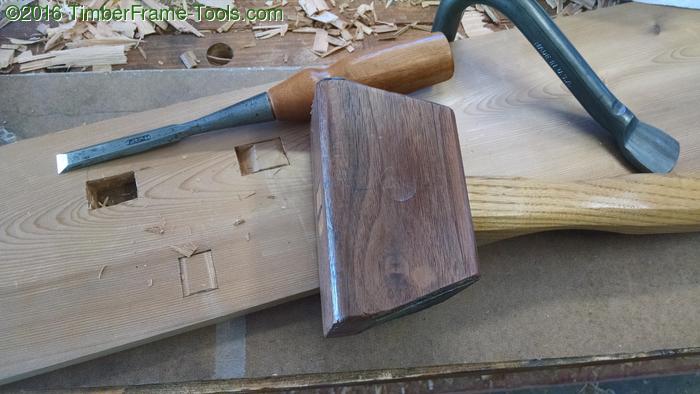
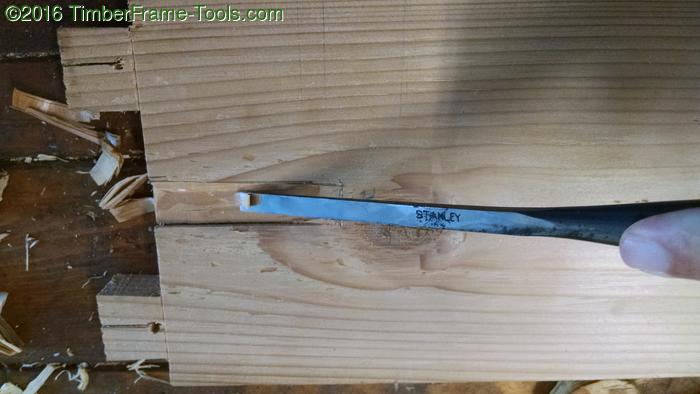
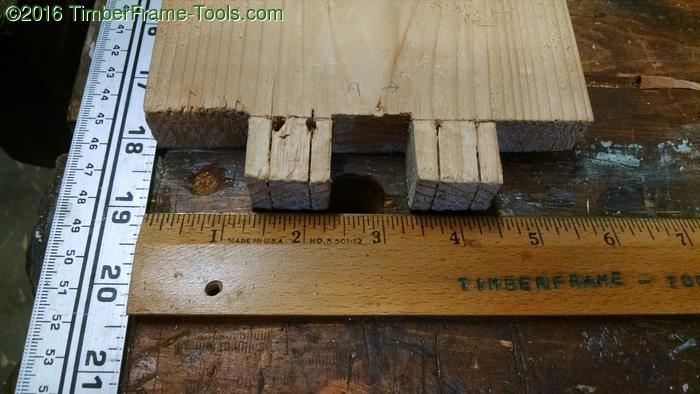
The front leg / arm support has three tenons on the top that will fit into through mortises on the arms. They will be held in with wedges. A good sharp chisel is a must. The softer wood is prone to not cut cleanly.
The carver’s mallet is nice, but my joiners mallet was the better tool for the job.
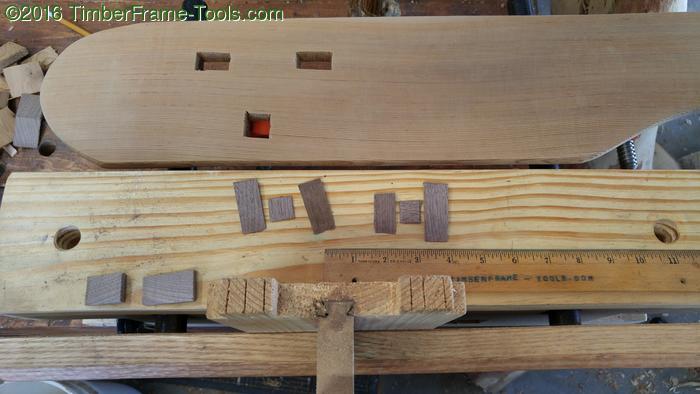
I used walnut wedges for contrast. The middle wedge slot on the tenon is petty worthless for strength, it was more just for looks.
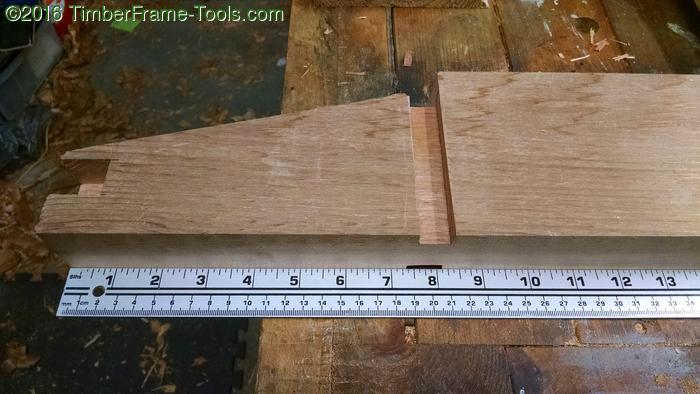
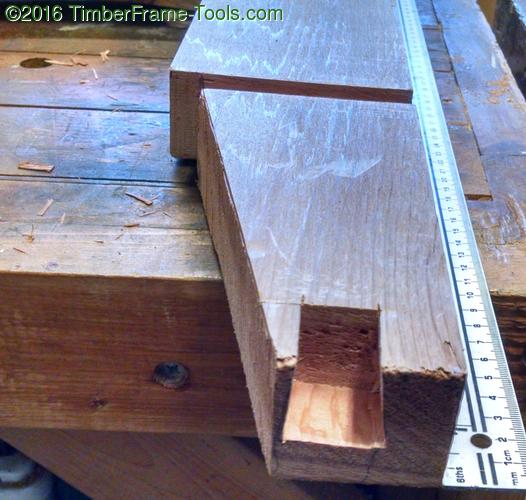
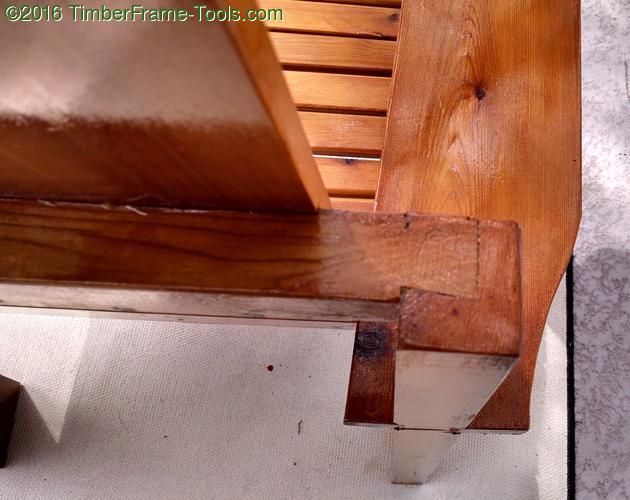
The board that makes up the front leg had a third support to keep the wide arm from twisting. We don’t want any spilled drinks or snacks. Here I am starting to create the sliding dovetail that the support arm will slide into.
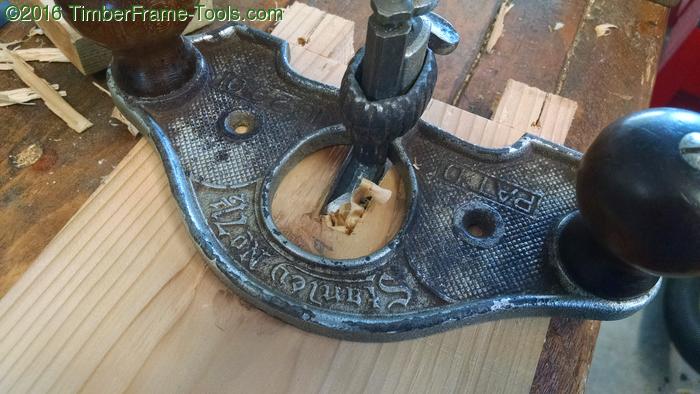
The walls of the slidng dovetail I cut half-way, with a hand saw. Then after chiseling, I used my router plane to flatten the bottom of the sliding dovetail.
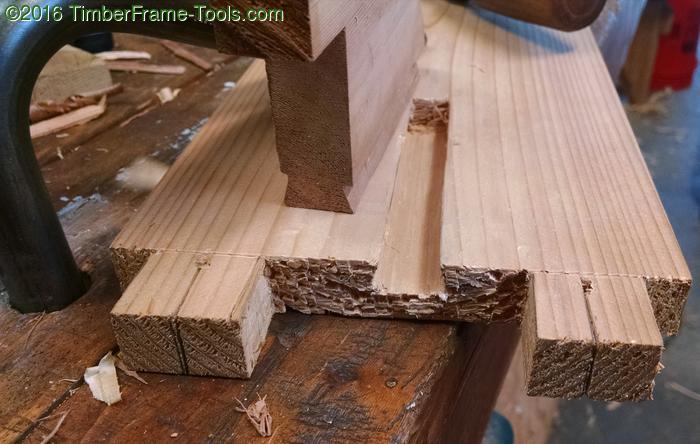
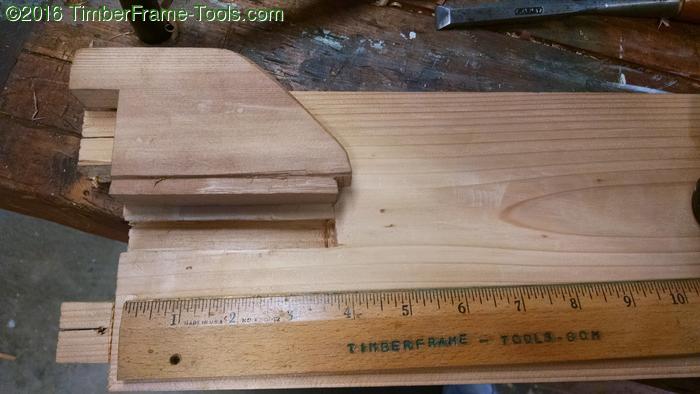
The support arm has a shoulder that goes beyond the sliding dovetail. This is partially to cosmetic, to cover the stopped end of the sliding dovetail. It is also preservative as it keeps water from getting in and sitting at the stopped end of the dovetail.
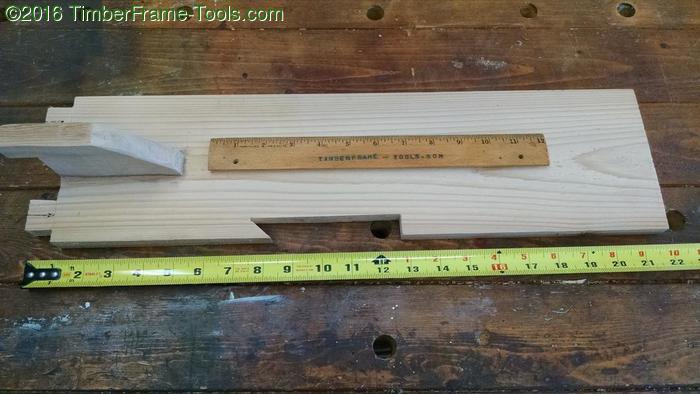
The notch on the leading edge will house the end of the front stretcher.

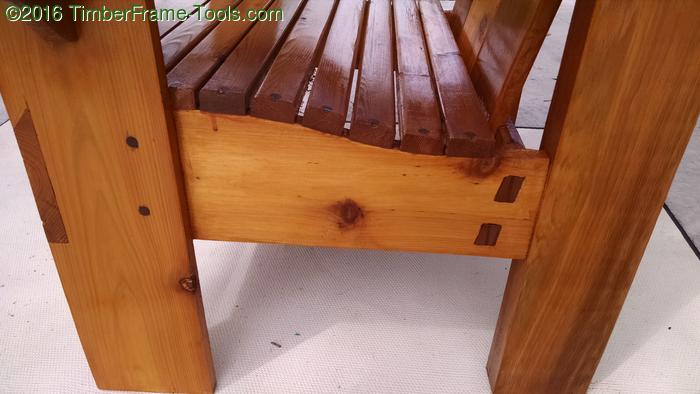
The back leg is not your traditional rear leg to an Adirondack chair. It has a mortise for the side rails of the seat (the siderail is already in place on this one). It has a pair of dados for the arm of the chair, and it has a single dovetail mortise at the top to hold the upper back support.
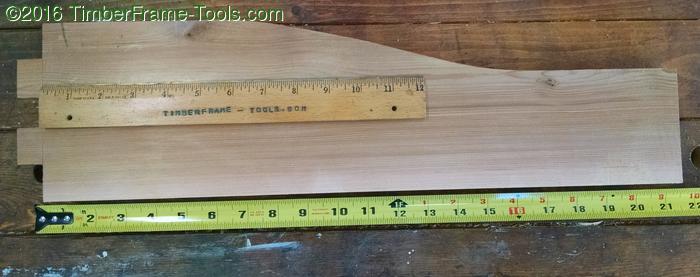
The siderail ends up being a bit complex. It has the curve to accommodate the seat. It has a pair of tenons at the front to fit into the stretcher. It also has a large tenon at the back to fit into the rear leg (no yet cut in this photo).
The siderail also has a pair of mortises for the rear stretcher to go into. Those are angled as that angle matches the rearward angle of the back.
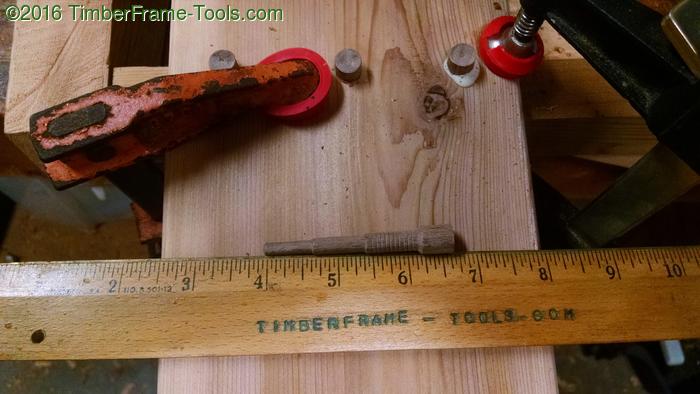
The tenons on the front will be wedged. Here you can see the slots for the wedges with holes drilled to terminate the slot. (one cut went too far, bypassing the relief hole).
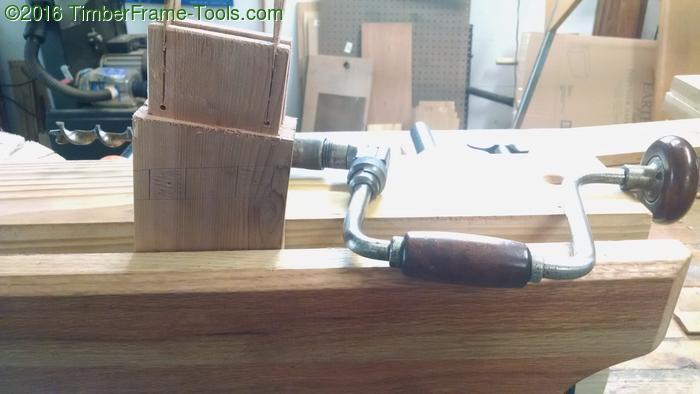
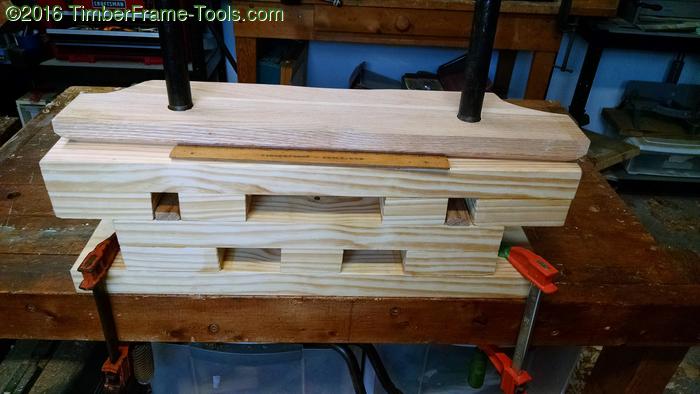
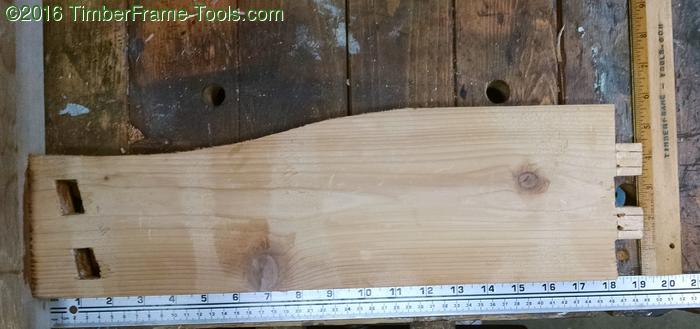
Here you can see the large tenon at the back side of the side-rail. I have the mortises marked and have put the two side-rails back to back so I can use the brace to remove most of the mortise.
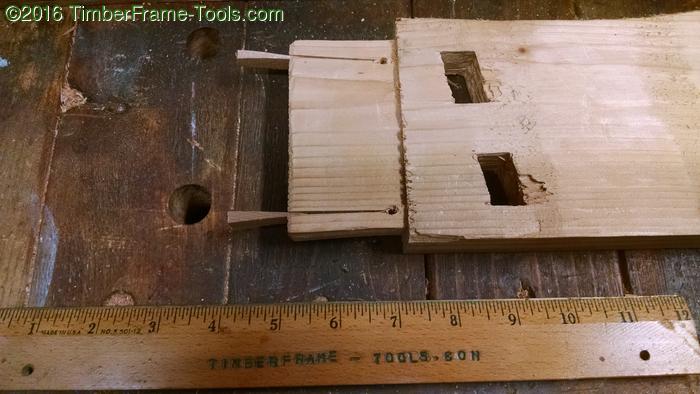
The tenon at the back of the stretcher is fox-wedged. Driving the tenon into the mortise will drive the wedges in and make it so the tenon can not be removed. On the mortises, notice the chipout. Cedar splits if you look at it the wrong way.
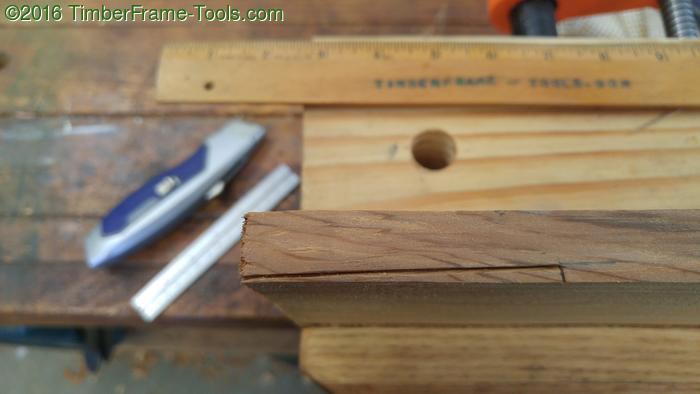
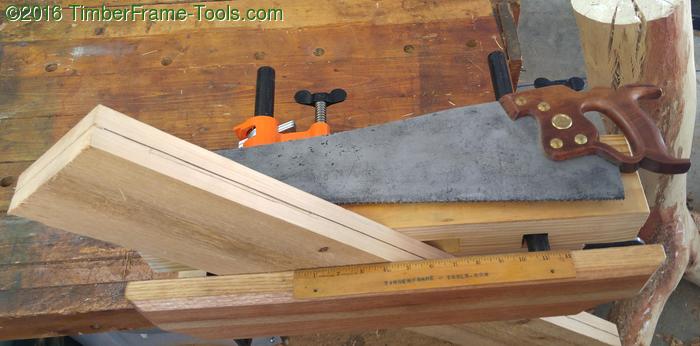
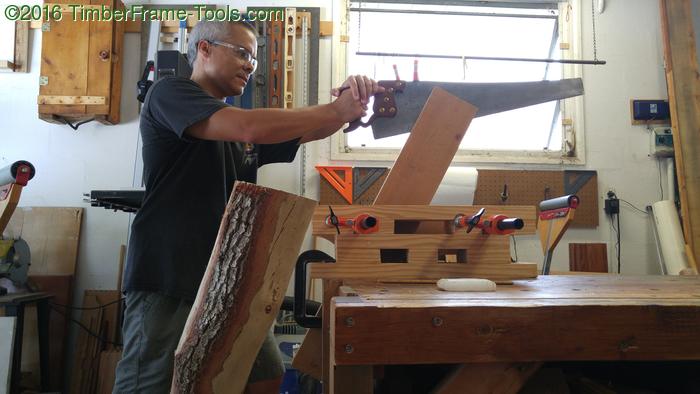
The bottom of the boards that makeup the back of the chair will rest on the rear stretcher. The angle marked for this cut, give the stretcher something to register against. I marked it and made a knife wall to guide my sawing. I often use my sliding utility knife to scribe the cut lines rather than a more formal marking knife.
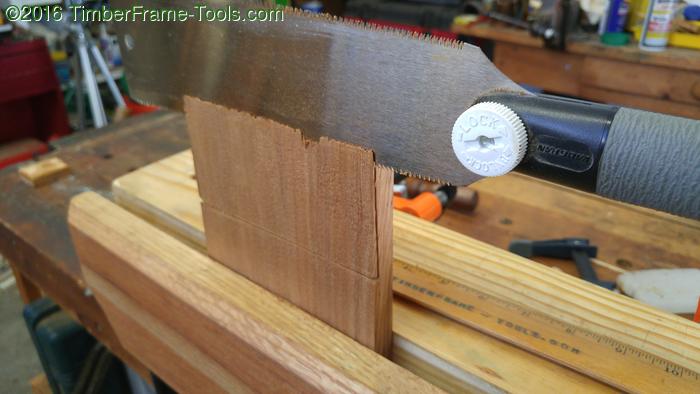
At the narrow end of the taper, it was so thin and so thin to breaking, that I used my Japanese style ryoba to make the cut rather than one of my Western saws.
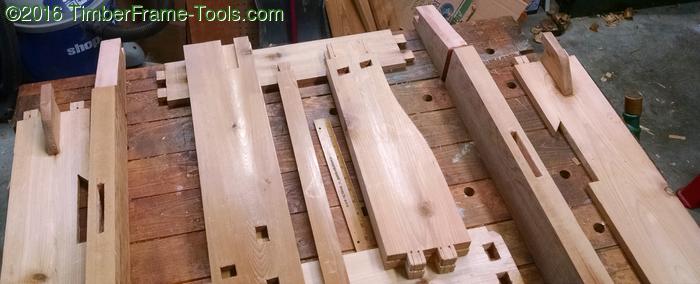
Here are all the joinery pieces for one chair, minus the seat and back boards.

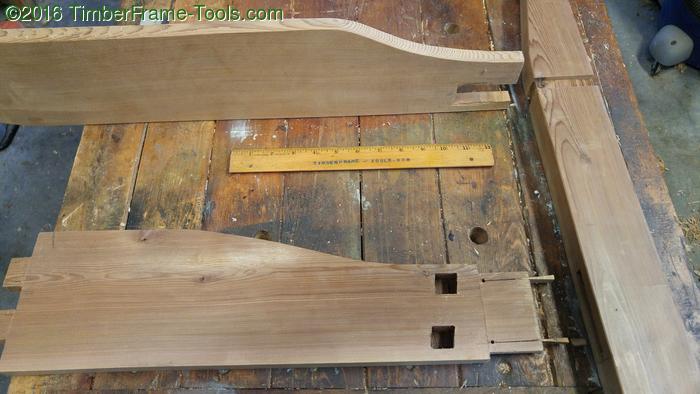
Here are the side-rail, arm and back leg ready for dry fitting.
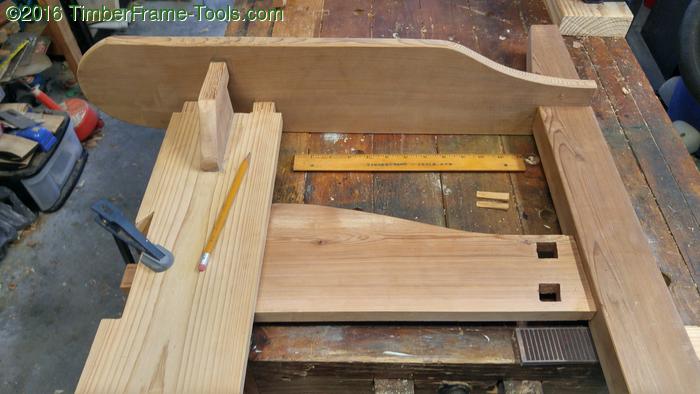
Here I have the parts positioned (fox wedges not in, they are lying on the bench near the ruler) so that I can get the alignment of the front leg to mark the position of the three tenons on the arm of the chair.
Gluing up an Adirondack Chair
So in gluing up this chair, there is a choice of:
- Building the two sides, then connecting the two sides with the stretchers and adding the seat slats and back.
- Building the seat box then connecting the arms legs and back.
I did one chair one way, and one the other. I can definitely say that choice B is the better one. Sorry, some of these photos show A and some show B so I apologize for any confusion the mixed display causes. I will label each as method A or B.
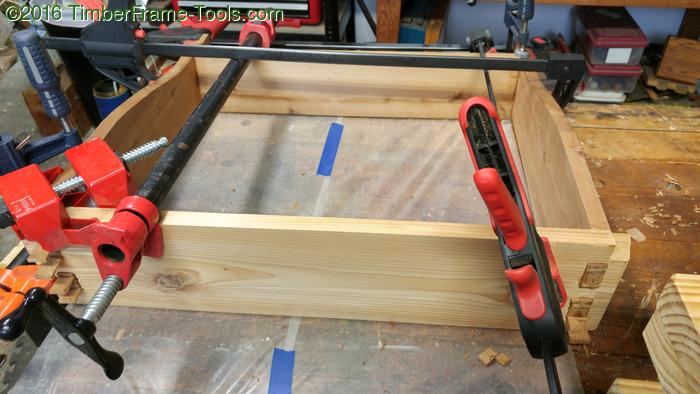
[B] Gluing up the seat box.
As in practically all glue-ups, many clamps are needed. Here I use a Bessey corner clamp to keep it square, a couple of pipe clamps, and a pair of squeeze clamps. I put wax paper down on the bench to catch any glue. It protects the bench and is easy to remove from the project.

[B] seat base with wedged tenons.

[B] Gluing he front legs to the seat frame.
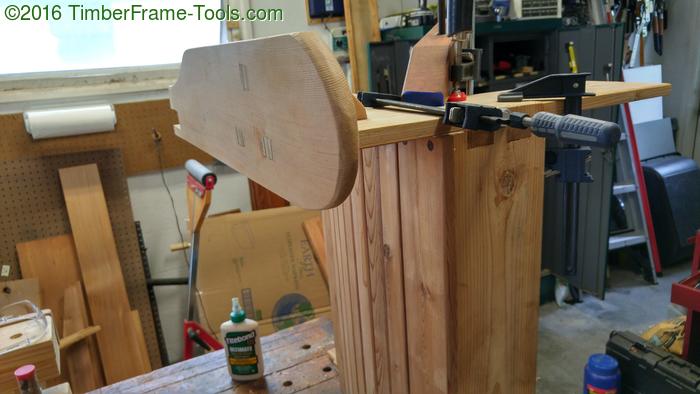
[B] The arm was already glued to the front leg (no photos)
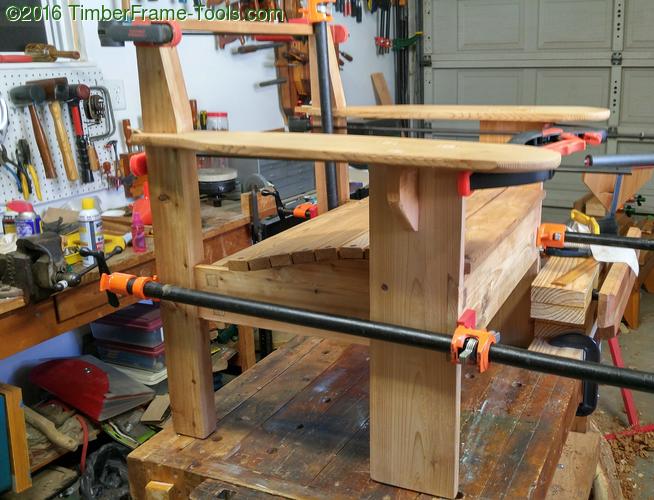
[B] Gluing the back legs and arms.

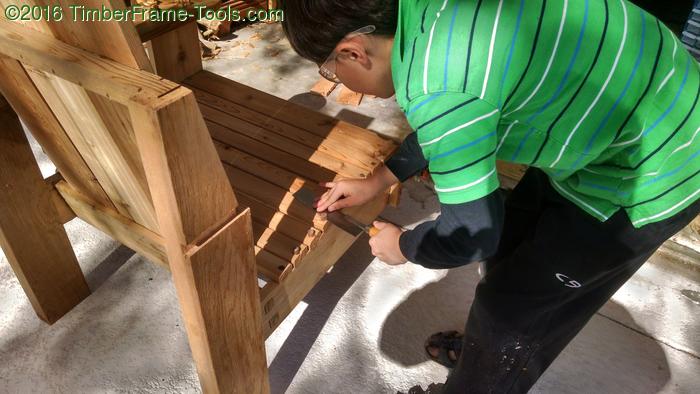
[A] Attaching the back slats.
These Miller dowels are pretty cool. They have an improved holding power over straight dowels. They need a special stepped bit to use them. I usually don’t like overly specialized stuff, but they fill a need in the way I like to design and build so I can see myself using them more in the future. For outdoor use, I was going to order them in Ipe or Black Locust. Unfortunately, even though their website lists several outdoor rated species, I could not find anywhere that sold them. All I could find to choose from was Birch, Red Oak, Cherry, or Walnut. Walnut seemed to have the highest resistance to rot, so I went with the Walnut. They work nicely and look great. Time will tell on how well they hold up.
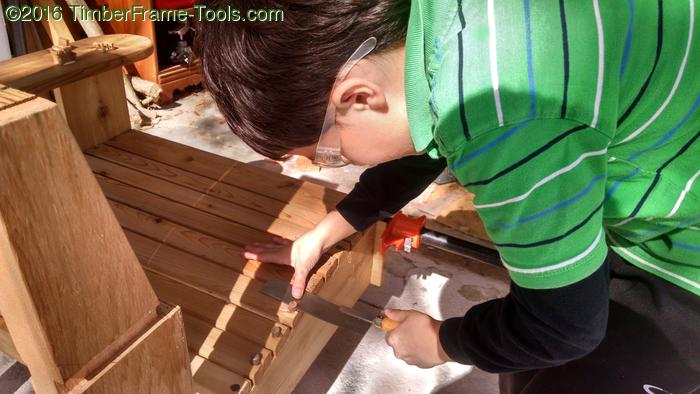
[A} Flush cutting the Miller dowels.
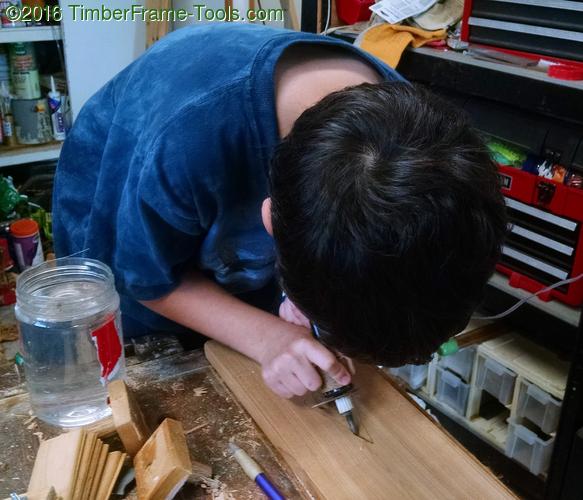
My son wanted to wood burn a heart into the middle back slat. Notice the peanut butter jar with water he made sure was close by in case he burned his finger. Safety first!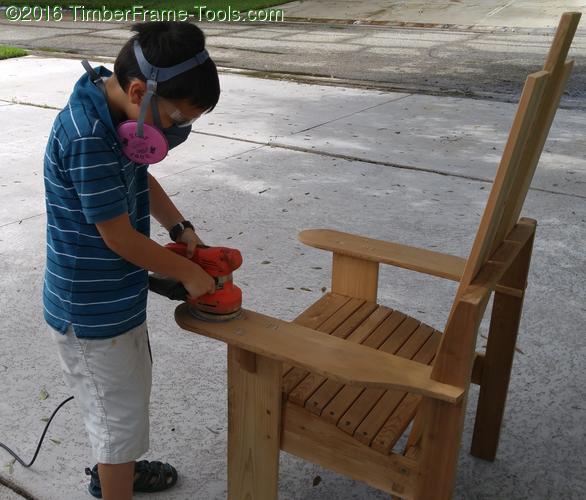
I’d have loved to have this go right from plane/scraper to finish, but as a mentioned earlier, this cedar did not play along. So, time for a bit of sanding.

No matter how many times I yell “Safety First!” that dog will not keep the mask and glasses on.
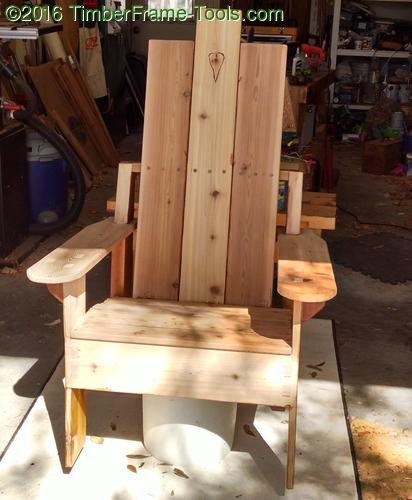
Just prior to finishing, I balance the chair on a 5 gal bucket so that the feet don’t touch and stick to the ground.
Finishing Adirondack Chairs
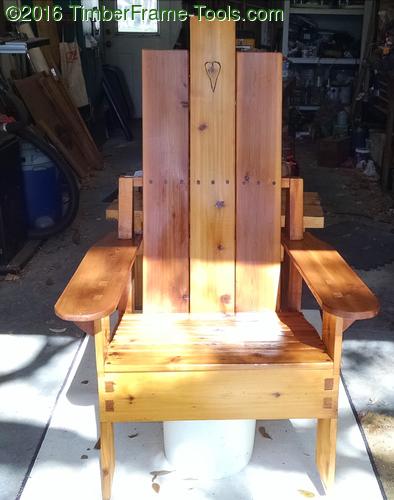
Here is the chair with one coat of Sikkens Cetol Marine (similar to Cetol 1). This is one of the best film-building, UV protecting outdoor finishes. I have used it on a bunch of outdoor projects. It is breathable and is easy to topcoat several years down the road when it needs refreshing. Superior to spar varnishes and polyurethanes.
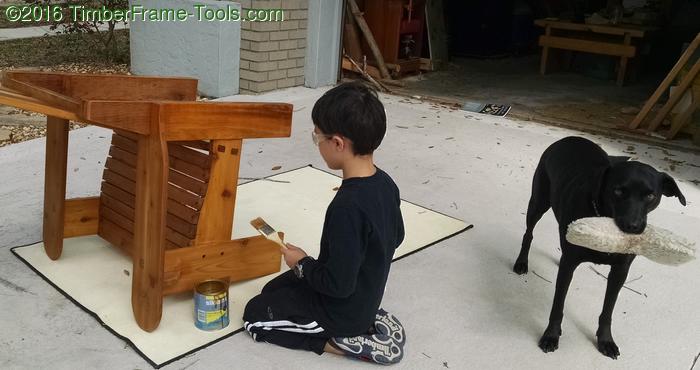
The shop dog is running quality control but is about to get dinged by OSHA for not wearing safety glasses. We went with 2 coats of Cetol Marine on the chairs. The colored variety has all the UV blockers. I will likely follow-up with one coat of Cetol Marine Gloss … the gloss is a more clear topcoat to keep the pigments from adding up too much, later in the year. A total of three coats (2 regular , one gloss) are recommended. I’ve been tempted to stop at two, but the third one makes for both a nice looking finish and a more durable one.


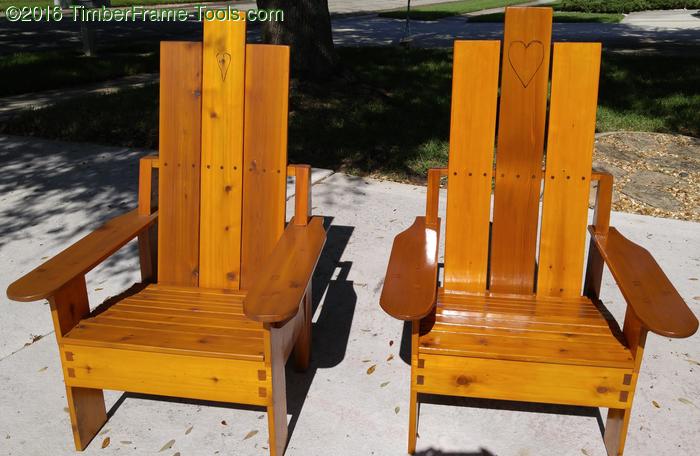
Camera angle is making the left one look wider. They really are exactly the same size,
I originally started building the both chairs simultaneously, but was afraid of getting my angles wrong and ruining two chairs, so I built the left one, then the right one. I did not plan that the left chair would have a light center with darker wings and the right chair would have a darker center and lighter wings. It just happened that way…. and I like it. It also worked out that the chair on the left has more plain sawn lumber and the chair on the right has more quarter sawn lumber.
Thanks for following along.