I wanted to build a frame saw for resawing wood, especially large slabs. Previously my resawing logs technique has either been to use my bandsaw milling sled for smaller logs or my one-man rip saw for logs that won’t fit on my bandsaw. Then I thought about the old saw mills that used to use parallel blades to gang cut logs into lumber, a gang saw (also called a head saw). Then I became a wee bit obsessed about making a gang saw that I could use by hand. I turned to the internet to see what others had done with hand powered gang saws. I found nothing in the way of a hand powered gang saw. I was either on to something unique, or onto a really bad idea.

After contemplating it for a while I came up with some requirements:
- Long enough to accommodate large diameter logs and still lay down at an angle to make long guiding cuts.
- Wide enough to accommodate large diameter logs.
- Adjustable width between the two parallel blades.
- Inexpensive, in case it turned out to be a horrible idea.
Gang Saw Frame
I decided the frame would not have handles (even though I had sketched them) as I wanted the side stretchers to be as far apart as possible, to not restrict the size of the wood. The side rails would be the edge of the frame. The frame would bear a lot of forces with the push and the pull, so I decided dovetails would be the best choice. I decided to use construction pine for the handhold ends since I might need to make to some trial and error, but would use maple for the side rails for strength.

I marked off the 2×4 for cutting to make the human facing ends.
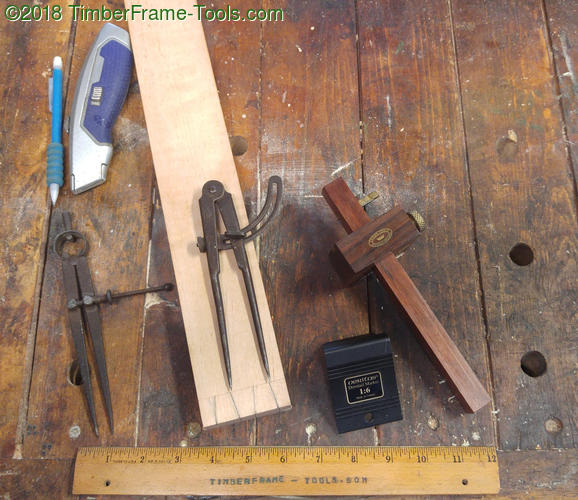
I marked off two tails on each ends of the maple side rails.
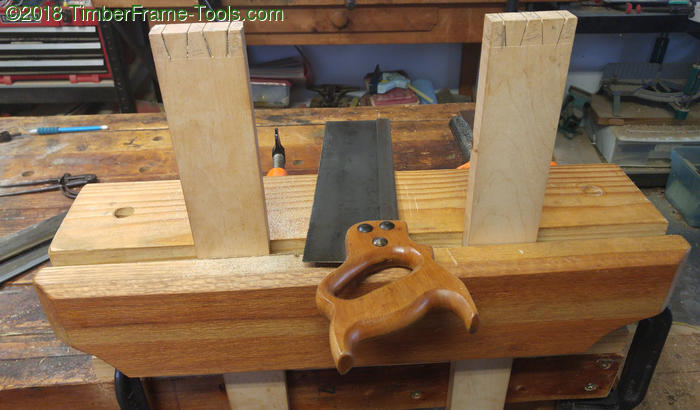
The bulloxon works great for cutting dovetails. Ripcuts first.
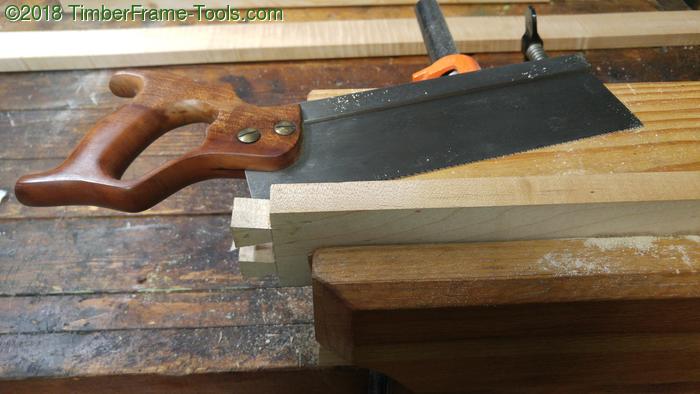
Followed by crosscuts.
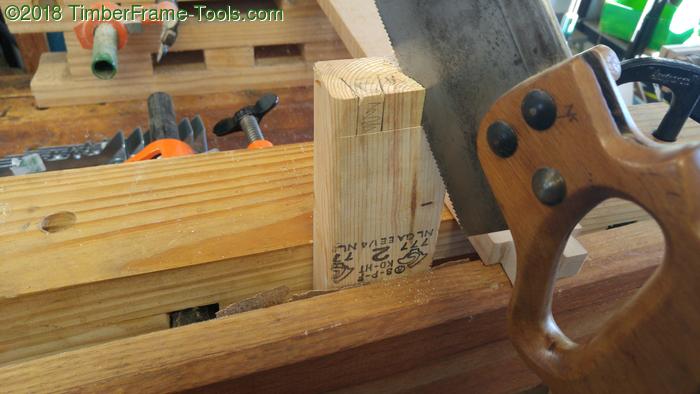
Using the rip saw to cut diagonal cuts to begin the half-blind dovetails.
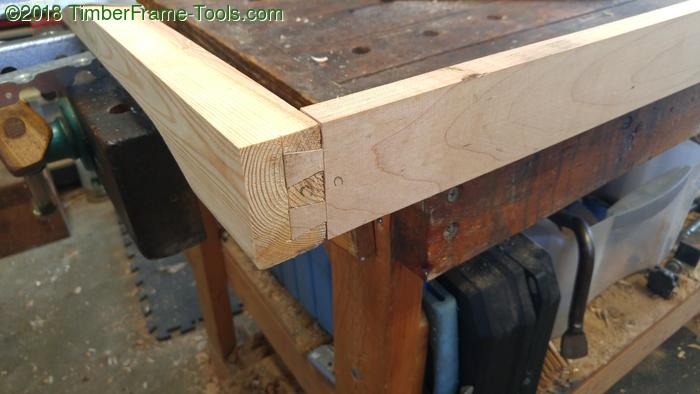
Not pretty, but plenty strong and ready to go.
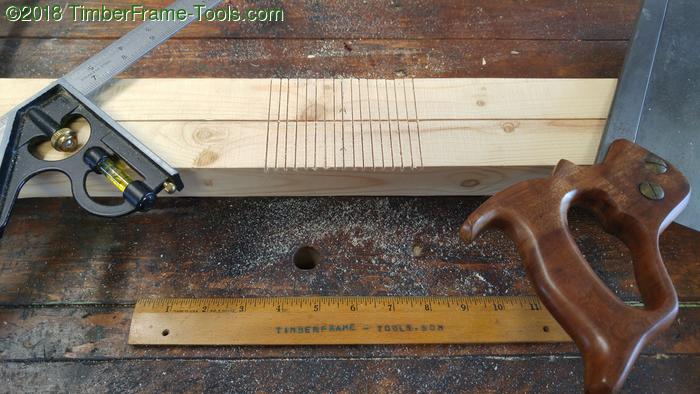
With the two end rails side by side, I cut lines 1/4″ apart to indicate spacing widths that could be used to reference the blades on each end.
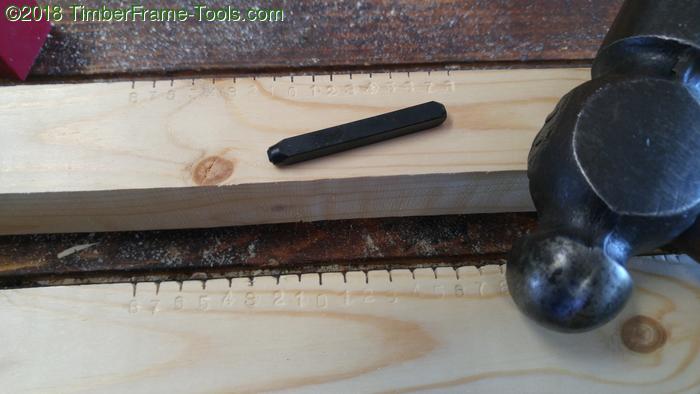
I used a stamp set to mark out the divisions from zero at the center and working out in each direction. The numbers end up indicating the number of half inches. Example, if one blade is positioned at the 2, and the other blade is positioned at the other 2, then the blades are 2 half inches apart, or 1″.

I used my spokeshave to shape the handholds to make them comfortable. I shaped both ends so that technically it could be used as a two-person saw. I did this knowing full well that there is nobody goofy enough to want to be my sawing partner with this saw. 😉
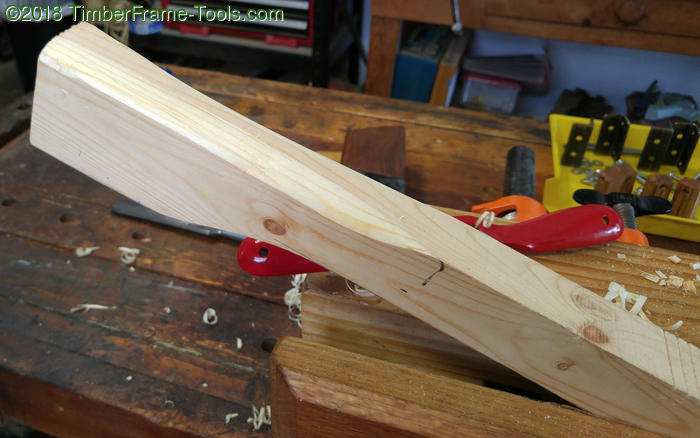
Trial and error on the shaping eventually led me to a fairly comfortable shape.
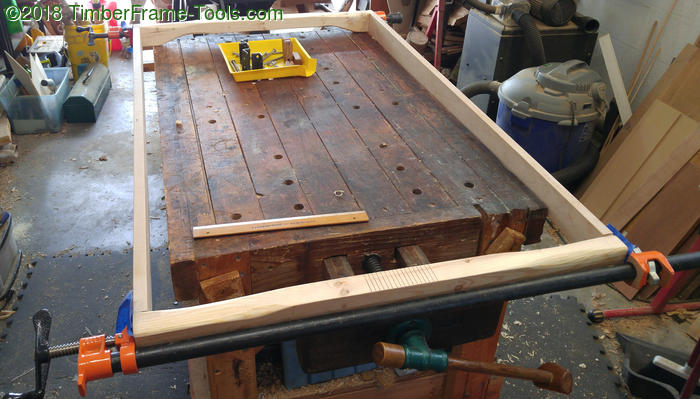
Now it was time to glue up and clamp the dovetails (it is hard to beat 3/4" pipe clamps) .
Gang Saw Hardware
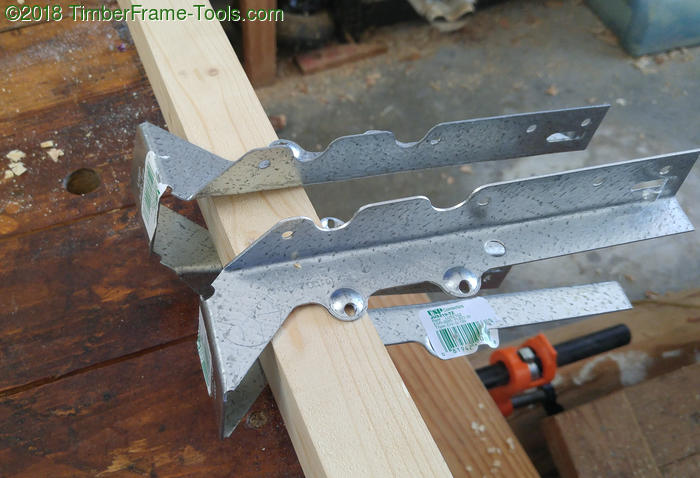
My original plan was to use joist hangers to attach the blades to, and put a bolt on them to adjust for tensioning the blades. Fail #1: These ended up flexing too much and I was unable to cleanly bend them to the shape I needed, so I eventually abandoned this idea.
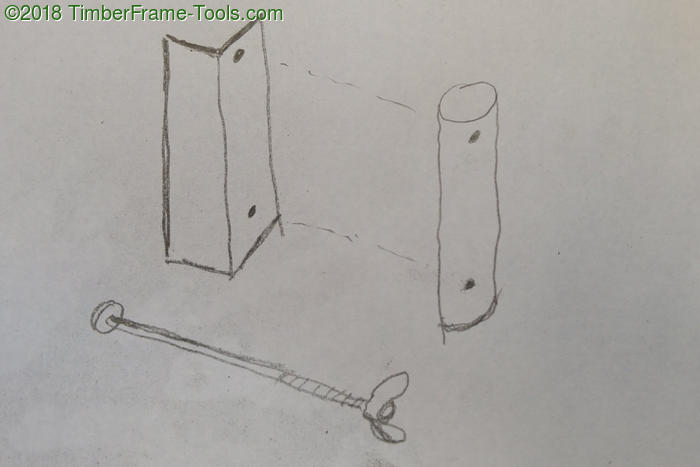
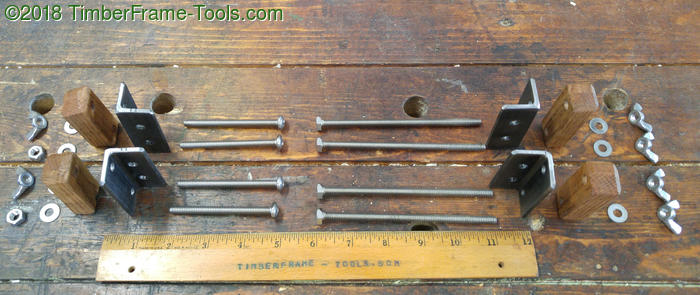
My second attempt for mounting hardware was to use angle iron that bolted to a dowel or block of wood. I originally thought that maybe the dowel could register in a groove on the saw frame that would keep it plumb to the frame. I did not go that route and chose to go with woot blocks, but I may come back to it.
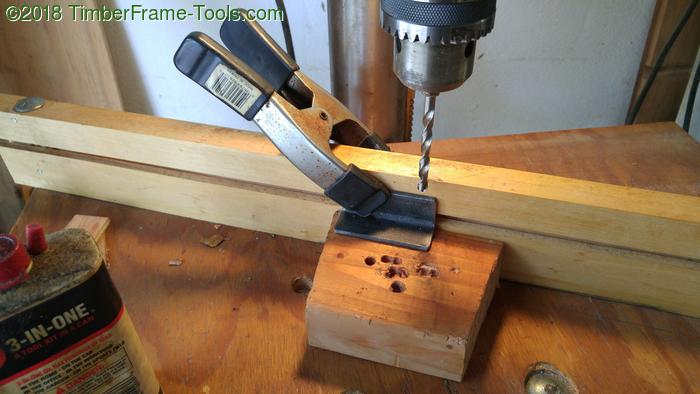
Drilling the hardware on my General drill press.
When it came to the holes where the saw blade would attach, I clamped the two mates together to make sure the holes lined up.
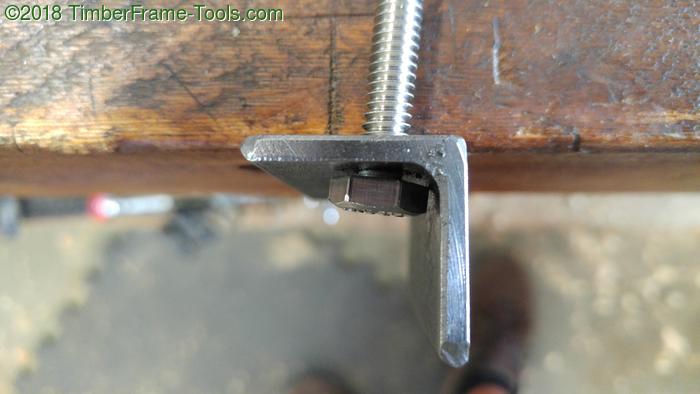
As you can see, the head of the bolt hits on the interior corner of the angle iron. I used my bench grinder to knock off the corner of each bolt so it would sit flat.
I went with stainless steel for the nuts and bolts because, when I saw, I sweat, and when I saw big things, I sweat big… and sweat leads to rust.
Gang Saw Blade
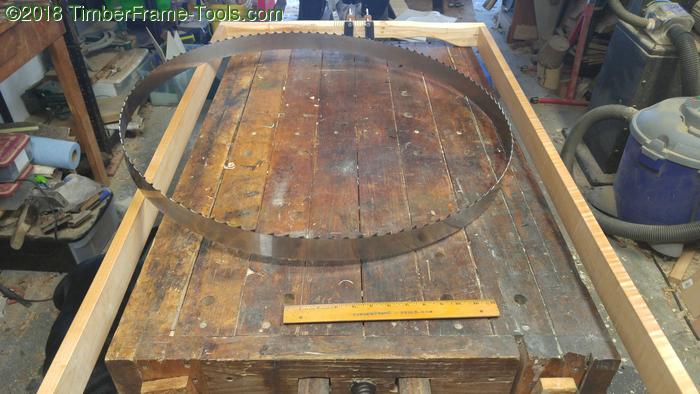
I wanted a deep blade so that it would continue to track straight, so I ordered a 2″ bandsaw blade from sawblade.com. The blade is intended for a monster gas powered sawmill. A nice company representative called me the next morning to make sure that I really wanted a 2″ bandsaw blade that was only 8ft long. As you can see above, it looks pretty ridiculous.
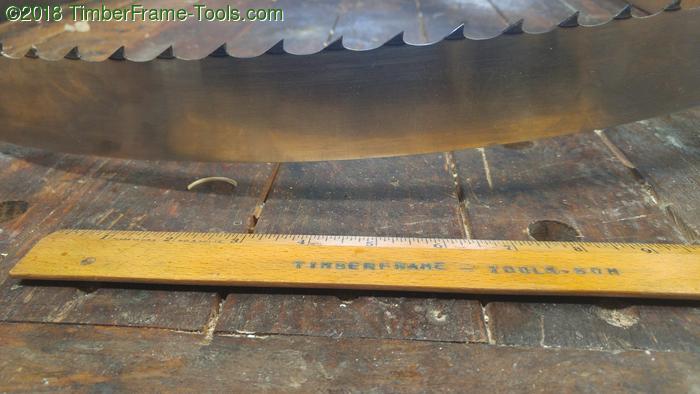
The blade was beautiful. It was thick and had teeth like a shark. They were pretty sharp and electro-hardened for strength. Unfortunately the 2″ blade only comes with 7/8″ tooth spacing. I was immediately concerned that it might be kind of hard to push these teeth through wood. I tried to push that fear from my head.
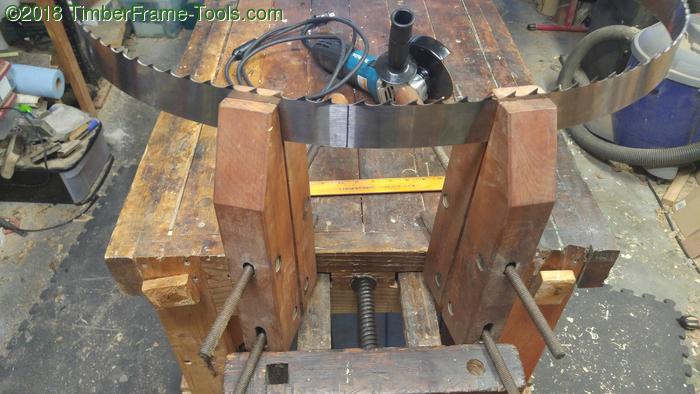
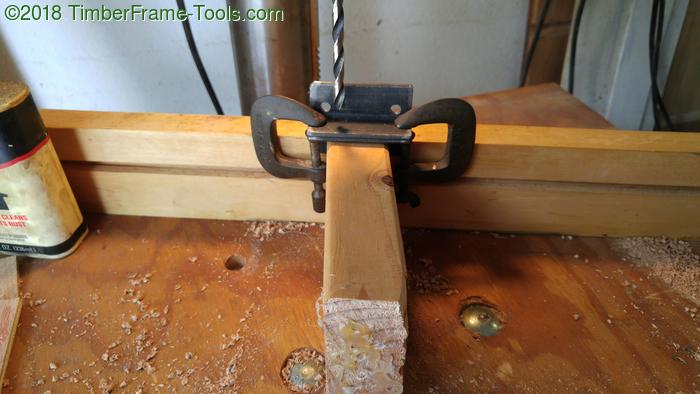
I used my Makita angle grinder with a cut-off wheel to cut the band in half. I was afraid of those teeth flailing around my shop when the tension unleashed by cutting the blade. So I held the blade in handscrew clamps while I made the cut.
I wanted to minimize the abrupt force of the teeth catching at the same time, so I cut the second blade to length while making sure that the teeth from one, were offset from the teeth of the other.
I used the angle grinder to grind off the first couple of teeth on each end of the blade, in order to make clearance for attaching the blades to the angle iron.
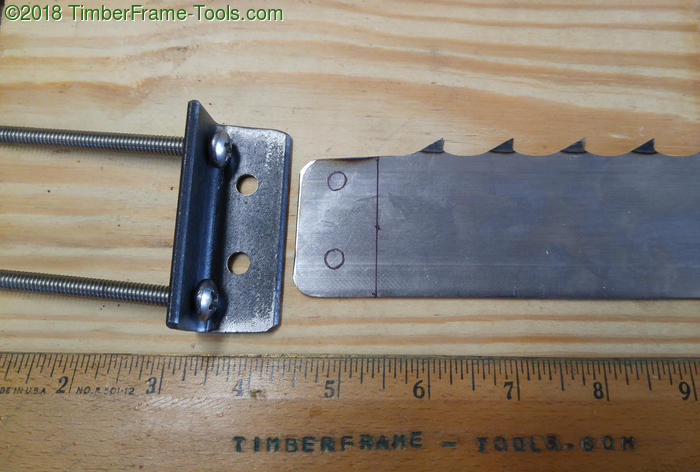
I used the angle iron to mark the holes on the saw blade.
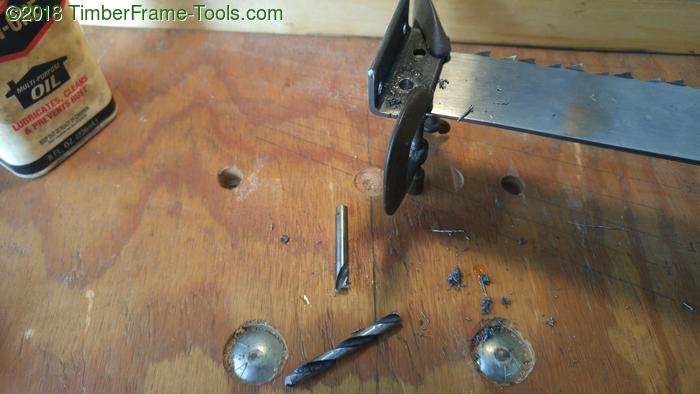
I knew the saw blade was going to be hard spring steel, but I was not prepared for how hard. I first broke a 1/4″ high speed steel drill bit and only managed to get through one hole. I dulled another 1/4″ HSS bit without making any real progress.
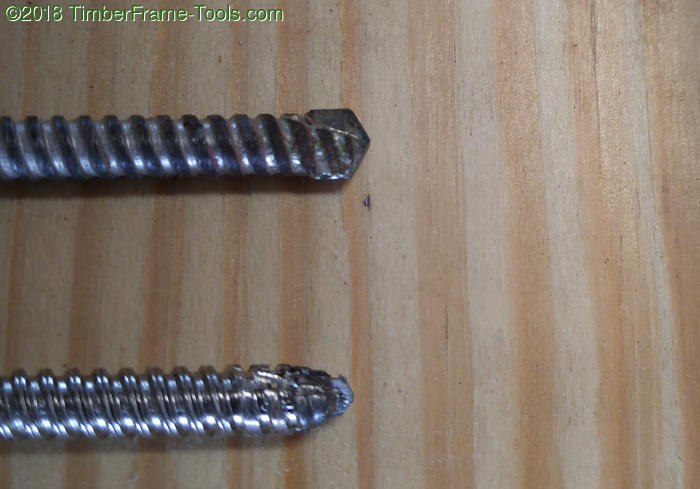
Fortunately I had a few 1/4" carbide tipped masonry bits that I sharpened with my DMT diamond bench stones. They made good progress, but by the time I had drilled all the holes, the carbide was warn down in one bit, cracked in another.
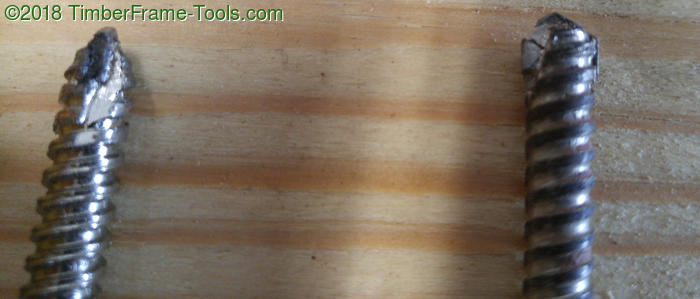
These broken bits alone speak stronger to the quality of the steel in the sawblade than I ever could.

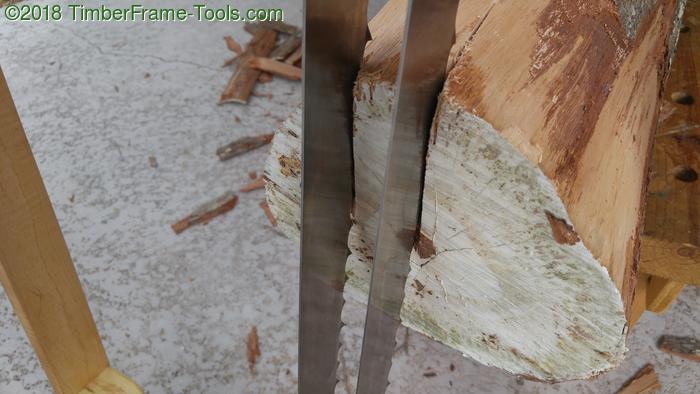
This is the fixed end of the blades.
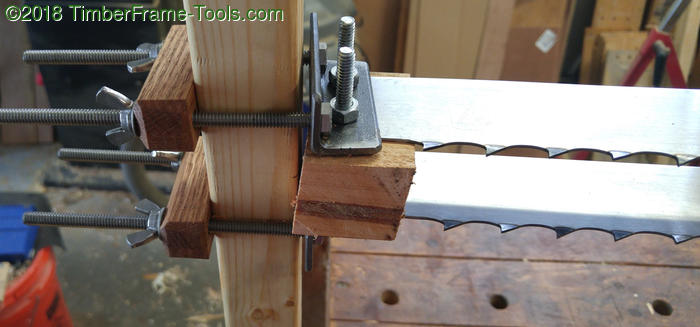
And this is the end for adjusting the tension.
This design allows me to control the separation of the blades by putting a block of wood between them at each end. In this case I have blocks made from a 2″x4″ scrap to set the thickness. Other blocks could allow for gaps from around 1/2″ up to about 6″.
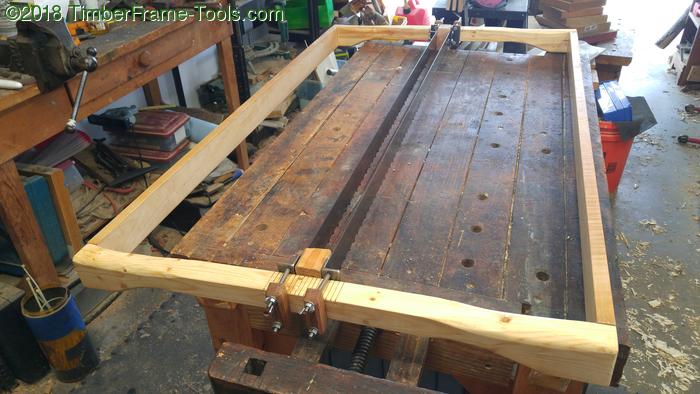
Here is the gang saw, ready to rip.


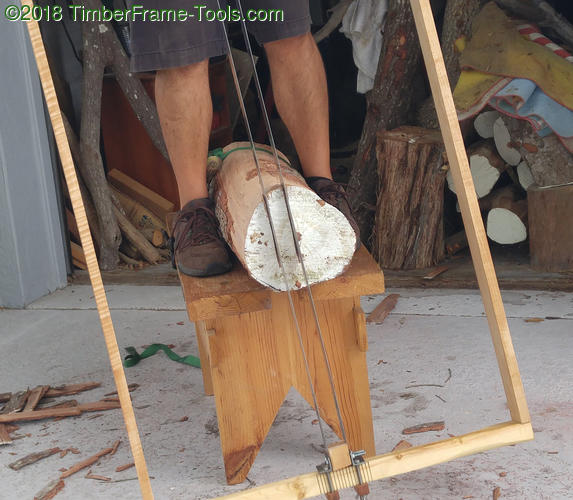
The first victim ready to test the gang saw. It is a piece of Oak that came down during hurricane Irma.
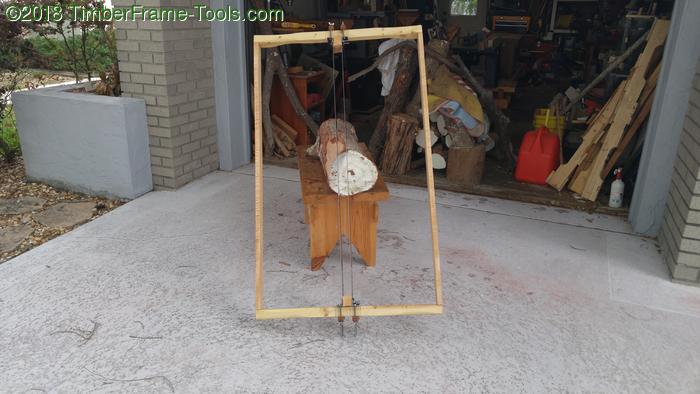
I positioned it on top of my saw bench to get the cut started.
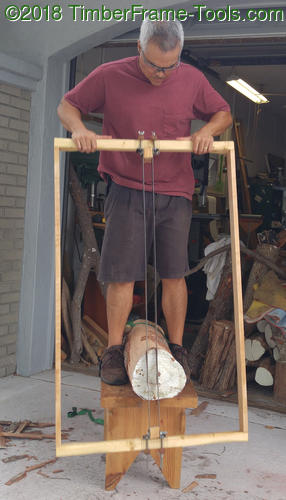
And so it began. The saw is fairly heavy, and I was able to get it started just by letting its own weight move the saw down. Any time I tried to push it down, a tooth would bite to aggressively and bring it to a stop. Unfortunately the saw bench is not tall enough to allow the gang saw to travel more than a foot.
Keeping the saw plumb, was not so difficult…
until the log started to roll. Even while strapped down with a ratchet strap, the sawing vibrations would cause the log to squirm. The vibrations were also causing the sawbench to creep down the sloped driveway, even with me standing on it.
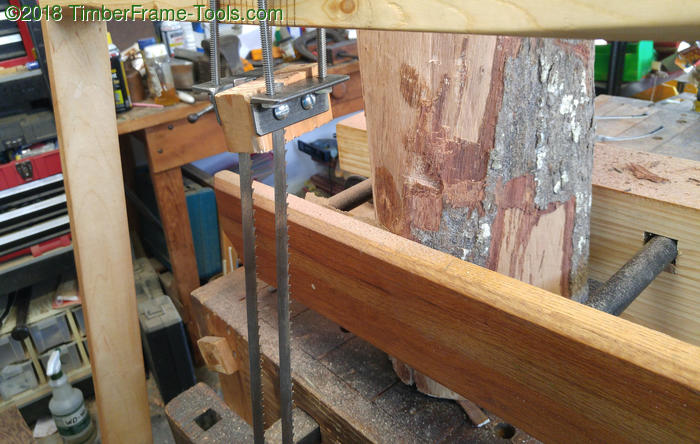
I moved the log into the shop and clamped it in my Bulloxon vise and began to saw.
The sawing effort got much harder as the weight of the saw made those giant teeth bite too deep. I could force it and the vibrations would bounce the bench all over the place, vibrate things off the bench and generally make a mess. Not to mention that the effort would wear me out pretty rapidly. The cuts were straight, parallel and looking good, but progress was not sustainable.
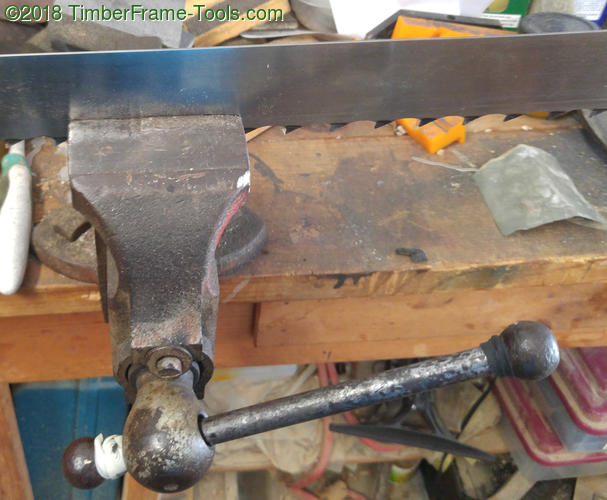
The blade had plenty of set to the teeth, it could afford to lose some. In an effort to make is saw more smoothly, I took the blades off and removed some of the set from the teeth by clamping them in my metal vise.

Then I sharpened them using diamond wheel on my rotary tool (an ordinary saw file did not seem to touch them). The saw was still too aggressive to use effectively. Fail#2: Blade too aggressive. Success #1: The parallel blades did not bind, as I was afraid they might. So part of this concept worked, I just needed less aggressive blades.
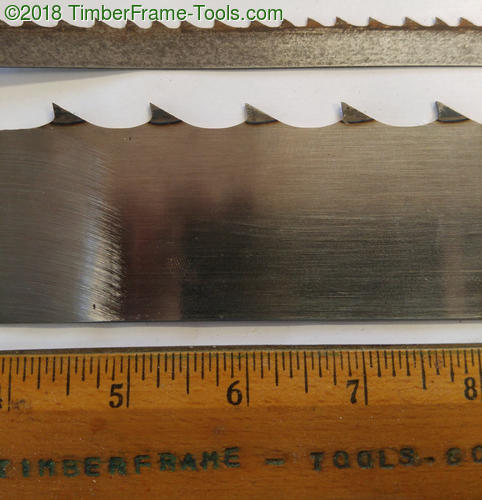
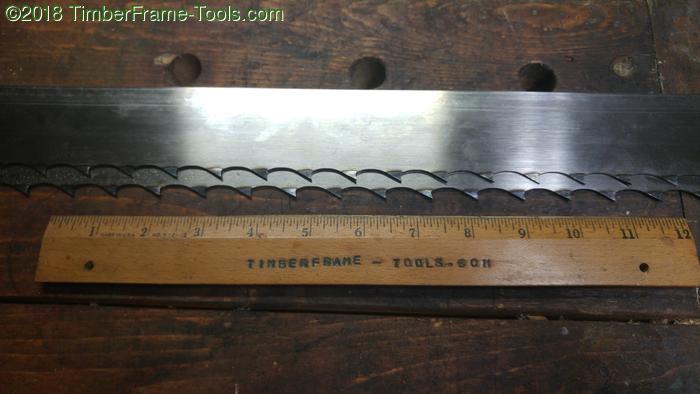
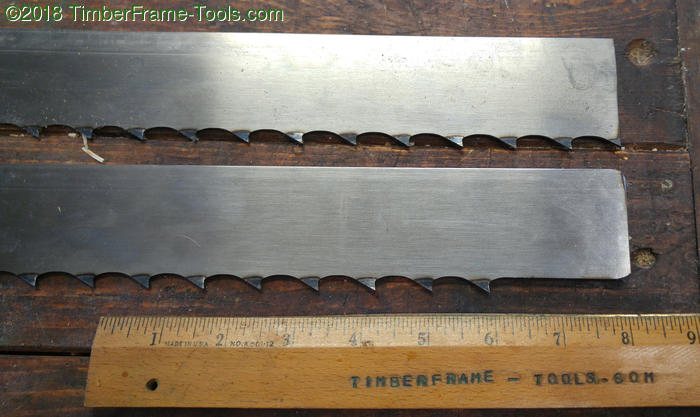
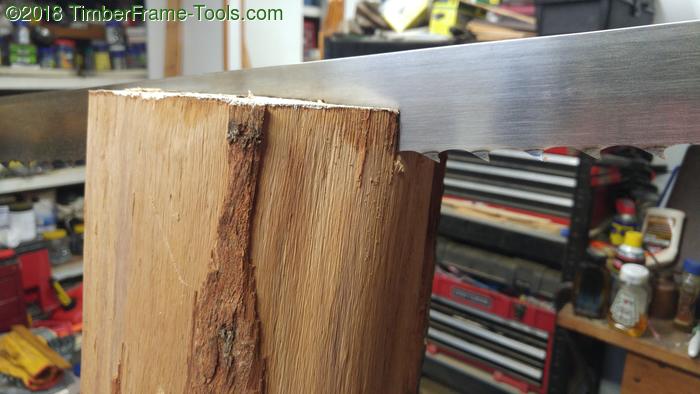
I had an old 1/2″ Wood Slicer blade (top), that had more teeth and was less aggressive. So I cut it up and drilled it, more as a proof of concept than a finished product. I was pretty sure the 1/2″ blade would wander, but I wanted to test the concept to see if more teeth per inch would improve the usability of the saw.
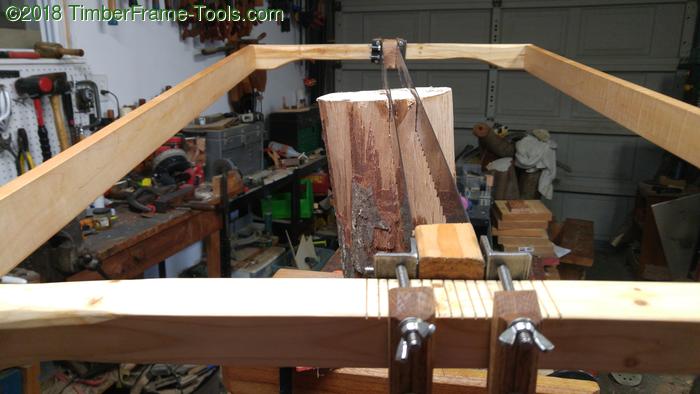
Here is the saw newly rigged with the 1/2″ blades.
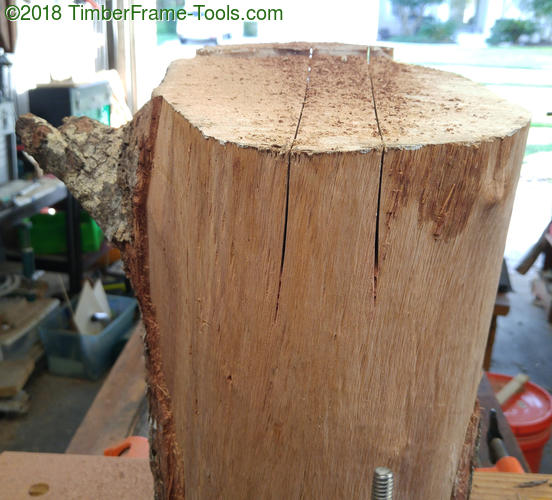
The blades cut much better. The action was smoother and with much less effort. The only drawback, as you can see above, is that after about an inch of cut, the blades started to diverge. They started wandering apart, they were likely to keep heading apart until one of them broke, so I stopped cutting. Fail #3: 1/2″ blades wander too much. Success #2: More teeth made the saw smooth and fairly efficient.
So I know what I have to do. I need to find a blade that is 2″ deep, but has more teeth per inch. Unfortunately, sawblade.com can not help with that because this is the only 2″ blade configuration they have. To get more teeth per inch, I would have to drop to a 1″ blade.
My gang saw blade options:
- Order a pair of Roubo blades from Blackburn Tools.
- Bad Axe Tool Works – turns out their blade is too short.
- Some other bandsaw blade option ??
- Re-cut the teeth on the 2 inch blades I have, or further alter the existing teeth to make them less aggressive.
I’ll keep you posted on my progress… or failures.
If you’re willing to shorten your saw, you could use a couple of these:
https://www.highlandwoodworking.com/continentalframesawroughcrosscutblade.aspx
Thanks Scott,
My concern with those is that at only 27.5″ long. Take out about 2″ for the mounting hardware, and then another 18″ for the throw/extension of my arms and I would be down to a 7″ diameter log capacity if cutting straight down the log. It would become even smaller than that when dropping one side of the saw to establish a longer more consistent cutting track.
The price is low enough though that I did consider brazing two of them together to get the length I need, but I am not sure if my brazing skills are up to it.
I made a very similar saw with the same problems here in Orange Australia.
While reading your article it came to me that to increase the number of teeth one could include another blade against each with the gullets of the additional blades set to align with the tooth of the adjoining saw. Of course the cut would be twice as wide.
Has any one tried such an arrangement?
Thanks Roger, I toyed with that idea, not only to solve the teeth spacing but to make the saw plates more rigid and less prone to wobble/deflecting. But for the size of the kerf I would almost be in chainsaw territory. I worked out a solution today that was a big improvement. I will write it up in a couple days.