The base of the chest will be held together with through dovetails (meaning the end grain of the tails will show). I like the alternating look of the endgrain and facegrain combinations. I have to admit that I am not an outstanding dovetailer …. some day I hope to be, but I’m not there yet..not even close. I’m also not even close to being one of those people that can do a dovetail in 3 minutes like these guys (though I do admire their techniques) First guy is tails first (dovetail master Rob Cosman), second guy is pins first (Frank Klausz).
Choice: I chose to use fairly chunky dovetails and pins (3 tails used over the 18″ length of the joint). Primarily this was because the more tails I use, the longer it takes me and offers me more chances to make a mistake which would end up scrapping the whole panel.
Choice: I chose to cut the tails first because they would be on the long panels and my bench isn’t tall enough to work those panels standing up. I needed to be able to lay them down on the edge of the short panels in order to transfer the tail markings. which I could face clamp to the edge of the bench.
Laying out the tails on the long side panels was fairly easy. The only thing I had to accommodate was that I wanted to make sure the dado that held the bottom of the chest in place terminated in a tail so that I would only have to make it a stopped dado on two panels and not all four. By terminating in the tails, the dado will not be visible in the pins.
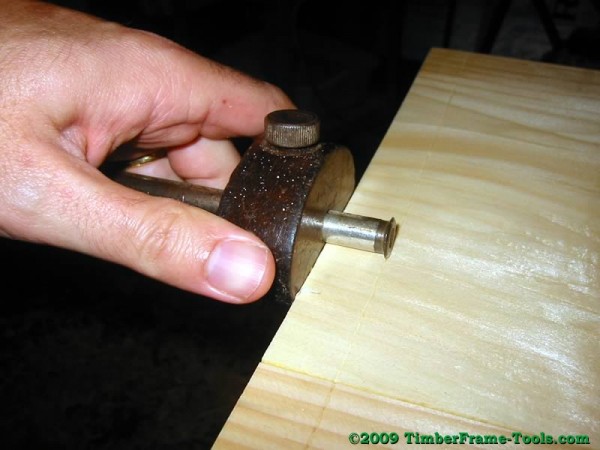
I used an old Stanley Marking Gauge set to the thickness of the stock, to mark the panel for cutting the depth of the tails. The wheel style leaves a nice crisp line in the soft pine. It is not as easy to see as a pencil line, but it is easier to feel when registering the tip of the chisel in it to make the final paring cuts.
The rest of the marking I did with a pencil and a Veritas dovetail marking guide.
When cutting the dovetails I clamped the two long panels together and cut the defining cuts at the same time. This made sure they were identical and saved me a little time too.
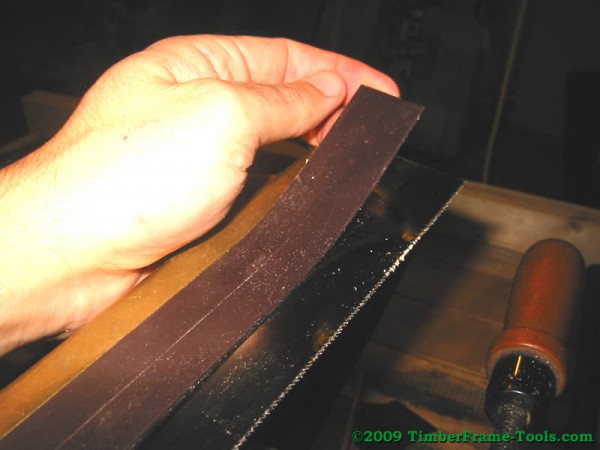
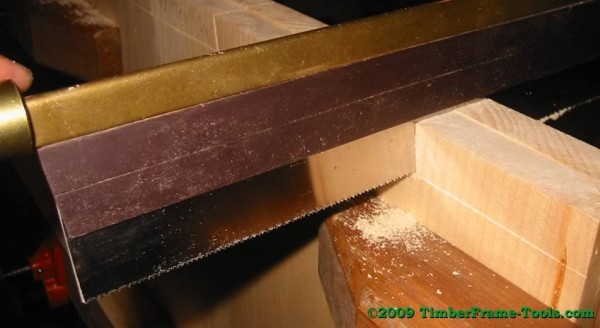
For cutting the defining cuts on the tails I used a dovetail saw. Once I made the first cut, being careful to not cut too far, I have a reference now for putting a magnetic depthstop on the saw. This prevents me from getting sloppy and over-sawing the remain tail cuts. I simply take two strips of flexible magnetic material and stick them on either side of the saw at the appropriate depth. On the tails you have to make one cut first to get the exact depth, but on the pins, you can position the material right at the thickness of the wood. (Caution: If using a magnetic depthstop, remember to remove the magnetic strip when you are done, or you may cause premature rust on the sawblade. This seems to be due to trapping moisture between the magnet and the saw.)
I trimmed the waste out between the tails with a coping saw and then pared back to the marked line with a 1/2″ chisel. I found the pine was prone to tearout on the opposite side of the chisel so I did a few things to help reduce that.
Tip 1: Put a small 6″ x 3″ scrap of 1/4″ MDF under the waste so that the board rests firmly on the MDF to reduce tearout and protect the surface of the bench from the chisel. On the opposite end I raised the board up 1/4″ on a folded over piece of rubber router mat. Without that MDF, the panel had just enough cup to it so that the part I was paring didn’t quite rest solidly on the bench top.
Tip 2: Pare back the interior of side first, but only go half way, then flip the panel over and pare back the exterior side last.
Tip 3: Don’t go too wide on the chisel. I found that a 1″ chisel was too wide and I either couldn’t push it through the grain, or it crushed the wood fibers instead of shaving them. With the 1/2″ chisel I was able to get to cut fairly well without crushing the wood fibers. I will admit here that it is possible that my 1/2″ chisel is just sharper than my 1″ chisel … but it does stand to reason that even at equal sharpness that twice as much blade will take twice as much force to cut through the wood fibers.
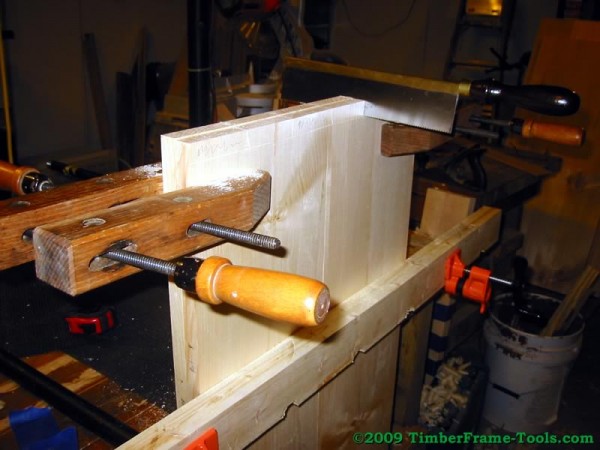
With the Tails all cut, I could then clamp the short panel vertically to the end of the bench, and lay the Long panel on the top of the bench with the tails resting on the end of the short panel. I marked the tails onto the short panel using an Exacto knife to define the pins. I used my dovetail saw with the depth-stop to cut the edges of the pins, being careful to make sure the saw only tracked on the waste side of the line. Then I used the coping saw to trim out the waste and pared it back with the chisel.
After a few fittings and minor shaving with the chisel I had all the side panels dry fit correctly.
The next step will be routing out the dado for the bottom and creating the profile to define the feet.


