So from my drawing of the Coffee Table / Chest / Play Table I determined how much wood I would need and returned from the home center with a decent selection of white pine.
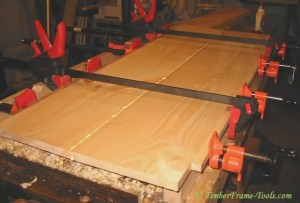
The table sides are all panels 18″ high, so I created them by joining two 1″ x10″s By the time I jointed the edges (with my vintage Stanley #7) and then tongue and grooved them using a set of match planes, they joined together at width of 18″. I cut the stock a few inches longer than I needed. Glued them up, then cut them to length using a panel cutting sled on my tablesaw.
 Mistake: I had one bit of insanity on the first panel where I tightened the pipe clamps a little too tight and the elasticity of the pine caused the joint to spring up with a bang as the two boards bounced into the air. From that moment forward I didn’t crank the pipe clamps down so tight, AND I put cauls across the top and clamped them down to the top (Caul not shown in the photo above). This helped keep the panels flat and prevented sproing!. Tip: Putting a piece of blue painters tape on the caul at the location of the glue joint kept the caul from sticking to the panel.
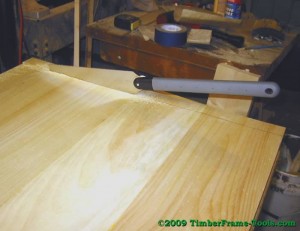
With the side panels all glued up and cut to length I performed the same methods for gluing up the top and bottom of the chest. When it came time to cut the top to length I realized that the top was too long to use comfortably with my panel cutting sled. It was just too un-wieldy. I marked it with a framing square and was about to set up my cutting guide and circular saw, when I realized the baby was sleeping (his room is above my basement shop) so power tools were out of the question.
So I turned to my Japanese style pull saw. I had doubts about being able to hold the cut straight enough, but I tried it anyway. I have to say I was really happy with the choice. The Japanese style saw cut the 24″ wide top quite quickly and by holding the saw at a low angle to the surface (~25 degrees) I was able to keep the saw tracking perfectly on the line. If I had known it was going to work so well, I would have used the same method to cut all the panels to length. It was quite a bit easier than holding the long panels on my short panel sled on the tablesaw.
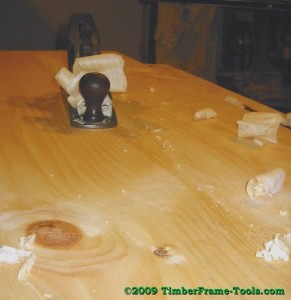
With the panels all cut to length the glue joints just needed a little cleaning up so I first used an old Stanley Handyman plane to remove the glue and then switched to my vintage Stanley No 4 smoothing plane to plane the large surface. Near the knots the grain was a little troublesome for the plane since it rises on one side of the knot and falls on the other. It lead to a bit of tear-out that I was just not able to avoid completely. I had hoped to not have to do any sanding as the planed wood usually has a clarity and depth that I like the looks of, but I just couldn’t manage to get it smooth enough around the knots.
Perhaps the plane needed to be sharper? I’ve seen it written that due to pine’s softness and fragility that cutting tools need to be even sharper than they would need to be in harder wood. Anyway, I still enjoy planing so I did a bit to smooth out the dings that I always manage to get in the panels regardless of how careful I try to be while handling them.
So now all the sections are glued up and cut to length. Tomorrow will be a day of dovetailing them together.

