I got a nice section of a Swamp Laurel Oak log from a neighbor that was cutting one down a little over a year or so ago. I wrote up a post about slabbing an oak log by hand. The entire time I was sawing the slabs out of that log, I knew I wanted to make a coffee table out of it. The design elements rolled around in my head for over a year. I would sketch them on a whiteboard near my desk and eventually narrowed down the features I wanted.
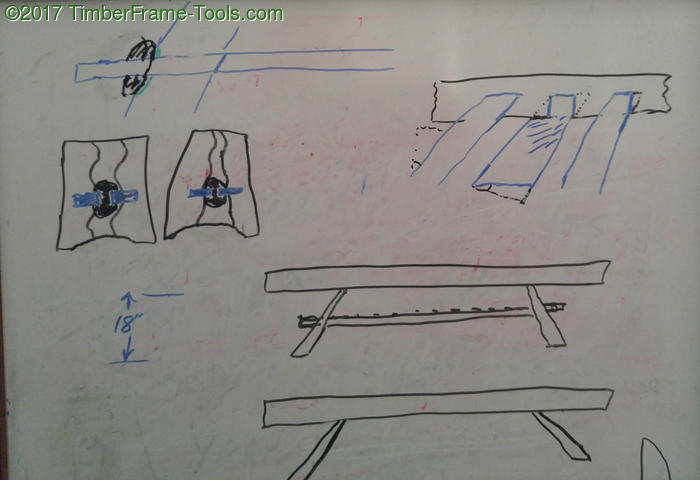
These sketches were how the design settled out.
The design features that settled out:
- Asian inspired tapered slab legs.
- River wood ‘flowing” down the legs.
- A sub-shelf with tusk tenons wedged in place with river stones.
- Legs mortised into the top slab.
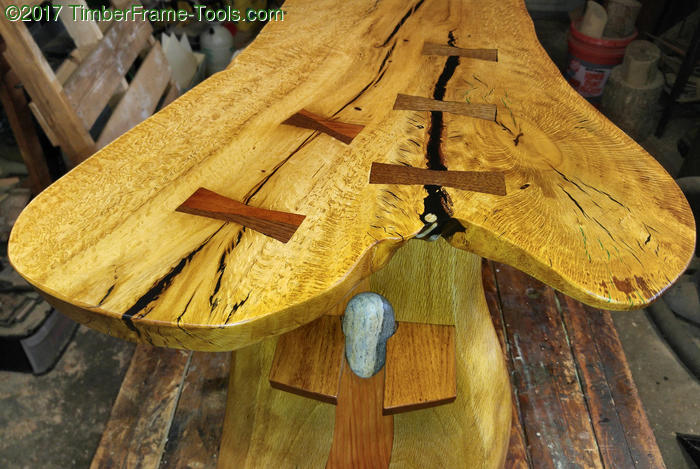
- Butterfly keys, with curves, for crack stabilization
- Black epoxy for cracks, with hints of emerald for a little color.
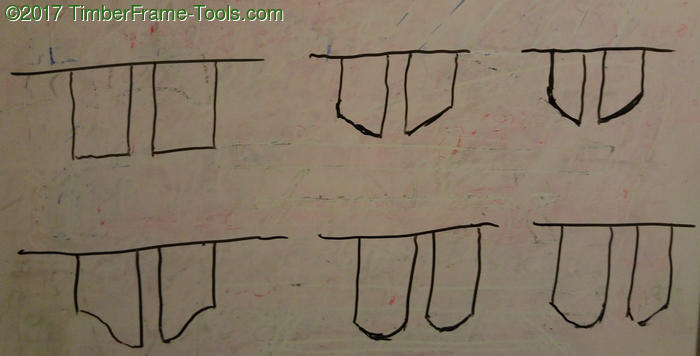
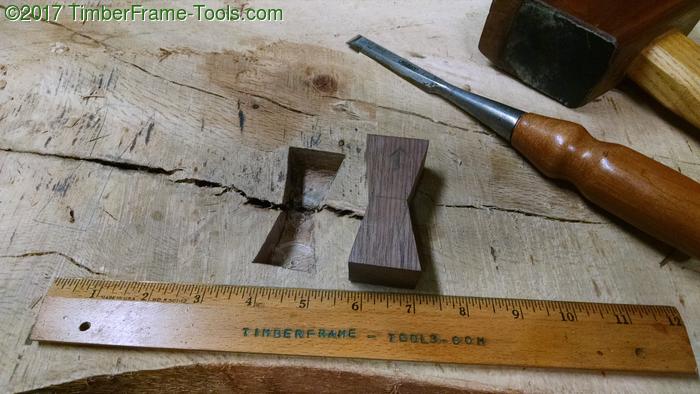
I sketched a bunch of possibilities of what the ends of the tusk tenons on the shelf should look like.
It took me a while to decide on the shape of the tusk tenons that would hold the shelf in place and lock the entire table together. I eventually decided that simple tapers (first row, middle column) gave it the look that I wanted.
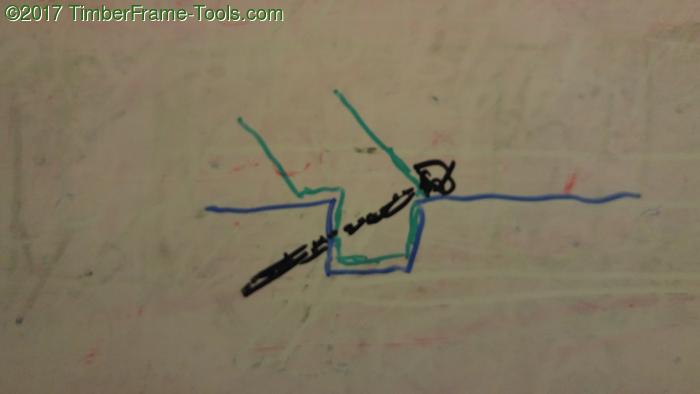
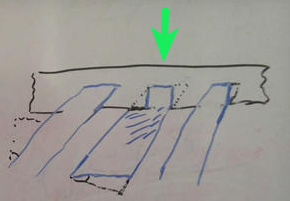
This sketch is upside-down because I drew it how I was working on it. So the bottom shape is really the table top, bottom facing up. The green is the table leg, and the scraggly scribble is the panhead screw used to hold the leg into the mortise.
I had planned to have the legs mortised into the underside of the table and glue them in, but then the table would not be able to be knocked down, so I decided to skip the glue make it so that a single screw run through the joint would hold each leg in place. Really all the screw has to do is keep the leg from dropping out of the mortise if someone tries to pick up the table top.
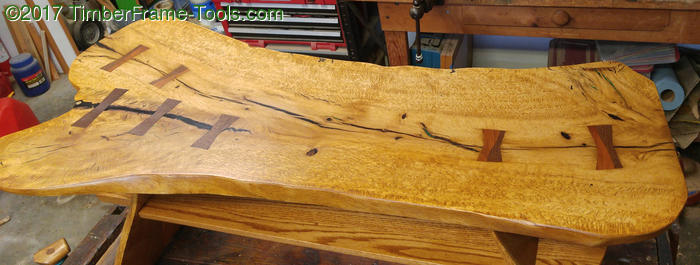
Live Edge Slab Top
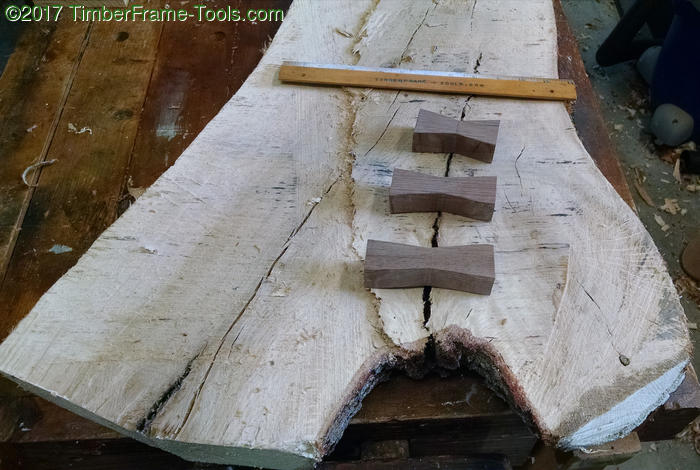
This gap actually had some bark inclusion, indicating that this crack already existed in the live tree.
This is the slab of oak for the table top, within days of cutting the slab. It was already drying and checking, so I decided to get some keys put in to minimize the cracks.
I hand chiseled the mortise for this dutchman.
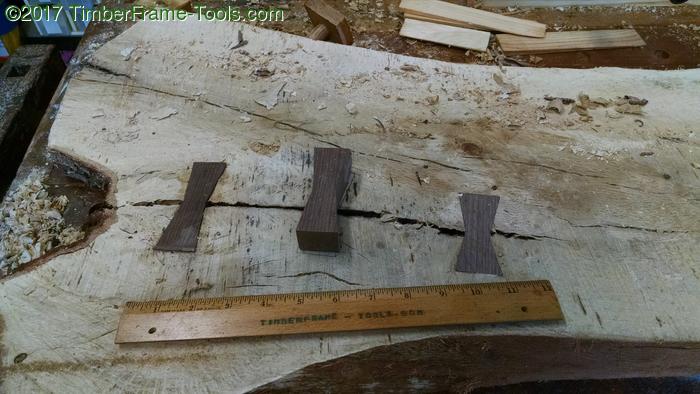
These last two I mortised initially with forstner bit in my drill, then cleaned it up with a chisel.
Mortising the walnut keys into place was a bit of fun. The hard part was recognizing that when the keys were in place, I would have to put the slab away for a year or more to dry. I had to be patient.
The first three keys were just black walnut. The remaining 4 were done as cherry-black walnut curvy bowties. After they were in place, I put the slab on stickers under my car for 15 months. I am limited on lumber storage, so it stores under my car. Taking care not to put it in a spot where my car air conditioner was going to dribble all over it.
15 months went by.
Eventually I grew impatient and brought the slab out to start flattening it with my router planing sled. What was a ~2.5″ thick had twisted enough while drying to leave me with a piece closer to an inch and a quarter by the time it was flattened. One small section had twisted so much that it is now only about 1/2″ thick.
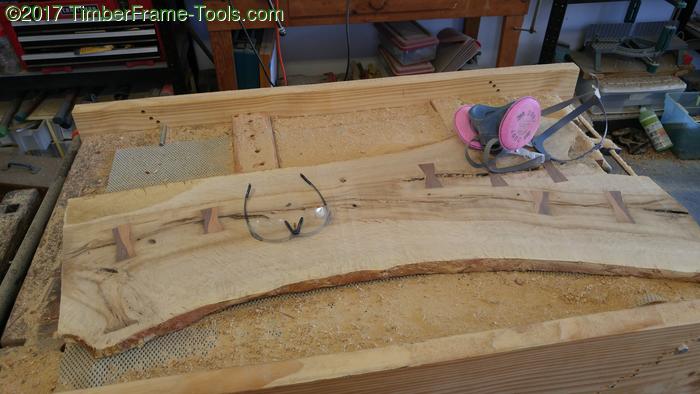
The slab was flattened with my router in a planing sled.
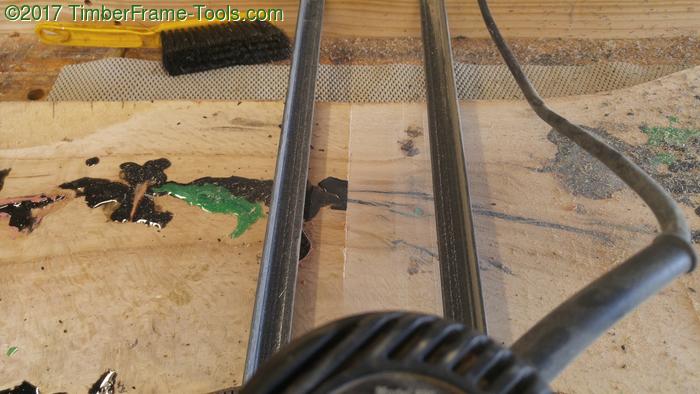
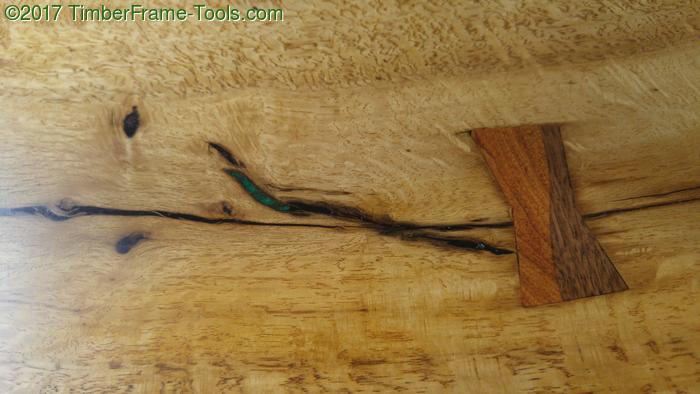
After initial flattening I filled most of the cracks with Alumilite Amazing Clear Cast (epoxy resin) colored black (Gamblin mars black dry) and emerald green (Pearl-Ex emerald green) .
Mistake #1: I used Nashua foil duct tape to block the cracks on the bottom to prevent the epoxy from spilling out. The tape did block the epoxy perfectly. The problem was that it was almost impossible to separate the tape adhesive from the wood. Even after softening the adhesive with a heat gun, then mineral spirits and a scraper, there was still a lot of tape residue on the wood. What remained, was there until the sanding stripped it away.
Last pass with the router to remove the epoxy.
At one end of the slab is an open crack that I decided to put a couple of polished pebbles into. I pushed the pebbles against the tape and then poured the epoxy. With the tape removed, the pebbles protrude nicely (you’ll see it in the finished photos further down).
Normally I use a card scraper to remove the epoxy that sits on the top of the wood. If I catch it within the window of time between 24 and 48 hours after the pour, the scraping is pretty easy, yet the epoxy is hard enough not to peel back out of the gaps.
Mistake #2: Getting the impulsive idea to use the router to remove a thin layer of wood and the epoxy on the top AND forgetting about the pebbles that lay just below the surface. It turns out that a pebble can really damage the carbide cutters on the router bit. Replacement ordered 😉
In some cases the router bit seemed to fracture the epxoy and flick out a few bits here and there, so there were some gaps in the epoxy now. Next time I will know not to use the router to remove the excess epoxy. I will go with the card scraper in the future. It is not really much slower, if at all, and the results are much better.
Live edge I like, but I am not a fan of rough bark, especially if I smash my shin into it. So I removed the bark and softened the edge.
The oak has a reddish layer of material between the wood and the bark. I used a card scraper to remove it from the edges of the slab and soften the edges a bit.
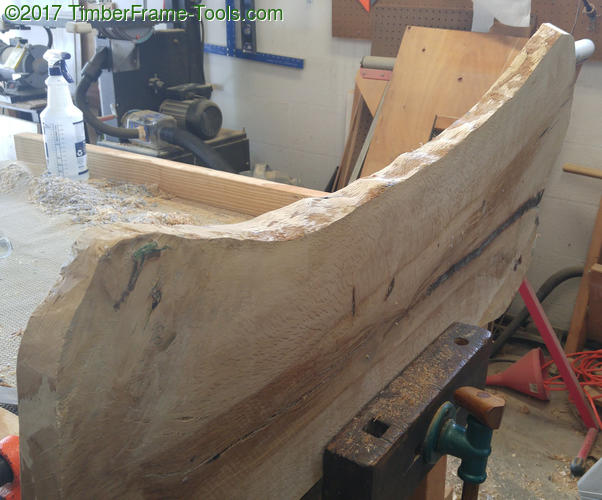
Tapered Slab Legs
The legs were coming from another slab from the same section from the tree. As you can see, this piece developed a huge twist. The twist is too big to resolve for the whole slab at once, but by cutting them roughly to length, it minimizes the amount of twist that has to be planed away.
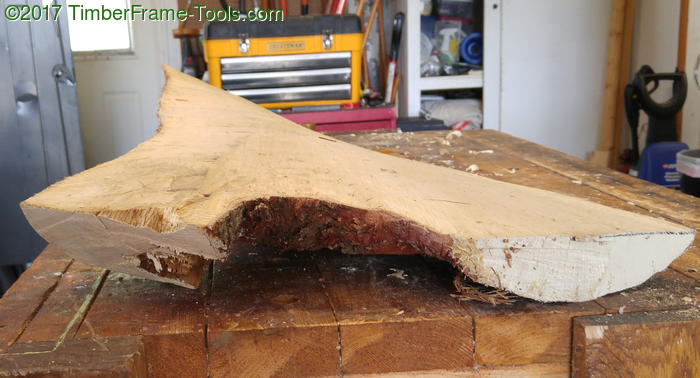
The outer slab of the tree twisted a lot more than the other slab, which was more toward the center of the tree.
After cutting the slab in half, it was time to do some flattening. I had originally planned to do this by hand, but the amount of twist would have been a bit of challenge to correct with a scrub plane. I changed my plans and went with my router planing sled
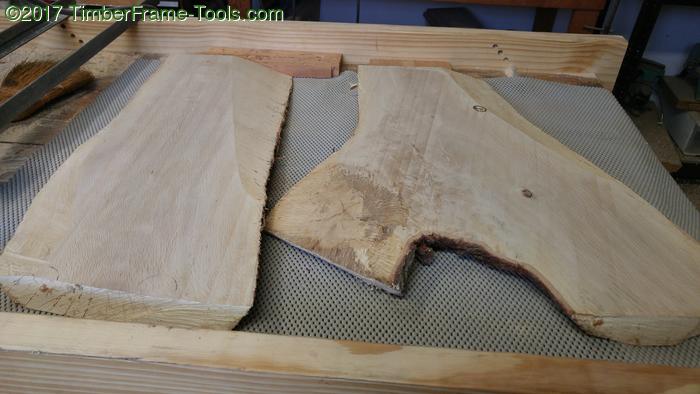
It took several passes just to get them close enough to flat, to make plans for the final shape.
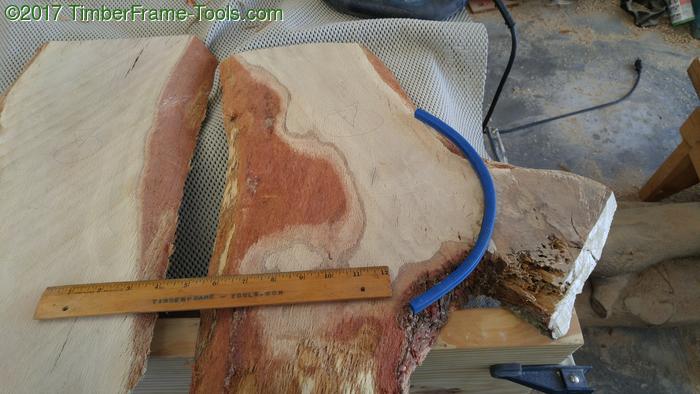
Removing the extra limb. It had great color, and some interesting grain and spalting, but just would not work for the leg.
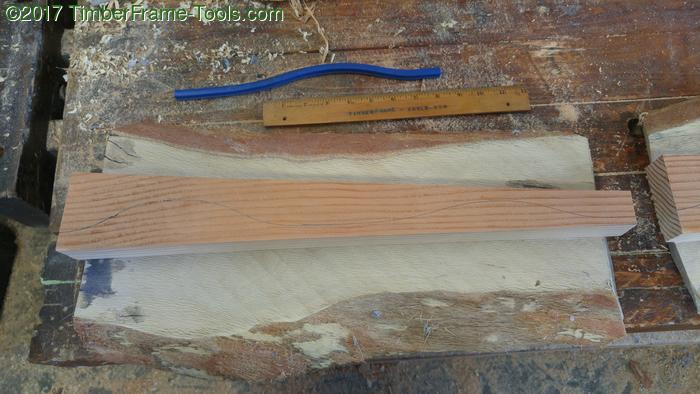
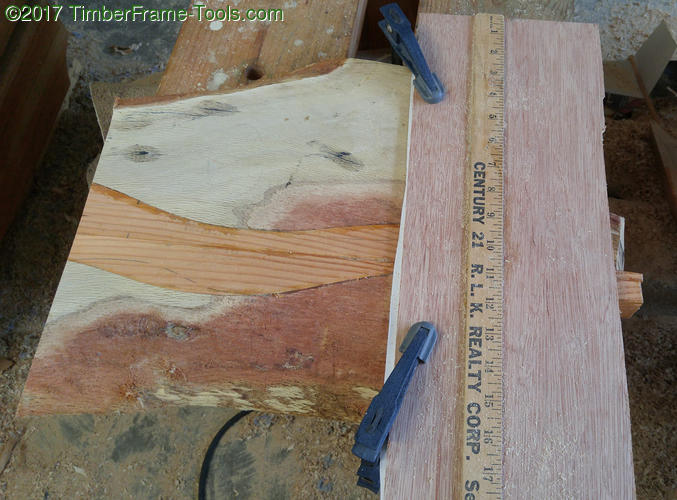
The extra limb stuck out too much to make the leg, so I used a flexible curve to map out what looked like a fair curve.
Since these pieces came from close to the outside of the tree, they are quite a bit narrower than the slab for the top. I wanted this table to be stable so I needed the base of the legs to be wider. For stability they needed to be roughly as wide as the table top.
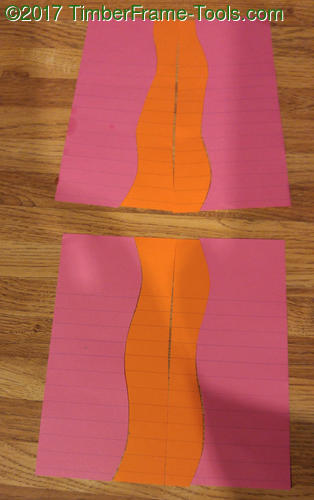
Testing out tapered river (top) and a fixed width river (bottom).
I decided to add to the width and do a bit of a river path with the added wood. I did some experiments with two different colored papers to see if I preferred a bit of taper to the river or just a fixed width river. The tapered pattern (top) appealed to me. Not only would the river be tapered, bit it would cause the leg to have a bit of taper as well, and I liked that idea.
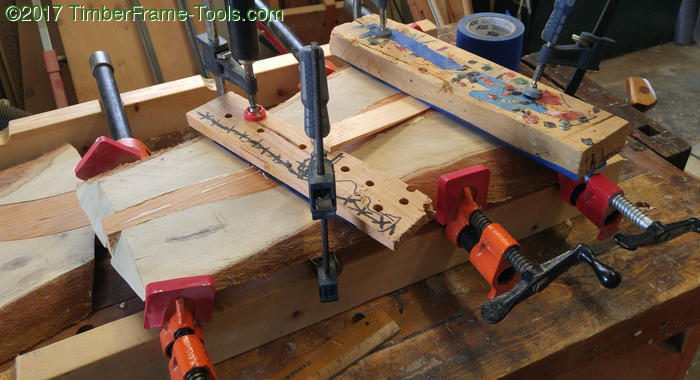
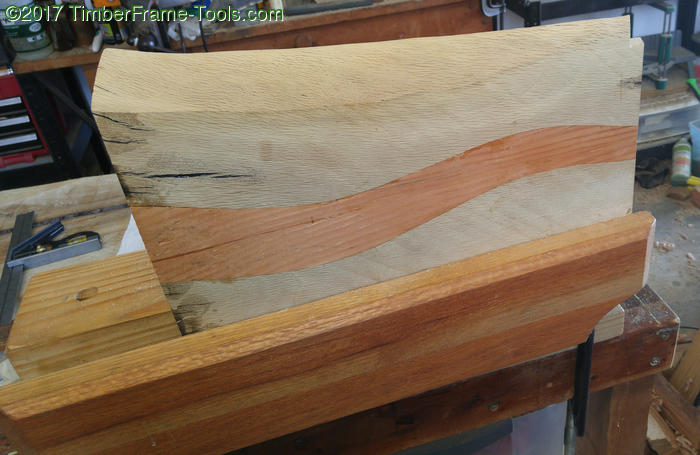
The tapered wood to become the river, stuck with double sided tape to the leg.
I wanted to use cherry for my river, but I didn’t have any on hand that was 2″ thick. So I went with a Douglass Fir 2″x4″ that I had available. It is pinkish, and would add some interesting color. I cut the wedge shape with a hand saw, then jointed them with a jointer plane. To make the river, it is important that the two outer edges are straight because they will be glued to each other. In preparation for cutting the curve, I penciled in the curve using a flexible curve. Then I used double sided tape to stick the river piece to the top of the leg.
The cut gets run through the band saw, cutting the curves on both pieces at the same time.
I used my bandsaw to cut the curve, and you can see that I completely missed my penciled in curve and just went with what the saw could naturally do in the 4″ stack of Oak and Douglas Fir.
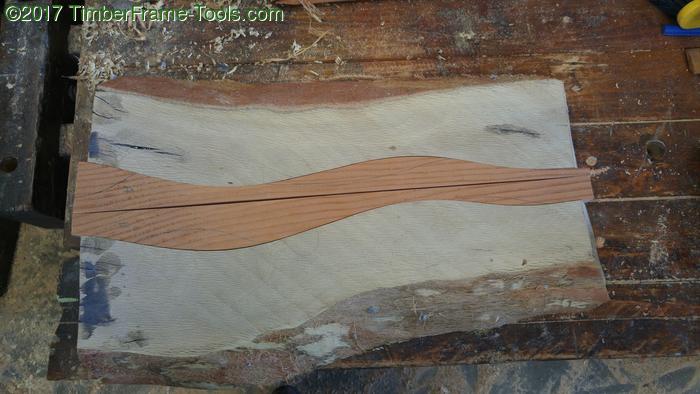
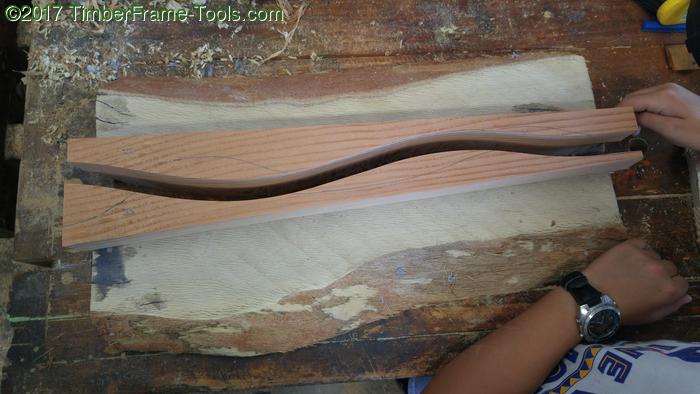
The tapered river flowing through the wood. It will look good when glued up.
Swapping the two curves and mating them up with the lower piece, gives you the look of the river running through the leg. Notice the live edge on the outside. That makes clamping the glue-up a little challenging.
Scrap wood as clamping cauls to keep everything flat.
I had to use some cauls to keep the sections flat and also prevent the whole thing from popping up as I started to apply pressure on the sides of the live edge.
This whole process was repeated for the second leg.
Preparing to cut the top of the leg, with a simple scrap cutting guide.
To cut the legs to length AND cut the 25 degree angle on both the top and the bottom, I used my circular saw with the base set to a 25 degree angle, and a cutting guide made from a piece of luan plywood scrap from a broken yardstick glued to it it. I can set the guide to the line, clamp it in place and make the cut (poor man’s track saw). I have a nicer cutting guide for plumb cuts, but the angle of the blade on this would have ruined it, so I went with making it from scrap.
Once both legs were cut to length and proper angle, I setup my router planing rig with one side lower than the other to make the legs taper in thickness from thicker at the bottom, to thinner at the top. That process was covered here: Making A Tapered Slab
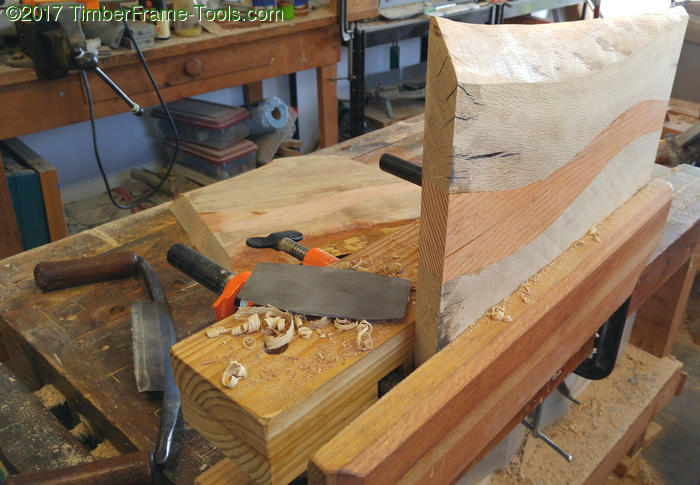
My Bulloxon vise works great at holding these tapered slabs while I clean up the live edges with a card scraper.
With the legs tapered, I did a bit of cleanup on the contours of the live edges. I didn’t want to change them much, just make them less painful to touch.
I wanted a self locking tenon like the one on the left, but the shelf made that impossible, so I went the with the center design.
The shoulder for the tenon cut on the right. (keep in mind the leg is sideways in the photo)
While the leg was in the vise, I was ready to cut the shoulders for the tenon that is going to fit the leg into the bottom of the table top.

I am holding the leg upside down and at the 25 degree angle, so that I can use my block plane to make the face of the tenon perpendicular bottom of the table.
The block plane worked pretty well for shaping the front edge on the tenon. With the tenon cut, now it was time to layout the mortises.

A framing square lets you mark the center line and then make the legs at a right angle to that.
I started by making a “center line” on the underside of the table top. On a slab with two live edges, the idea of center is open to interpretation. I layed it out with a framing square. With center defined by the line, I could then align the centers of the legs.
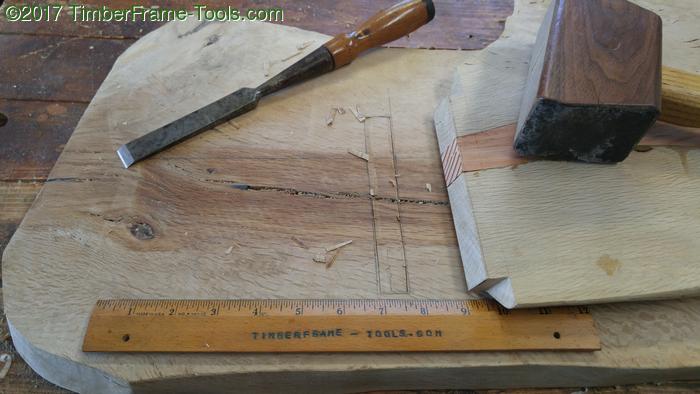
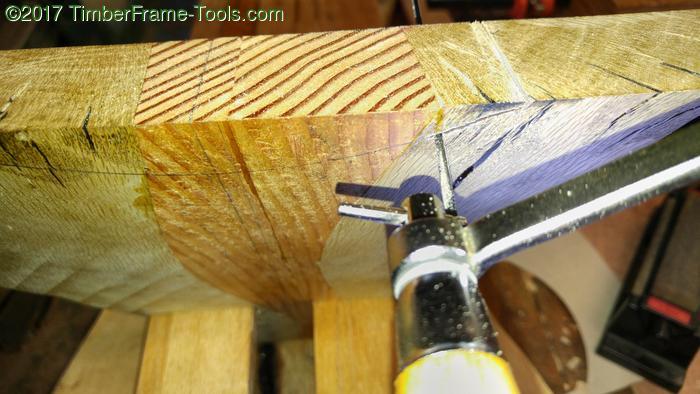
Mark the mortise with the tenon and start chiseling.
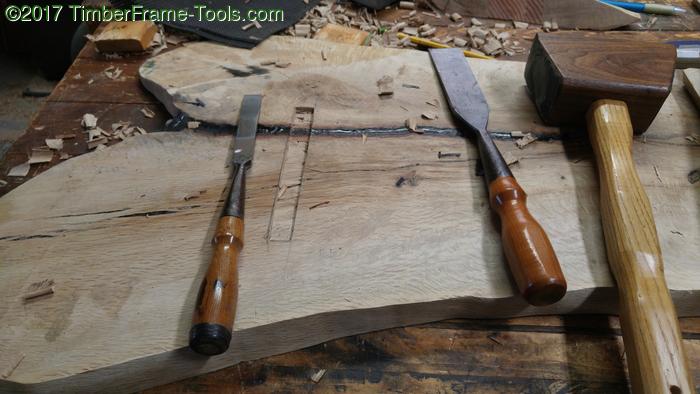
Repeat the chiseling on the other end.
Middle Shelf

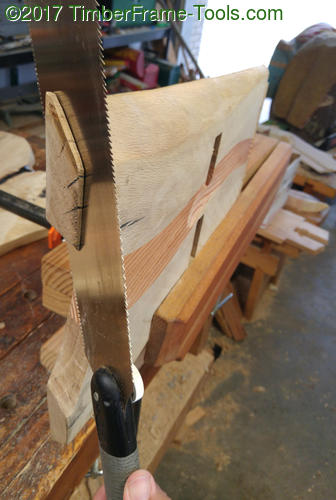
I marked the cuts and created a knife wall to guide the handsaw.
The middle shelf is just made from some 3/4″ Red Oak. That I found on the side of the road on garbage day. Someone was throwing out a bunch of solid oak shelving. I laid out the tenons on each end of the board and cut them out with hand saws.
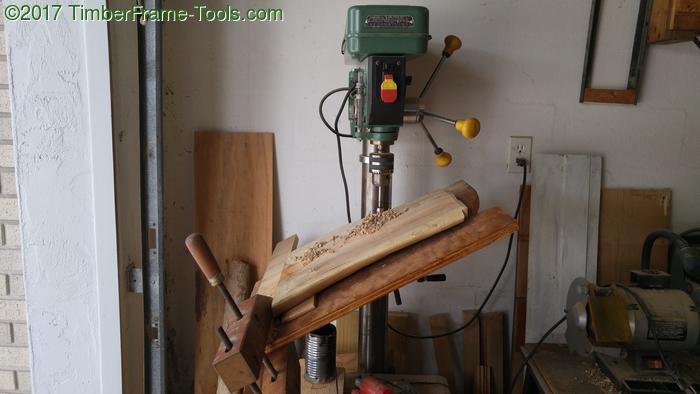
If you have to do this, tilt your table the other way so that the handles of the drill press are less likely to hit your table leg.
The mortises on the legs had to be bored at 25 degrees to so that the shelf would be level with the bottom of legs. I tilted the table of my drill press and then clamped in a rest for the bottom of the table leg to ride along. To get the height of the shelf from the bottom I used the golden ratio. So

The length of the leg (a+b) is 18″ so ‘a’ must be 11 and 1/8th inches.
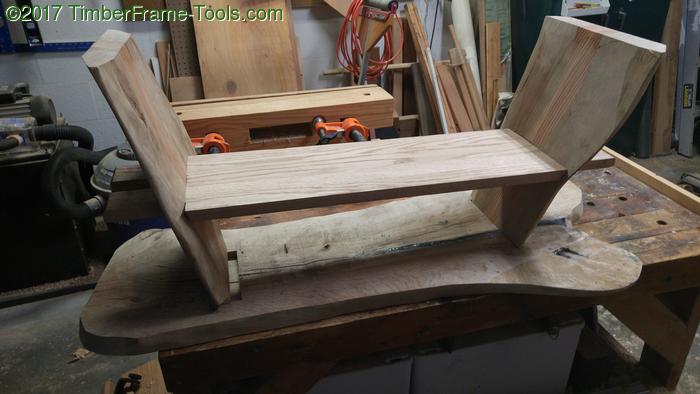
Test fitting the leg and shelf assembly.
Getting the fit just right involved a lot of dry fitting, and again and again.
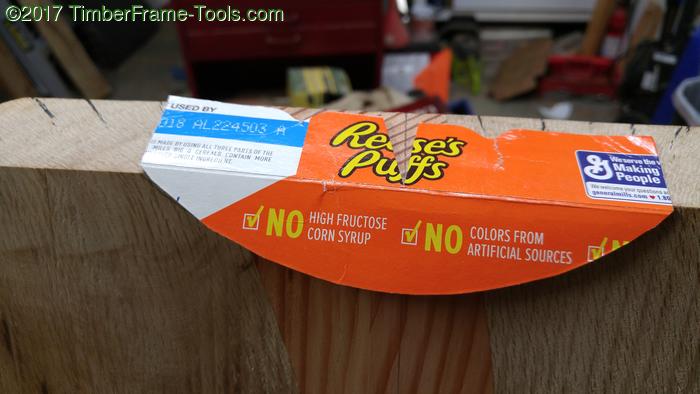
I made my pattern from a cereal box because… it’s important that my templates have no high fructose corn syrup.
I wanted the table legs to have a shallow arch at the bottom to lighten the look and make it less wobbly by having distinctive feet in contact with the floor. I used a cereal box since it already has one crease in it. I notched out a section so that I could place it on the centerline of the leg. That way I could flip the template to the other side of the leg and draw the same arc over there.
Sawing a 2″ thick piece of Oak with a coping saw is a little slow. But it works.
I used a coping saw to cut the curve out from the bottom of the leg. The cut was fairly smooth, but I cleaned it up with a spoke shave and a card scraper.
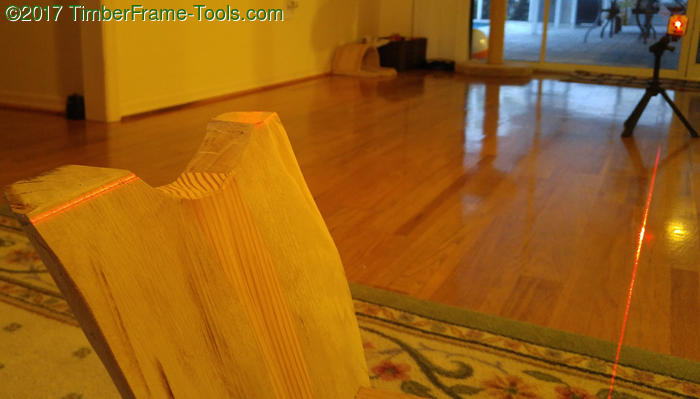
Leveling the table is an important step while it is dry fit together.
I don’t use a lot of high tech tools, but this self-leveling laser Stanley Cubix is proving to be very handy. With the table upside down, I turn the laser on so it just touches the lowest leg. Then I can trace the line on the other feet.
I use the pull saw to reduce splintering.
With the feet marked all the way around, it is easy enough to cut them off with my Vaughan Bear Saw.
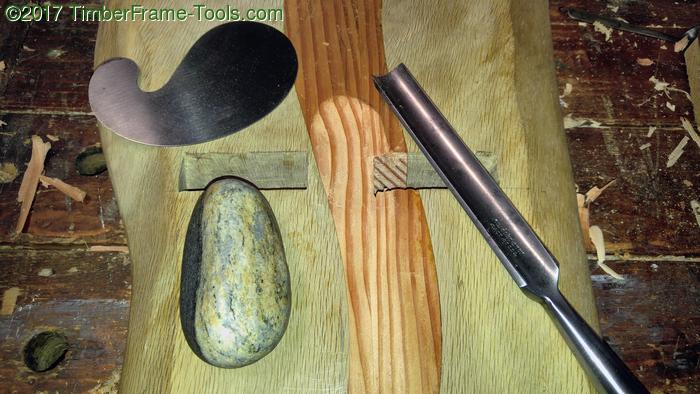
Scalloping out the wood to make a place for the stone wedges.
I used my out cannel gouge and curved card scraper to shape a well for the stone wedges that will need to sit between the two mortised shown here. Chiseling the the oak was pretty easy to carve out, but he Doug Fir just wanted to splinter and split. The two rocks I am using for the wedges came from the Chattooga river where we stayed in Mountain Rest SC on a vacation in 2016.
During sanding, my son, who loves cats, found this little feline hiding in the grain.
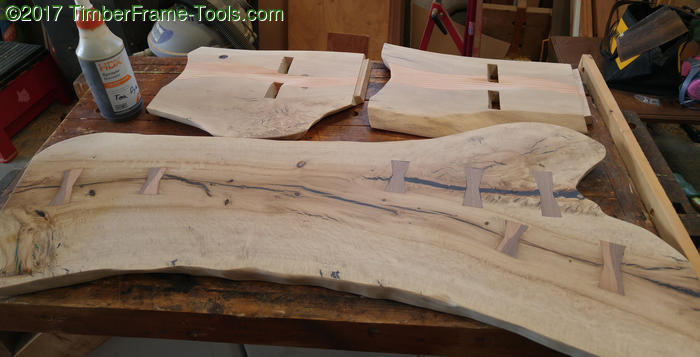
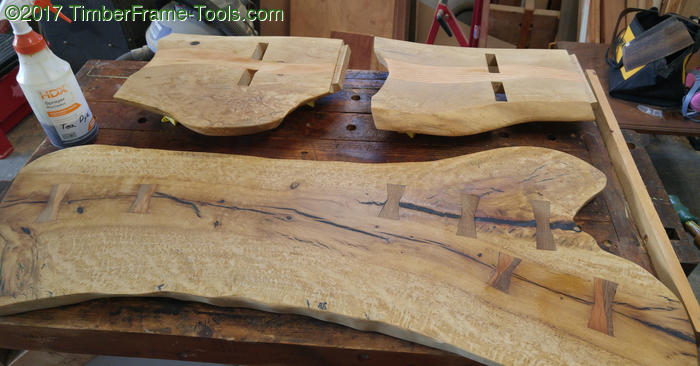
These are the pieces of the table, just prior to staining.
After sanding everything down to 300 grit, my son sprayed everything down with my alcohol based tea dye.
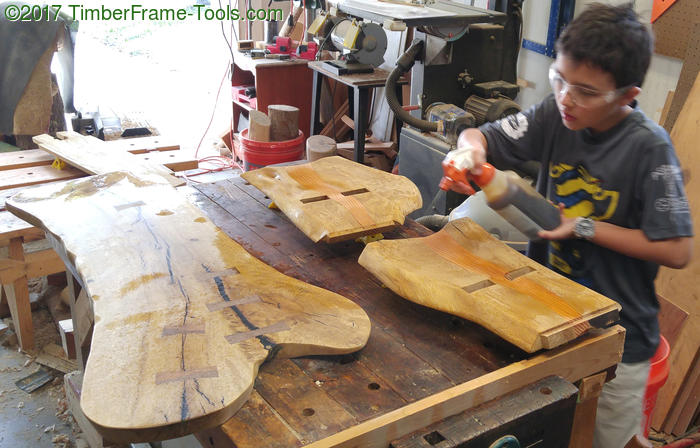
Spraying on the tea dye. Because it is alcohol based, goggles are important.
We used a trigger spray bottle to spray down all the pieces. Care has to be taken to not put too much on too fast which would pool and create darker zones. The alcohol evaporates quickly so we only had to wait about 10 minutes per coat. There is still enough water in the 90% alcohol that I used in the dye that it still raises the grain a little bit. So after the first couple applications I had to knock down some of the raised grain with 300 grit sandpaper. There were 4 total applications of tea dye
Since it is dye, the color appears lighter than it is once the finish is applied.
For a finish I went with:
- Two coats of Hope's pure tung oil thinned with mineral spirits. Wipe it on, wait an hour, wipe it down. Let dry for a day in between.
- Three un-thinned coats of Hope’s Tung Oil. Wipe it on, wait 20 minutes and wipe it off. Let dry for a couple of days in between coats.
- Three coats of mixture of dewaxed shellac and Tung Oil. Wiped on with a pad, wait 10 minutes and buff off. Wait a day in between.
The light on my camera really altered the colors in a bad way. The actual coloring is much more brown, not this yellow that is showing. 🙁
I just realized I had no photos of using a coping saw, rasps and files to cut the stone’s shape in the tenons. It was a lot of test fitting, but not too much trouble.
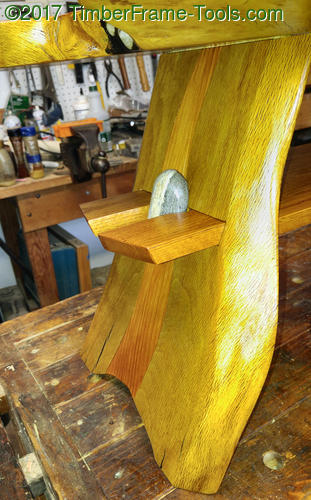
Rock wedge tenon. Again the color is off in the photo
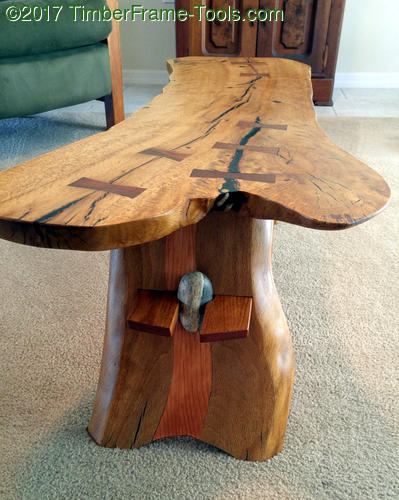
The wide end of the coffee table. The limb on the right is mainly end grain on this surface. It also has some spalting going on.
Prior to these past two slab projects, I had never worked with Swamp Laurel Oak. Usually I am not a big fan of Oak, but this wood has such amazing variations in grain and patterns that I really like the end results. It does not resemble the Red or White Oak. The squirrely grain makes it unreliable for more traditional furniture, but it works great in this natural style.
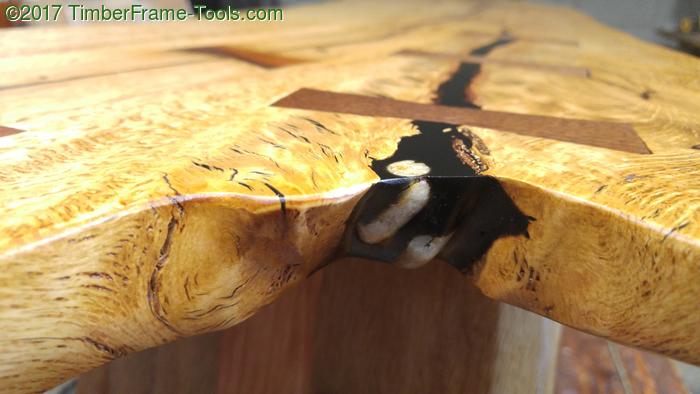
Here you can see the two white pebbles protruding from the black epoxy. You can also see the top surface that the router made flat. I like how it came out, even though it did trash my router bit.
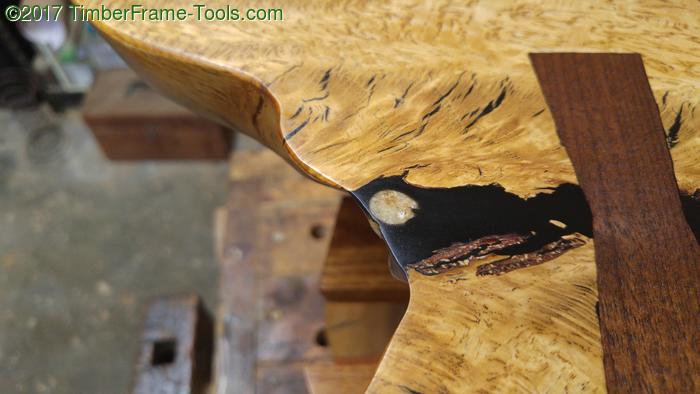
Here is the top surface of that same pebble in the epoxy. I like the contrast of the white pebble with the black epoxy and the black walnut butterfly.
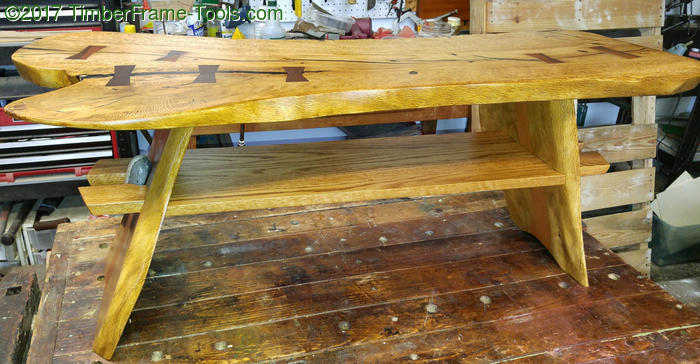
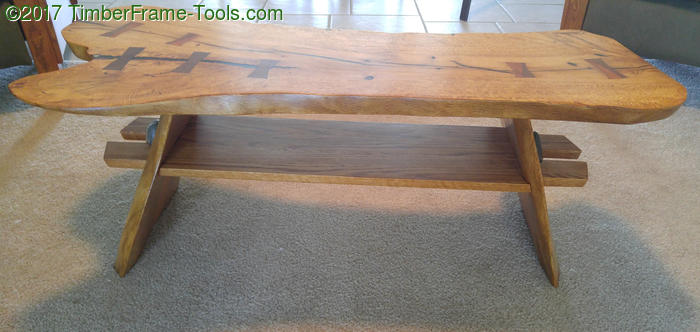
Finished and ready to go into the house. The color in this photo is more accurate.
I really love the character of this wood. The checks and little cracks make it all the more beautiful.
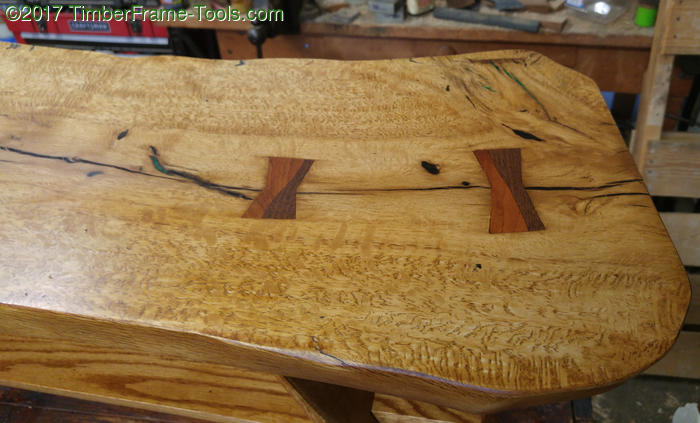
The curvy cherry, black walnut keys may have been a bit too much. I don’t hate em, but I don’t love them as much as I thought I would. I think I will like them more as the cherry ages and gets darker.

On the right side you can see where a limb was cut off and the tree grew over it (limb occlusion).
These oak trees amaze me with how rapidly they can cover over a limb that has been cut off.

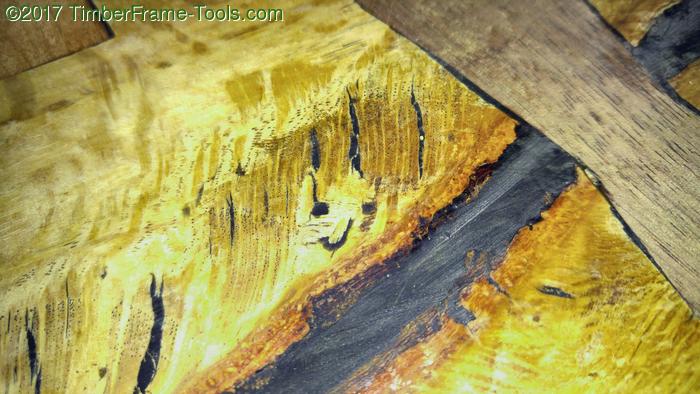
Here is a close-up of the limb occlusion. You can see the dark vertical line that represents the end of the cut off branch. Most of the crack filling I did with black tinted epoxy, but in a few instances I did the pearlescent green, and I really like it.
Great character in the grain.
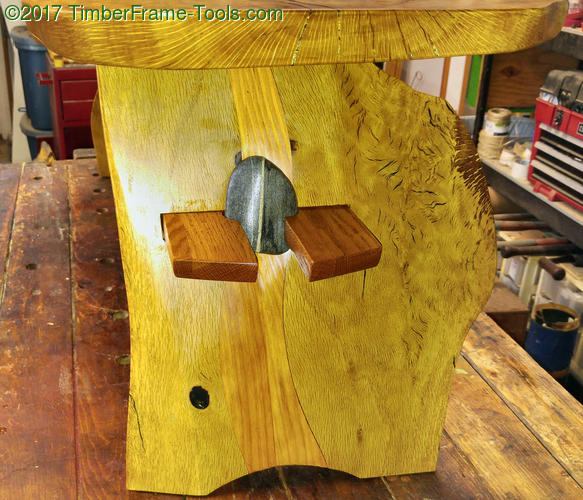
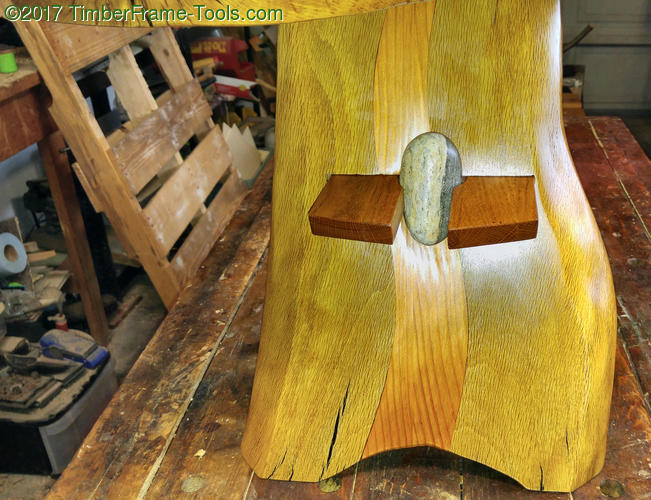
The other table leg end with a stone wedge. This leg has a limb off to the right that was cut off and became a bit spalted. I am surprised that this photo shows such a distinct color difference between the leg and shelf tenons. In reality they are very close to the same color. I think it is some weird interaction between the LED lights in my shop and the LED light on my phone.
The coffee table in place in my living room. See, in these photos the shelf and the rest of the table appear perfectly matched.
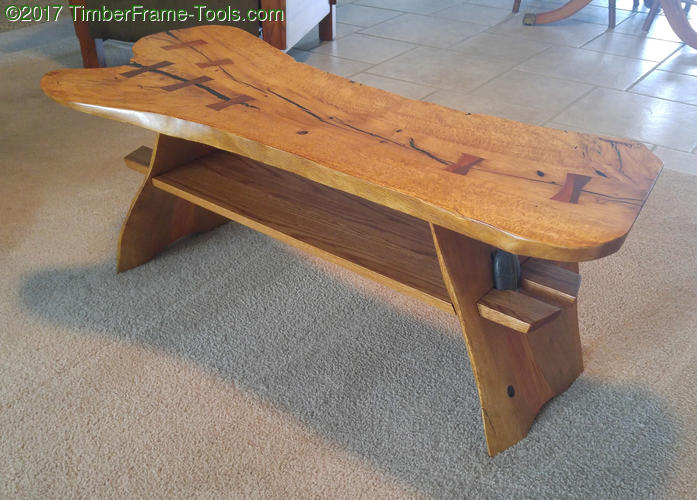
The tung oil and shellac finish is smooth, but still very much feels like wood. I like that.
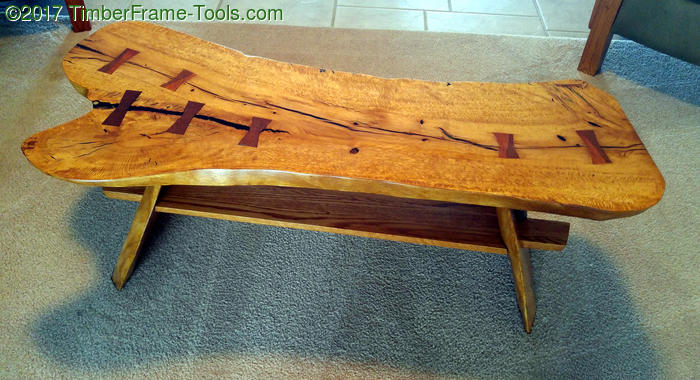
I really like the grain variations of this laurel oak. It makes me smile.
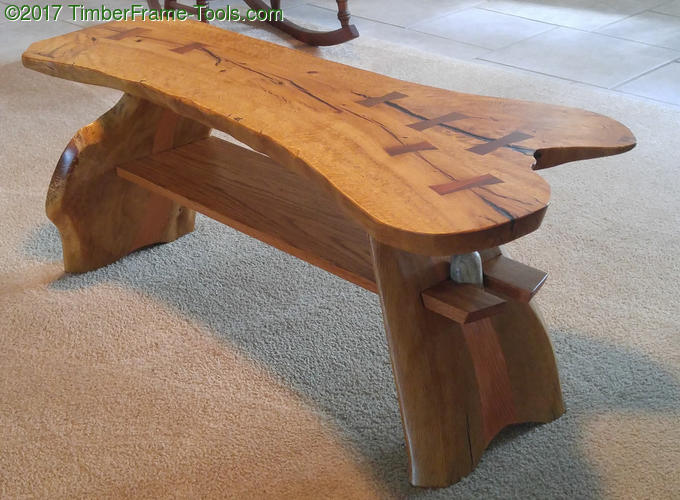
The curvy nature of the legs is nice. I do regret a bit here that I did not make the degree of taper in the thickness more pronounced. There is about a 3/4″ difference between the bottom and the top of each leg. In hindsight I should have gone for more like a 5/4″ reduction.
The stone tenons were a fun thing to try.
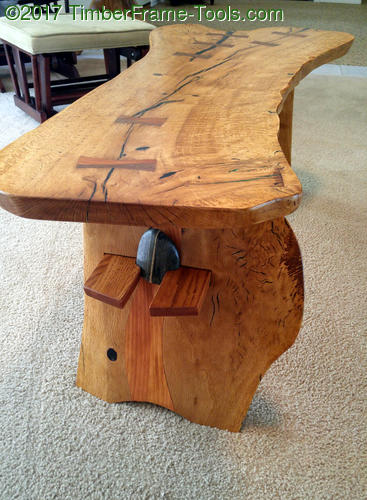
The stones seemed plenty big enougth when I started, but now they seem a bit dwarfed by the table. If I decide to use stone in the future, I will keep in mind that they need to be bigger than I think seems right.
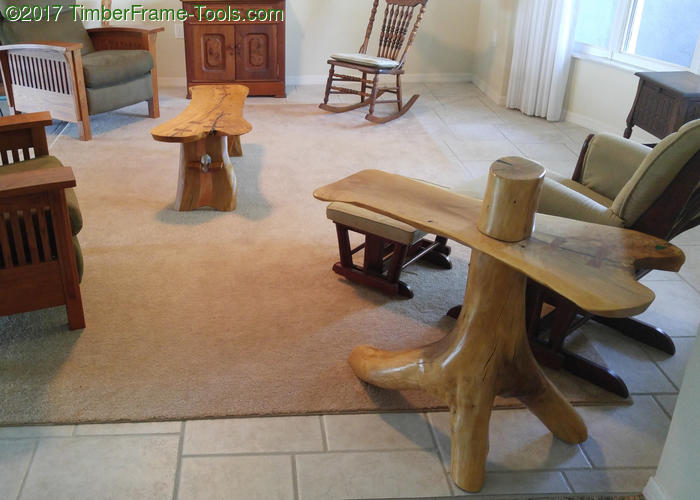
Here is the coffee table in the same room with the end table that I made from the same section of the tree. The two slabs were adjacent to each other in the tree.
I like the way both tables came out, but if I could do it all over again, I wish I got the end table’s color as dark as the coffee table. Two more coats of tea dye would have gotten it there.
I have one more slab from the same flitch. I haven’t come up with a project for it yet. I am not sure my living room could handle three tables from similar looking slabs. I think I will have to come up with some other use.