- Starting Up
- Rough Sawn Lumber Delivery
- Planning the Timber Frame Gazebo
- Peg Making (It’s a hard knot life for us…)
- The Foundation (sill plates and joists)
- Flooring (half-lap)
- Posts and Beams (part 1)
- Braces – Posts and Beams (part 2)
- Bent Assembly : Posts and Beams (part 3)
- Bent Raising: Post and Beams (part 4)
- Rafter Creation
- Top Plates – Tying it all together
- Raising the Rafters
- Windows Resurected
- Roof Decking and Siding Preparation
- Raising the Roof
- Cedar Shingles
- Siding the Gazebo – Shiplap
- Screens with Wood Frames
- Making Wooden Bolts
- Door with Wooden Hinges
With the floor complete, it is time to build the framework that supports the roof, and the walls. This is where the “post and beam” of post and beam construction comes in. The two posts at the north end of the building will be joined together by a beam to form one “bent”. The bent consists of 2 posts, 1 beam, and two diagonal braces. An identical bent will make the south end of the building. (drawing below)
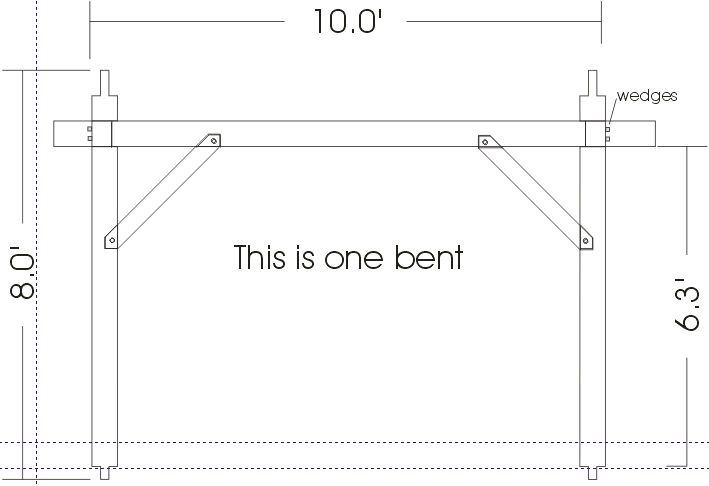
These 10′ wide bents will make up the narrow ends of the 10’x14′ gazebo.
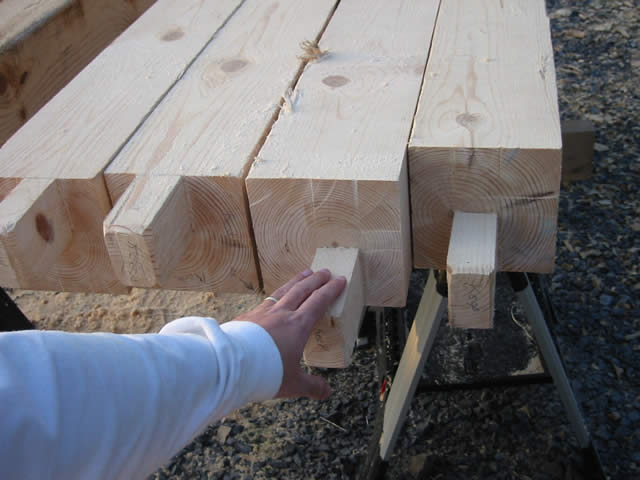
These are the stub tenons on the bottom of the four posts, they will fit down into the mortises created in the foundation. Each post sits at one of the four corners of the building. These stub tenons were all cut with a combination of circular saw and hand saw
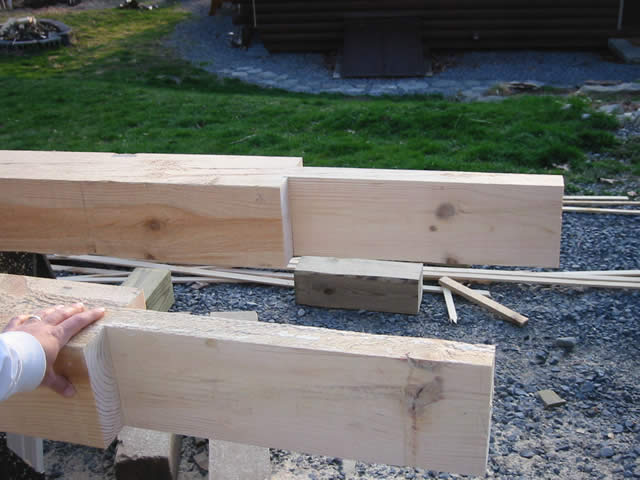
These are the ends of the beams. The long tenon will pass all the way through a mortise in the post and stick out the other side by more than a foot. Then wedged will be driven through holes in the tenon to hold them in place. This method allows the wedges to be tightened as the wood dries. These were all cut with a circular saw and a reciprocating (demolition) saw. In hindsight, a rip saw should have been used here as the demolition sawblade bends too much and creates an out of square tenon.

Since some exacting fits are going to need to be made, the posts and beams are planed with a hand plane. Steve did one bent with a power plane and one bent with an old hand plane. The hand planed wood actually looks nicer and was more fun, the power plane went a little faster though, but it covered me with wood shavings, as opposed to the nice curly shavings of the hand plane. This lead to one of the funnier statements of the project, from my wife, “Go clean your ears and blow your nose, you have wood shavings both places!!”

Of course the mortise for the long tenon has to be cut first by making a couple of big auger holes (1 and 3/4″ in diameter) then making them rectangular with some chisel work.
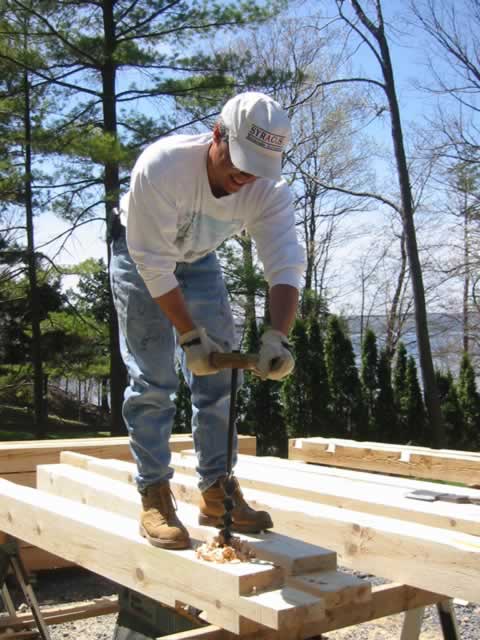
Still augering. This antique tool works quite well but leaves you feeling lopsided as the left arm gets worked in a different way than the right arm. Makes me wonder if the old-time timber framers were lopsided in old age. A large Forstner bit in a power drill probably could have done just as good a job, but would have lost the old-time feel I was really enjoying.
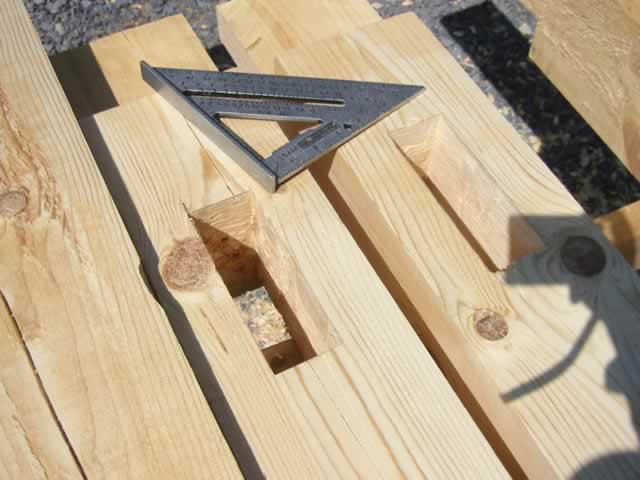
Here is what the mortise looks like after the augering was done and had been cleaned up with the chisel.
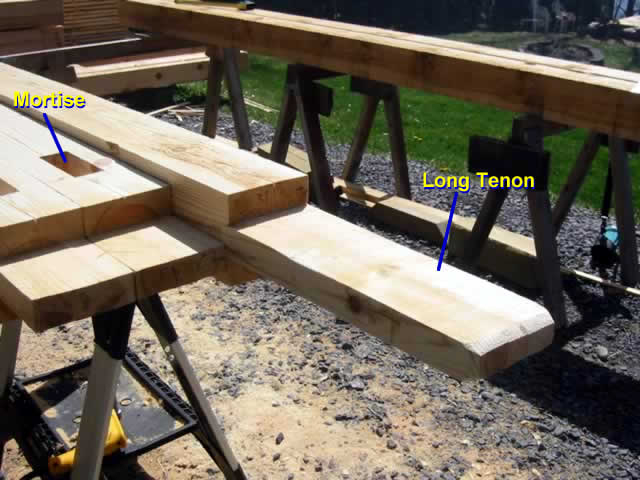
With the mortising done and the long tenon shaved to fit, they ought to go together nicely (knock on wood!!!) Notice the end of the tenon is chamfered to allow easy entry into the mortise. I did the chamfering with a wood rasp to keep the rough texture, but a plane or even a chisel could have been used. At some point I may carve the through-tenon on each corner to look like a dog’s head or fish head (I’ve seen it on other buildings and I think it would fit the motif.
[next up, the diagonal braces]